How Do Yuu Promote Sales 1

How do You Promote Sales

Key Takeaways

  • Understand what sales campaigns are and how they help achieve specific business goals.
  • Learn how to set measurable objectives and align your strategy with your audience’s needs.
  • Follow a structured approach to launching campaigns with compelling content and timing.
  • Discover proven promotional tactics like flash sales, referrals, and loyalty programs.
  • Get practical guidance on using Depicter to build effective popups and notification bars.

Capturing your audience’s attention and converting interest into action is more important than ever. That’s where sales campaigns come in. Whether you’re launching a new product, clearing out seasonal stock, or simply trying to drive more traffic to your website, a well-planned campaign can make all the difference.

But creating a campaign is just the beginning. The real challenge lies in promotion. How do you promote sales in a way that actually drives results? That’s where strategy comes in, and tools like popups and notification bars can be powerful ways to boost visibility and conversions.

In this guide, you’ll learn what makes a successful sales campaign, how to plan one strategically, and how to amplify your results using Depicter.

1. What Is a Sales Campaign?

A sales campaign or sales promotion is a short-term, focused effort that businesses use to boost interest in their products or services and drive more sales within a specific period. It’s a step-by-step plan that helps reach the right people, often through methods like emails, calls, ads, or social media, and encourages them to take action. 

Whether the goal is to launch a new product, clear out extra inventory, or hit sales targets before a deadline, these campaigns are designed to make an impact quickly. 

A good sales campaign not only brings in new customers but also keeps existing ones engaged. 

It’s more than just pushing a product—it’s about offering something that feels timely, useful, and even exciting for buyers, while giving the sales team clear goals and tools to succeed.

For example, an online clothing store might run a “Summer Flash Sale” where everything is 30% off for 48 hours to clear out seasonal stock. They promote it through email and social media, driving urgency with a countdown timer.

Another case could be a tech store launching a “Back to School” campaign, offering student discounts on laptops and free shipping for a limited time. These kinds of campaigns use specific timing, clear offers, and targeted communication to increase engagement and sales quickly.

2. Planning for a Successful Campaign

Launching a sales or promotional campaign that truly delivers results takes more than just a good idea — it requires thoughtful planning, a clear direction, and a deep understanding of your audience. Below is a step-by-step guide to help you organize a campaign that not only catches attention but also drives meaningful results.

Set Specific and Measurable Goals

 Start by defining what you want to achieve. Are you looking to clear out seasonal inventory, increase revenue during a slow period, bring in new customers, or simply get your brand more exposure? Avoid broad goals like “increase sales.” Instead, choose measurable targets such as “increase website purchases by 20% over the next three weeks.” These clear benchmarks help you and your team stay focused and assess how well the campaign is working.

Know Your Audience Inside Out

Understanding who you’re targeting is just as important as what you’re offering. Start by creating detailed customer profiles based on real data, such as age, interests, buying habits, and location. Segmenting your audience allows you to customize your offers. For example, young parents might respond well to baby product bundles, while frequent online shoppers might be more interested in free shipping. Use tools like surveys, purchase history, and social media analytics to gather insights that shape your approach.

Choose the Right Promotional Strategy

The method you choose to deliver your offer can greatly affect your campaign’s impact. There are three common strategies:

  • Push Strategy: Offer incentives to retailers or distributors to stock your product — ideal for B2B and retail-focused campaigns.
  • Pull Strategy: Focus on end customers by creating demand directly through promotions like flash sales or giveaways.
  • Hybrid Strategy: Combine both push and pull methods — for instance, give your distributors a bonus while also offering a buy-one-get-one deal to consumers.

Match your strategy to your product’s lifecycle. New products often benefit from pull tactics like samples or influencer promotion, while well-established ones may perform better with a push approach.

Develop a Detailed Campaign Plan

A structured plan ensures smooth execution. Lay out your campaign elements in advance, including:

  • Timeline: Set start and end dates to build urgency. Short durations (like 48-72 hours) can motivate quicker responses.
  • Budget: Decide how much to invest in areas such as ads, discounts, influencer fees, or giveaways.
  • Channels: Choose where to promote — email, social media, website banners, or even physical displays — based on where your audience is most active.

A well-timed offer aligned with holidays or shopping seasons can also increase relevance and boost performance.

Craft a Compelling Launch

 How you present your offer can make or break the campaign. Pay attention to:

  • Messaging: Use clear, catchy headlines and action-driven phrases like “Ends Soon” or “Grab Yours Now.”
  • Visuals: Eye-catching graphics and clean design help your message stand out on crowded platforms.
  • Multi-Channel Distribution: Don’t rely on just one outlet. Combine social media posts, email blasts, website banners, SMS alerts, and influencer collaborations to maximize visibility.

It’s also smart to test variations of your content, such as different images or headlines, to see what performs best before scaling it across all platforms.

A successful campaign doesn’t happen by chance. It’s the result of clear goals, audience awareness, a solid strategy, and strong execution. 

When all these pieces work together, you’re more likely to see results that matter — whether it’s more sales, new customers, or stronger brand presence.

3. Proven Campaign Promotion Strategies

Running effective promotions helps online stores attract new customers, increase sales, and build brand loyalty. While there are many ways to do this, here are five of the most popular strategies:

1. Buy One, Get One Free (BOGO)

Why it works: Shoppers love getting something for free—it feels like a reward. BOGO promotions also help move excess stock quickly.

Example:

Kraft Heinz used BOGO offers to increase sales of slower-moving products. This helped clear out their inventory while giving customers extra value for their money.

2. Flash Sales

Why it works: These limited-time offers create urgency. People don’t want to miss out, so they’re more likely to buy right away.

Example:

Amazon Prime Day is a huge flash sale event. For a limited time, customers get deep discounts on popular products, resulting in a massive spike in purchases and engagement.

3. Email Marketing

Why it works: Email lets you talk directly to your customers. You can send targeted messages, offer discounts, and follow up on abandoned carts.

Example:

Grammarly’s Black Friday campaign offered a “55% Off” deal exclusively through email. The urgency and savings pushed many free users to upgrade to paid plans.

4. Referral Programs

Why it works: People trust recommendations from friends. Offering a reward for sharing your brand encourages loyal customers to spread the word.

Example:

Many brands use the classic “Give $5, Get $5” offer. It motivates customers to invite others while earning a bonus themselves, growing the customer base through word of mouth.

5. Loyalty Programs

Why it works: Customers who get rewarded are more likely to come back. Points, discounts, and special perks help build long-term relationships.

Example:

LEGO’s Insiders program gives points for every purchase. Customers can use points for rewards, access members-only content, and feel like part of a special club.

While these five strategies are widely used and highly effective, there are many others worth exploring, like giveaways, cashback deals, product bundles, free trials, and even charitable donations linked to purchases.

4. Use Popups and Notification Bars to Maximize Reach

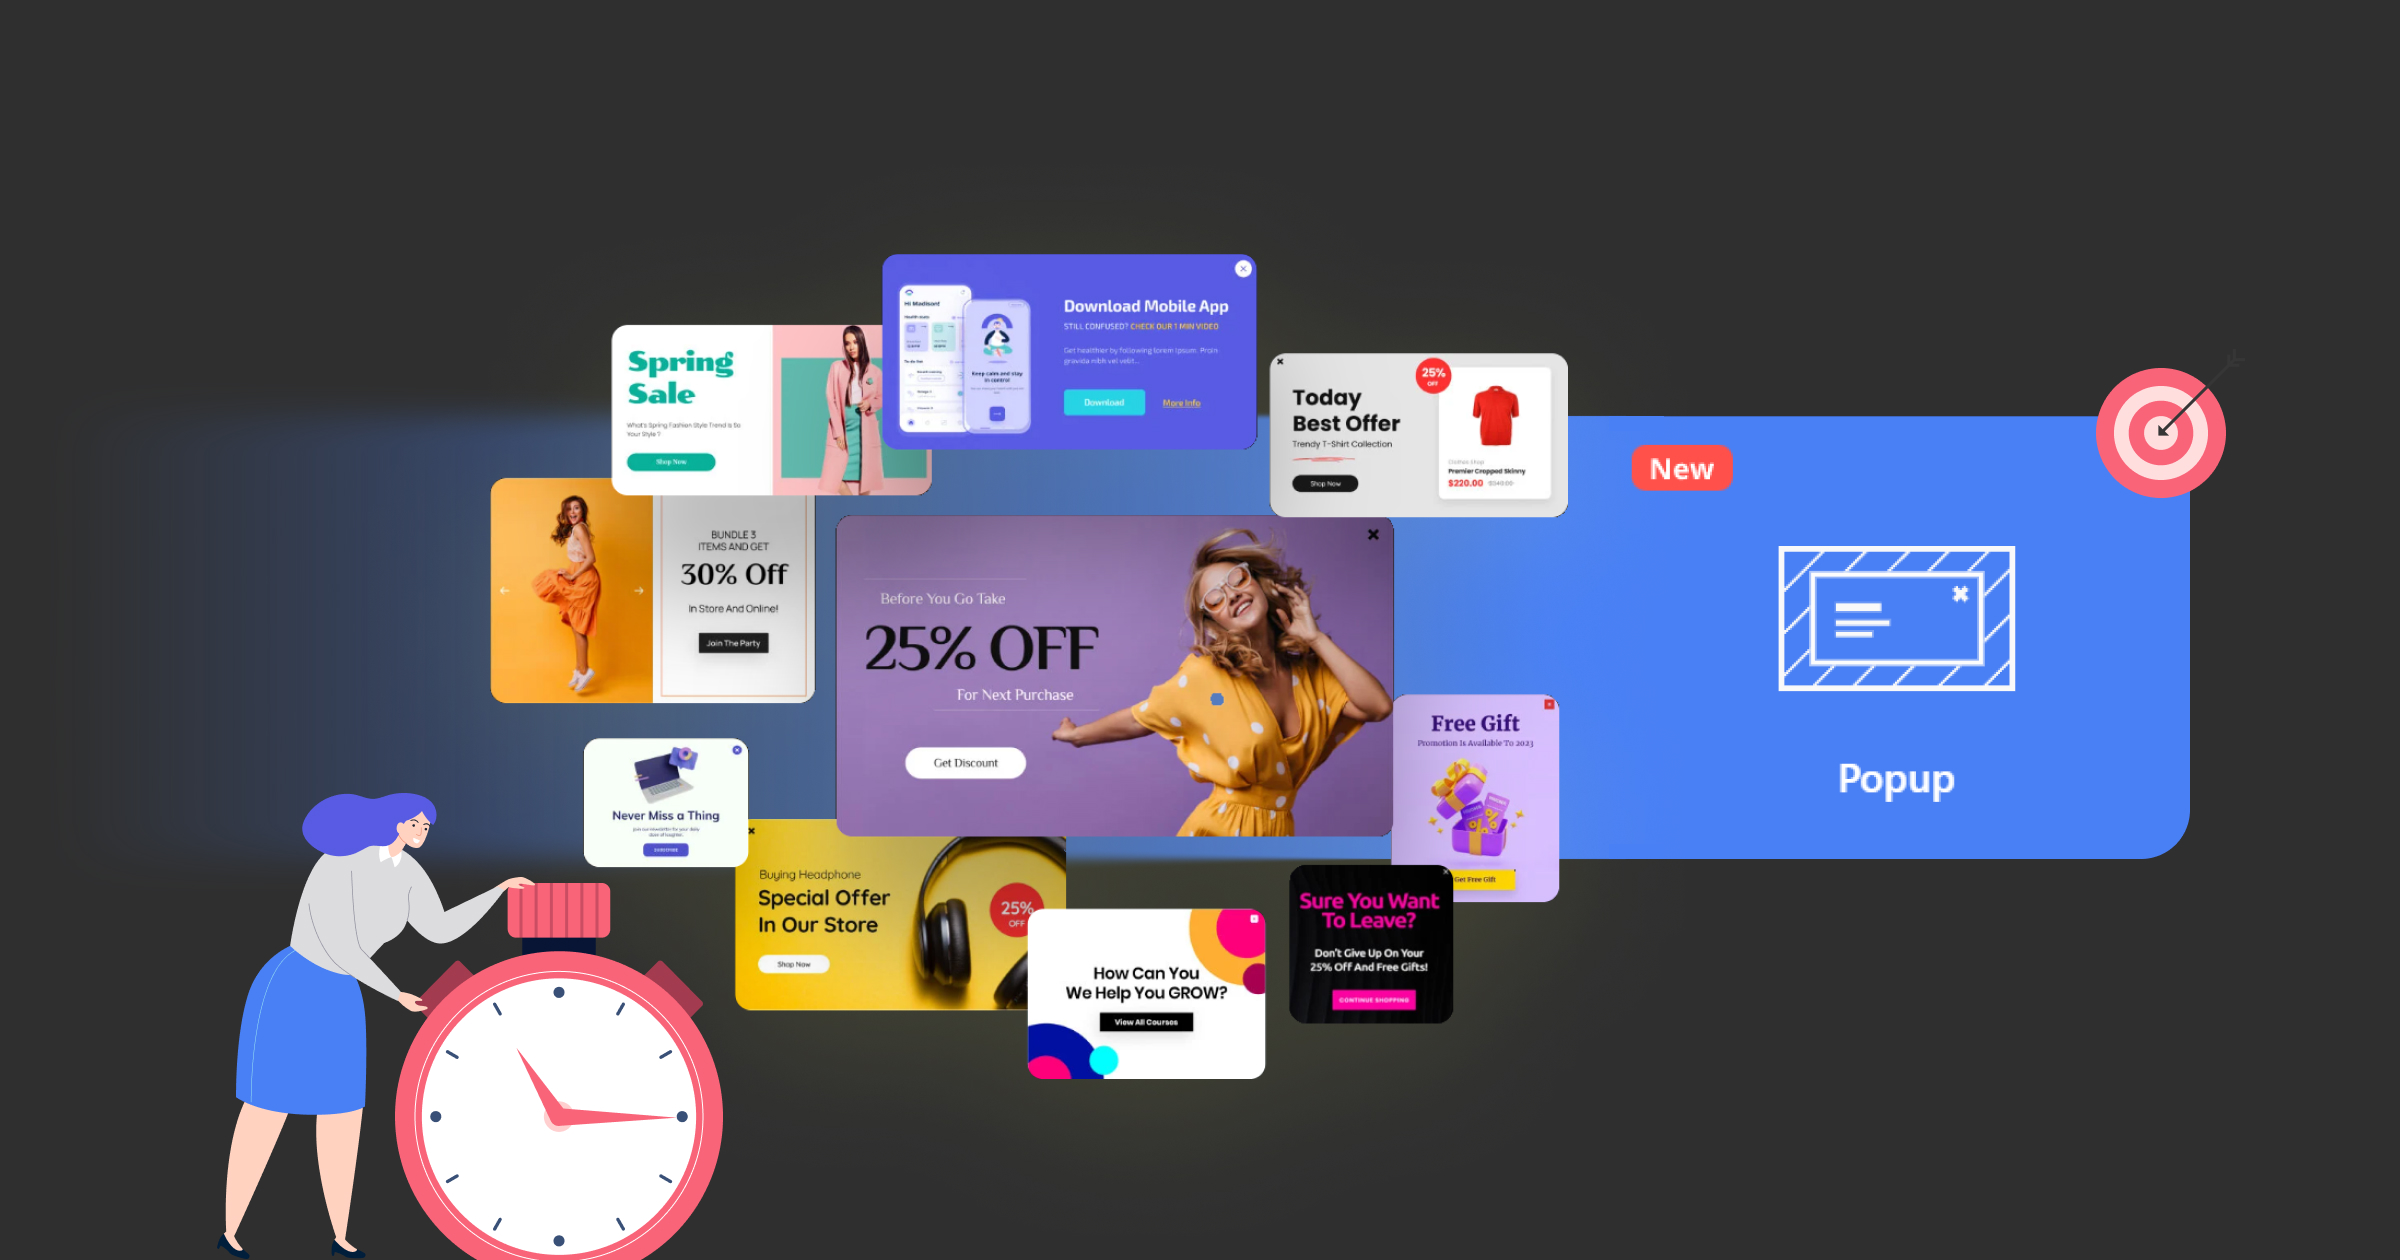
Popups: Timed and Targeted Engagement

Popups are effective for delivering timely messages, such as special offers or email sign-up prompts. To ensure they enhance rather than hinder user experience, consider the following best practices:

  • Timing Is Crucial: Deploy popups based on user behavior. For instance, use exit-intent popups to retain visitors about to leave, or display them after a certain time on the page to engage interested users.
  • Clear and Concise Messaging: Keep the content straightforward, highlighting the value proposition and including a compelling call-to-action (CTA).
  • Design for Clarity: Ensure the popup is visually appealing but not overwhelming. Use contrasting colors for visibility and make it easy to close to respect user autonomy. 

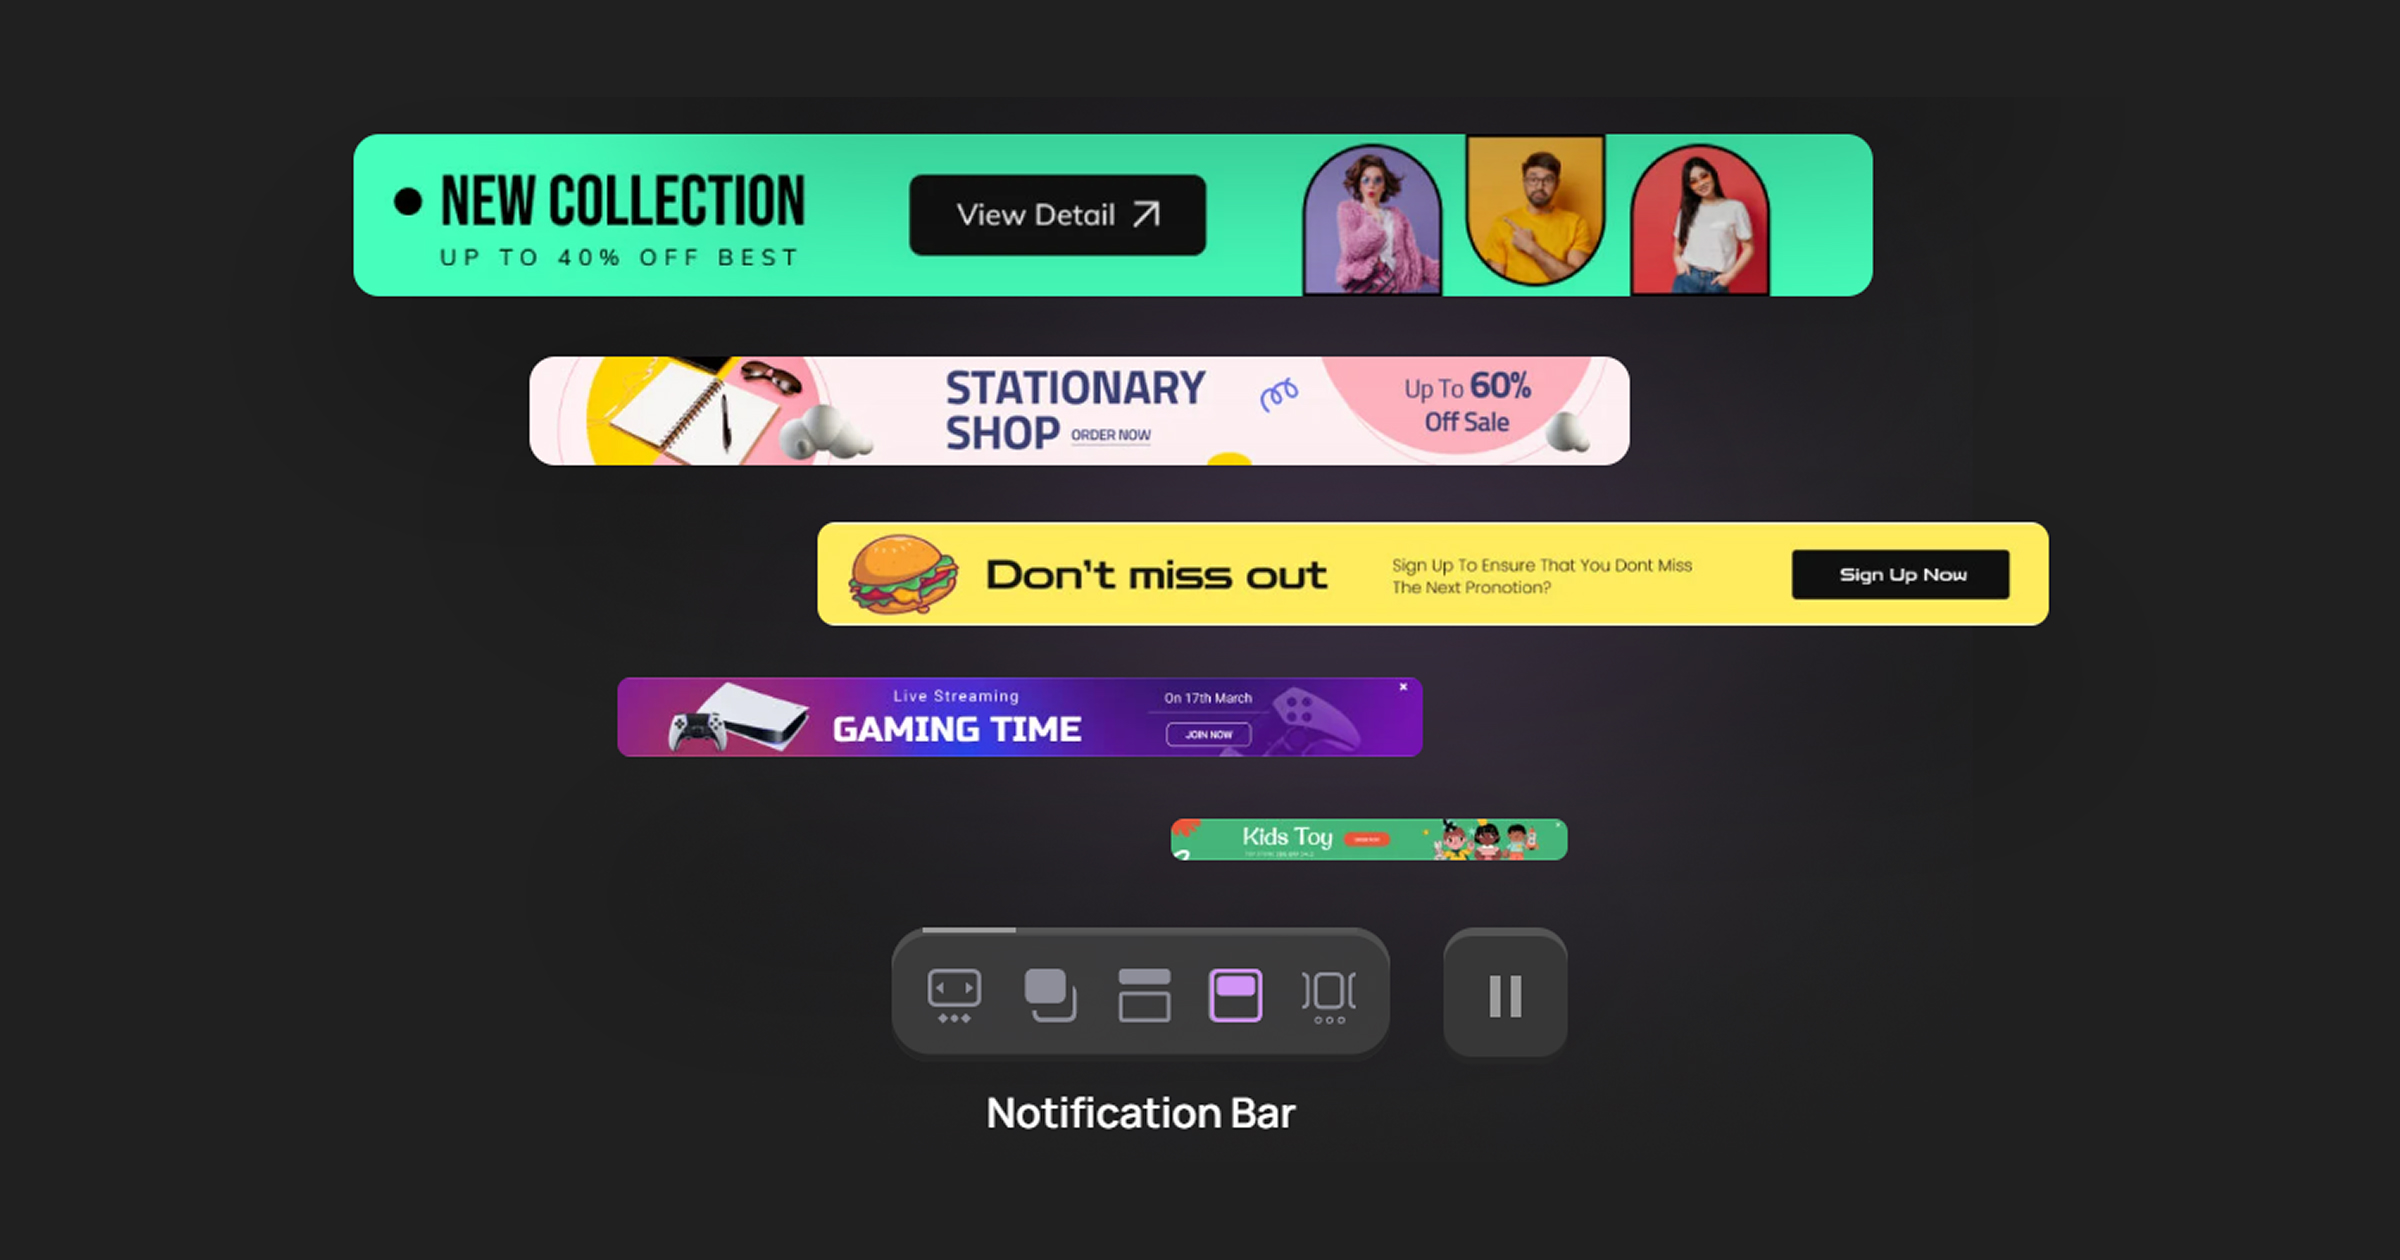
Notification Bars: Subtle Yet Effective

Notification bars, also known as sticky bars or announcement bars, sit at the top or bottom of a webpage and provide persistent, unobtrusive messaging. They are ideal for:

User Experience Stack Exchange

  • Announcing Promotions: Highlight ongoing sales, discounts, or special offers. For example, a bar stating Offering free shipping on orders over $50 can encourage customers to spend more to qualify for the deal.
  • Sharing Important Updates: Inform visitors about new product launches, upcoming events, or changes in service.
  • Encouraging Sign-Ups: Prompt users to subscribe to newsletters or join loyalty programs with concise messages and clear CTAs. 

Design Tips:

  • Keep It Simple: Use brief, impactful text to convey your message without clutter. 
  • Use Contrasting Colors: Ensure the bar stands out against your site’s background to grab attention. 
  • Strategic Placement: Place the bar in a spot that’s easy to see, usually at the top of the page, without covering up any important content.

5. How to Create Campaign Popups with Depicter

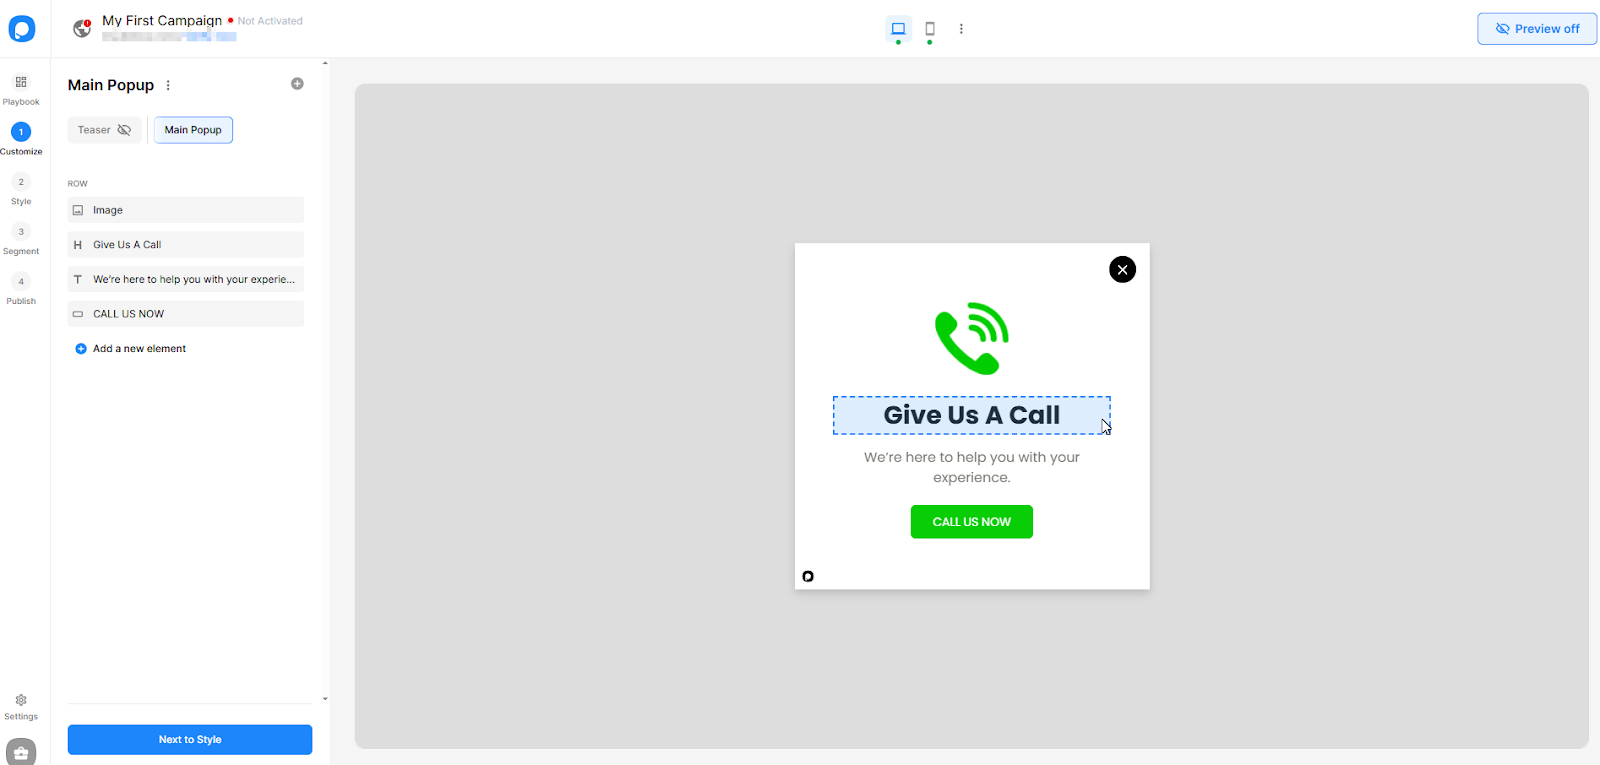
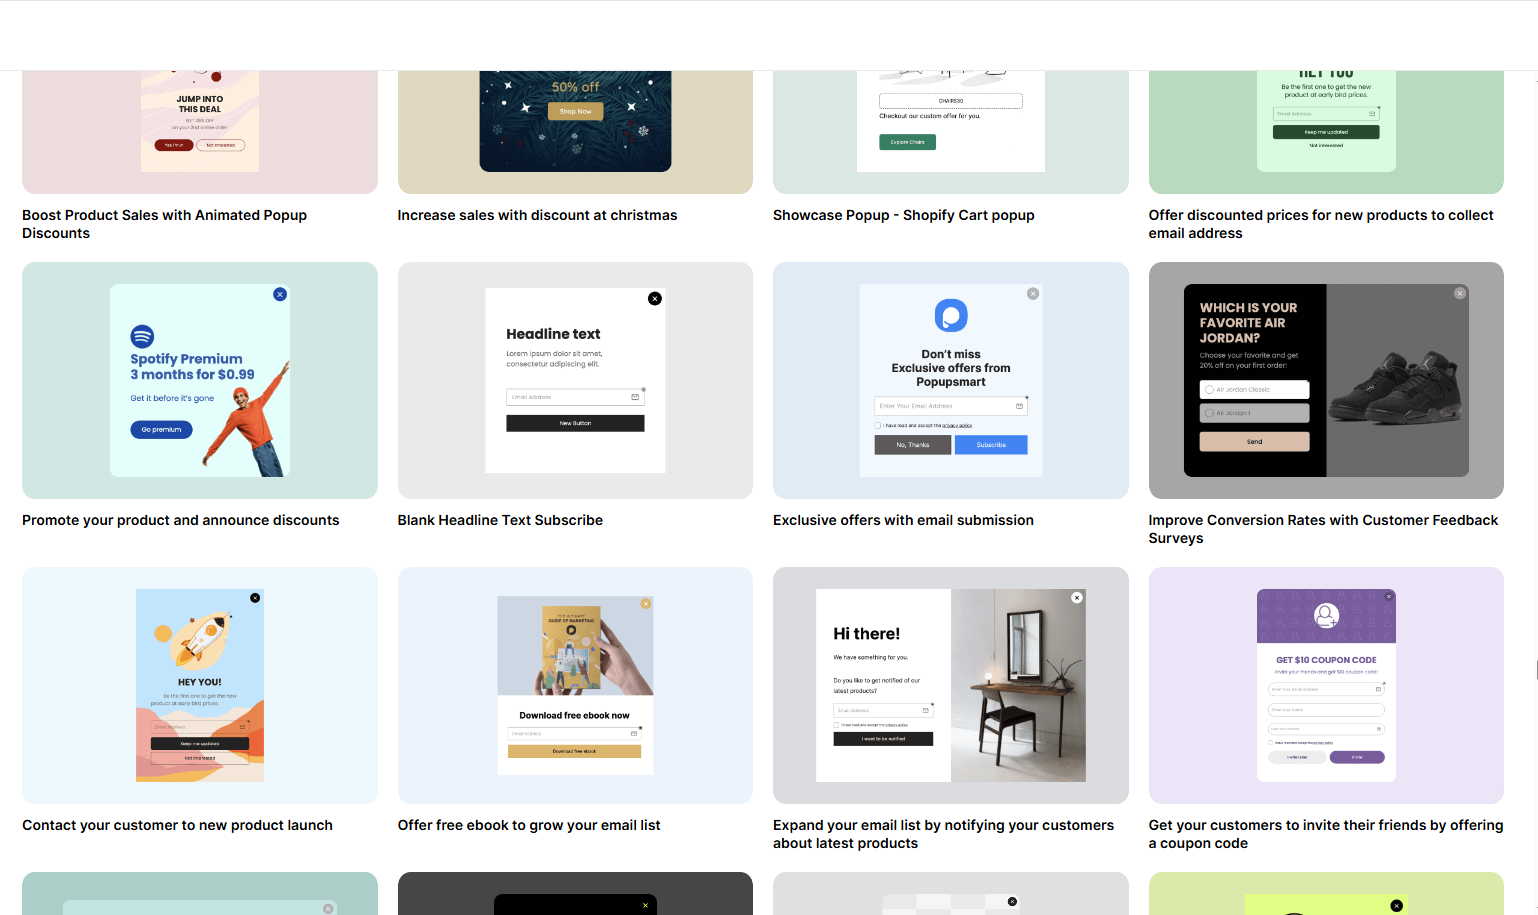
Depicter is a visual Popup builder and Notification Bar builder for WordPress that provides many features as part of marketing or promotional campaigns. It offers a user-friendly interface with a range of pre-designed templates, allowing users to quickly implement customized messages without writing code. Depicter’s tools include flexible display rules, responsive design options, and behavior-based triggers, making it suitable for creating targeted interactions such as limited-time offers, email capture forms, and general site announcements.

We will be creating a simple popup-based sales campaign designed to quickly boost sales through a pull strategy and a flash sale. The goal is to create urgency and excitement by offering a limited-time discount to all website visitors. The popup will appear based on user behavior to avoid interrupting the browsing experience and will include a countdown to drive fast action.

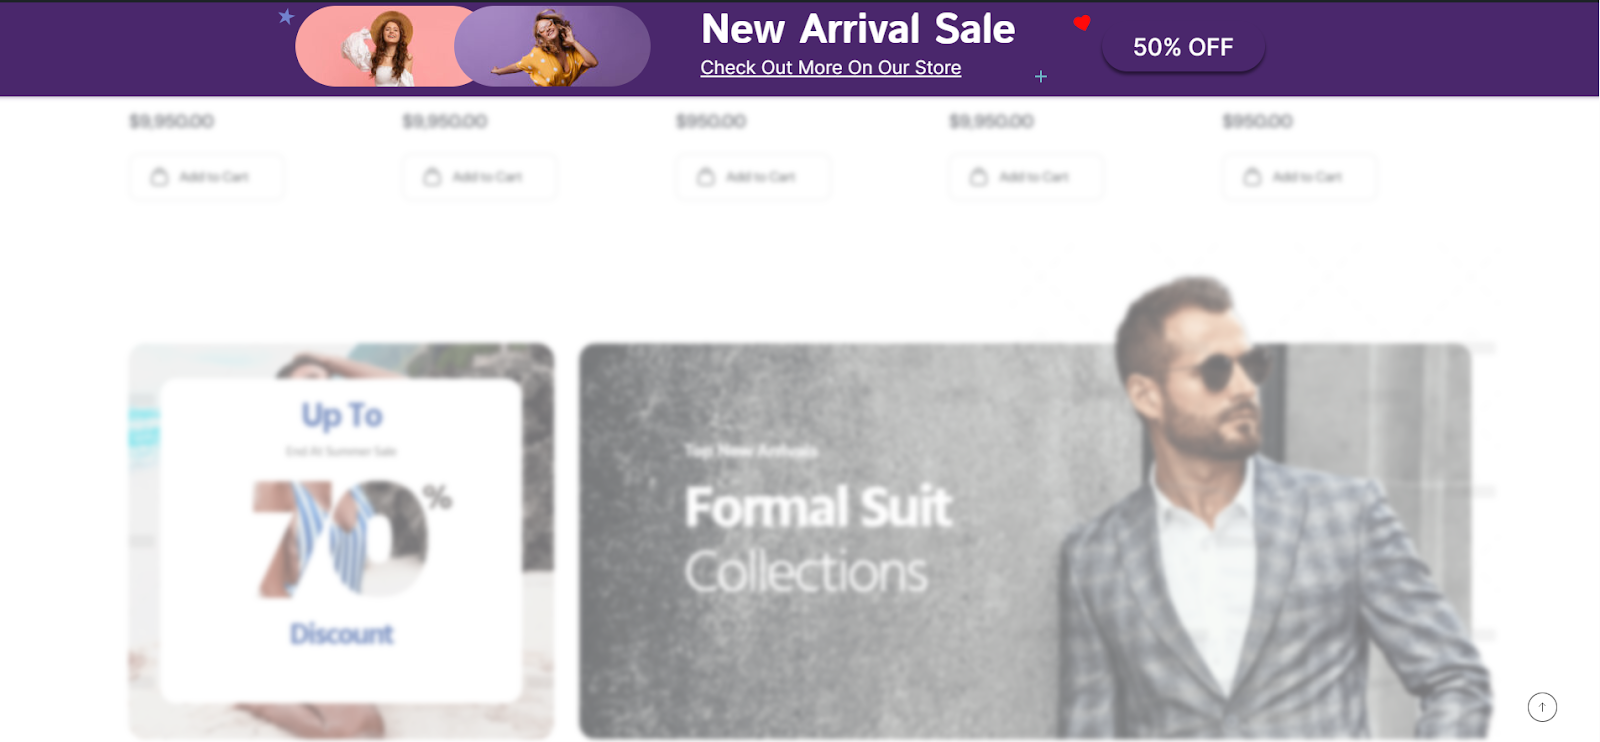
[The website full image] 

Campaign Details

Campaign Goal:
Increase purchases by 25% within 48 hours by promoting summer clothing through a time-sensitive offer.

Strategy:

  • Pull Strategy: Reaching out directly to customers visiting your website
  • Flash Sale: Creating urgency with a two-day discount event

Target Audience:
All visitors to the website, with no special segmentation for this general campaign

Depicter Popup Content

Headline:
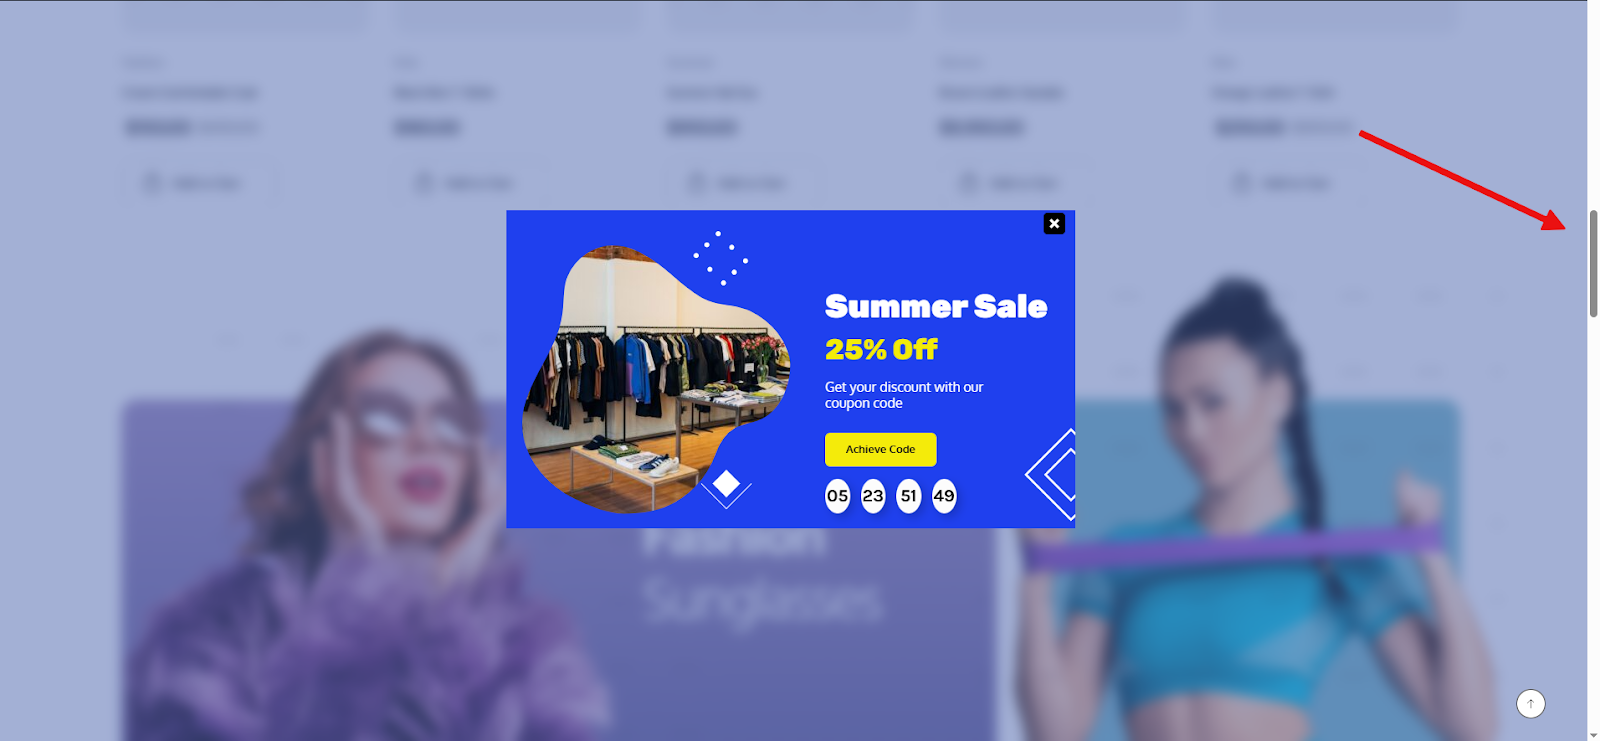
Summer Sale

Body Text:
25% Off

Get your Discount with our coupon code

Countdown Timer

Call to Action Button:
Achieve code

Popup Settings:

Trigger Timing:

  • Show popup after 10 seconds on the homepage
  • Or on scroll (30% down the page)

Frequency Control:

  • Show once per session to avoid annoying users

Design Notes:

  • Colors: Use brand-aligned and eye-catching colors that draw attention without overwhelming the user.
  • Appropriate Images: Include visuals that reflect the user’s interests to increase relevance and engagement.
  • Responsive Design: Ensure the popup adjusts smoothly across all devices and screen sizes.
  • Close Button: Always provide a clear and accessible close button so users can easily dismiss the popup.

Install Depicter

Before getting started, make sure the Depicter plugin is installed on your site.
You can quickly find it by searching for “Depicter” in the Plugins section of your WordPress dashboard.
Need help? Check out our step-by-step guide with a video tutorial here.

Importing a Template 

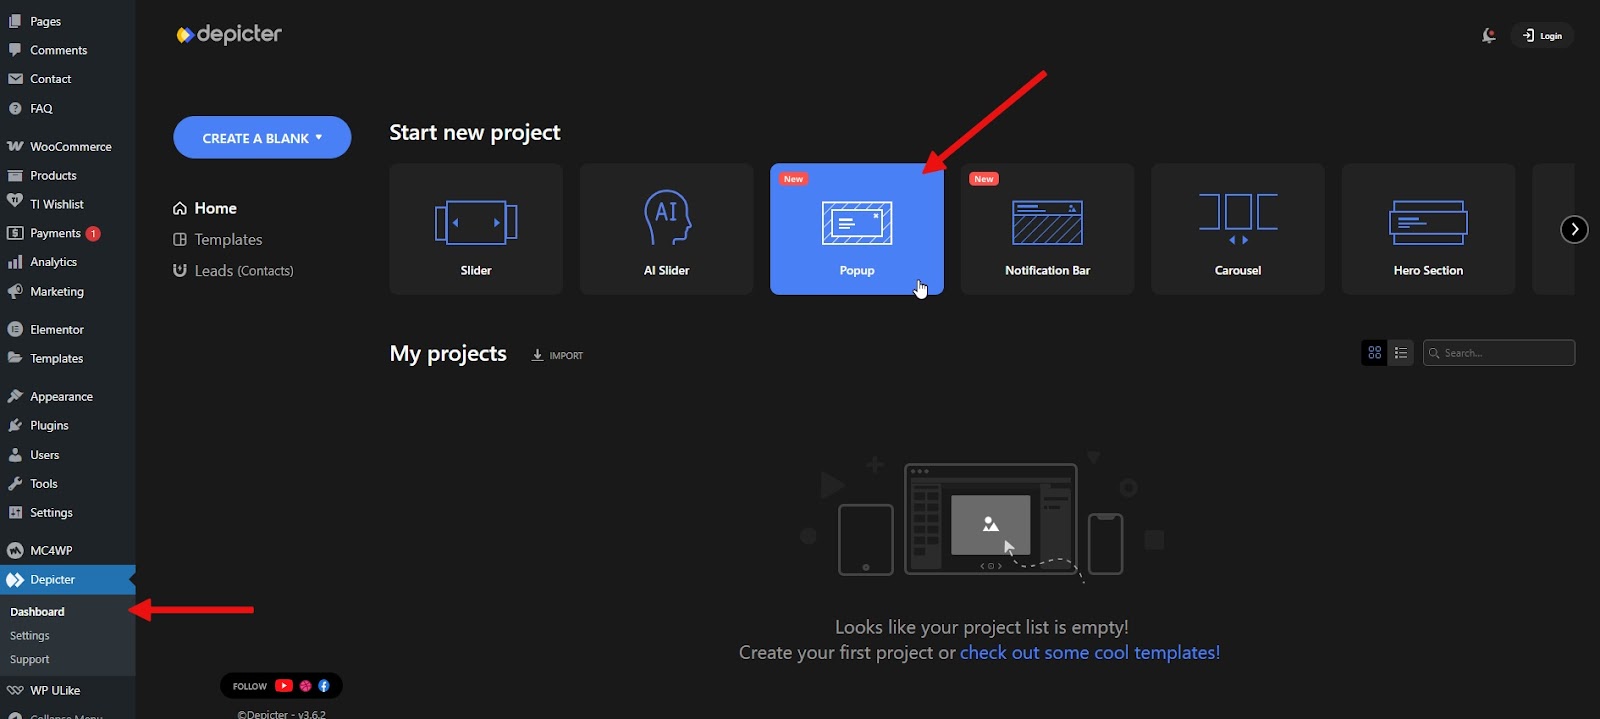
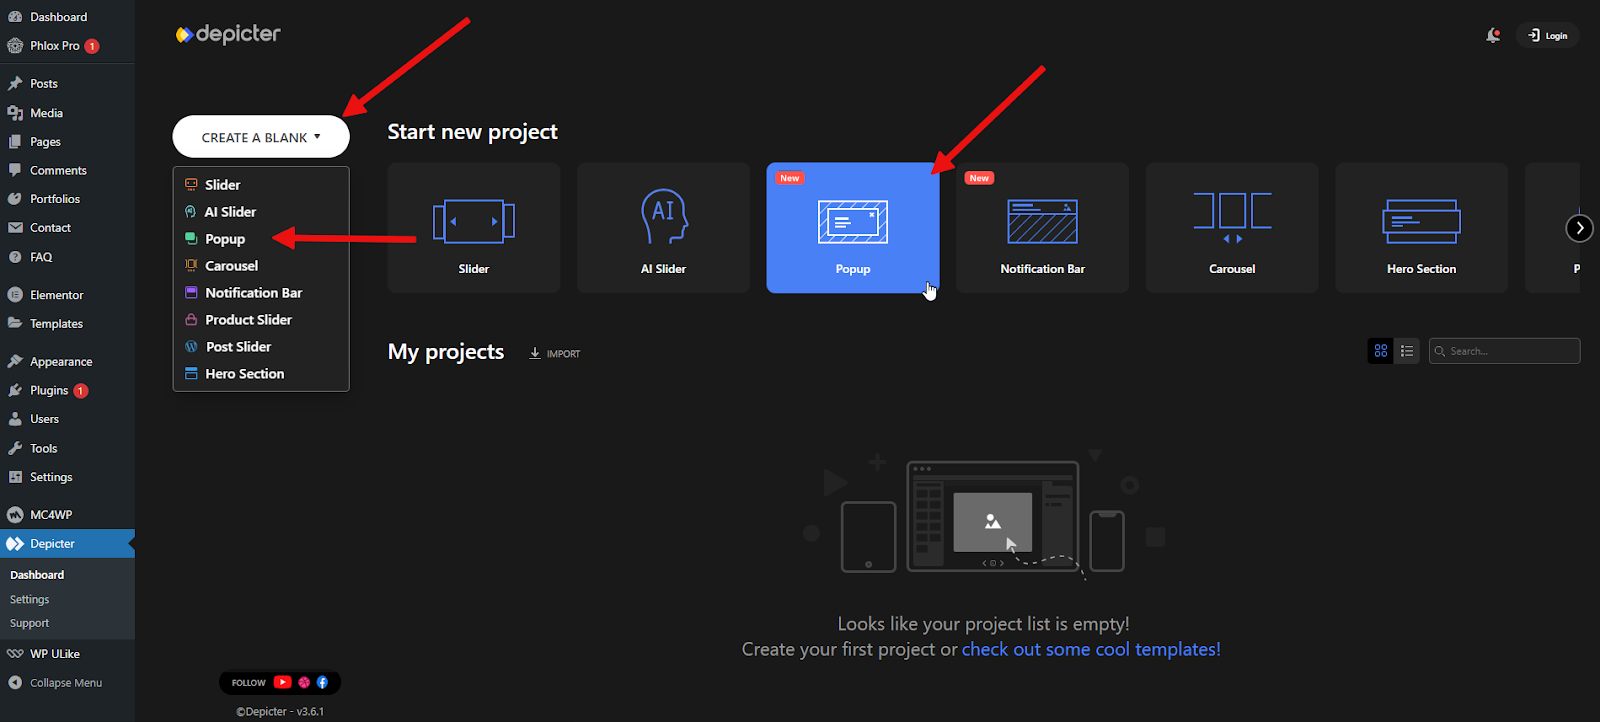
After going to the Depicter dashboard, click on the Popup section.

There are two ways to create our desired popup:

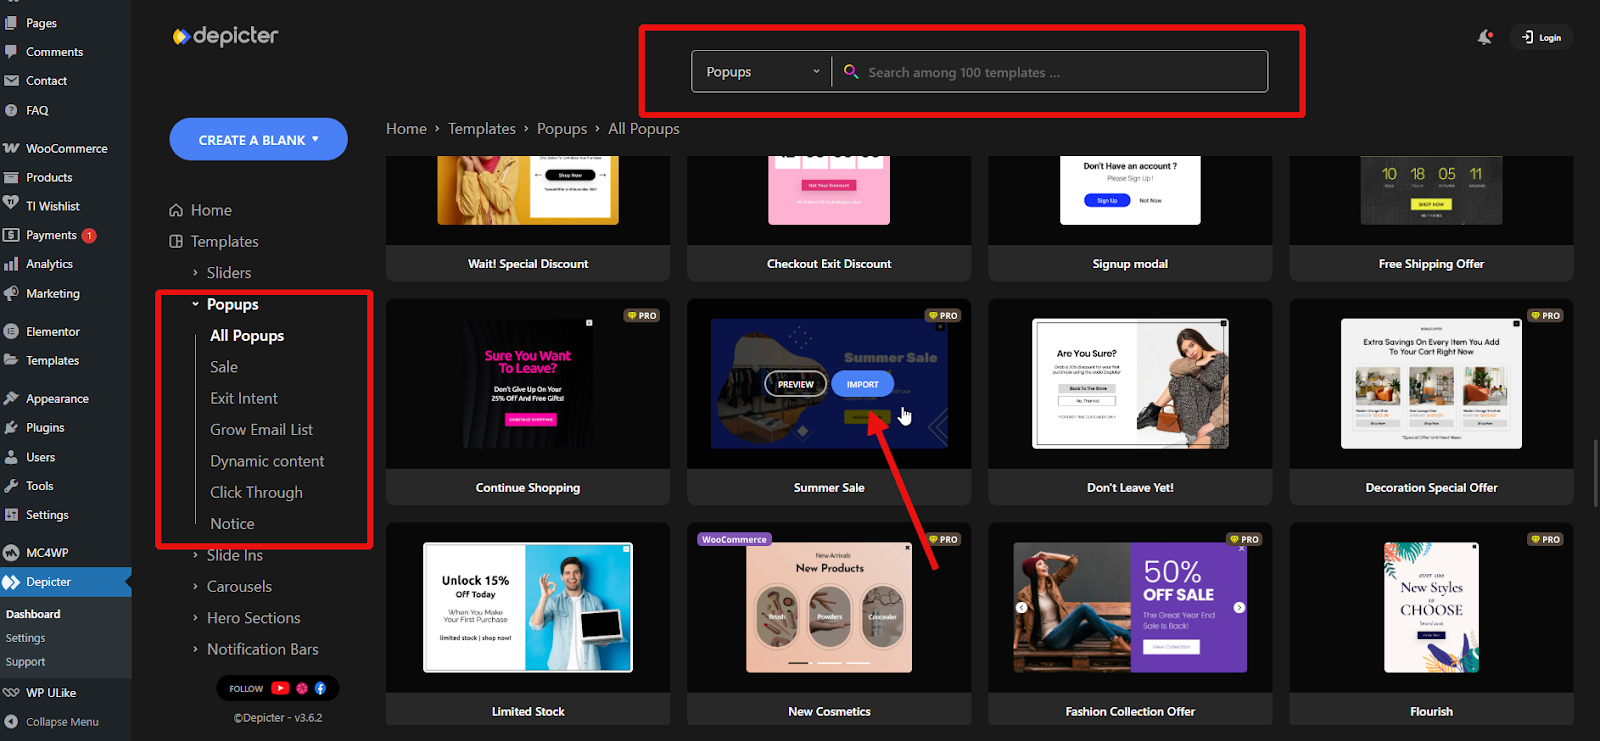
One is to start from scratch with a blank popup and build everything manually, or we can use one of the ready-made templates provided by Depicter.

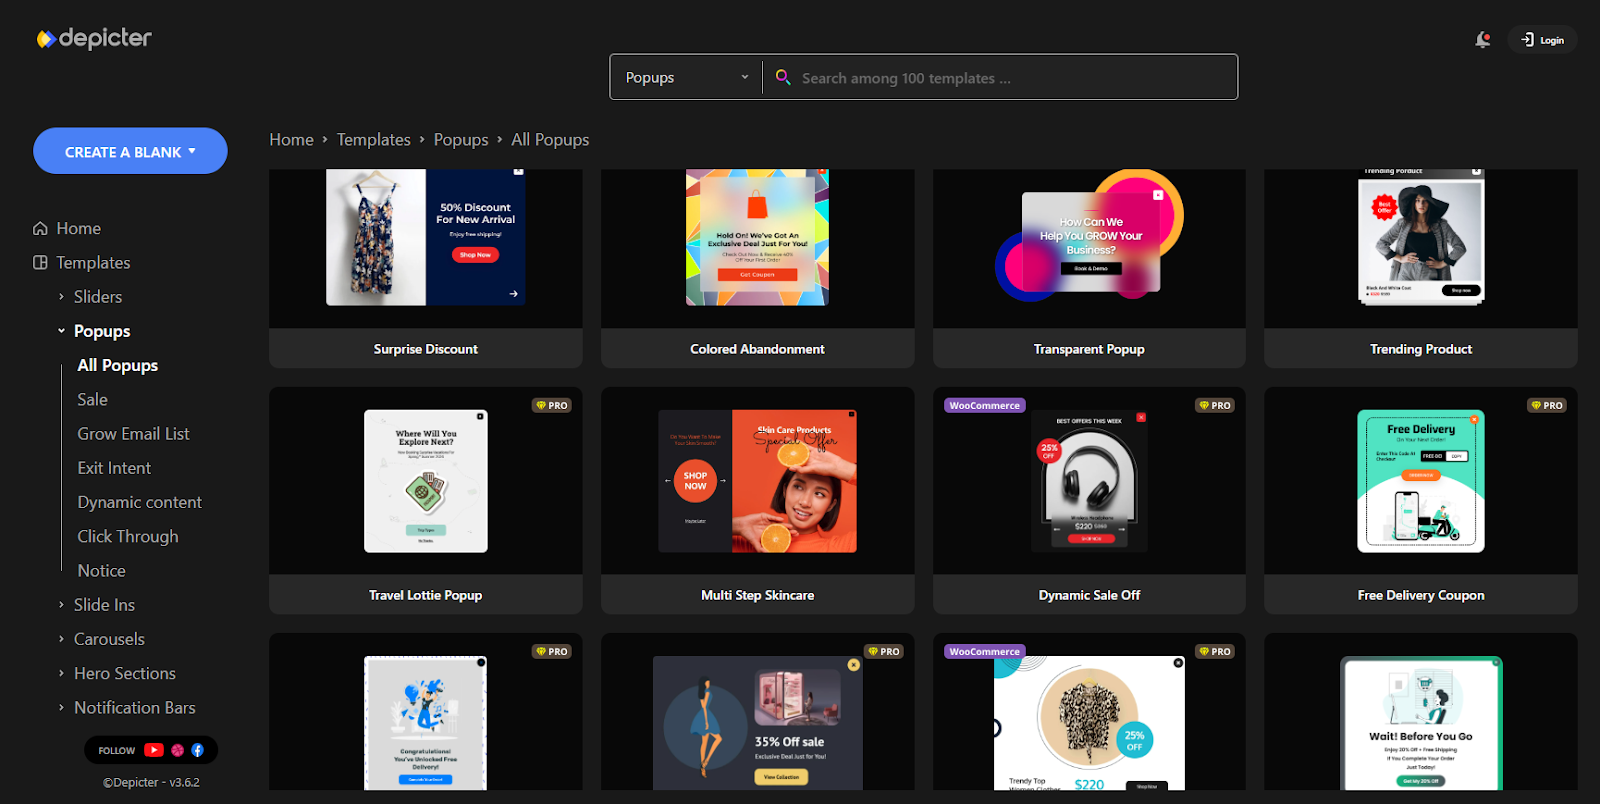
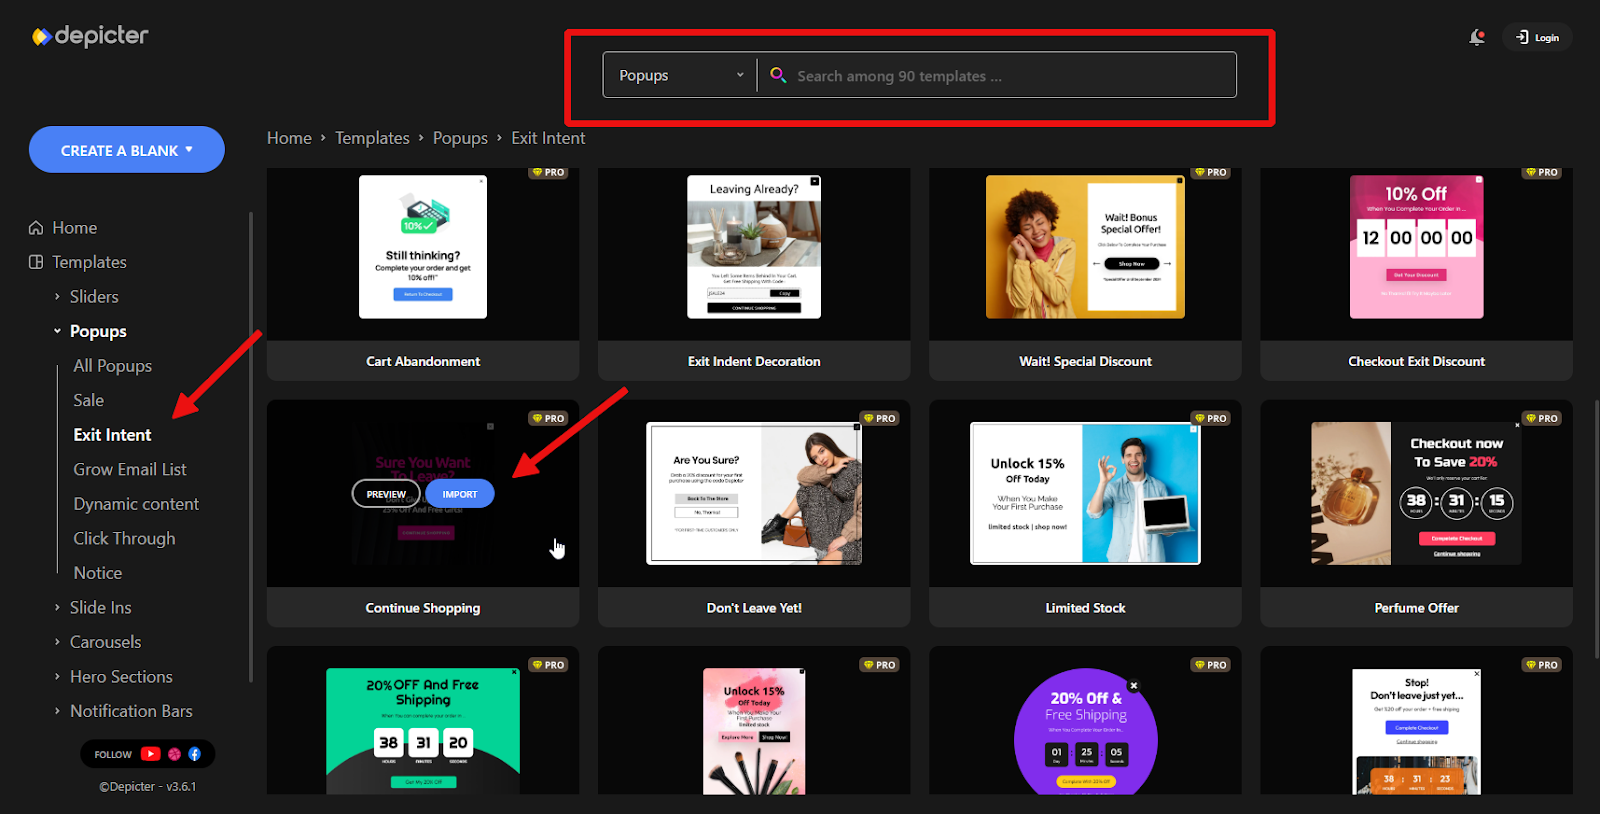
Depicter offers a large and diverse collection of popup templates, covering everything from newsletter signups and promotions to exit-intent messages and seasonal offers.

Having access to such a wide variety is a huge advantage for any popup builder — it saves you a significant amount of time, ensures professional design quality, and helps you get started quickly without the need to build layouts from scratch.

Even better, every template is fully customizable, so you can easily apply your own design, branding, and content to make it truly your own.

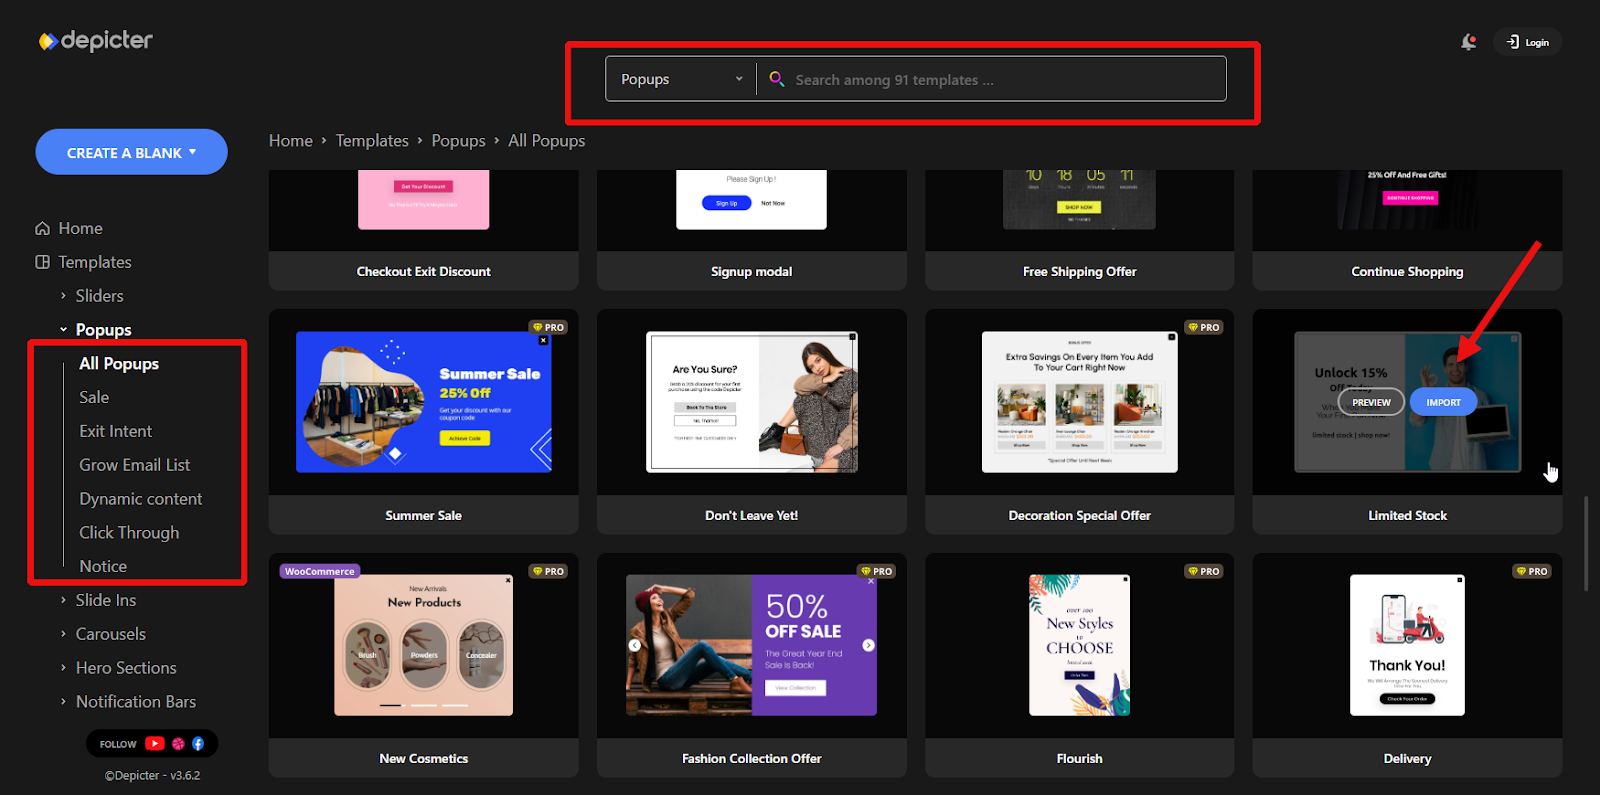
You can browse these templates, use the targeted categories on the left side, or filter the popup list using the search bar at the top with relevant keywords.

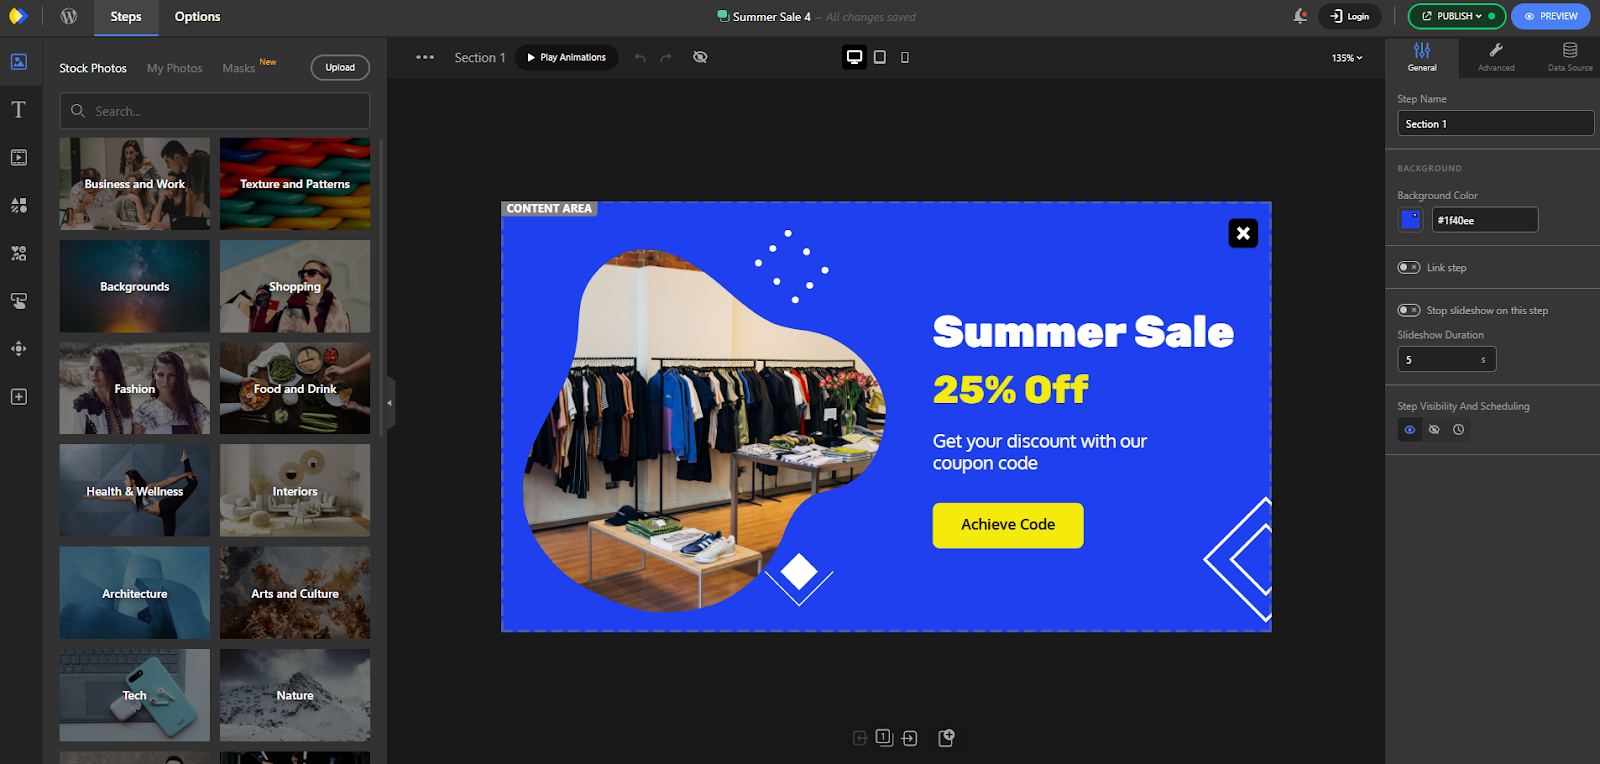
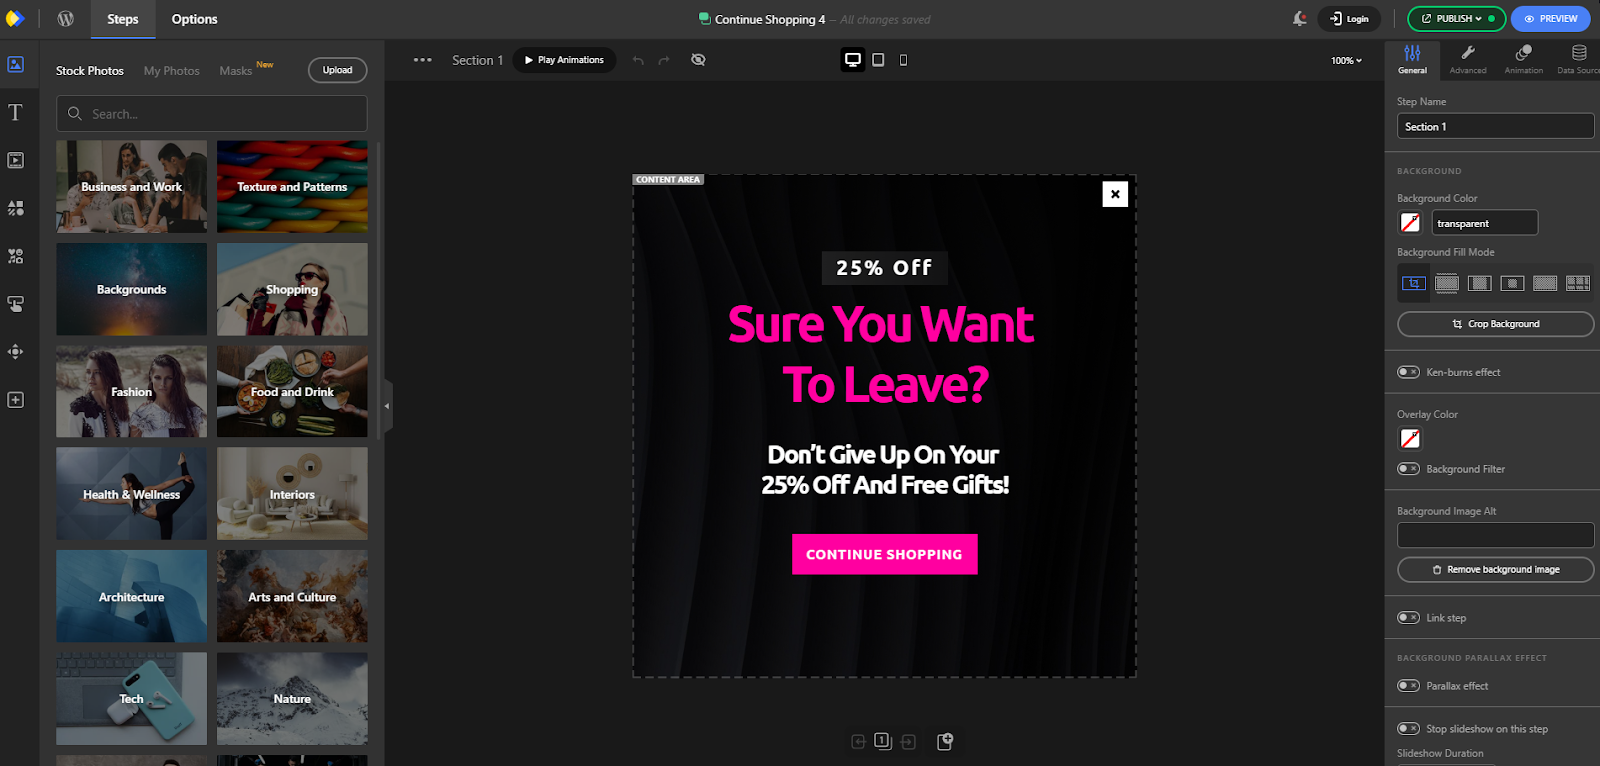
After selecting the desired popup, simply click the Import button. Within a few seconds, the template will be imported and you’ll be taken to the Depicter editor.

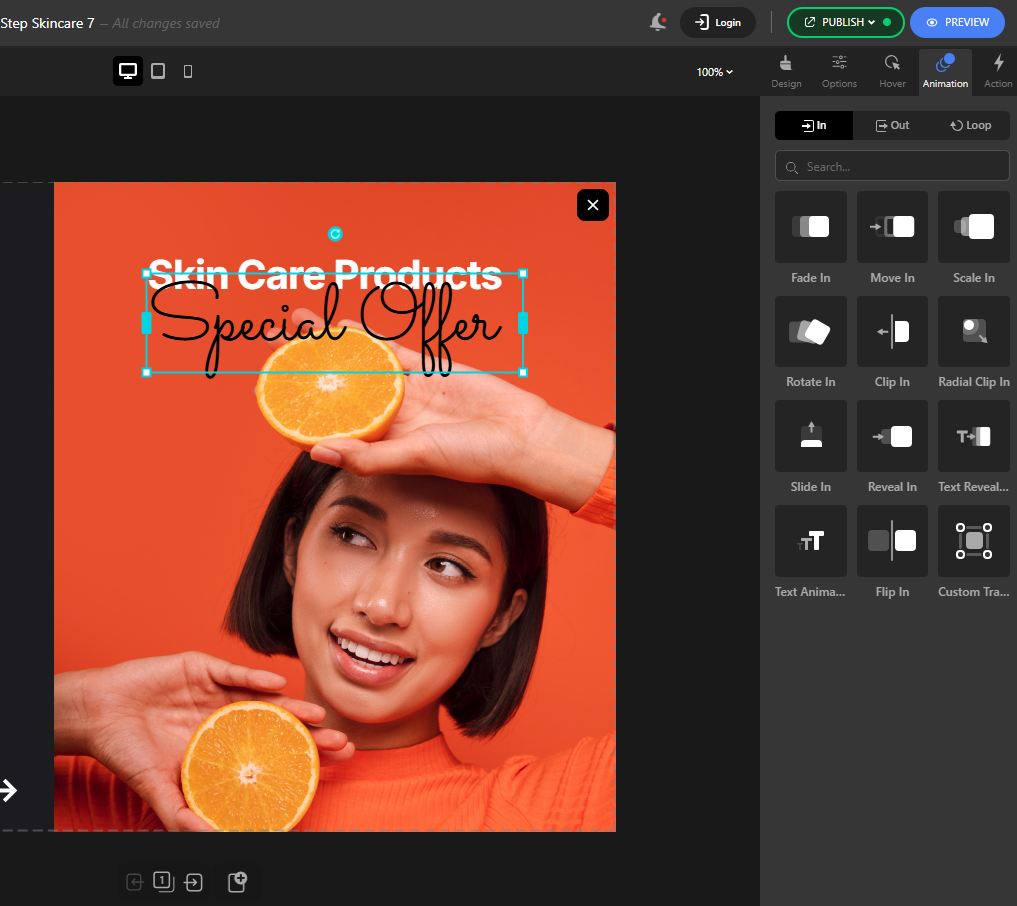
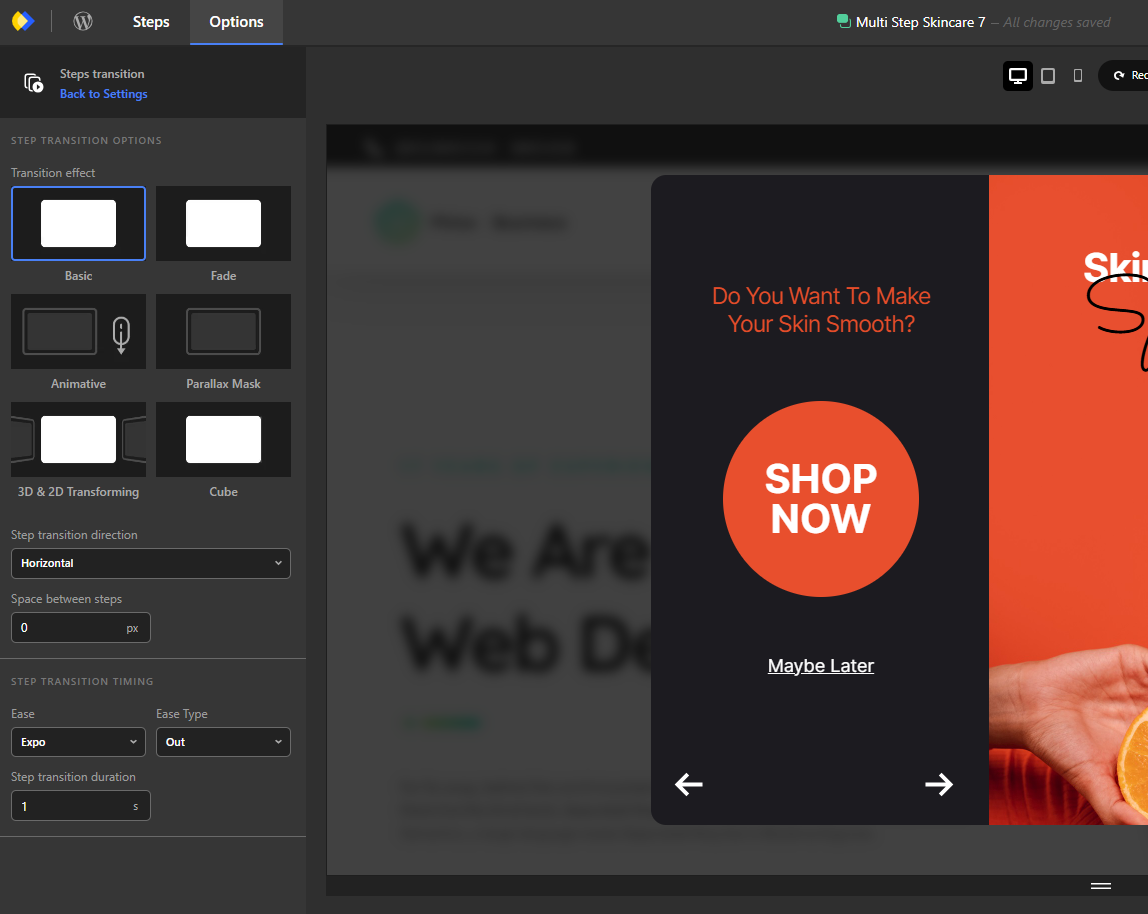
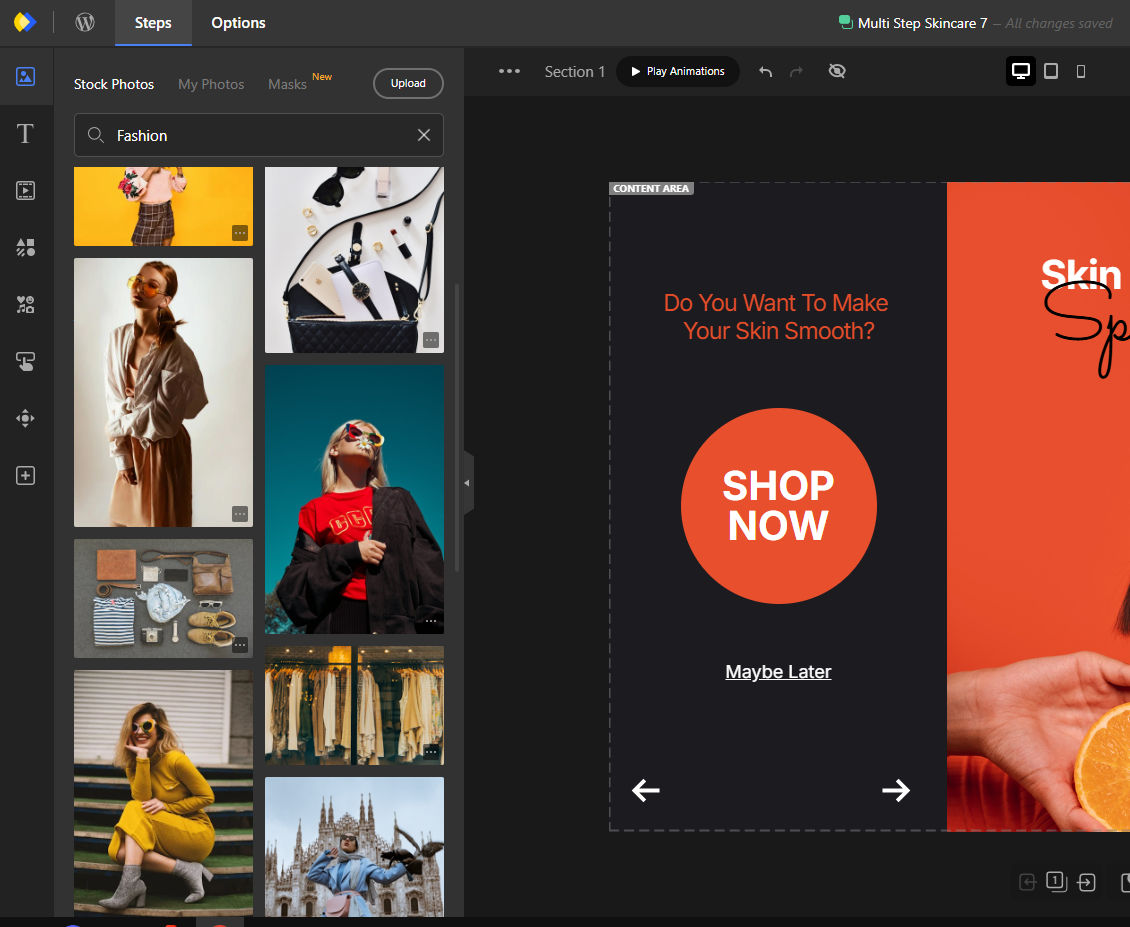
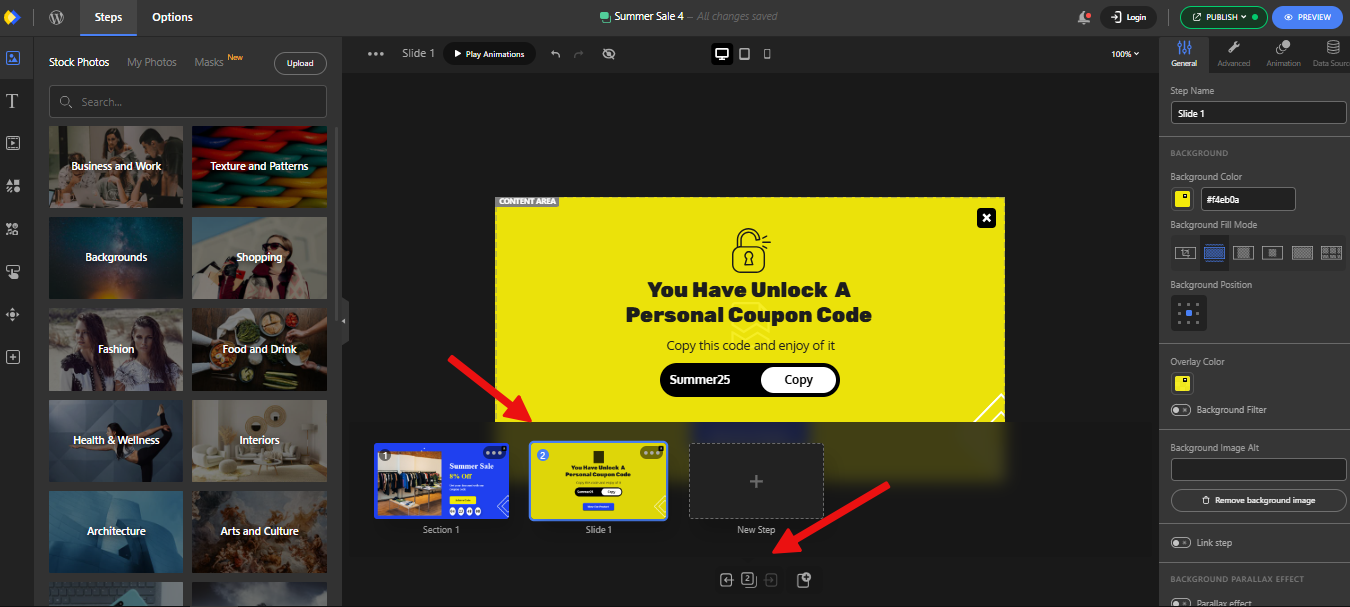
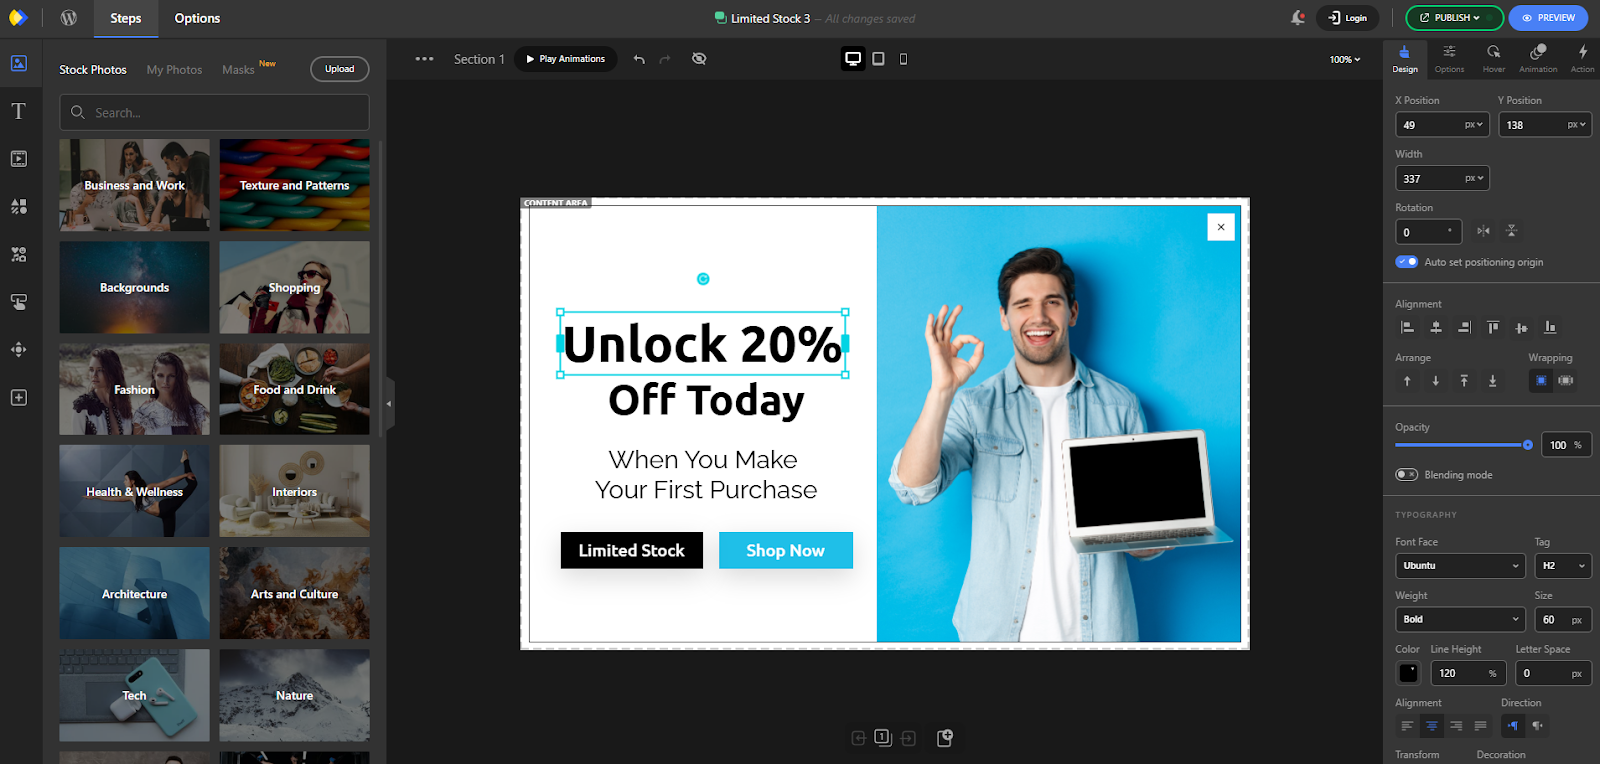
It’s worth noting that our popup has two steps. You can switch between them by clicking on the Steps Panel.

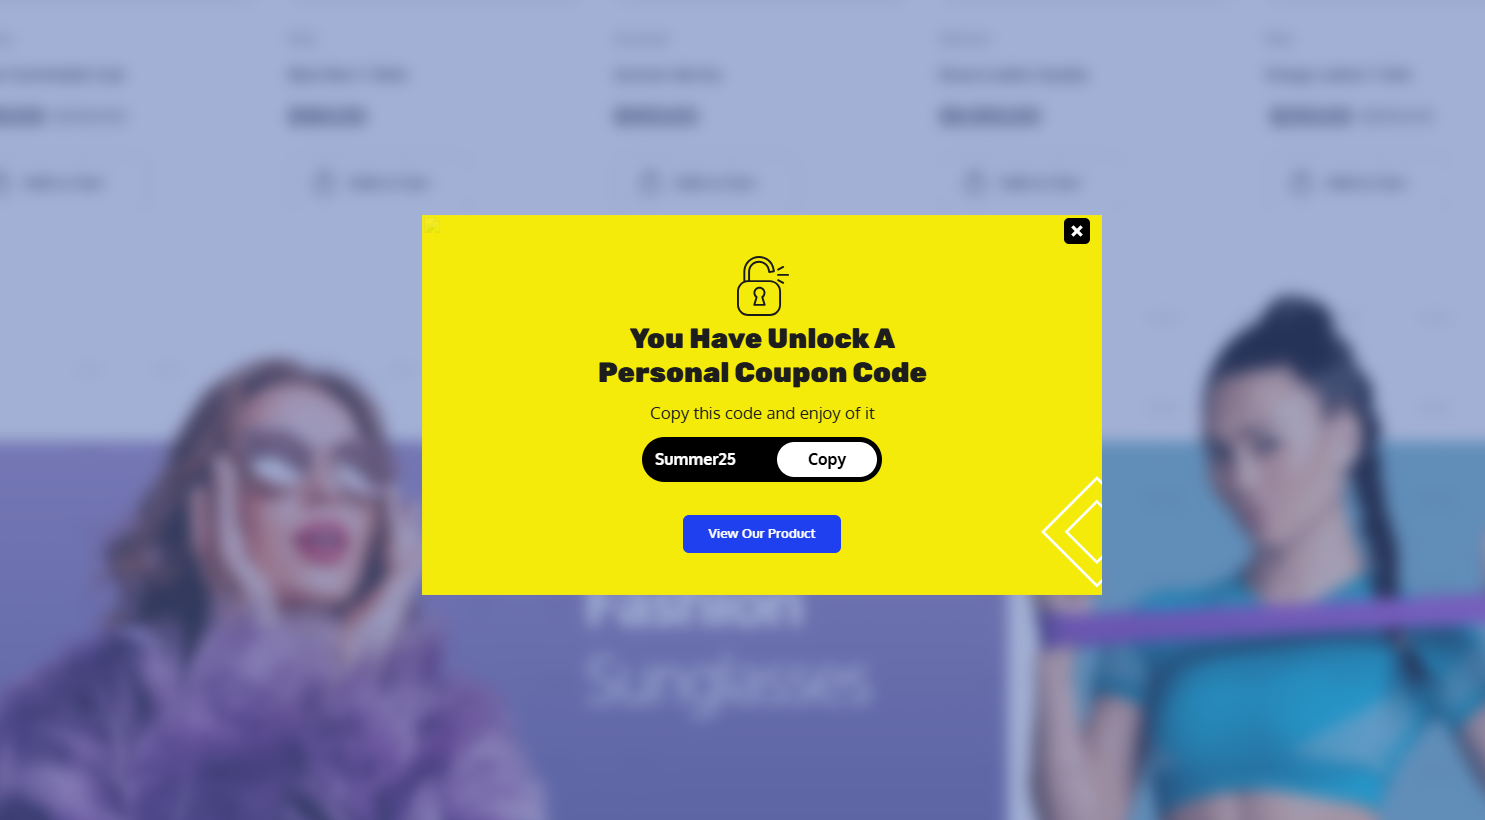
Visitors can click the CTA button on the first step to be directed to the second step, where the campaign’s discount code is displayed.

Customizing the Popup

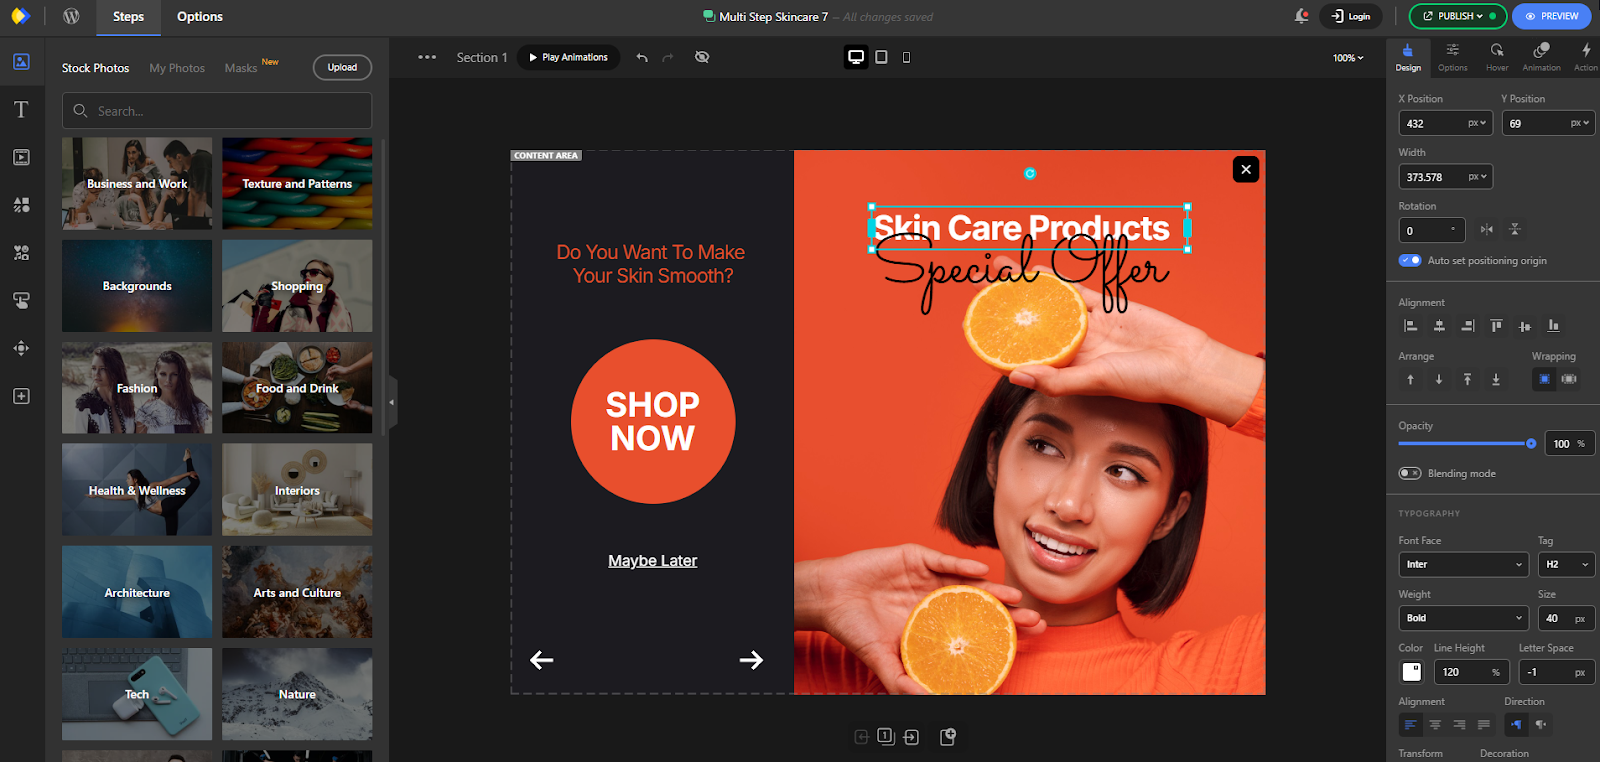
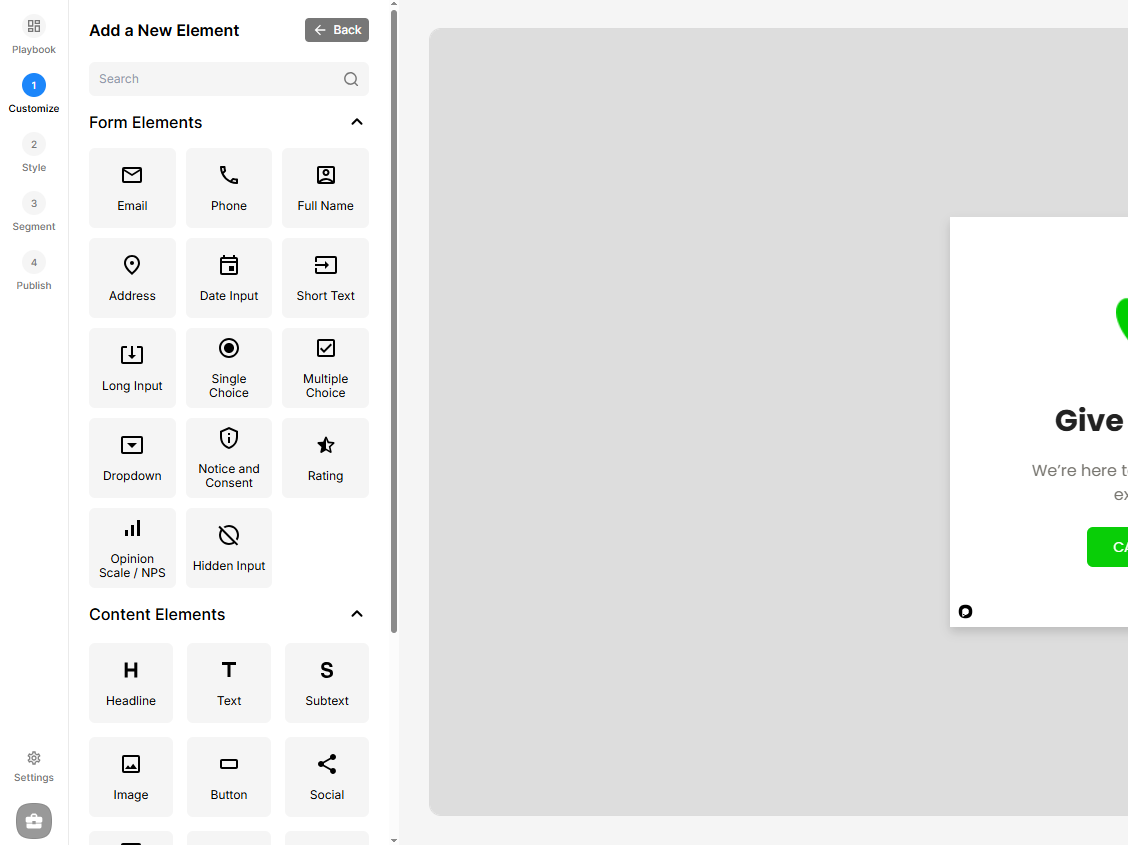
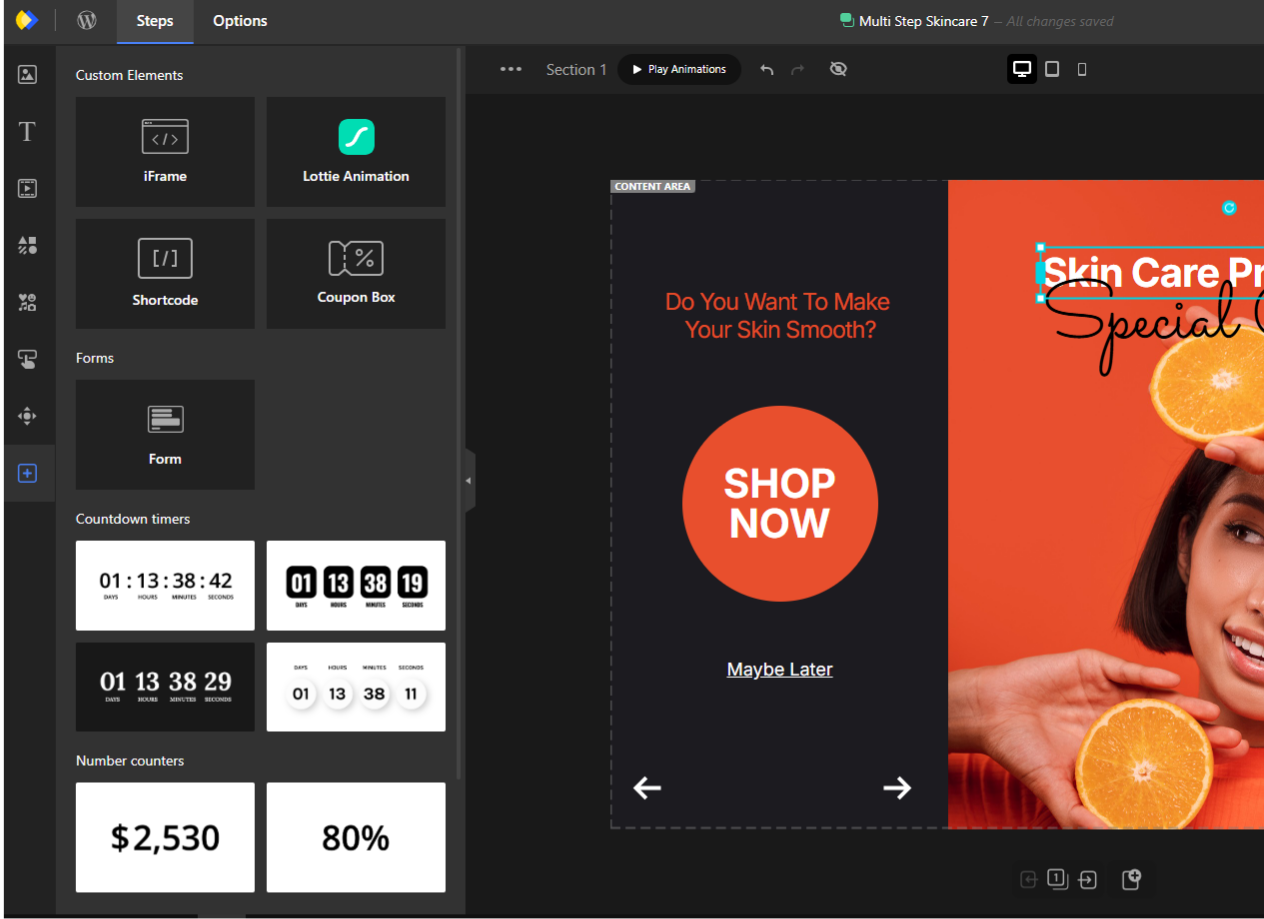
Here, using the tools and features provided by Depicter, you can customize every aspect of the popup — from how it looks to how it functions.

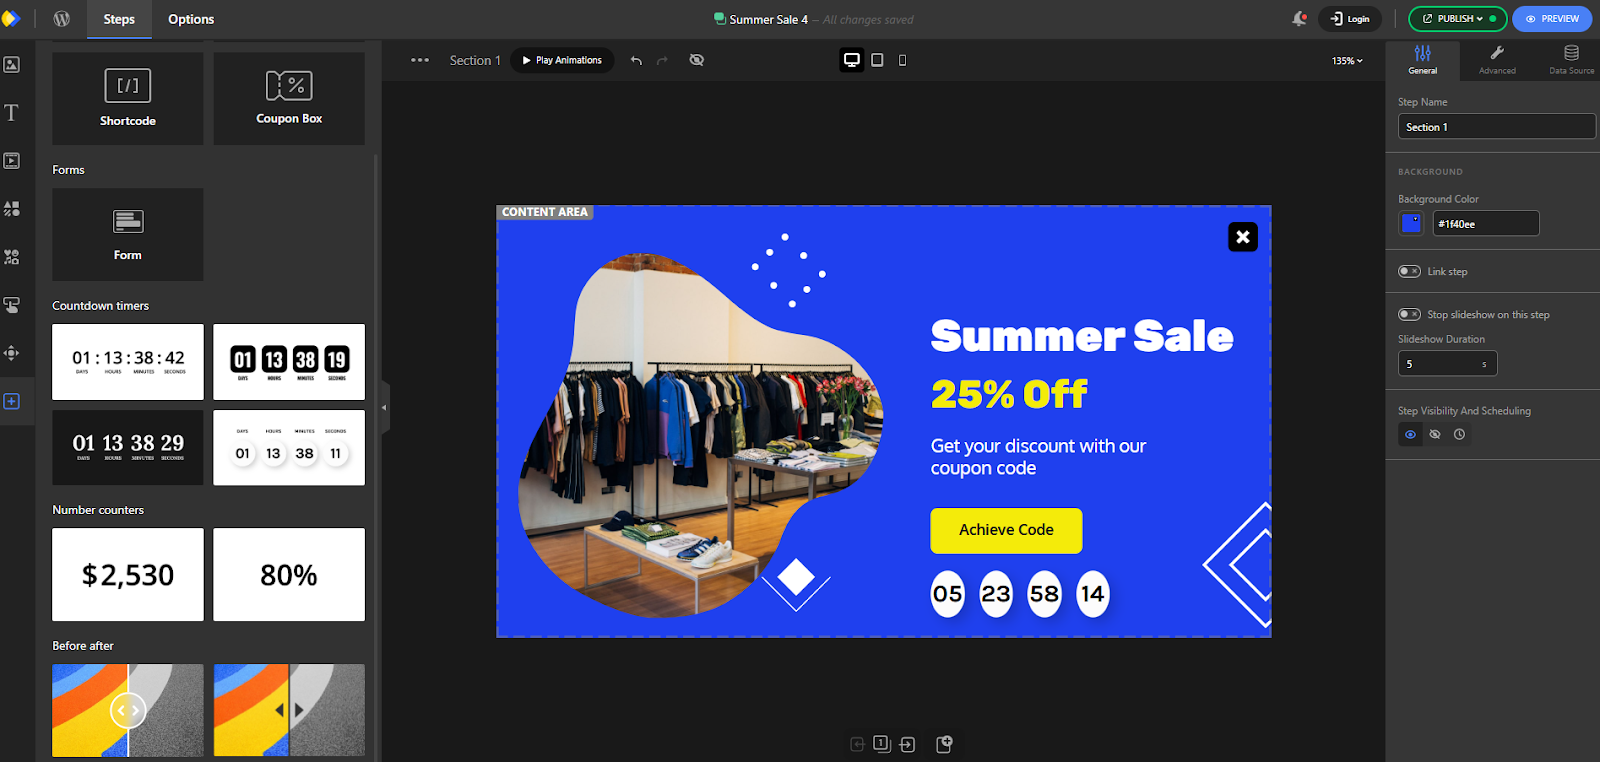
For example, we’ve added a Countdown Timer element to the popup here.

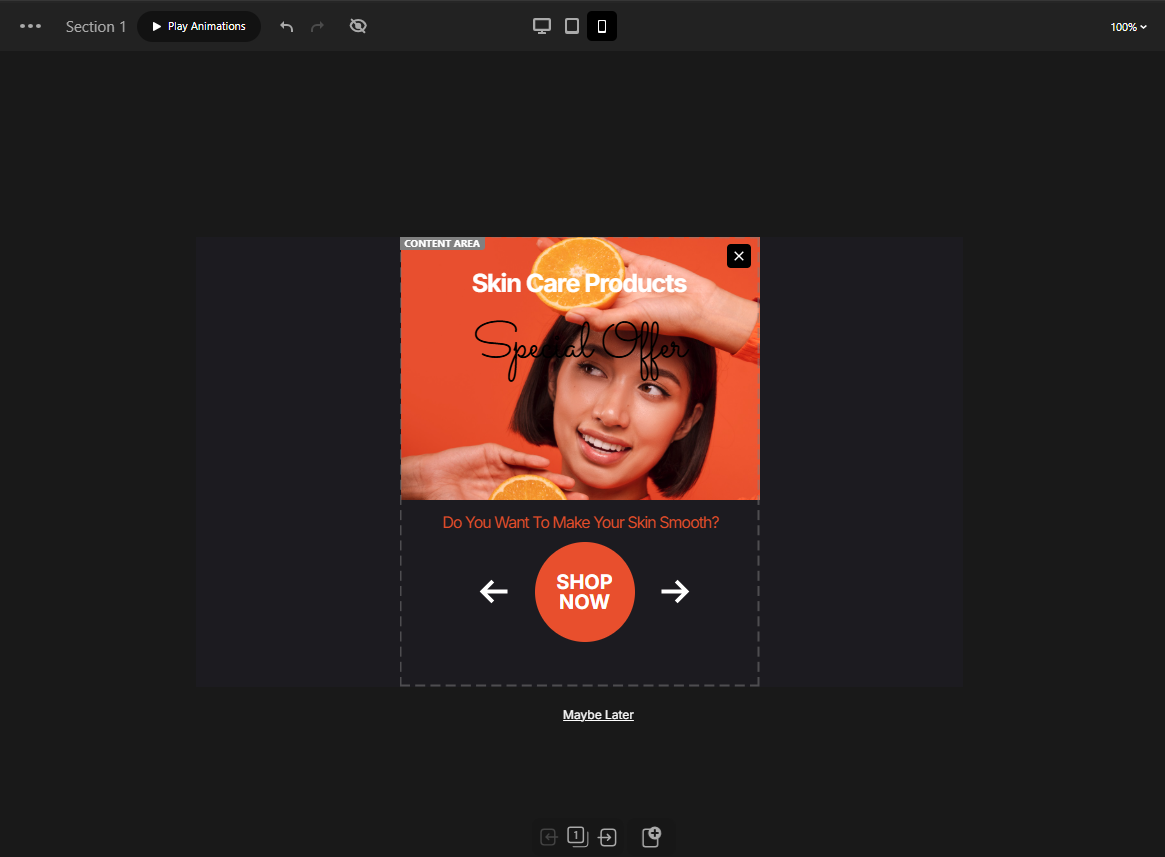
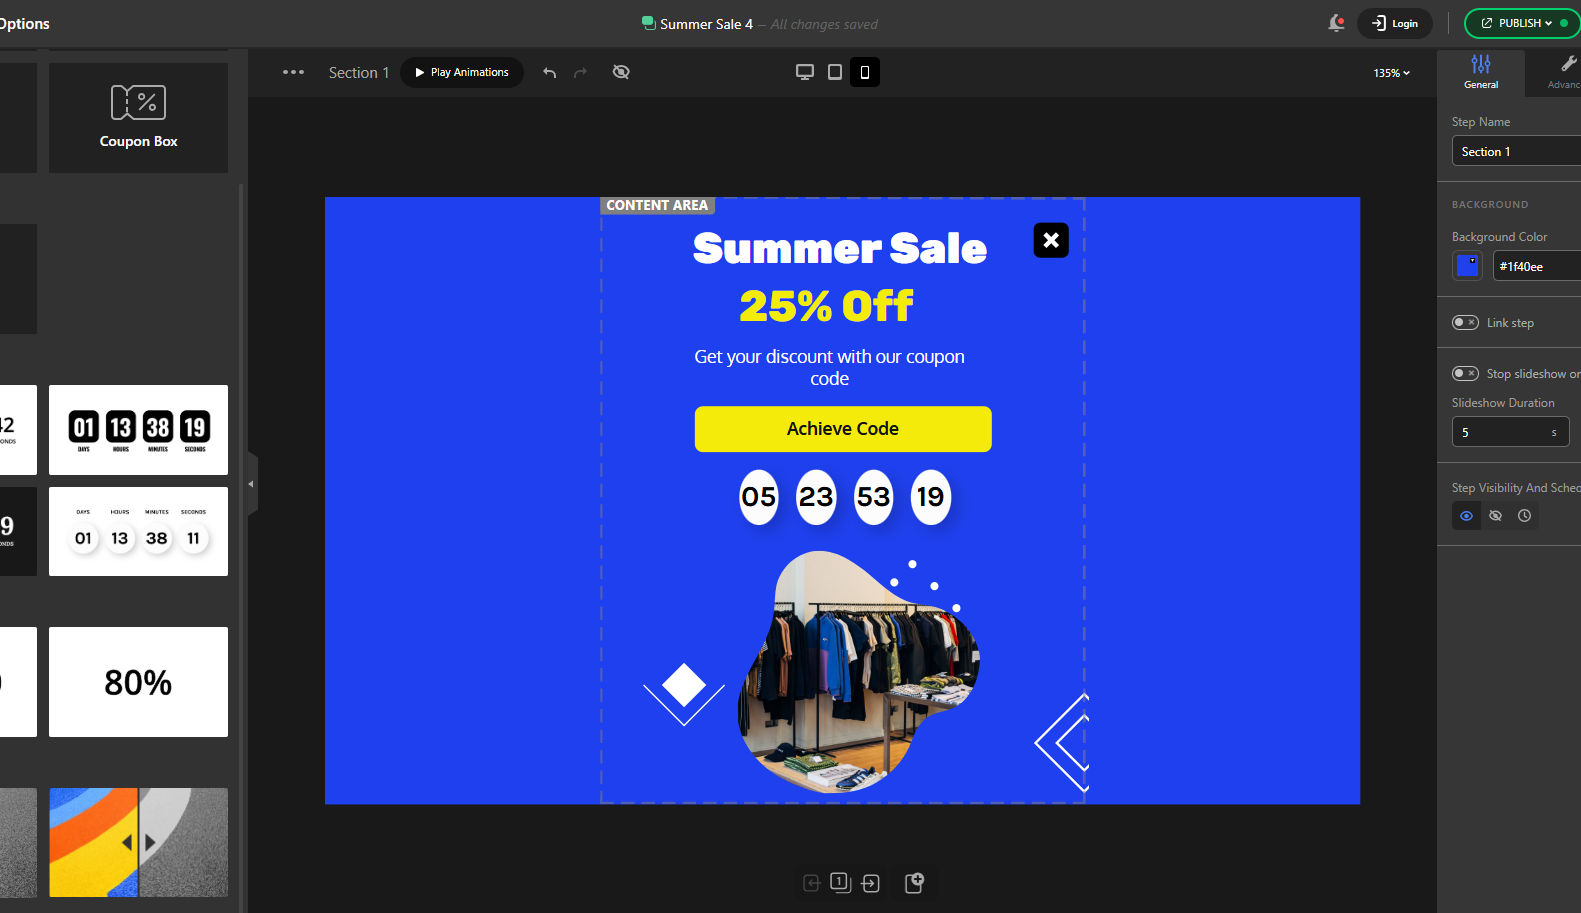
When it comes to responsive design, although all of Depicter’s ready-made templates are fully responsive by default, you still have access to all the tools and options needed to fine-tune the popup’s appearance for standard responsive sizes.

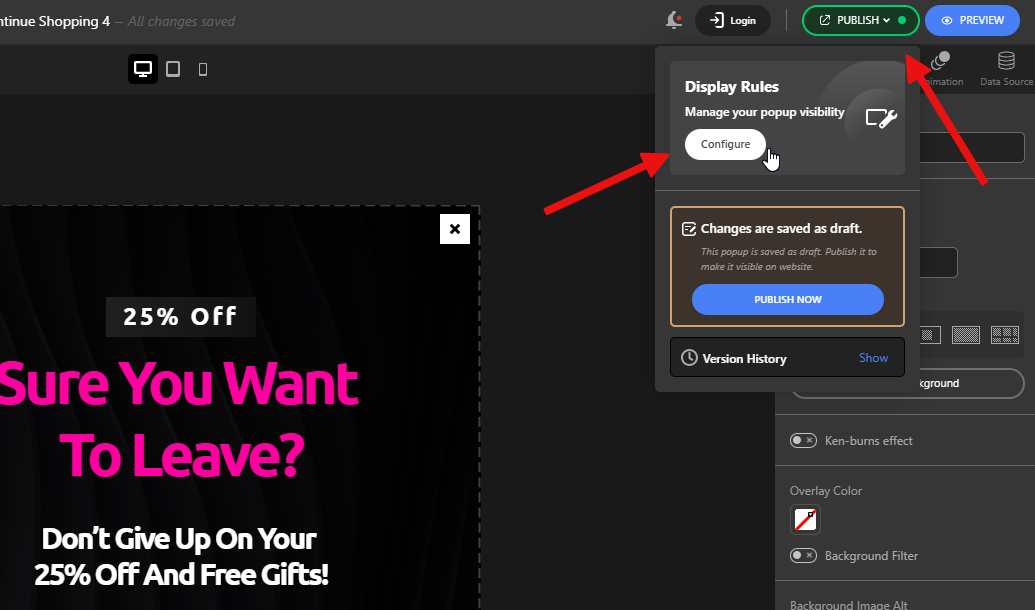
The next step is configuring how the popup is displayed. This section includes all the settings that determine 

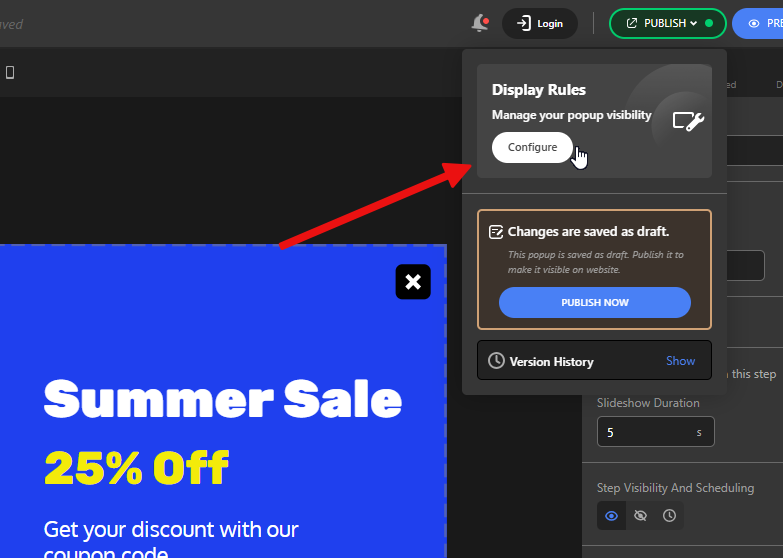
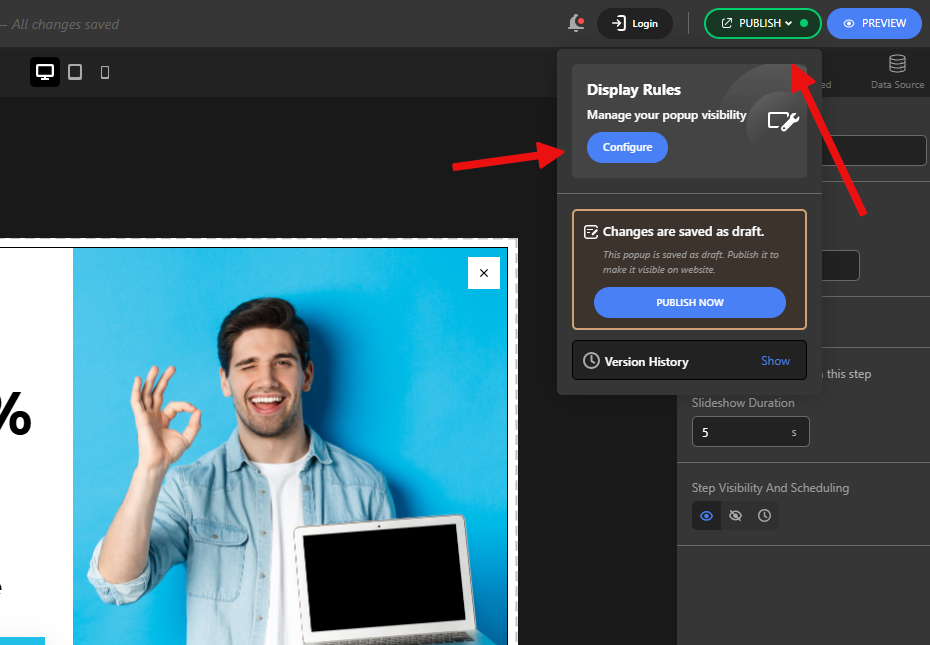
under what conditions the popup will appear to make sure that it displays at the right time and in the right place. After clicking the Publish button, go to the Display Rules section and click on Configure.

Configuring the Display Rules

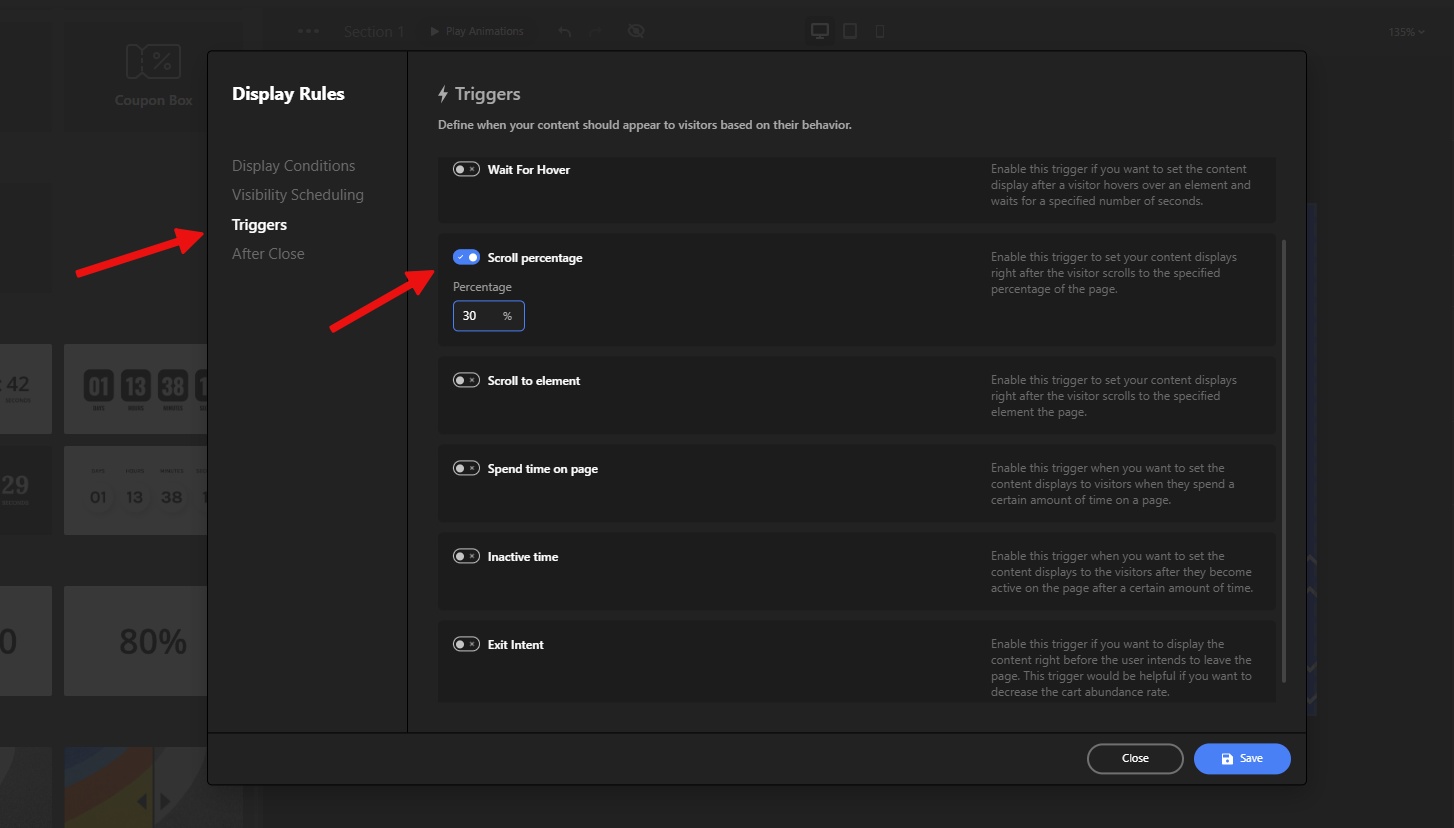
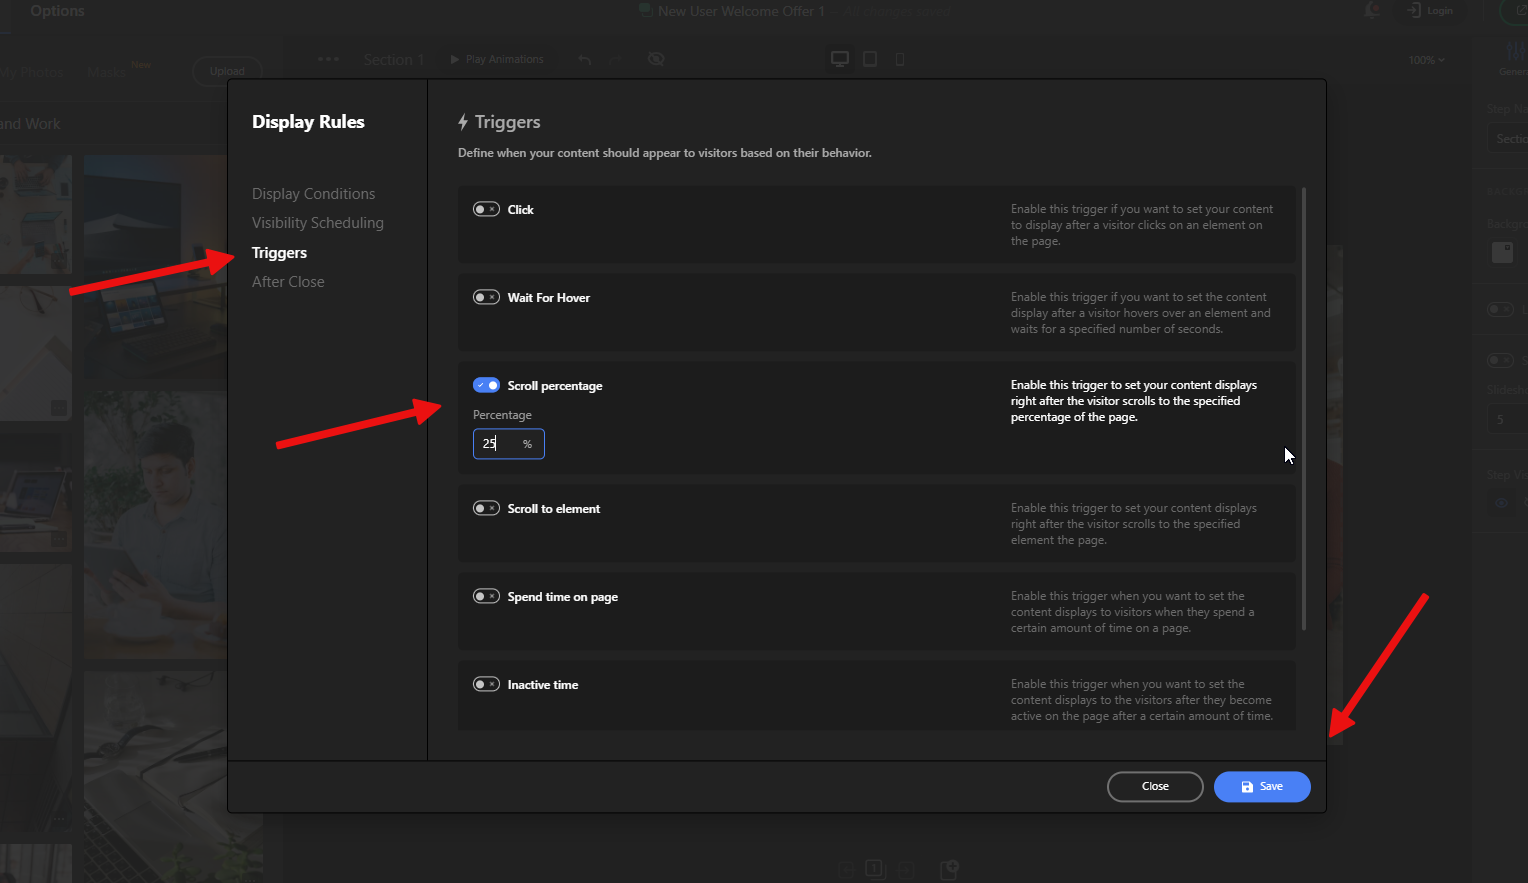
Based on what we decided in the details of our campaign, the popup should appear after the user has scrolled down 30% of the page. To do this, go to the Triggers section, activate the “Scroll percentage” option, and set the value to 30 seconds.

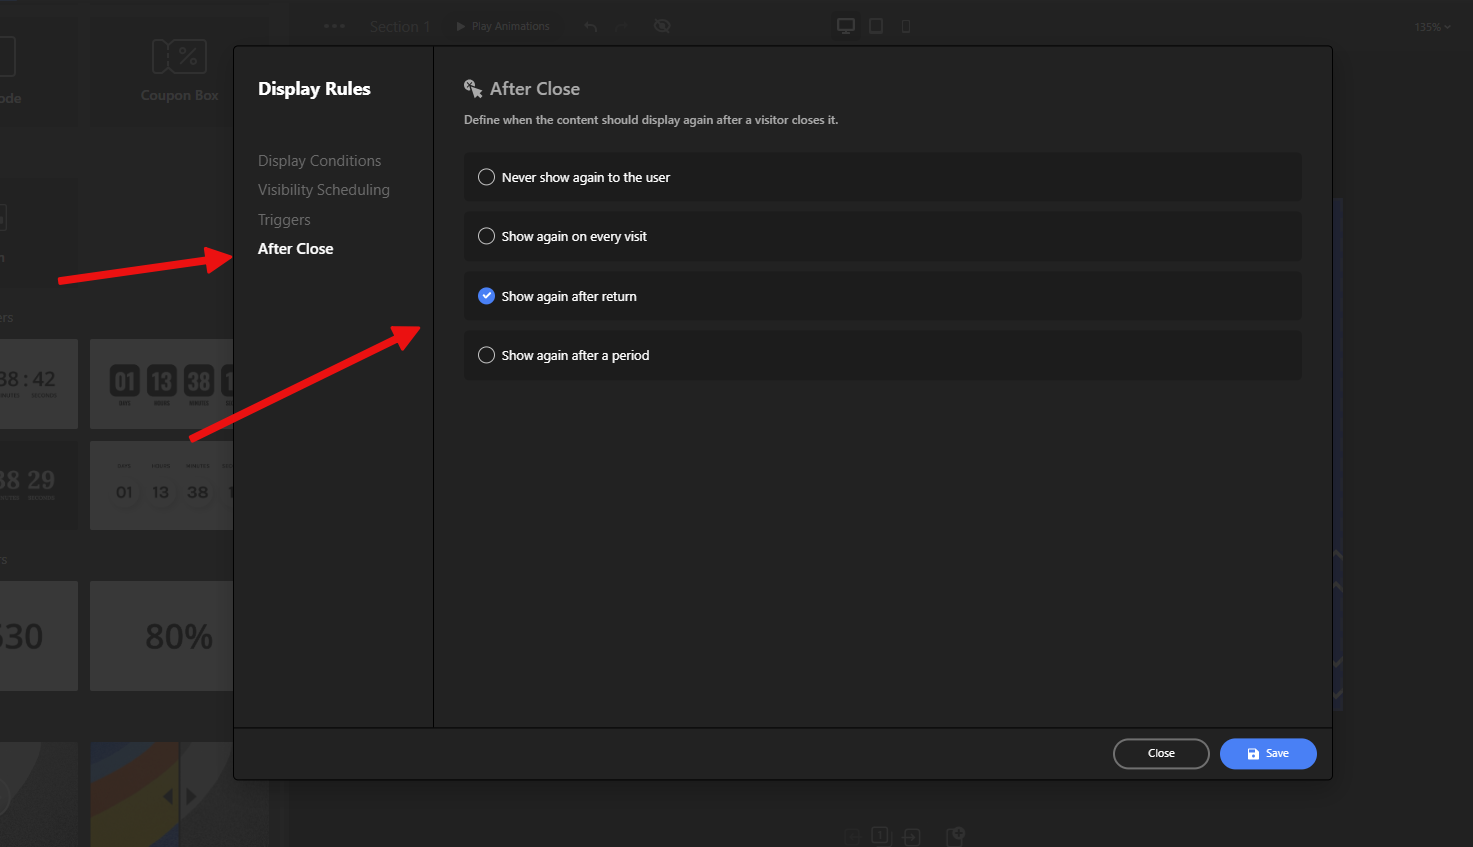
Also, for the popup to reappear, it should only show up again if the visitor returns to the site, and not more than once during the same session. To set this up, go to the After Close section and select the “Show again after return” option.

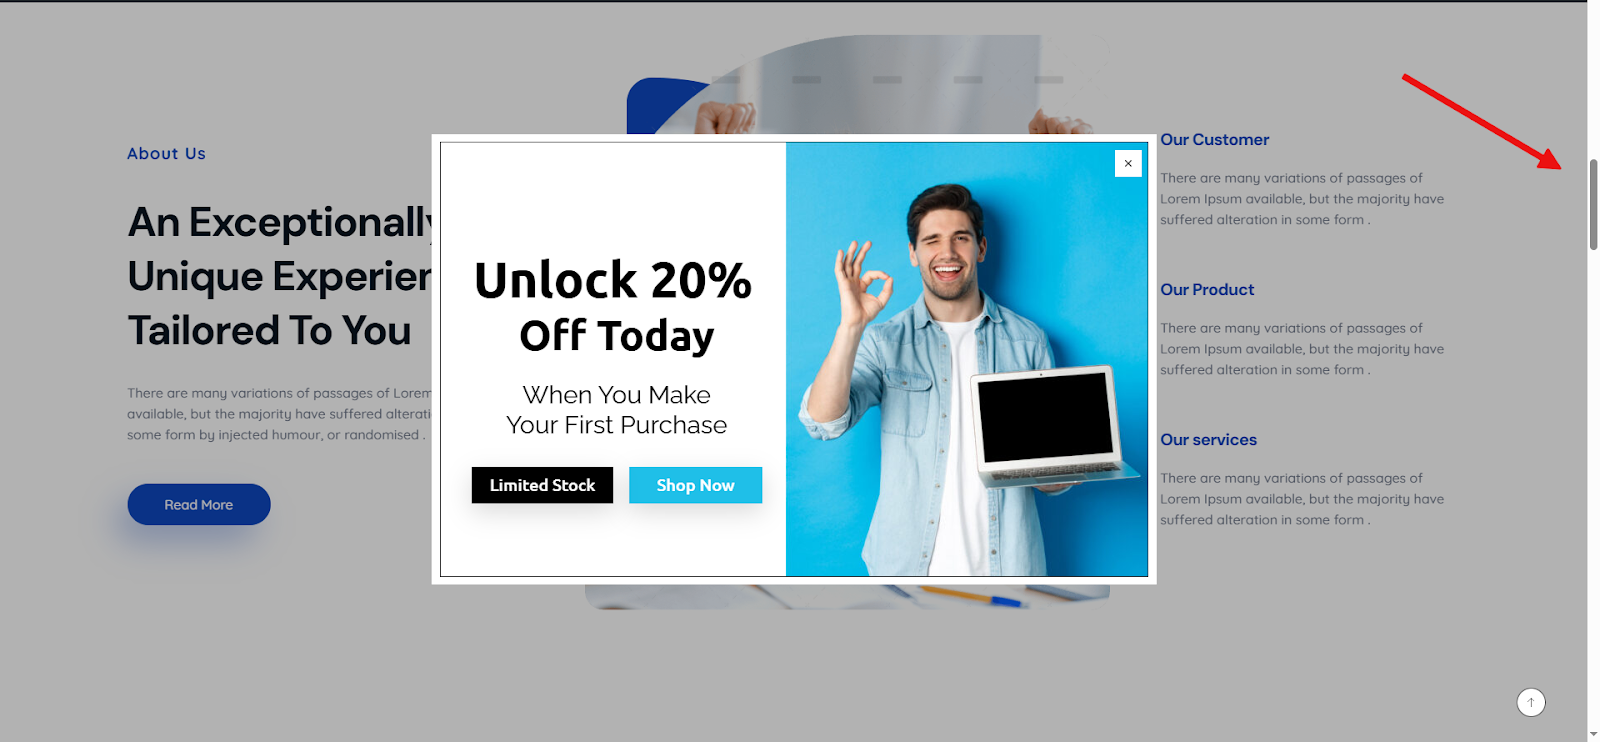
Everything is done, and the result will be that when a user scrolls through 30% of the webpage, our popup will appear. 

According to our design, when the user clicks the specified CTA button, the discount code will be

6. Adding Notification Bars with Depicter

When deciding between popups and notification bars, it’s important to consider the nature of your message and how intrusive it should be. 

Notification bars are ideal for subtle, ongoing promotions or general announcements, like highlighting free shipping thresholds, new product launches, or seasonal hours. 

They sit quietly at the top or bottom of your page, making them perfect for keeping users informed without disrupting their experience. 

On the other hand, popups are more attention-grabbing and should be used when you need to drive action, like collecting emails, promoting a limited-time offer, or re-engaging users about to leave the site.

In short, use notification bars when you want to inform, and popups when you want to convert.

We’re not going to go over all the campaign scenario details here—instead, we’ll just walk through how to create a notification bar.

Here is a video that shows the whole process of creating a Notification Bar with Depicter:

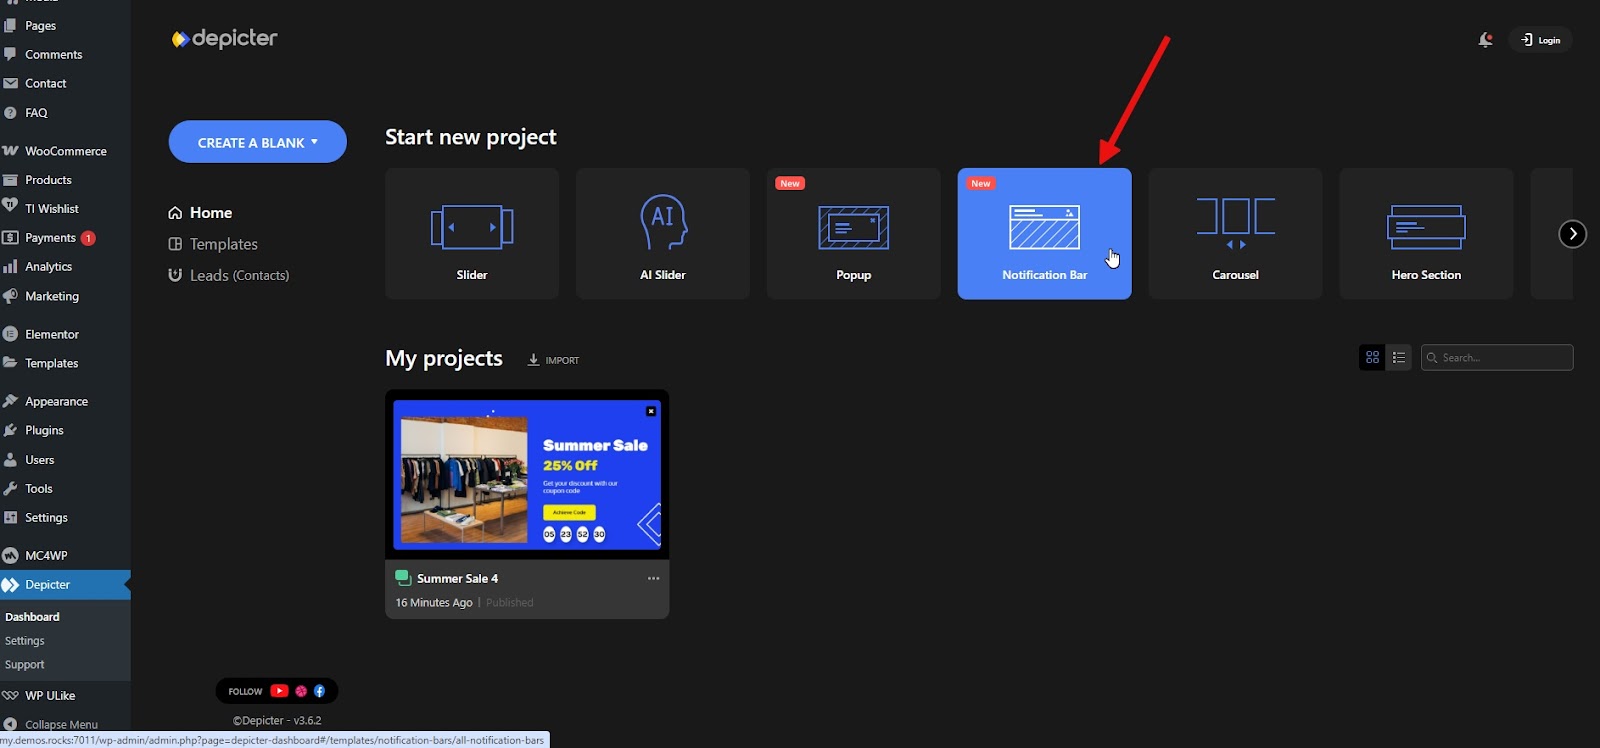
In the Depicter dashboard, click on the Notification Bar option.

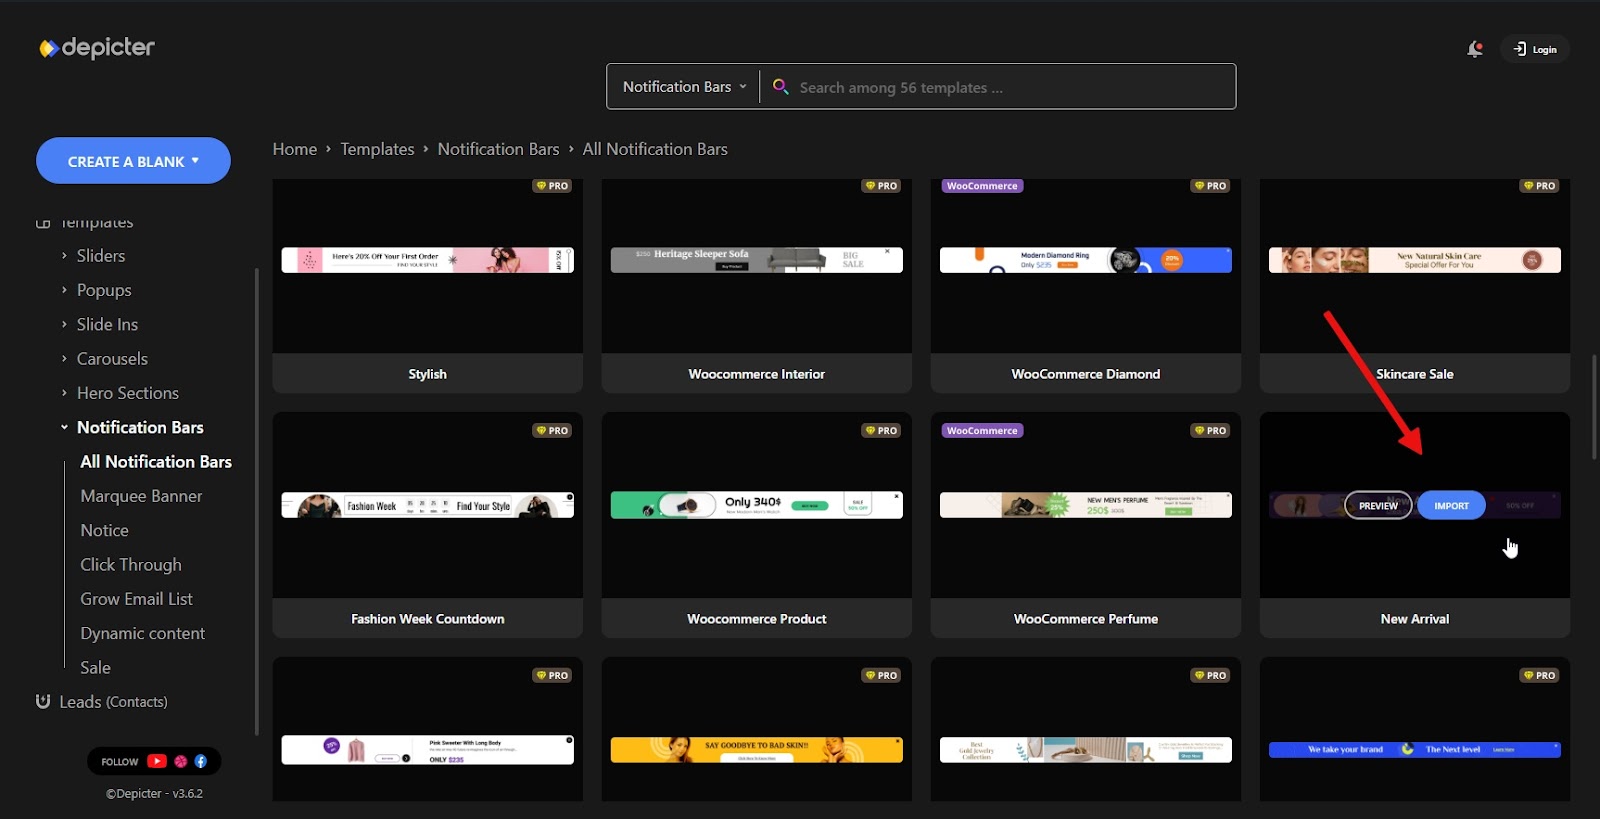
From the available templates, choose one and click Import to start the import process.

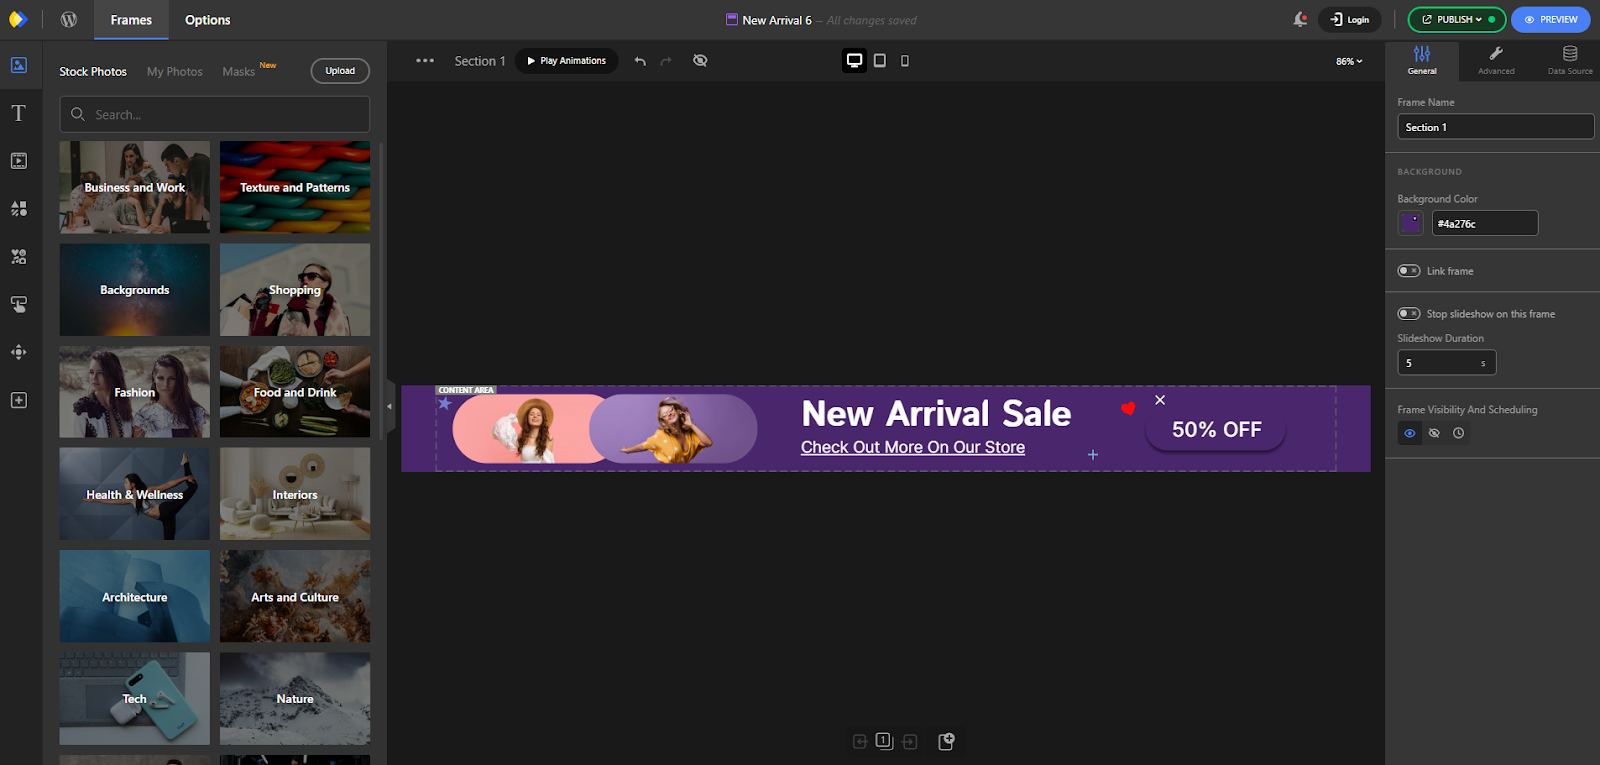
After a few seconds, it’s done and you’ll be taken into the Depicter dashboard, where you can make any changes you want before finalizing your notification bar.

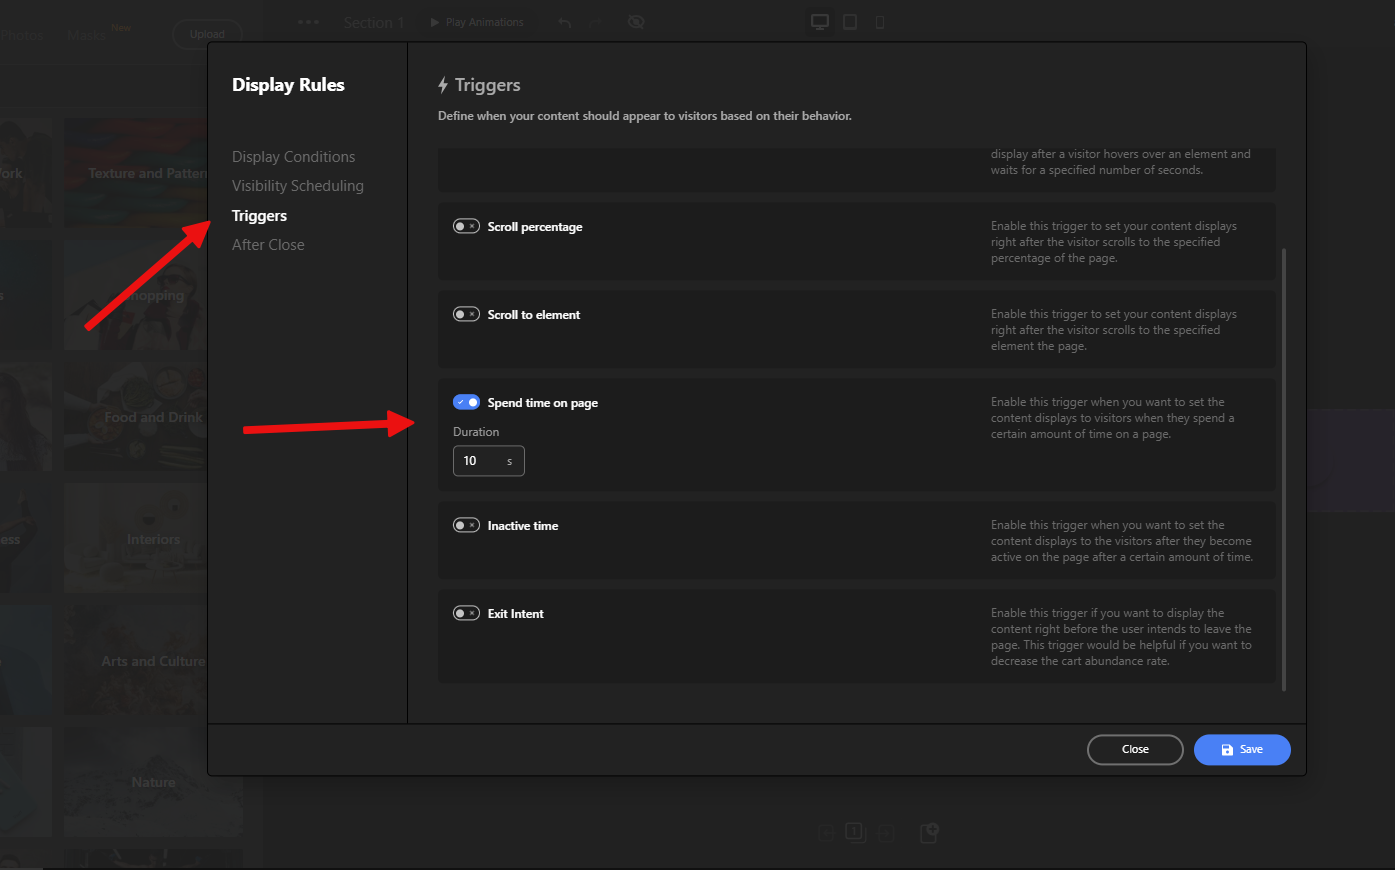
To configure how it’s displayed—similar to what we did for the popup—go to the Display Rules section.

This time, for the notification bar, we’ll set it to appear a few seconds after the visitor lands on the page by enabling the Spend time on page option and setting it to 10 seconds.

Finally, once a visitor has spent 10 seconds on our site, the notification bar will appear like this.

Conclusion

A sales promotion is an essential tool for any business looking to drive results in a competitive market. But without the right promotional tactics, even the best campaign ideas can go unnoticed. By combining smart planning with high-converting tools like popups and notification bars, you can maximize reach, create urgency, and guide visitors toward taking action.

Depicter makes it easy to launch visually appealing, behavior-based popups and subtle yet effective notification bars—no coding required. Whether you’re running a flash sale, collecting emails, or announcing new products, using these tools strategically can dramatically increase your chances of campaign success.

Remember: Good timing, targeted messaging, and clear design are the keys to getting the results you want. 

Let me know in the comments if this article helped you start a campaign.

FAQs

1. What’s the difference between a sales campaign and a regular promotion?

A sales campaign is typically a more structured and time-bound initiative with a clear goal, such as increasing revenue or clearing out inventory. A promotion is one part of a campaign—like offering a discount, running a giveaway, or launching a flash sale.

2. When should I use a popup instead of a notification bar?

Use popups when you want to grab immediate attention or drive a specific action, like collecting email sign-ups or promoting limited-time deals. Notification bars are best for subtle messaging that doesn’t interrupt the user experience, like announcing free shipping or a product launch.

3. How often should I show a popup to users?

To avoid annoying users, limit the frequency. Best practice is to show a popup once per session or only when specific behavior triggers it (e.g., after scrolling or before exit). Depicter allows you to control this easily with built-in display rules.

4. Can I customize popup templates in Depicter?

Yes! All templates in Depicter are fully customizable. You can change the colors, text, layout, and even add features like countdown timers or multi-step flows to match your brand and campaign goals.

5. Do popups and notification bars work on mobile devices?

Absolutely. Depicter templates are responsive by default, and you can fine-tune their appearance on different screen sizes to ensure a seamless mobile experience.

6. What makes a popup effective?

An effective popup is:

  • Timed well (not shown too early)
  • Visually appealing
  • Clear in its message
  • Action-oriented (strong CTA)
  • Easy to dismiss

When done right, it adds value without disrupting the user’s journey.

Final

Set Up a Scroll Popup with Depicter Now

A Scroll popup is a powerful tool for delivering the best content at the best time to your website visitors without being intrusive. Unlike standard popups that appear immediately when someone lands on a page, scroll popups are designed to show up only after a user has scrolled to a specific point. This allows you to target users who are already engaged, making them more receptive to your message.

You should use a scroll popup when visitors have shown genuine interest by scrolling through your content, especially on long pages like blog posts or product descriptions. This is the moment when they are more likely to take action, such as signing up for your newsletter or exploring a special offer. Aligning your popup with the user’s engagement level to not only improve the experience but also increase conversions.

Step 1: Install Depicter Free

Before we start, just double-check that you’ve installed the Depicter plugin.
It’s super easy — just search “Depicter” in the Plugins menu in your WordPress dashboard.
Want a full walkthrough with video? Take a look at our guide here.

Step 2: Import a Template

To start building your popup, head to the dashboard and click on the “Popup” tab in the top navigation menu. Depicter makes the process fast and seamless by offering a wide selection of professionally designed templates, including many free options to choose from.

Find your perfect template by typing keywords into the search bar or exploring the categories listed on the left. When you see one you want, just click “Import.”

Your popup will be ready in seconds, taking you directly to the Depicter editor. There, you can customize every detail. 

To explore all the tools and learn to build a popup from scratch, check out this video:

Step 3: Activate Scroll Trigger

The last step to ensure your popup appears at a chosen scroll percentage is enabling the Scroll option in the Display Rules. You’ll find this setting by clicking Publish and then Configure within the Display Rules section.

Now, navigate to the Triggers section and enable the Scroll percentage option. Define the percentage at which you want the popup to appear, save your adjustments, and that’s it!

Now, whenever a visitor scrolls down your website to the specified percentage, the popup will be shown to them.

Be sure to explore additional tips to maximize the impact of your popups with Depicter:

Desktop - 13

Don’t Let Visitors Leave Empty-Handed — Create Exit Popups Fast!

If you’re not using exit-intent popups yet, you’re missing a valuable opportunity to retain visitors who are moments away from leaving your site. Exit-intent technology allows you to make a final, well-timed offer — whether it’s a discount, exclusive content, or a simple feedback request — that can turn lost traffic into leads or customers. It’s an easy, non-intrusive way to increase conversions, reduce bounce rates, and gain insights into visitor behavior, all without disrupting the user experience.

Let’s start setting up exit-intent popups in just three easy steps with Depicter Popup Builder!

Step 1: Install Depicter Free

To get started properly, ensure that the Depicter plugin is already installed.
You can install it by going to Plugins → Add New and searching for “Depicter”.
For detailed instructions and a video tutorial, see our guide here.

Step 2: Import a Template

Depicter provides a wide range of professionally designed templates, including many free popup templates, to make the creation process fast and hassle-free. Once you’re in the dashboard, simply head to the top navigation bar and click on the “Popup” section to begin building your design.

You can use the preset categories on the left side or search through the ready-made templates using keywords. Once you find a template you like, hover over it and click Preview to see how it looks. If it fits your needs, click the Import button to load it into your project.

After a short moment, the import will be complete and you’ll be taken to the Depicter editor. Here, you can customize every detail of how your popup looks and functions using the powerful features Depicter offers. 

For a step-by-step walkthrough, watch the video below.

Step 3: Activate Exit-intent

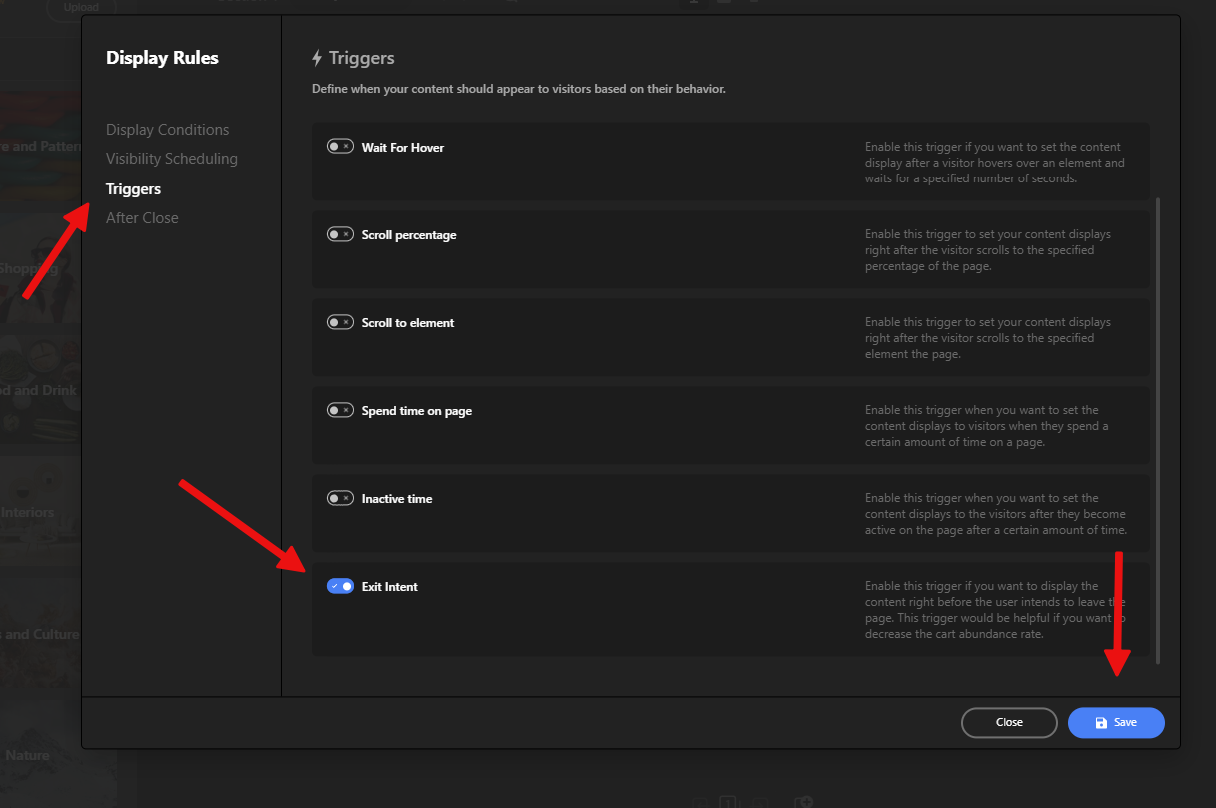
Once that’s done, all that’s left is to enable the Exit-Intent option under Display Rules, so your popup appears right when a visitor attempts to leave the page. To do this, click the Publish button, then hit Configure in the Display Rules section to open the settings panel.

Next, go to the Triggers section, enable Exit-Intent, save your changes, and you’re done!

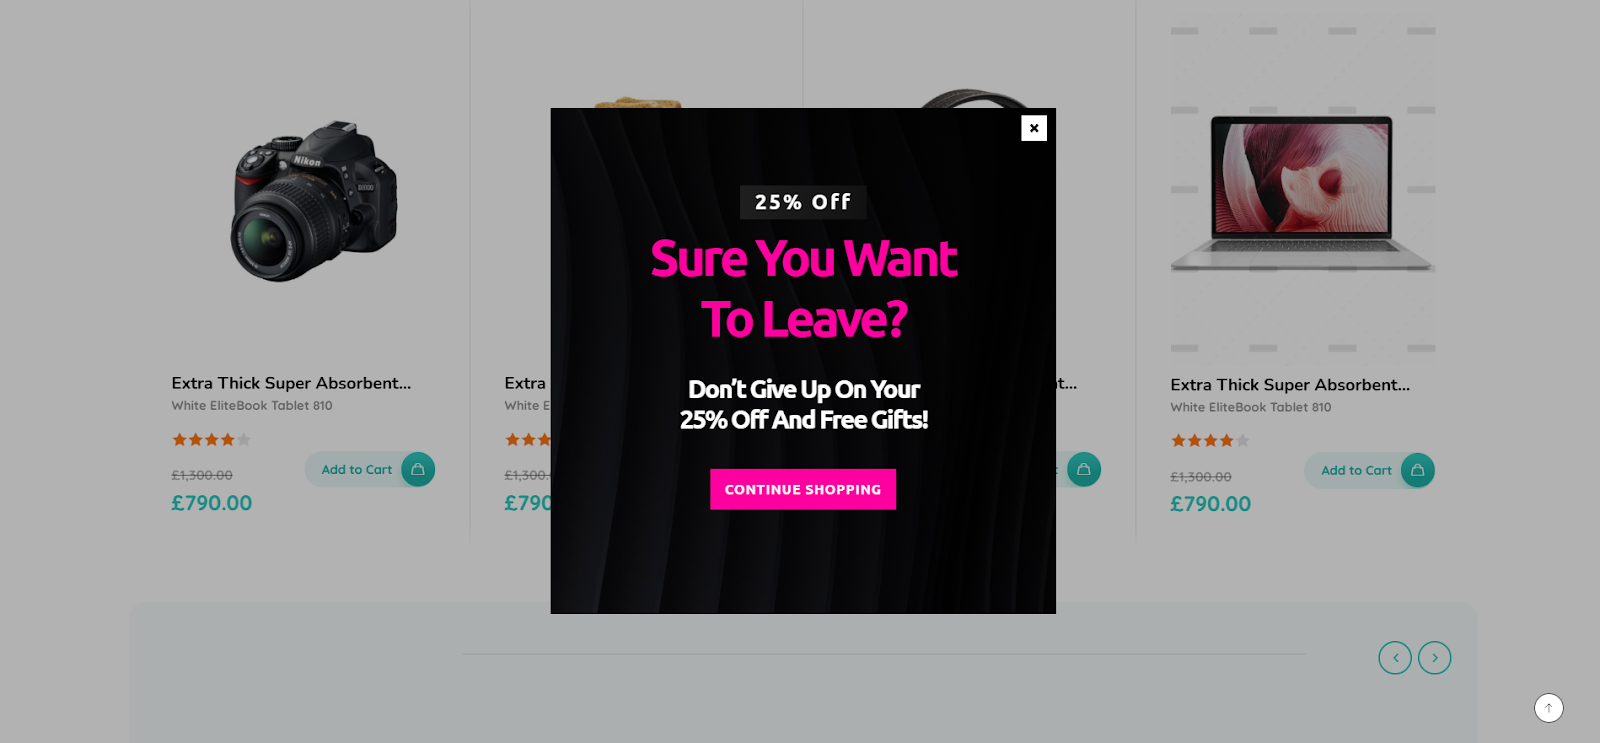
This is the result of our work:

Make sure to check other tips to get the most out of your Popups with Depicter:

Create Slide-In Popups in 3 Easy Steps-min

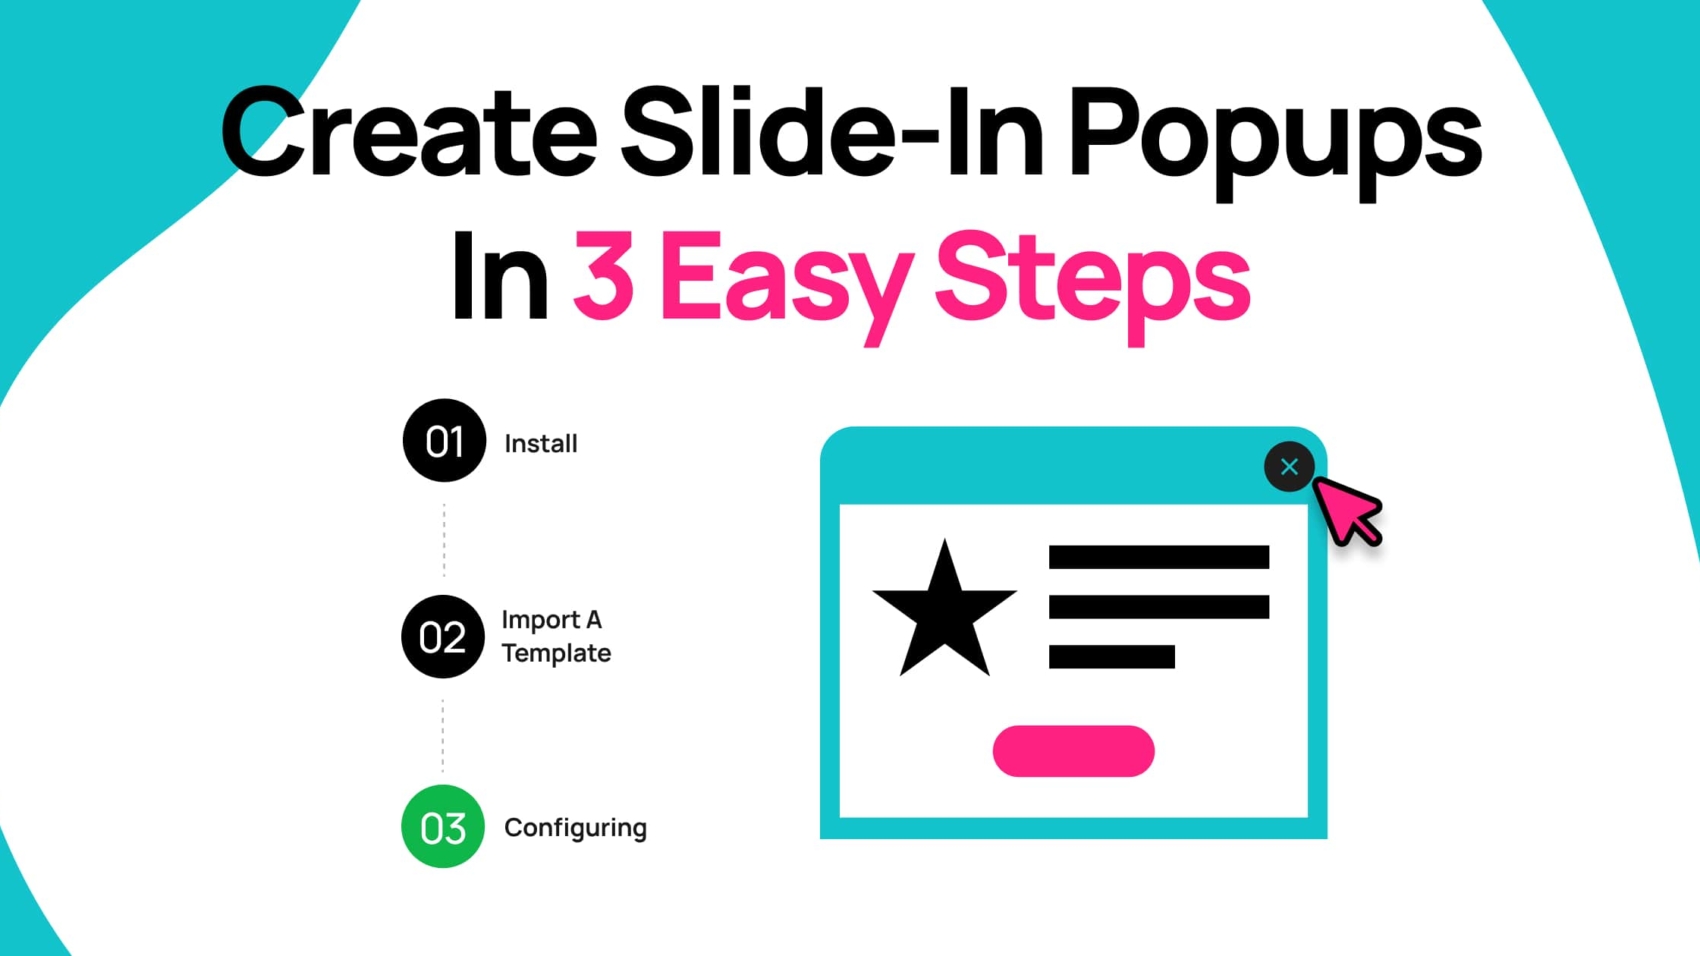
Create Slide-In Popups in 3 Easy Steps

Slide-in popups offer a less intrusive way to engage website visitors. Appearing from the side or corner, they present a brief call to action without disrupting the browsing experience. This allows you to capture leads, boost sales, and increase conversions politely.

Slide-ins are versatile and suitable for many purposes. They can replace most other popup types when you want a lower impact on your site’s metrics and avoid blocking conversion pages or the user interface.

With Depicter Free Popup Builder, creating these effective slide-ins is a quick three-step process.

Step 1: Install Depicter Free

  • Log in to your WordPress dashboard.
  • Go to Plugins > Add New.
  • Search for “Depicter” then click Install and Activate.

Here is a video showing the whole process:

Step 2: Import a Template

Depicter offers an extensive, high-quality selection of templates, including a variety of free popup templates, designed to help you create popups quickly and efficiently. After entering the Depicter dashboard, navigate to the top menu where the feature categories are listed, and select the “Popup” option to get started.

You can search through the ready-made templates using keywords or browse through the categories on the left side. Once you’ve found the template you like, simply click the Import button.

After a few seconds, the import process will finish, and you’ll be taken to the Depicter editor. Here, you can customize every detail of your popup using the wide range of features Depicter offers. To get a better understanding of the editing process, watch the video below.

Step 3: Configuring Display Rules

That’s all there is to it! Now, the only thing left is to set your preferred Display Rules, which determine where, when, and to whom your popup will appear.

To do this, click the Publish button, then hit Configure under the Display Rules section to open the settings window.

In this example, we want the Slide-in Popup to appear for everyone, but only on the Shop page. We’ll set this up in the Display Condition section, just as shown in the image.

Once you save the settings, your Slide-in Popup will be displayed on your website’s Shop page like this.

If you’d like to learn to do more with your Popups, we recommend checking out these articles:

Best Popup Builder Alternative-min

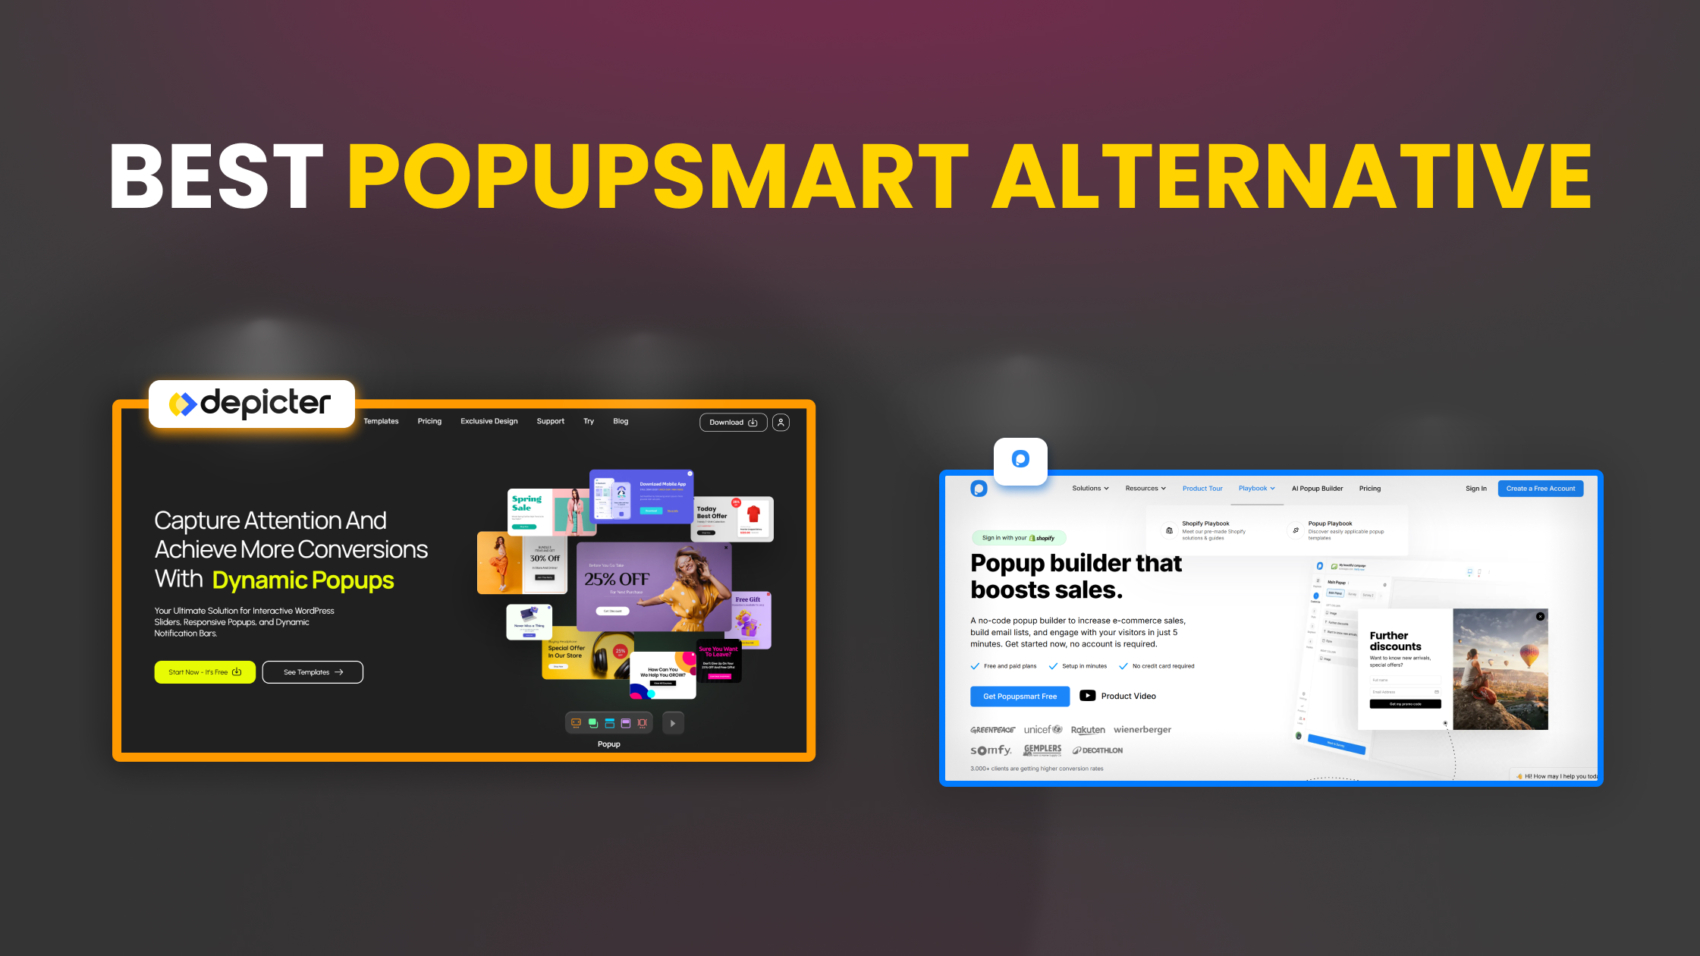
Best Popup Builder Alternative

What are the Reasons to Consider an Alternative to Popup Builder?

When it comes to choosing a Popup builder plugin for WordPress, having the right tools, flexibility, and user experience can make all the difference. A good Popup builder should make the process of creating and managing Popups easy, efficient, and enjoyable, helping you engage visitors and boost conversions without unnecessary frustration.

While Popup Builder (the plugin) has been around for a while, it falls short in several important areas that modern website owners expect. Throughout this article, we’ll take a closer look at where Popup Builder struggles and why exploring a stronger alternative like Depicter could be a smarter move for your site.

Lack of Editor

Having a built-in drag-and-drop editor is very important for any WordPress Popup Builder plugin. It helps users quickly design and customize Popups without coding, making the process faster, easier, and more flexible. A good editor also improves the user experience by giving full creative control.

However, the Popup Builder plugin does not include a built-in editor. This is a big downside because users have less freedom to design Popups easily and may need extra tools or plugins, which can slow down their workflow and website.

You might think that because the default WordPress editor opens up, anything you add there will show up in your Popup — but that’s not the case. Whatever you enter in that editor has no connection to your Popup and won’t be displayed.

On the other hand, Depicter offers an advanced drag-and-drop editor along with professional design tools, giving you a high level of customization over every Popup element. It includes powerful features like free resizing and positioning of elements on its editor canvas, various layout options such as full-width, fullscreen, or boxed designs, auto-snapping for easier arrangement, and flexible group, grid, and flex structures. On top of that, it provides auto-responsive capabilities, rich design customization options, and a wide selection of animation effects to make your Popups stand out.

With these kinds of tools at your fingertips, creating polished and personalized Popups becomes faster and much more enjoyable.

Considering that Popup Builder doesn’t even have its own editor, Depicter clearly comes out on top and delivers a much better experience, especially for users who are looking for a more modern and professional solution.

No Templates

Another key feature that greatly improves user experience is having ready-to-use templates. Templates allow users to start with professional designs and simply tweak them, instead of building every Popup from scratch. This saves time, ensures better design quality, and makes life much easier, especially for beginners. However, the Popup Builder plugin does not offer any pre-made templates, making it harder and more time-consuming for users to create polished Popups quickly.

Depicter excels in this area by offering over 500 professional, ready-made templates across various categories and with a wide range of functionalities. Right from the Depicter dashboard, you can browse through these templates, and with just one click, import any of them to start building immediately.

This huge collection of templates not only saves time but also inspires creativity, giving users a strong starting point for almost any type of design they need.

Almost No Responsive Options

Having professional responsive options in a Popup Builder means that Popups automatically adjust to look perfect on different devices like mobiles, tablets, and desktops. It includes settings for custom sizes, positions, visibility controls, and design tweaks for each screen type. You should consider these features based on your website audience because a large portion of visitors might come from mobile devices, and delivering a smooth, optimized Popup experience can greatly impact engagement and conversion rates. Now, can we say that the Popup Builder has these options? Absolutely not. Take a look at the following image. This is all you get for the responsive options. 

Depicter addresses this perfectly with fully responsive design options. You can easily create device-specific layouts, control visibility per device, and tweak sizes, positions, and designs for mobiles, tablets, and desktops individually. 

No matter what device your visitors use, Depicter ensures a seamless, professional-looking Popup experience.

Pricing

A fair and reasonable price is important for a Popup Builder plugin because it makes the tool accessible to a wider range of users and ensures good value for the features offered.

Popup Builder offers three pricing plans, which mainly differ based on the number of websites you can use the plugin on. The cheapest plan costs $49.95 per year and allows usage on up to two websites.

However, considering that Popup Builder lacks some important features and feels outdated compared to many modern alternatives, its overall value for money is quite low.

Price often plays a major role when people are deciding which plugin or service to choose. Even if some features are available for free, one of the first questions users ask is, “How much does the full version cost?” 

Depicter offers a free version that covers all your basic Popup-building needs, and when you’re ready to upgrade, the Pro version for a single website costs just $39 per year. Best of all, Depicter unlocks all premium features at once — no gradual access or hidden paywalls. When you buy the Starter plan, you get everything you need right away for one website.

Having clear, fair pricing without confusing tiers creates a better experience and shows that Depicter truly values its users.

Depicter Offers Even More

With a variety of powerful tools like exit-intent Popups and smart triggers, Depicter helps you grab your visitors’ attention right when they’re about to leave.

It makes it easy to create highly effective Popups that deliver personalized messages and special offers tailored to your audience.

Instant Feedback

When working with visual design tools, getting immediate feedback is key to making the creative process faster, easier, and more enjoyable.

Depicter offers a powerful live preview and an interactive editor that allows users to see their changes in real time. User experience is crucial for WordPress plugins, and a good plugin should not only be easy to use but also let users instantly see the results of their work. That’s where Depicter really shines. With its live preview feature, you can see exactly how your Popup or page will look as you edit it, without needing to constantly save, refresh, or switch between tabs.

Whether you’re browsing templates inside the dashboard or actively designing a Popup in the editor, Depicter gives you one-click access to live preview, making the design process smoother and more intuitive. Thanks to its interactive editor, all your changes are auto-saved and immediately reflected when you open the live preview, creating the shortest and most seamless visual feedback loop possible.

While speed and efficiency matter, having real-time feedback through a live preview and an interactive editor is a game-changer for anyone serious about building great websites.

The Powerful Visual Output Suite

Having a versatile set of output options is essential for anyone who wants to create engaging and dynamic content on their website.

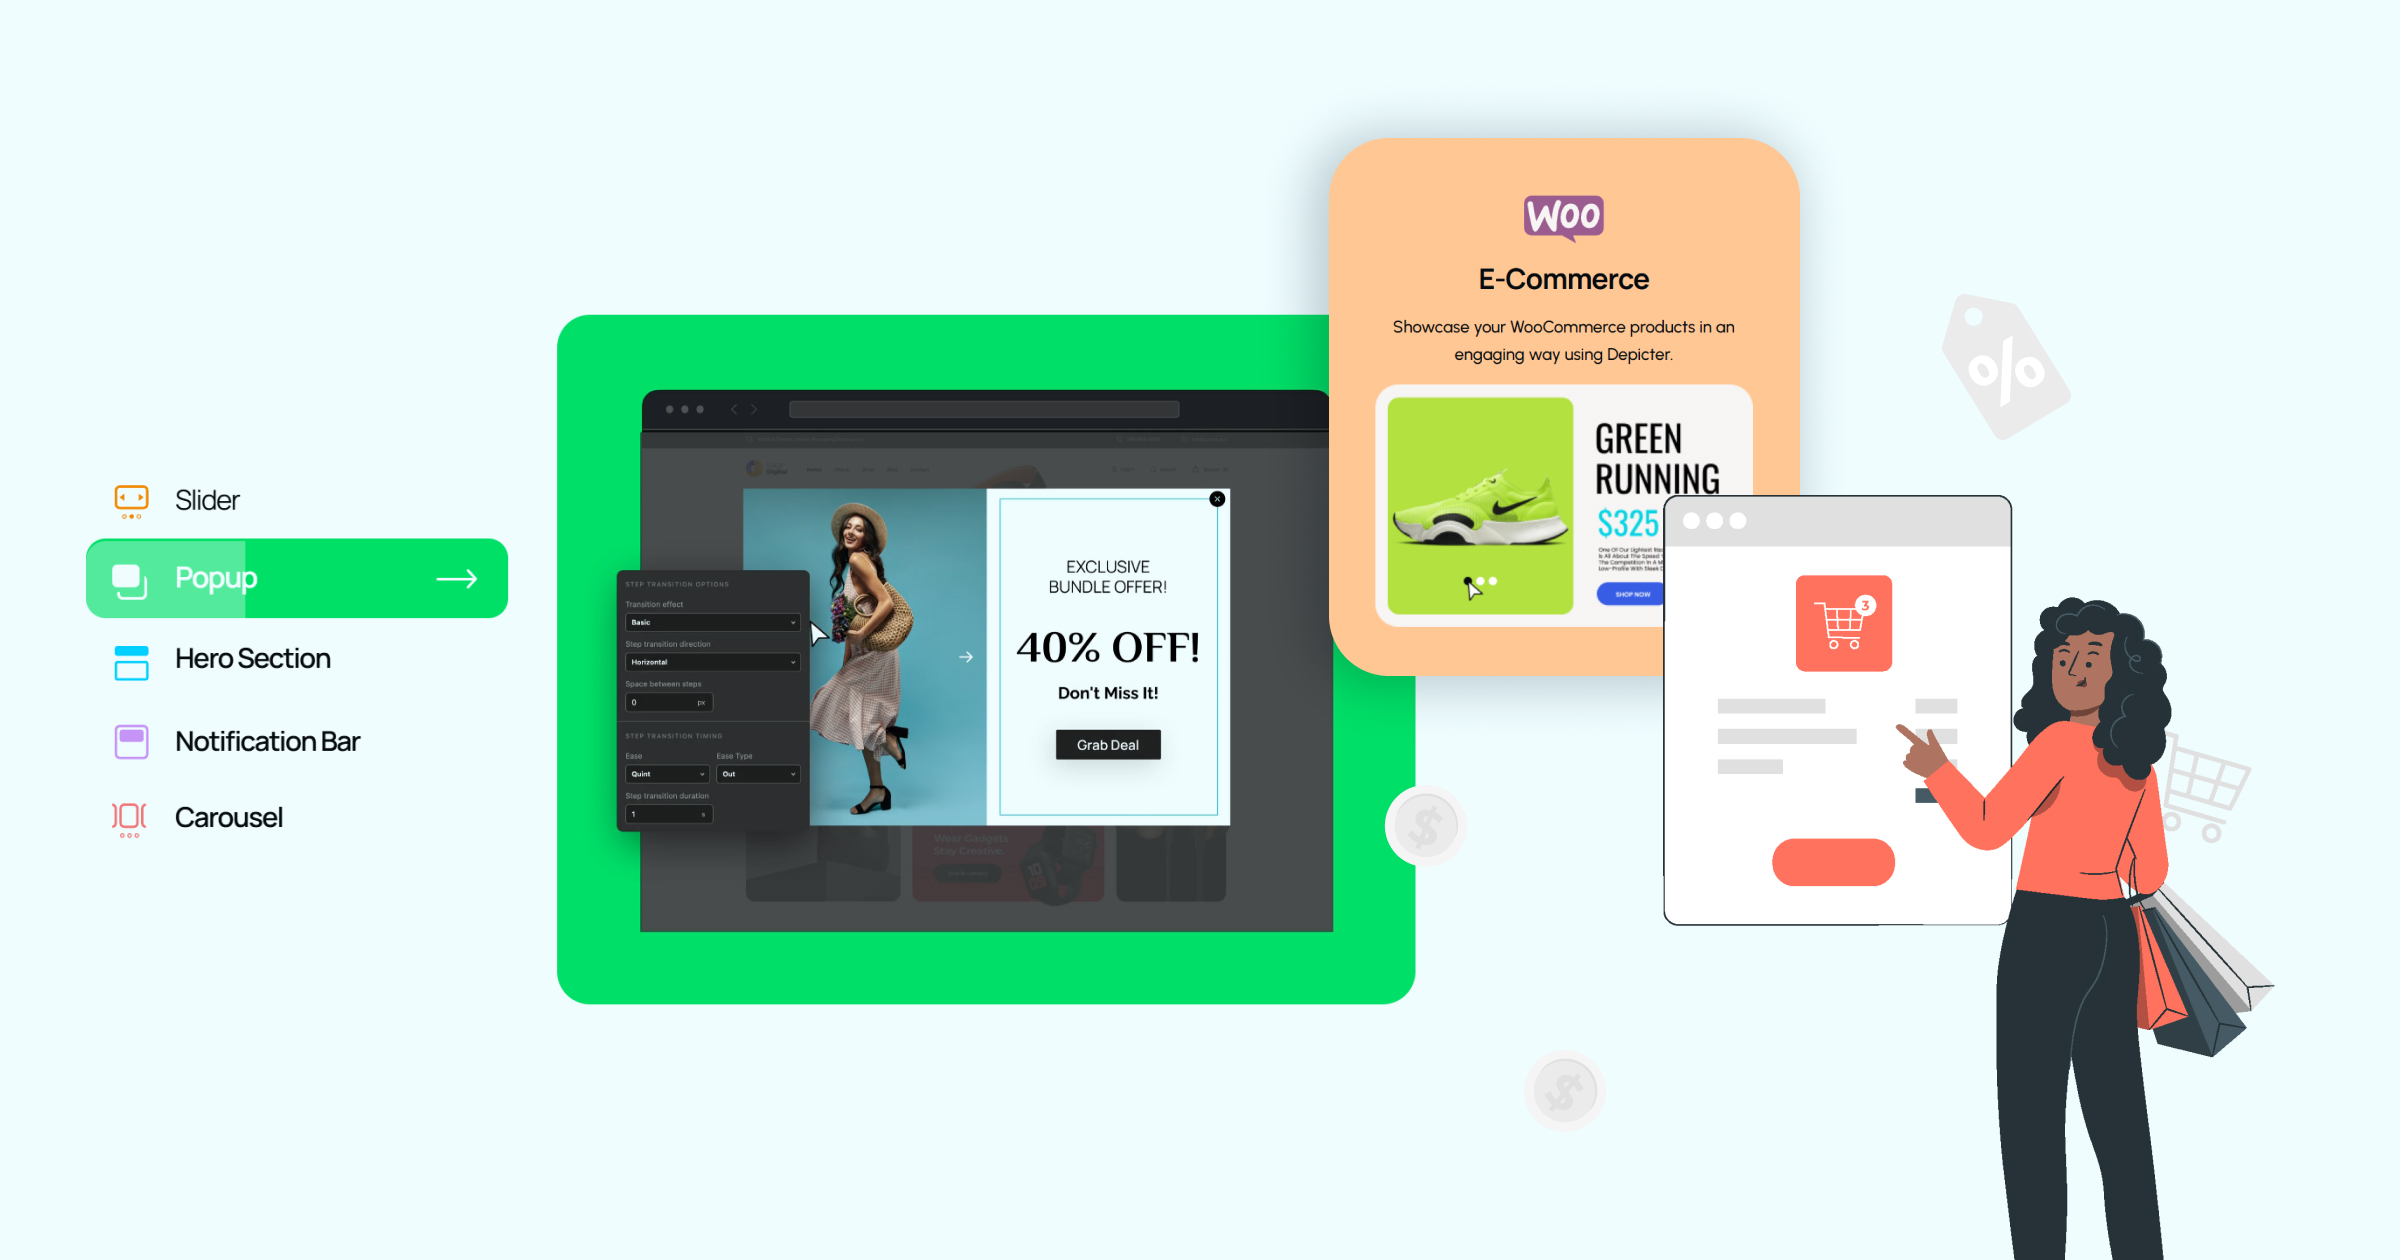
One of Depicter’s biggest strengths is the wide range of visual outputs it offers. Both during the creation process—inside its powerful editor—and at the final display stage, Depicter provides users with more tools, more options, and more flexibility than many other plugins. Whether you’re designing a simple slider or a complex Popup, the experience stays smooth and professional.

Here are some of the visual output types Depicter supports:

  • Slider
  • Popup
  • Carousel & Testimonials
  • Notification Bar
  • Product & Dynamic Sliders
  • Hero Section

Beyond these, Depicter also packs an impressive range of advanced features that help users build even more powerful and customized content. A truly flexible plugin should empower users to create whatever they imagine, and Depicter does exactly that with options like:

  • Flexible Layouts and Position Settings
  • Various Layers and Elements
  • Advanced Animations, Transitions, and Navigation Controls
  • Multi-Step Popups for deeper interaction
  • Fully Responsive Design Modes
  • Built-in Form Element for capturing leads and boosting conversions
  • Dynamic Content integration with Blog Posts and Shop Products
  • A massive library of premium-quality Image and Video assets
  • Advanced Call to Action features that can be attached to any Popup element

Having all these options in one place gives creators the freedom to design stunning visuals without the need for multiple plugins or complicated setups.

When flexibility and creativity come together in a single tool, it unlocks endless possibilities for building better, more engaging websites—and Depicter delivers exactly that.

Support and Community

Good support can make a huge difference when you’re using a tool to build and grow your website.

Depicter shows a strong commitment to its users by offering 24/7 support across several channels. Whether you run into a quick question or need more detailed help, there’s always a way to get assistance. You can reach out through live chat for fast answers from the Depicter team, explore the detailed Help Center filled with articles, tutorials, and a ticketing system, or post your questions on the WordPress Forum, where the Depicter team actively responds. Plus, the team stays connected through their YouTube and Facebook communities, where users can ask questions, share feedback, and get helpful tips.

Having multiple support options means you’re never left figuring things out on your own, and it really helps create a stronger, more helpful user community.

Tutorials

Providing video tutorials is a smart way for any plugin or service to help users understand features, master the tools, and discover new possibilities. Depicter does a great job in this area with its active YouTube channel, where it regularly uploads videos. Every week, they release fresh content to introduce new features, explain existing options, showcase templates, and guide users step-by-step through different capabilities. These videos help users get more out of Depicter and create better results faster.

Conclusion

Choosing the right Popup Builder can make a big difference in how your website connects with visitors and drives results. After seeing where Popup Builder falls short — and how Depicter shines with its powerful editor, rich templates, advanced features, great support, and fair pricing — the decision becomes easy. Depicter not only covers everything that Popup Builder lacks but also takes the experience to a whole new level.

If you’re serious about building beautiful, effective Popups without unnecessary headaches, Depicter is hands down the better investment for your website’s future.

Schedule Your Popups in Minutes-min

Schedule Your Popups in Minutes

Timing your popups strategically allows you to engage website visitors more effectively. By timing when popups appear, you can deliver targeted messages that capture attention and encourage action.

With Depicter, scheduling popups on your WordPress website is a straightforward process. This allows you to create limited-time offers, promote seasonal products, and ultimately improve user experience and drive conversions.

Depicter is a WordPress Free Popup Builder plugin that makes it easy to create and schedule effective popups. Its intuitive interface and customization options enable you to design popups that deliver the right message at the right time.

Let’s see how to schedule a Popup in WordPress with Depicter:

Step 1: Install Depicter Free

  • Log in to your WordPress dashboard.
  • Go to Plugins > Add New.
  • Search for “Depicter” then click Install and Activate.

Here is a video showing the whole process:

Step 2: Import a Template

Depicter provides you with a large and professional collection of templates, including free Popup templates to make the popup creation process as fast as possible for you. Once you’re in the Depicter dashboard, in the top bar, which shows the different categories of Depicter’s features, click on the “Popup”.

On the next page, where you’ll see all the available popup templates, you can search for a specific keyword or use the categories on the left to filter the templates. Here, we’ll easily import one of the templates by simply clicking the “Import” button.

The import will be done in a few seconds, and then you’ll be taken to the Depicter editor. To get familiar with how the Depicter editor works for building and designing a Popup from start to finish, you can watch this video.

Step 3: Schedule the Popup

To set up the schedule, follow these steps: click the “Publish” button, then click “Configure” in the “Display Rules” section.

In the “Display Rules” window that appears, activate the scheduling option within the “Visibility Scheduling” area. 

Finally, click on the “Start” and “End” options and select your desired start and end date and time for the Popup to be displayed from the drop-down menus.

Here, we’ve selected the time range of 2:59 PM to 3:02 PM, and as you can see, precisely within that timeframe, our Popup is displayed on the website according to the settings we configured.

If you found this tutorial helpful, be sure to check out our other useful articles about Depicter:

Desktop - 10 (3)

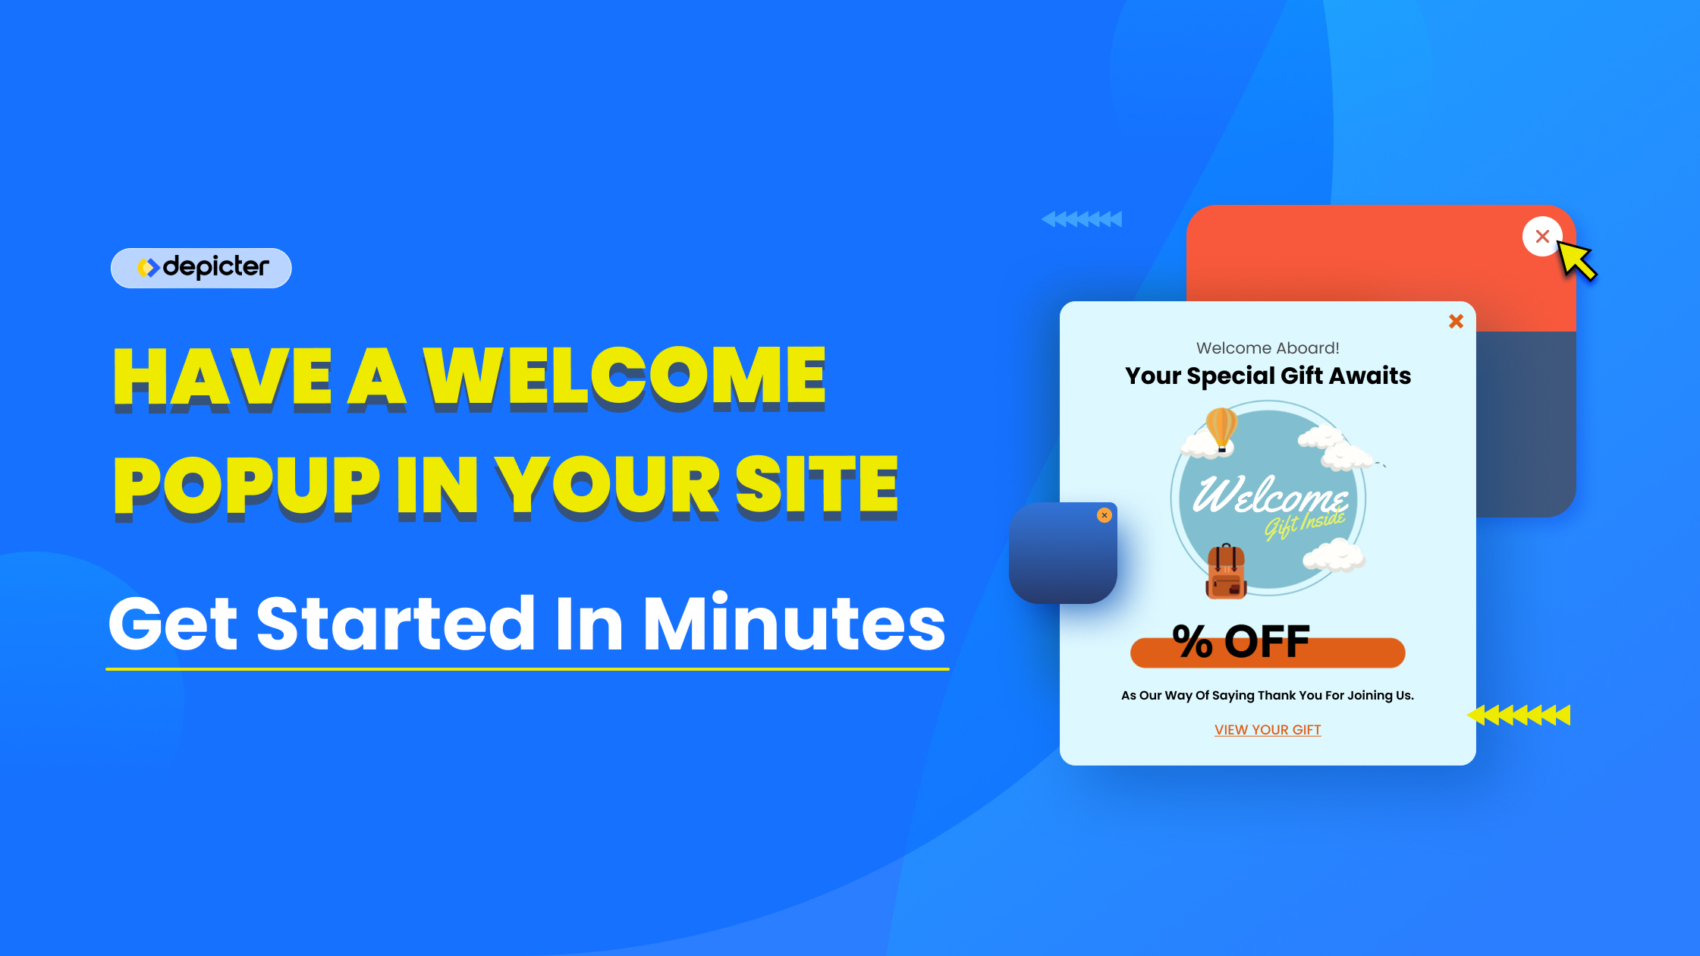
Quick Welcome Popups: Get Started in Minutes

Welcome Popups are a simple yet effective way to greet new website visitors and encourage immediate engagement. They can help grow your email list by offering an immediate incentive for subscription, highlight special offers by placing timely promotions directly in front of new eyes, or guide users to important content such as key product pages or introductory guides right from the moment they land on your site, improving their initial experience.

With Depicter Free Popup Builder, creating a Welcome Popup is straightforward. Here’s how to do it in a few quick steps:

A Welcome Popup on the website homepage

Before you begin, ensure that the Depicter plugin is installed. You can easily find and install it by entering “Depicter” in the Plugins menu of your WordPress dashboard. For a comprehensive guide, including a video tutorial, please refer to our instructions on how to install Depicter.

Step 1: Import a Template

Depicter comes with a great selection of over 550 pre-designed templates, including many free Popup templates. Finding and importing the right template for what you need is fast and simple – just head to the “Popups” section in your Depicter dashboard.

Depicter Dashboard

You can search for your specific topic among all the options to filter and see only the relevant templates. Then, you can click the “Preview” button to see how it looks, and if you like it, just click the “Import” button – it’ll be imported in seconds.

Finding a Welcome Popup among templates

Your Popup will be ready in just a few seconds, and you’ll be taken straight to the Depicter editor.

Depicter Editor

From there, you can customize everything about your Popup to your liking. If you want to explore all the tools available and learn how to build a Popup from the ground up, you can check out this video:

Step 2: Configure the Display Rules

With your template set, the next step is to configure the “Display Rules.” You’ll find these options by first clicking “Publish” and then the “Configure” button within the “Display Rules” section.

Opening the Display Rules Screen

Display rules are organized into four sections. Allowing you to control the timing, where to display, and audience of your Popup. Our aim is to show this Popup on all website pages after a visitor has been on the page for 10 seconds. To do this, simply activate the “Spend Time on Page” trigger within the “Triggers” section. 

Configuring the Display Rules Options

By default, the Popup appears on all pages unless specific conditions are set. So, enabling this trigger and saving your changes will achieve the desired behavior.

Now, after these steps, the welcome Popup or your specific offer will appear on every page of your website after a visitor has spent 10 seconds there, ready to capture their attention.

A Welcome Popup Displays on the website homepage

If you’d like to learn how to include a form on your Popup to collect email addresses for free, we recommend checking out this article:

Start Collecting Emails Today For Free-min

Start Collecting Emails Today For Free

Building an email list is one of the most essential long-term strategies for any website owner. It grants you complete ownership of your audience and provides a direct, dependable channel for communication, a level of certainty that social media algorithms simply can’t match. Email marketing allows you to cultivate genuine relationships, share valuable updates, and gently guide potential customers toward a purchase with personalized, targeted content.

The good news is that growing your list doesn’t need to be difficult or expensive. Straightforward tools, such as website popups, whether they are a friendly welcome message, a special discount offer, or a final exit-intent prompt, make it incredibly simple to capture interested leads and maintain visitor engagement.

Depicter’s Free Popup Builder is here to help you with that.

Before getting started, make sure you have the Depicter plugin installed.
You can easily find and install it by searching “Depicter” in the Plugins menu of your WordPress dashboard.
For a full guide with a video tutorial, check our guidelines on how to install Depicter.

Let’s have a quick look at what you’ll do:

  • Step 1: Import a ready-made Popup template in Depicter and customize it if you like.
  • Step 2: Set up Display Rules so your Popup appears at the right time. For example, when a visitor is about to leave your website.

By the end, you’ll have a working Exit-Intent Popup that collects emails automatically.

Let’s see a video tutorial first.

Now let’s see about a step-by-step process:

Step 1: Import a Template

Depicter provides more than 100 ready-made Popup templates, with new ones being added every day, including Free Popup Templates. You can quickly and easily import a template that suits your specific goal from this large and diverse collection and get it onto your website in no time. To do this, once you’re in your Depicter dashboard, go to the “Popups” section.

Depicter Dashboard

From the left sidebar, select the “Grow Email List” category. This will filter the templates specifically designed for this purpose.

To import your desired template, simply click the “Import” button.

Importing a Template

 Within a few seconds, your Popup will be ready, and you’ll be directed to the Depicter editor.

Here, you have complete control to make any changes and customizations you like to your Popup.

Depicter Editor

Step 2: Configure the Display Rules

Once your template is ready, the most important step is configuring the “Display Rules.” To access this section, first click the “Publish” button, and then click the “Configure” button in the “Display Rules” area.

Display Rules Button

Here, you’ll find options categorized into four sections. In short, these allow you to specify when, where, and to whom your Popup will be displayed.

Let’s set it up so that our Popup appears on all pages of the website, but only when a user is about to leave the page. This is also known as an Exit-intent Popup.

When you don’t specify anything for “Display Conditions,” the Popup will be displayed on all website pages by default. So, we just need to activate the Exit Intent option. To do this, simply enable the designated option in the “Triggers” section and then save the changes and publish our Popup.

Configuring Display Rules

That’s it! Now, on our website, on every page, whenever a visitor is about to leave, they will see the Popup containing the pre-defined offer and an email entry form.
Popup displays before visitor leaves the page

One last thing to note is that when a visitor enters their email address and subscribes, all the information entered in the form, along with other details, can be seen in the “Leads” panel of your Depicter dashboard, which you can then use for your email marketing efforts.

The Leads Menu

If you’d like to get even more out of the Depicter Free Popup Builder, make sure to check out the posts below for more simple, powerful tutorials like this one.

Collect your visitor’s email list for free-min

Collect Your Visitors’ Email List For Free

An email list is one of the most valuable assets a website owner can possess. It’s a direct line of communication to your audience, a way to build relationships, and a powerful tool for driving traffic and sales. Many website owners believe that building a substantial email list requires a significant investment of time and money. However, several cost-effective strategies, including the use of website Popups, can help you achieve this goal. This article will explore how to increase your email list, the benefits of collecting email addresses, discuss what you can do with an email list, and explain why Popups are one of the easiest and most effective methods for growing your subscriber base.

Why You Should Collect Emails?

Building an email list offers numerous advantages for website owners.  An email list provides a direct channel to your audience, unlike social media platforms where reach is controlled by algorithms.  Email subscribers are typically more engaged, revisiting your website through newsletters and updates, which increases traffic.  Email marketing effectively converts subscribers into paying customers through lead nurturing, product promotion, and exclusive deals.  It also allows for personalized messages and offers, which leads to higher conversion rates and customer satisfaction.  Consistent and valuable email communication helps establish trust and loyalty, building a strong community around your brand.  Additionally, email lists are a valuable tool for gathering feedback and insights through surveys.

Proven Tactics for Capturing Emails

Popups have become a popular tool for collecting email addresses due to their effectiveness and ease of use.  They are designed to capture attention with their prominent placement, ensuring visitors see subscription offers.  Modern Popup technology offers non-intrusive options like exit-intent or timed displays, minimizing disruption.  Popups also automate the email collection process and integrate seamlessly with email marketing services, streamlining workflows.

Welcome Popups

A Welcome Popup is displayed when a visitor first arrives on a website, providing an immediate opportunity to subscribe. These Popups can be timed to appear after a brief delay, allowing visitors to view some initial content before being presented with the subscription offer. They often feature a friendly greeting and a clear value proposition, such as access to exclusive content or updates, to encourage sign-ups from new visitors.

Discount Popups

Discount Popups incentivize subscriptions by offering a special discount, promotion, or coupon code in exchange for an email address. These are particularly effective for e-commerce websites, as they directly tie subscription to a tangible benefit that can lead to a purchase. Discount Popups can be displayed on entry, after a visitor views a certain number of pages, while browsing down your page, which is also called a scroll Popup, or when they add items to their cart, providing a timely incentive to subscribe.

Exit-intent Popups

Exit-intent Popups are shown when a visitor is about to leave the website, presenting a last-chance offer to subscribe. By detecting the visitor’s mouse movements, these Popups can trigger at the precise moment they intend to navigate away, offering a final opportunity to capture their email address. An Exit-intent Popup often employs compelling messaging and strong calls to action to encourage visitors to reconsider and subscribe before leaving the site.

How to Collect Your Visitors’ Email with Depicter

Depicter Free Popup Builder is a powerful tool to boost visitor engagement and conversion rates. It combines a visual drag-and-drop editor with a rich library of 700+ templates and an intuitive user interface.

Create dynamic Popups, WordPress Notification Bar, and sliders populated with content from your posts and products. Utilize flexible triggers and display conditions to target the right audience at the optimal time, and build high-conversion lead capture forms.

Installing Depicter 

To install Depicter, simply go to the Plugins menu, search for “Depicter,” and then install it with a single click. To see this in a video tutorial format, please watch the video below.

Importing a Template

Depicter simplifies the whole process by providing a vast collection of ready-to-use templates for each category and different use cases. This extensive library of templates means that users don’t have to start from scratch, which can be time-consuming and require design expertise. Instead, they can select a template that closely matches their needs and customize it to align with their brand and specific campaign goals. This not only speeds up the creation process but also ensures a professional and polished final result.

After installation, go to the Templates section in the Depicter dashboard. Then, in the Popups section, click on the ‘Grow Email List’ category to see the relevant templates. Simply click the ‘Import’ button on the template you want, and the import process will begin.

Importing a Popup Template

Customizing Your Popup

After a few seconds, the template will be imported, and you’ll be directed to the Depicter editor. Here, you can use the available tools to make any changes you like to the appearance and functionality of your Popup. To learn more about how the Depicter editor works, watch this video.

Depicter Dashboard

Once you’re happy with the Popup’s design, the next most important part is the Display Rules settings. This section controls when, where, and for whom your Popup will be shown. After clicking the Publish button, you’ll click the Configure button within the Display Rules section.

Display Rules

Explaining all the options in this area would require a separate, detailed article. Here, we just want to enable the Exit-Intent setting. To do this, simply activate the corresponding option in the Triggers section.

Triggers

So, when a user on our website tries to leave the page, as soon as their mouse cursor moves outside the page area, our Popup will appear. This creates a fantastic opportunity to show offers and discounts based on your sales strategy.

Popup on the Website

Conclusion

Building an email list doesn’t have to be a daunting or expensive effort. As we’ve explored, an email list is an invaluable asset, offering a direct line to your audience, increasing engagement, driving conversions, and building brand loyalty. Depicter streamlines this process, offering a user-friendly interface and a wealth of customizable templates to create compelling lead capture forms combined with Popups. Whether you choose welcome popups to greet new visitors, discount popups to incentivize purchases, or exit-intent popups to capture departing users, the key is to offer value and make it easy for your audience to connect with you. Start implementing these tactics today and unlock the power of direct communication with your website visitors.

FAQs

Q: Why is building an email list so important?

A: An email list provides a direct channel to communicate with your audience, bypassing the algorithms of social media. It allows you to nurture leads, promote products, share valuable content, build relationships, and ultimately drive traffic and sales to your website.

Q: Are popups an effective way to collect email addresses?

A: Yes, when implemented strategically, popups are a highly effective method for capturing email addresses. They are attention-grabbing and can be triggered based on user behavior, such as entry, exit intent, or time spent on a page, allowing you to present relevant offers at the right moment.

Q: Are popups intrusive to website visitors?

A: Modern popup technology offers non-intrusive options like timed displays, scroll-based triggers, and exit-intent popups. By carefully configuring the display rules, you can minimize disruption and provide a positive user experience while still effectively collecting emails.

Q: How can Depicter help me collect email addresses?

A: Depicter is a Free WordPress Popup Builder plugin that offers a visual drag-and-drop editor and a library of professionally designed templates specifically for growing your email list. It allows you to create customizable popups with various display triggers and seamlessly integrate them with your email marketing services.

Q: Do I need any coding knowledge to use Depicter?

A: No, Depicter features a user-friendly, visual drag-and-drop editor, meaning you don’t need any coding skills to create and customize your popups.

Q: What are “display rules” in the context of popups?

A: Display rules are settings that control when, where, and to whom your popup will be shown. This includes triggers like time on page, scroll depth, exit intent, and targeting specific pages or user segments.