
How Changes Work in Depicter
Depicter gives you several ways to manage your work, depending on what you want to do:
- Save your latest changes automatically
- Undo or redo recent actions
- Restore an earlier published version
- Publish changes when you’re ready
Before looking at Save, Undo, Redo, Restore, and Publish, it helps to understand how Depicter handles different versions of a project.
Depicter works with two main states for your project: Draft and Published.
When you publish a slider or any other Depicter project for the first time, that published version becomes the version displayed to your visitors on the frontend.
From that point on, any new changes you make in the editor are saved as a Draft. Your edits remain in the draft until you decide to publish them.
This means that making changes to a project does not immediately replace the stable version that your visitors are currently seeing.

The published version stays unchanged while you continue working on your new draft.
This is particularly useful when you’re making larger changes that may take some time to complete. You can save your progress, leave the editor, come back later, and continue working without affecting the version currently displayed on your website.
Once your changes are ready, you can Publish the project. At that point, your new version replaces the previously published version and becomes the version displayed to visitors on the frontend.
Depicter also keeps Version History, which allows you to go back to previous published versions when you need to restore an earlier state of your project.
In simple terms:
Published = the stable version currently shown to visitors.
Draft = the version you’re currently working on and refining.
This separation lets you work on your project freely, save your progress, experiment with different changes, and publish only when you’re ready.
Saving Your Changes in Depicter
As you work on a project, Depicter saves your changes so you can continue editing without having to manually save every individual adjustment.
This means that while you’re changing text, moving elements, updating styles, adjusting animations, or modifying other parts of your project, your work is continuously kept up to date.
When you’re working on a project in Depicter, you don’t need to worry about manually saving every change you make.
Depicter automatically saves your changes as you work.
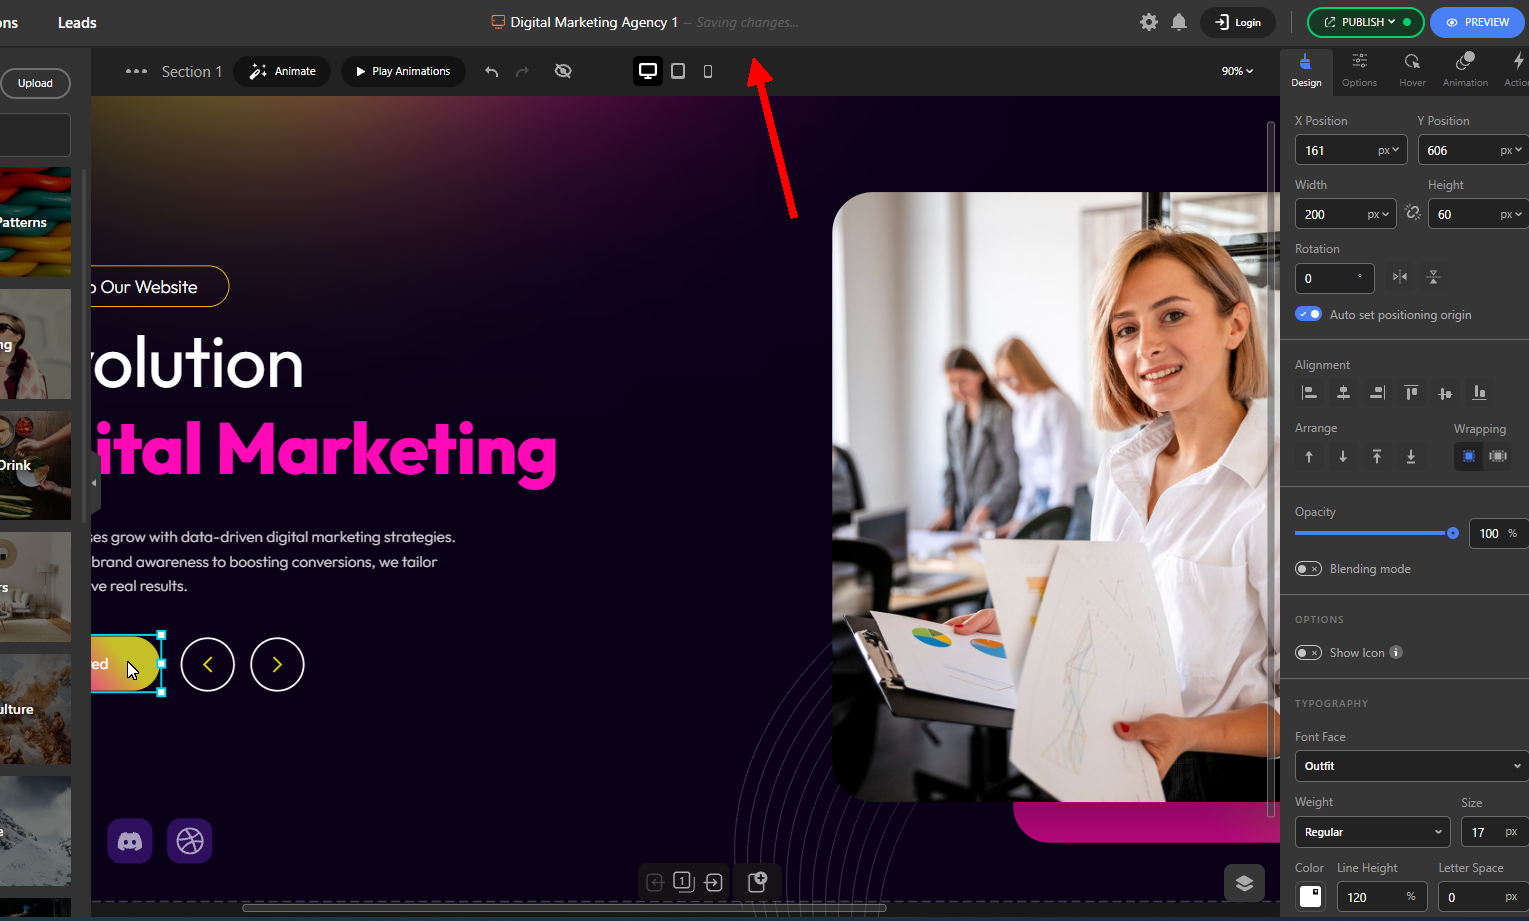
Whenever you make a change in the editor, you can see the saving status in the top bar, next to the name of your slider. While Depicter is saving your latest changes, the status displays:
Saving changes…
This happens automatically in the background. There is no Save button you need to click, and you don’t need to manually save your work after making changes. Depicter takes care of that for you.
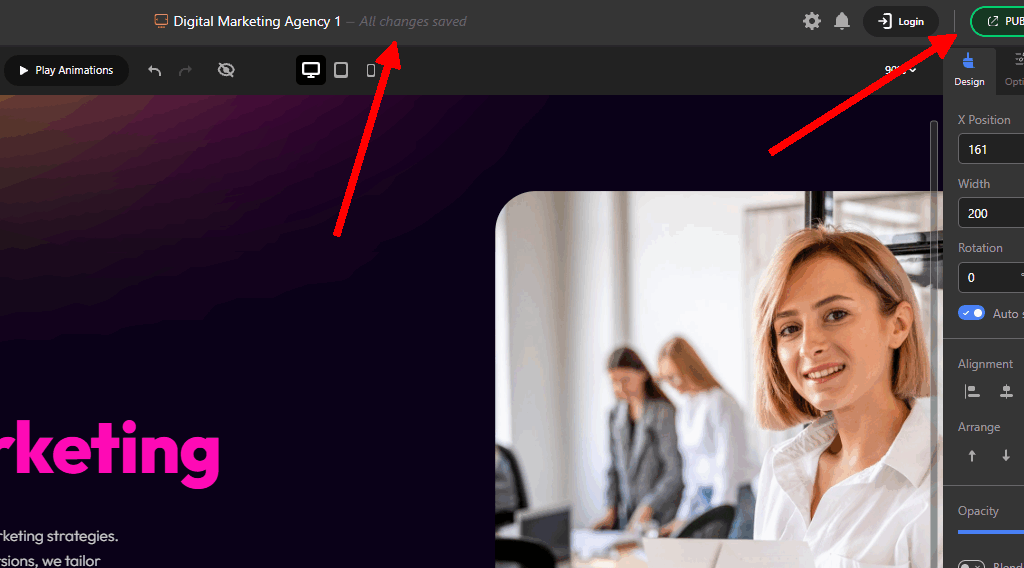
Once the saving process is complete, the status changes to:
All changes are saved
This lets you know that your latest changes have been successfully saved.
What Happens If You Close the Browser?
Because your changes are automatically saved, you don’t have to worry about losing your work after the saving process is complete.
If you see the All changes are saved message and accidentally close your browser, close the editor, or leave the page, the changes you made have already been saved.
So, instead of constantly thinking about whether you remembered to save your work, you can simply focus on editing. Depicter automatically saves your changes in the background and lets you know when everything is safely saved.
Undoing and Redoing Changes in Depicter
Experimenting is an important part of the design process. You might move an element, change its style, replace an image or video, adjust a project setting, and then decide that the previous version was actually better.
In Depicter, you can use Undo and Redo to move backward and forward through the changes you’ve made.
Undo a Change
Nearly every change you make in the Depicter editor can be undone.
This includes changes such as:
- Moving or repositioning elements
- Changing styles or design settings
- Replacing an image or video
- Modifying project options
- And other changes that are saved through Depicter’s Auto Save system
In general, if you make a change in the editor and that change triggers Auto Save, you can undo it.
You can find the Undo button in the top bar of the editor, below the Auto Save status area and next to the animation play button.

You can also use the universal keyboard shortcut:
Ctrl + Z
There is no limit to how many changes you can undo. Whether you’ve made a few changes or spent a long time editing your project, you can continue going backward through your editing history and undo your changes one by one.
Redo an Undone Change
Redo does the opposite of Undo.
When you use Undo, Depicter takes you back to the state before the change you just made. If you later decide that you actually want that change back, you can use Redo to apply it again.
For example, imagine that you change the position of an image and then use Undo to return it to its previous position. After comparing both versions, you might decide that the new position actually looked better. Instead of manually moving the image again, you can simply use Redo to bring back the change you just undid.
In other words:
- Undo takes you one step backward through your changes.
- Redo takes you one step forward again through changes that you previously undid.
The Redo button is located next to the Undo button in the top bar of the editor.
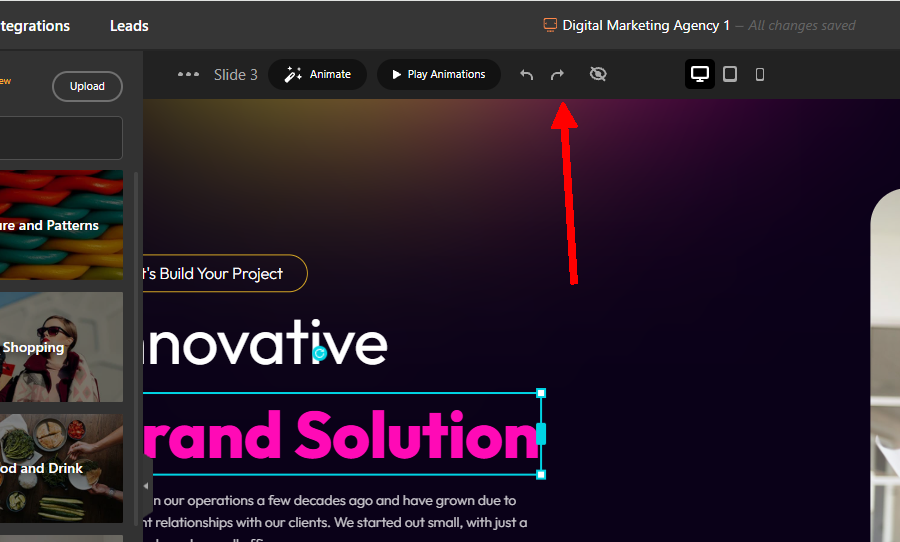
You can also use the universal keyboard shortcut:
Ctrl + Y
Together, Undo and Redo give you the freedom to experiment without worrying about manually recreating every change. You can move backward when you want to reverse something and forward again when you decide that an undone change was worth keeping.
Switch Between Your Published Versions With Version History
As I mentioned earlier, the version of your project that visitors see on the frontend is always the published version. Each time you publish your project, that published version becomes a new checkpoint for your project.
With Version History, you can easily switch between all the previous published versions of your project.
This means that even if your project has been published and updated many times, you always have access to its previous published states. You can switch back to an older version whenever you need to.
More importantly, switching to an older version does not delete the other published versions. All of your previously published versions remain available in Version History, so you can switch back to any of them later.
For example, imagine you have published your project five times:
Version 1 → Version 2 → Version 3 → Version 4 → Version 5
You can switch from Version 5 back to Version 2. Later, you can still switch to Version 4 or return to Version 5. Your previous published versions remain available throughout the process.
Make a Copy of a Previous Version
Version History also gives you another useful option: Make a copy.
When you find a previous version that you want to use as the starting point for a separate project, you can create a copy of that version.
The copied version is added to your Depicter dashboard as a new project, allowing you to keep both versions separately.
This is particularly useful when you want to keep an older design while continuing to work on a newer one. Instead of choosing between the two, you can create a separate project from the version you want to keep.
How to Access Version History
To open Version History:
- Open your project in the Depicter editor.
- Click the Publish button.
- From the menu that opens, select Version History.
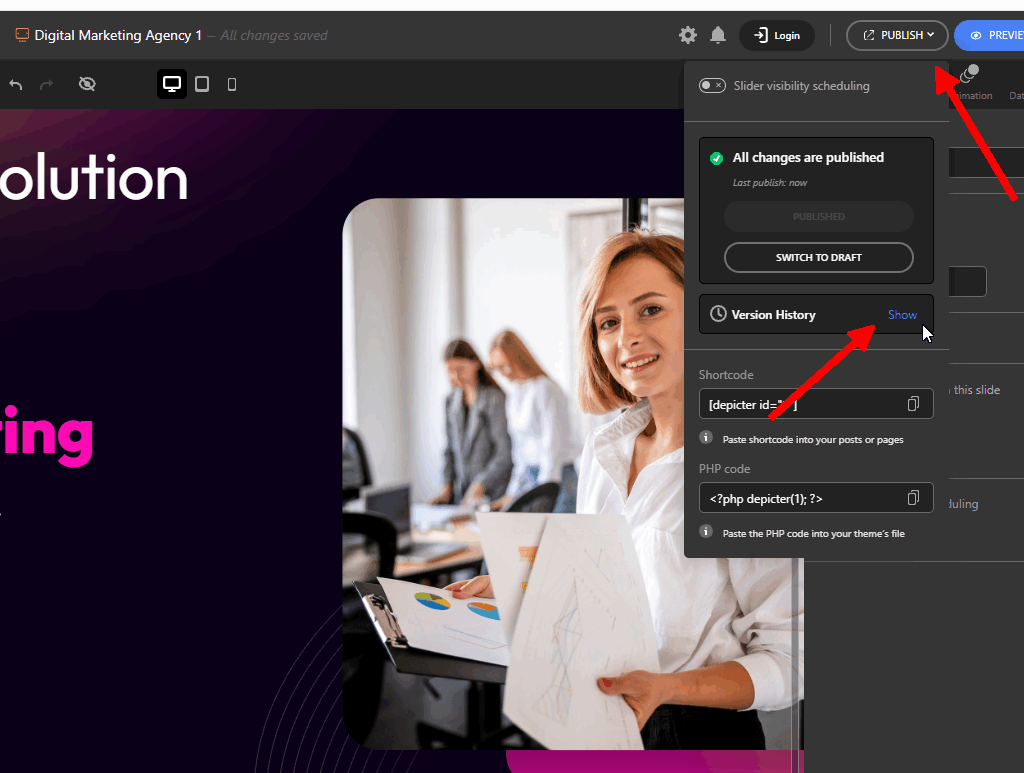
Depicter will then open the Version History panel, where you can see a list of your previous published versions.
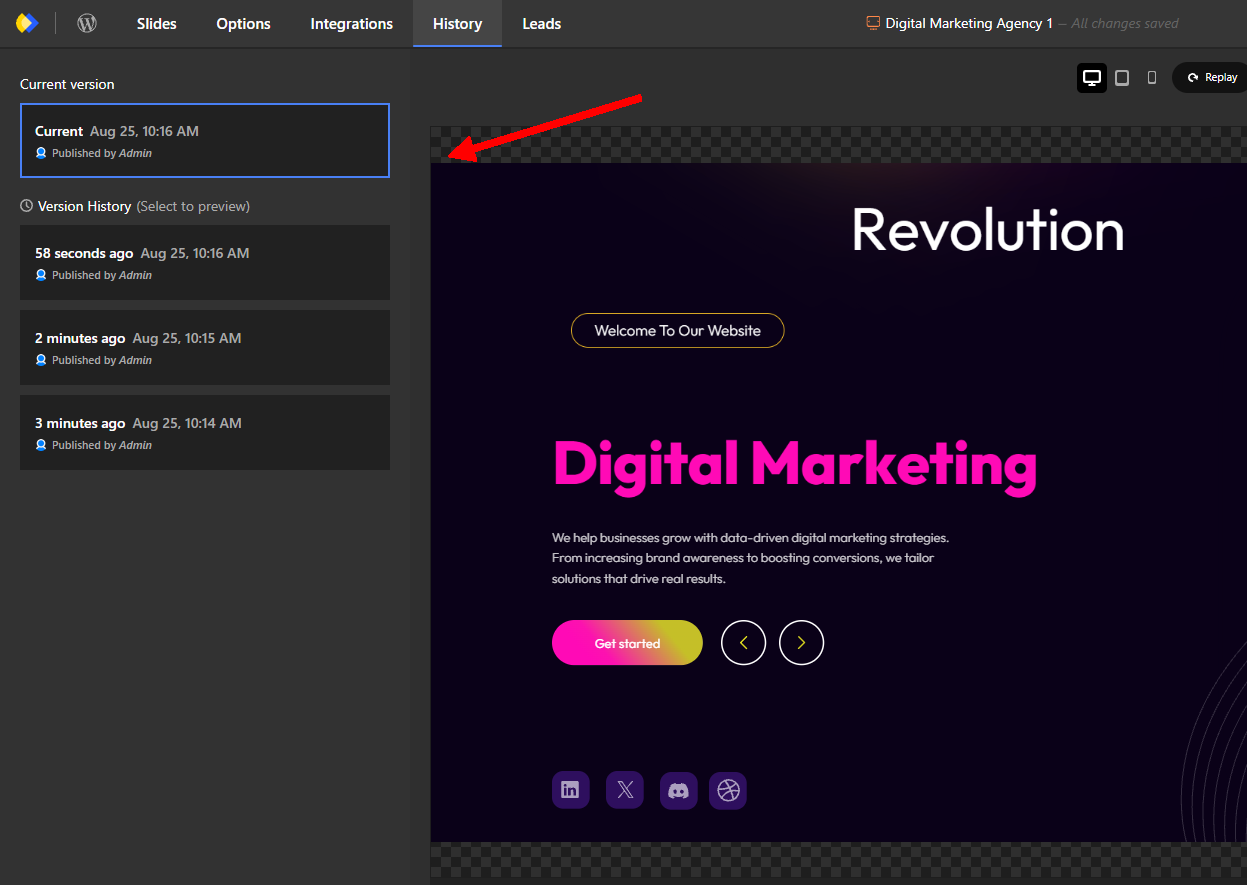
When you select a version from the list, you can immediately preview that version to see exactly how it looked.
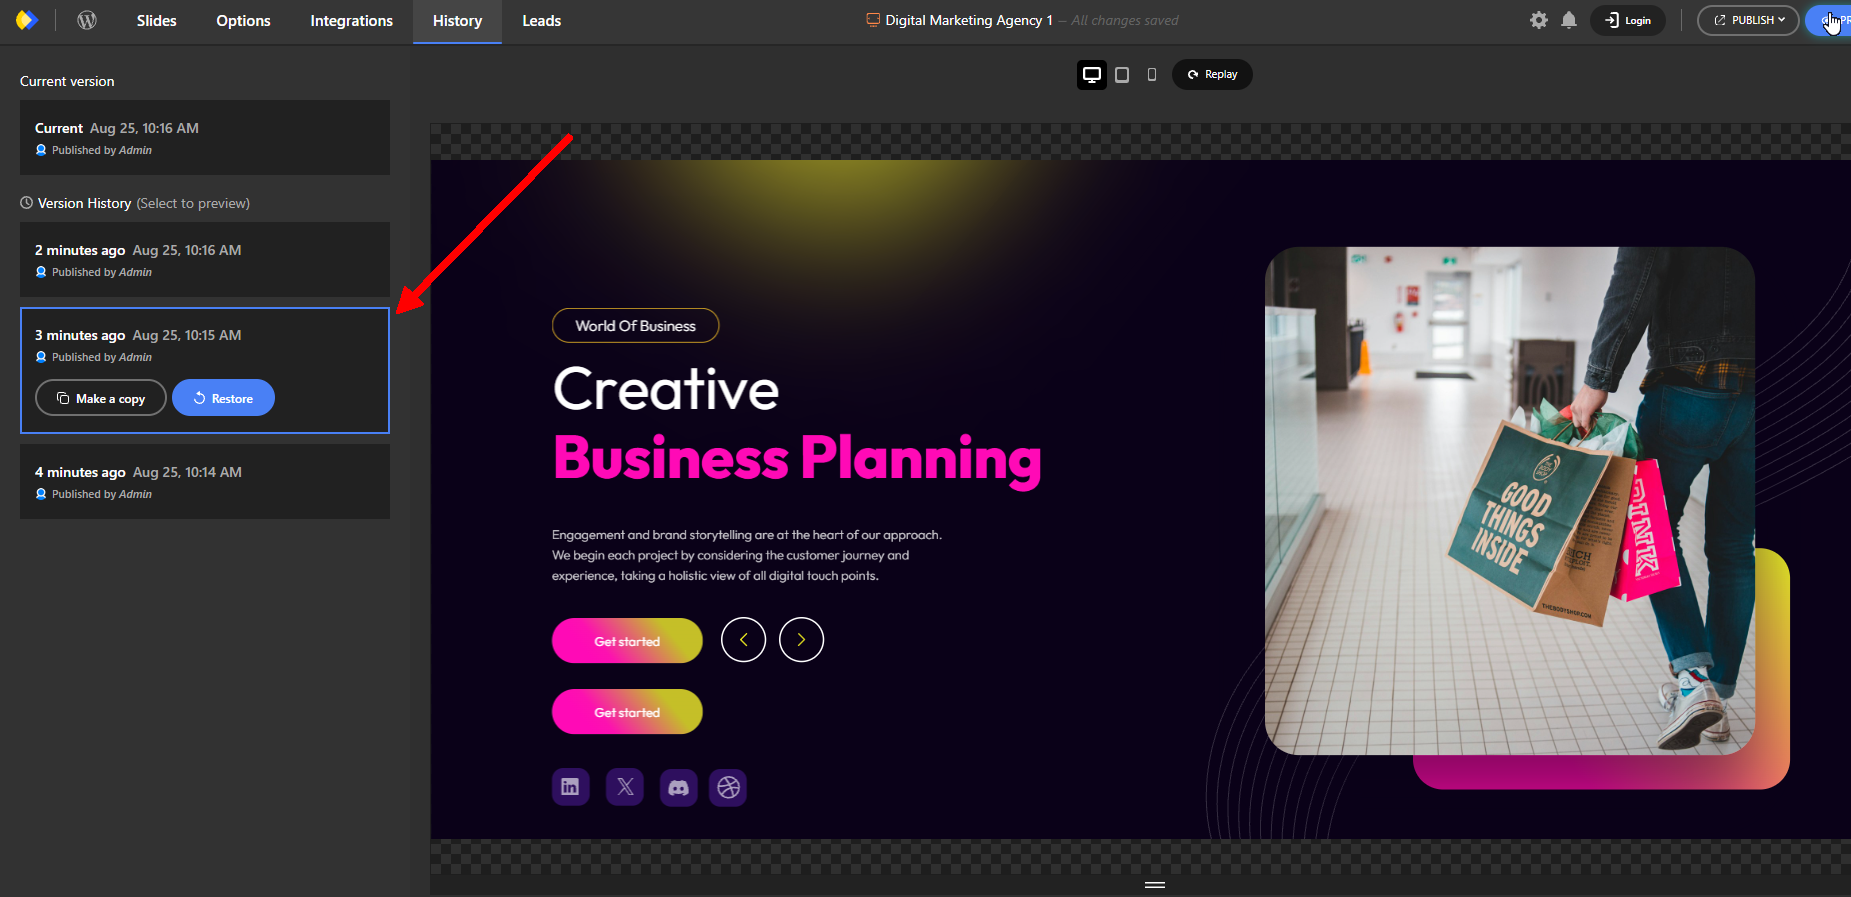
From there, you have two main options:
Make a Copy
Creates a new Depicter project based on the selected version and adds it to your dashboard.
Restore
Rolls your current project back to the selected version, making that version your current version.
This gives you a safe way to work with older versions of your project without losing access to your publishing history.
Publishing Your Changes
When you make changes to your project, Depicter automatically saves them as a draft. These saved changes don’t immediately affect the version currently displayed to your visitors.
After you make changes and Auto Save finishes, the Publish button in the top-right corner of the editor, next to the Preview button, turns green.
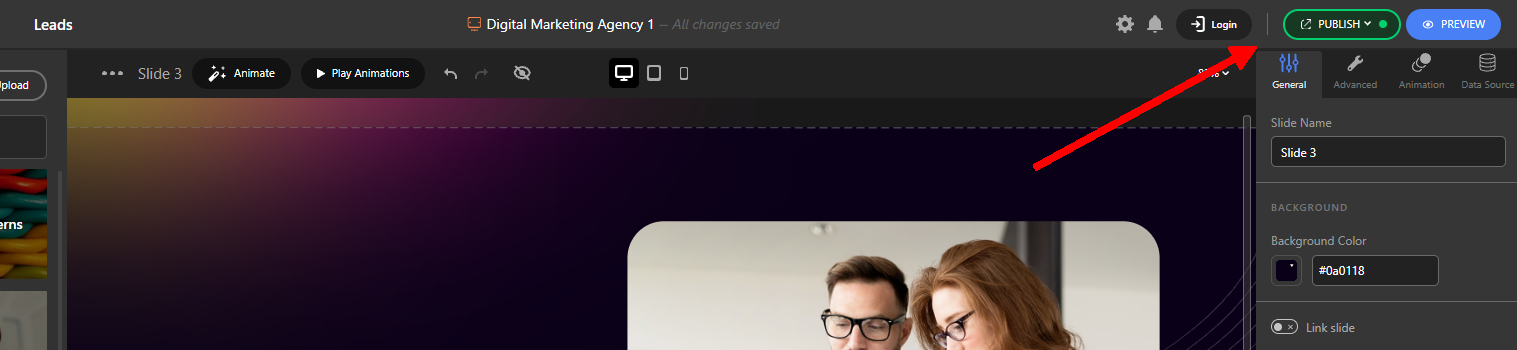
The green Publish button indicates that you have saved changes that have not been published yet.
Publishing Your Changes
When you’re ready to make your changes visible to your visitors:
- Click the green Publish button in the top-right corner.
- From the menu that opens, click Publish changes.
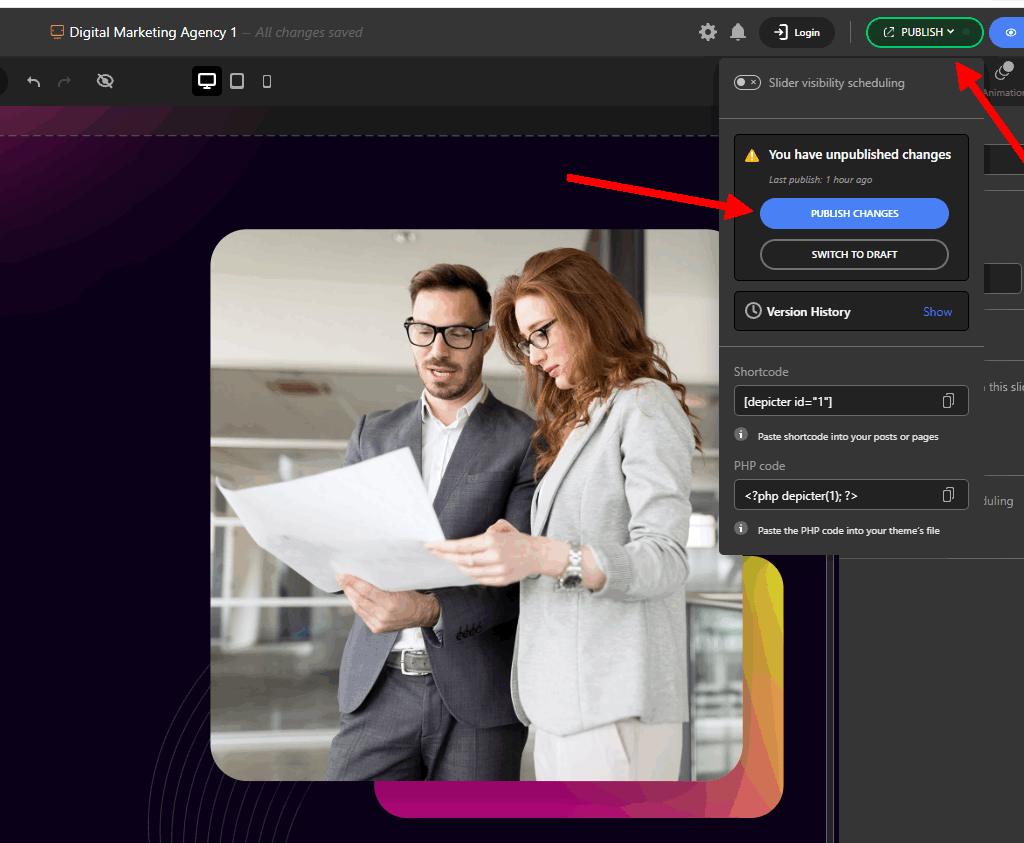
Your saved changes will then be published and become the version displayed to users on the frontend.
At the same time, this newly published version becomes a new checkpoint in your project’s Version History. This means that after making further changes, you can always return to this published version later using Version History.
Switching a Project Back to Draft
You’ll also find another option in the same menu, directly below Publish changes, called Switch to Draft.
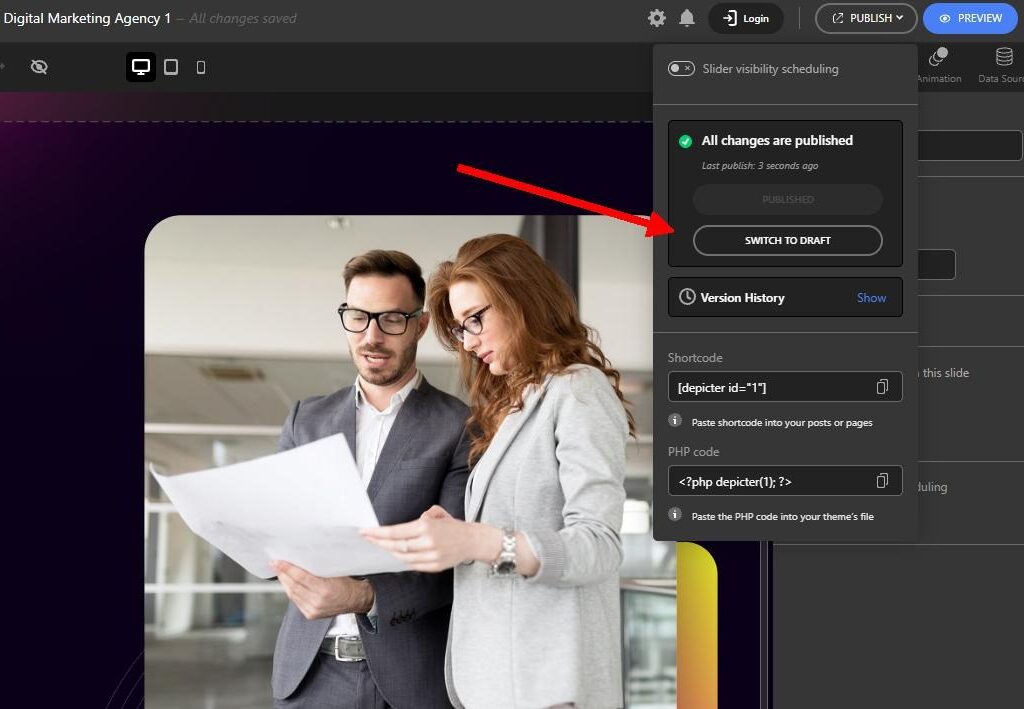
Clicking Switch to Draft takes the project out of its published state and changes it to an unpublished or draft state.
This is useful when you want to stop the project from being publicly available without deleting it.
When a project is in this draft/unpublished state, it can still be used on your site, but it will only be visible to logged-in site administrators. Regular visitors will not see the project because it is no longer published.
In other words:
Publish changes → Makes the project available to normal visitors on the frontend.
Switch to Draft → Removes the project from its published state, so only a logged-in site admin can see it when it is used on the site.
Quick Summary
Here’s how the different features fit together:
| Feature | What it does |
| Auto Save | Automatically saves the changes you make in the editor. |
| Undo | Reverses recent changes you’ve made. |
| Redo | Brings back a change that you previously undid. |
| Draft | Stores the version you’re currently working on without changing the version shown to visitors. |
| Publish | Makes your current draft the new published version displayed on the frontend. |
| Version History | Keeps your previously published versions available so you can preview, restore, or make a copy of them. |
The easiest way to think about the workflow is:
Auto Save keeps your work safe → Draft lets you work without affecting the live version → Undo/Redo help you experiment → Publish makes your completed changes live → Version History lets you manage your published checkpoints.
Leave Comment