
Creating a slider, hero section, popup, or any other visual design often means working with multiple elements at the same time. You may need to add text and images, position them precisely, resize them, reuse existing designs, or arrange several elements into a consistent layout.
Depicter’s Visual Editor is built around a flexible, Canva-like, and canvas-based workflow that lets you perform many of these tasks directly on the canvas. You can select and edit individual elements, work with multiple layers at once, organize elements into groups, and use visual guides to position everything precisely. If you want to learn more about what makes the best WordPress slider editor, check out our detailed guide.
In this guide, we’ll explore the different ways you can work with elements in Depicter, from basic actions such as adding, deleting, and moving layers to more advanced features such as Marquee Selection, grouping, Auto Layout, snapping, and smart guides.
Here is a quick list of Depicter’s Editor features:
- Adding Elements to the Canvas
- Selecting Elements
- Marquee Selection
- Moving Elements
- Resizing and Rotating Elements
- Copying and Pasting Elements
- Duplicating Elements
- Grouping Elements
- Using Auto Layout for Groups
- Managing Layer Order
- Snapping and Smart Guides
- Editing Images and Text Directly on the Canvas
- Replacing Images and Videos
- Panning Around the Canvas
- Locking Elements
- Essential Keyboard Shortcuts
Adding Elements to the Canvas
You can add elements to your design directly from the left-side panel of the Visual Editor.
Click an element in the panel, and Depicter will add it to the corner of the canvas. If you want to control exactly where the new element is placed, simply drag it from the panel and release it wherever you want on the canvas.

This makes it easy to quickly build a design while keeping control over the placement of every element.
Selecting Elements
Selecting elements is one of the most common actions when working in a visual editor. Depicter gives you several ways to select and work with layers, depending on what you’re designing.
You can click an element directly on the canvas to select it. You can also select layers from the layer panel when working with overlapping or harder-to-reach elements.
Selecting Multiple Elements
When you need to work with several elements at once, you don’t have to select each one individually.
On Windows, hold Ctrl and click the elements you want to include in your selection. On Mac, hold Command (⌘) and click the elements you want to select.
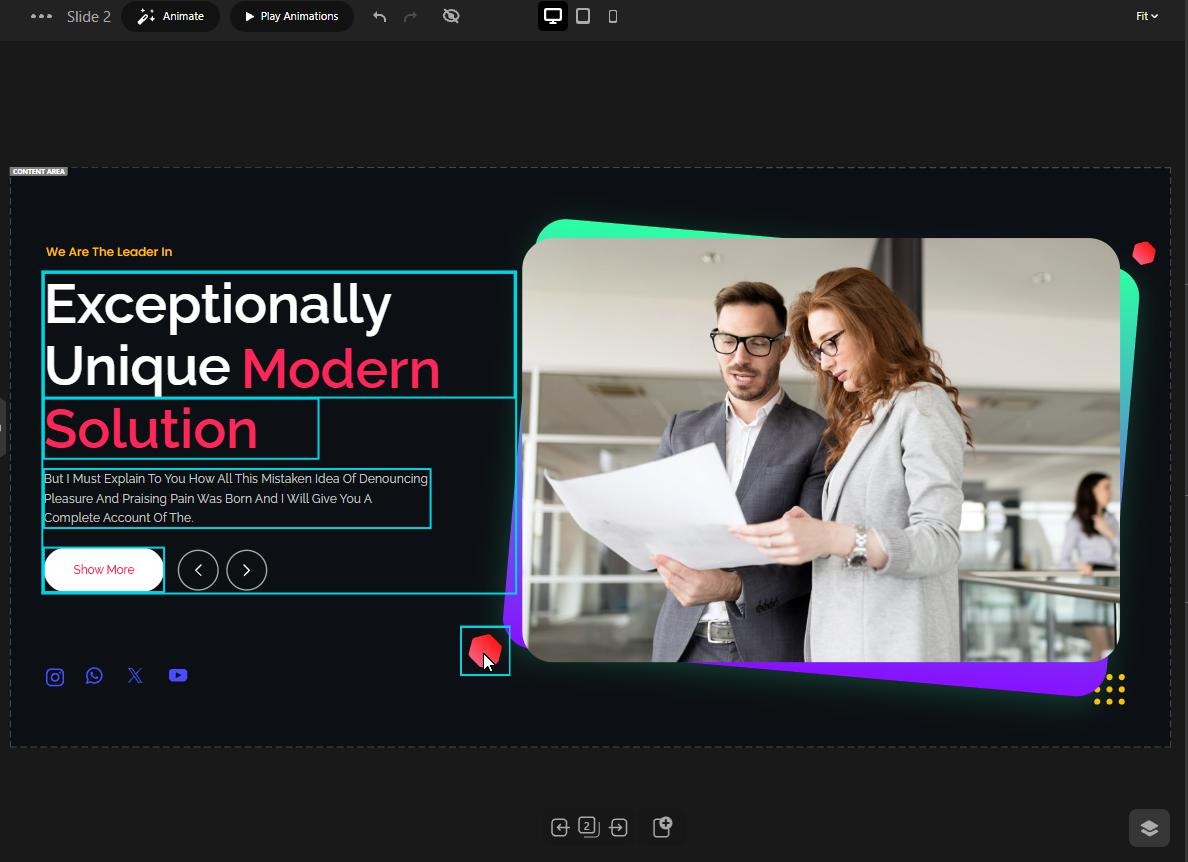
Once selected, you can perform actions on multiple layers together.
This is particularly useful when several elements need to be moved, resized, grouped, or otherwise managed as a unit.
Marquee Selection
For designs with many elements, selecting them one by one can quickly become tedious.
Depicter also provides Marquee Selection, a familiar selection method commonly found in professional visual design tools.
Simply click and drag across an empty area of the canvas to create a selection box. Elements within the selection area can then be selected together.
For example, imagine a hero section containing a heading, paragraph, button, image, and several decorative shapes. Instead of holding Ctrl or Command and clicking every element individually, you can drag a selection box around the elements you want and select them in one action.
This makes Marquee Selection especially useful when you’re working with complex layouts or need to make changes to several elements at once.
Once you’ve selected the elements you need, you can move, resize, group, or organize them together. You can also lock the selected elements using Ctrl + K on Windows or Command (⌘) + K on Mac to prevent accidental changes while continuing to work on the rest of your design.
Moving Elements
You can move any selected element directly on the canvas by clicking and dragging it to a new position.
Depicter also supports keyboard-based positioning for more precise adjustments. Use the Arrow keys to move a selected element in small increments.
Need to move an element further? Hold Shift while using the Arrow keys to move it by a larger distance.
This gives you two different ways to position elements: intuitive drag-and-drop for general placement and keyboard controls when you need more precise adjustments.
Resizing and Rotating Elements
Elements can be resized and rotated directly from the canvas using their visual controls.
These controls work across different element types, including text. When you resize a text element, its font size scales with the element, allowing you to visually adjust the size of the entire element without manually changing its typography settings.
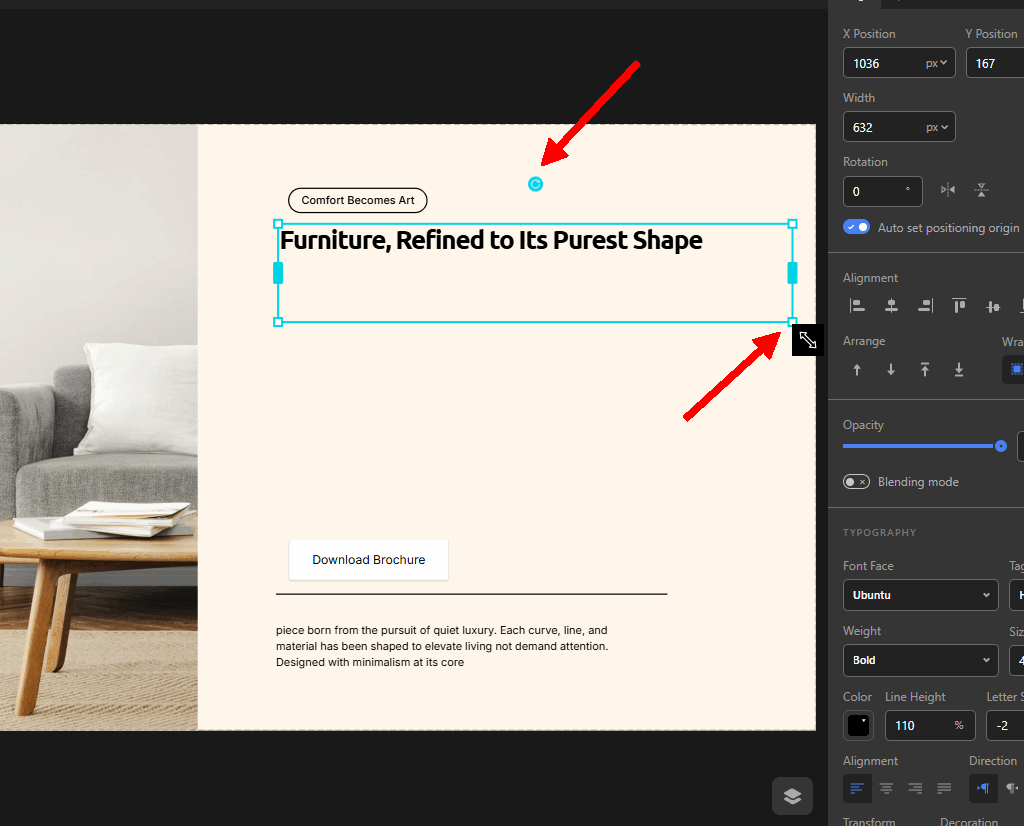
This makes it easier to experiment with proportions and quickly adapt elements to different layouts.
Copying and Pasting Elements
When you’ve already created an element and want to reuse it, you can copy and paste it instead of rebuilding it from scratch.
Depicter supports the standard Ctrl + C and Ctrl + V shortcuts on Windows, and Command (⌘) + C and Command (⌘) + V on Mac.
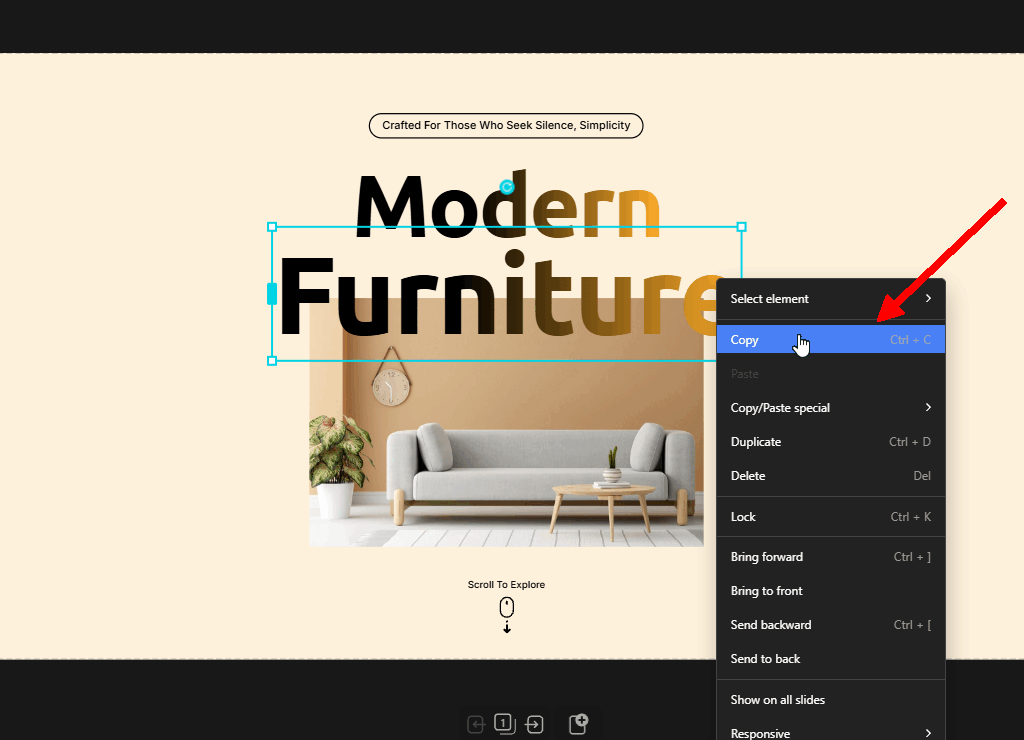
You can copy an element and paste it within the same slide or paste it into another slide. This is particularly useful when you have created a design element that you want to reuse in multiple parts of your project.
Copying and Pasting Styles
Let’s say you’re trying to grow your email list on your website.
You’ve designed a popup in Depicter with a specific style for the Submit button, and now you want to use that exact same button style for another button in a different step of the popup. Instead of recreating the styling from scratch, you can simply copy the style from one element and apply it to another.
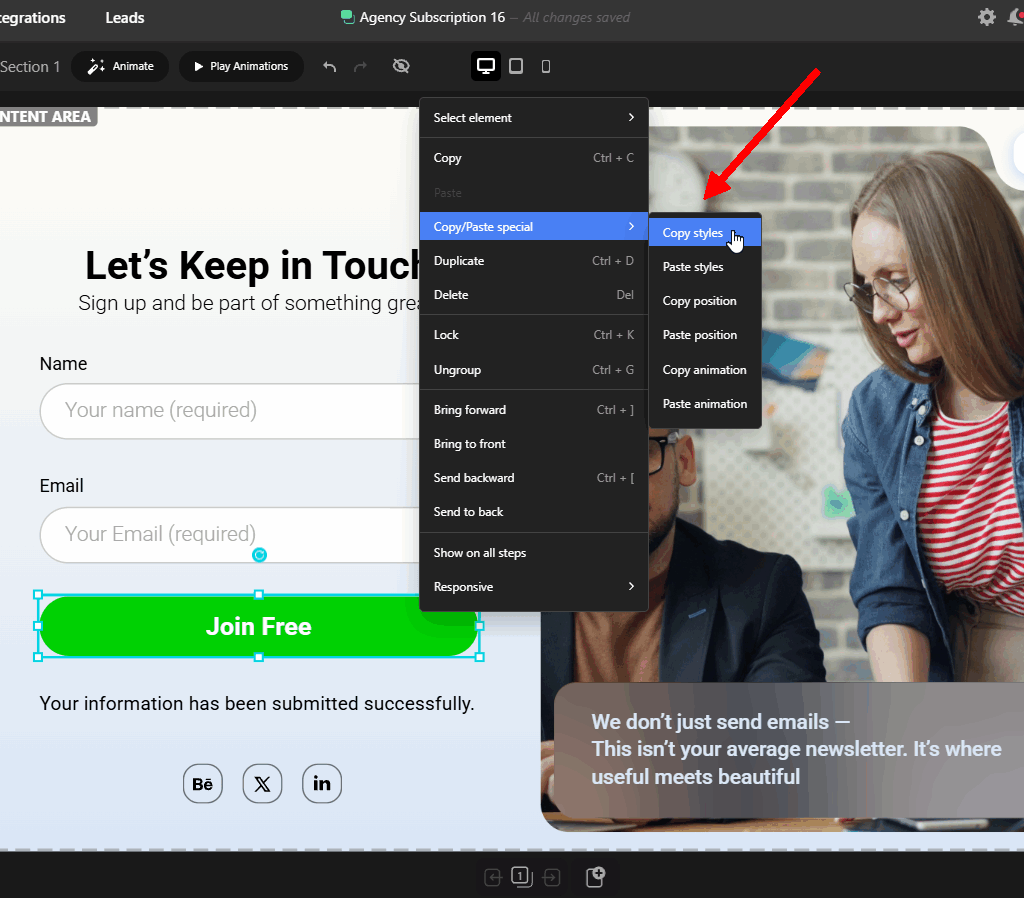
For example, suppose you’ve carefully designed a heading with a particular font, size, spacing, alignment, and other styling properties. You can create another heading and apply the original heading’s style to it without manually configuring every setting again.
This is especially useful when working with multiple elements of the same type and maintaining visual consistency across your design.
Duplicating Elements
If you need an exact copy of an element, including its content and styling, you can duplicate the layer.
Duplicating creates another instance of the same layer directly in your design, making it useful when you want to create similar elements quickly.
You can use Ctrl + D on Windows or Command (⌘) + D on Mac to duplicate a selected layer.
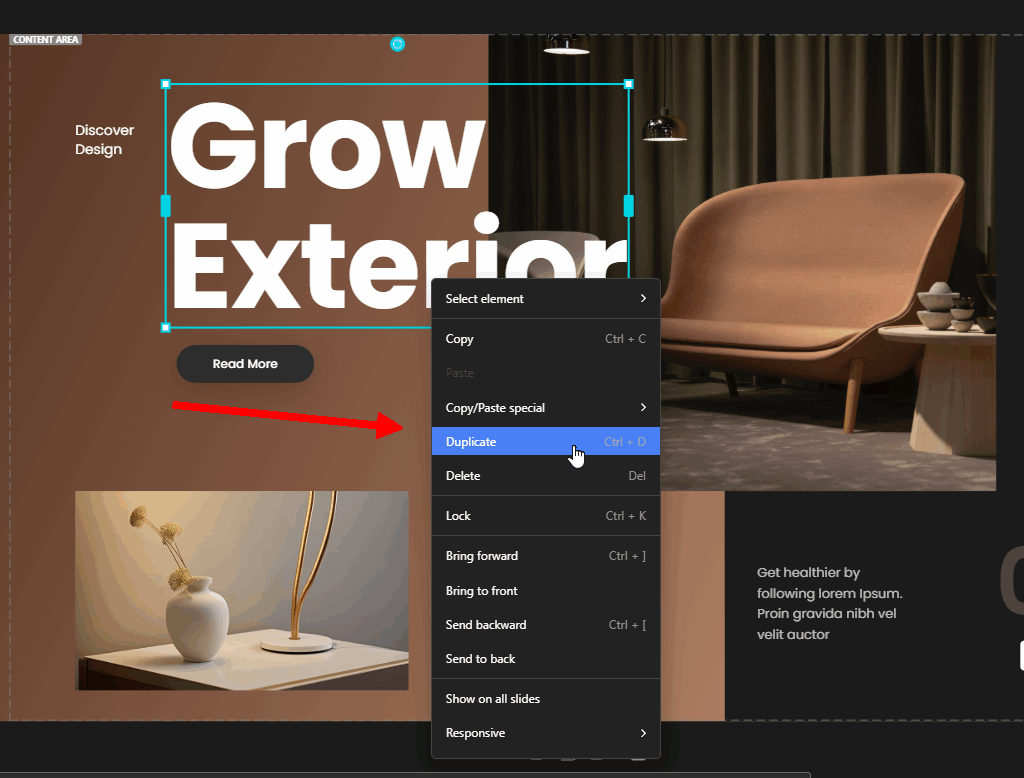
Copy and paste are useful when you want to reuse an element elsewhere, while duplication is particularly convenient when creating another version of an element within the same layout.
Grouping Elements
When several elements work together as part of the same visual component, grouping them can make your workflow much easier.
For example, a hero section might contain a heading, description, button, and decorative shape. You may want to move this entire collection without changing the relative position of each individual element.
By grouping the elements, you can treat them as a single unit while preserving their relationship to each other.
Use Ctrl + G on Windows or Command (⌘) + G on Mac to group selected elements.
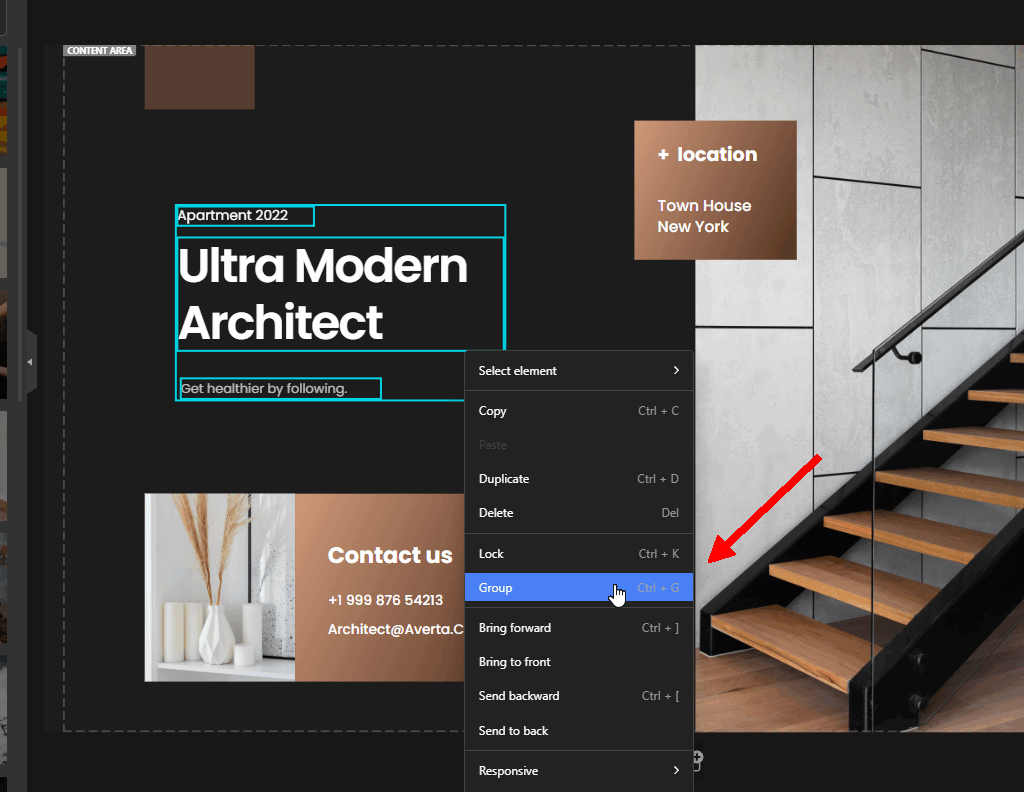
Grouping is especially useful for:
- Moving several elements together
- Keeping relative positions intact
- Creating reusable visual sections
- Managing complex designs with many layers
- Preparing elements for structured layouts
Using Auto Layout for Groups
Grouping elements is useful when you want to keep several layers together, but sometimes you need more than simply preserving their positions.
For these situations, Depicter provides Auto Layout.
After creating a group, you can use Auto Layout to control how the elements inside that group are arranged. Depending on the structure of your design, you can choose between layout systems such as Flex or Grid and configure the available options for each.
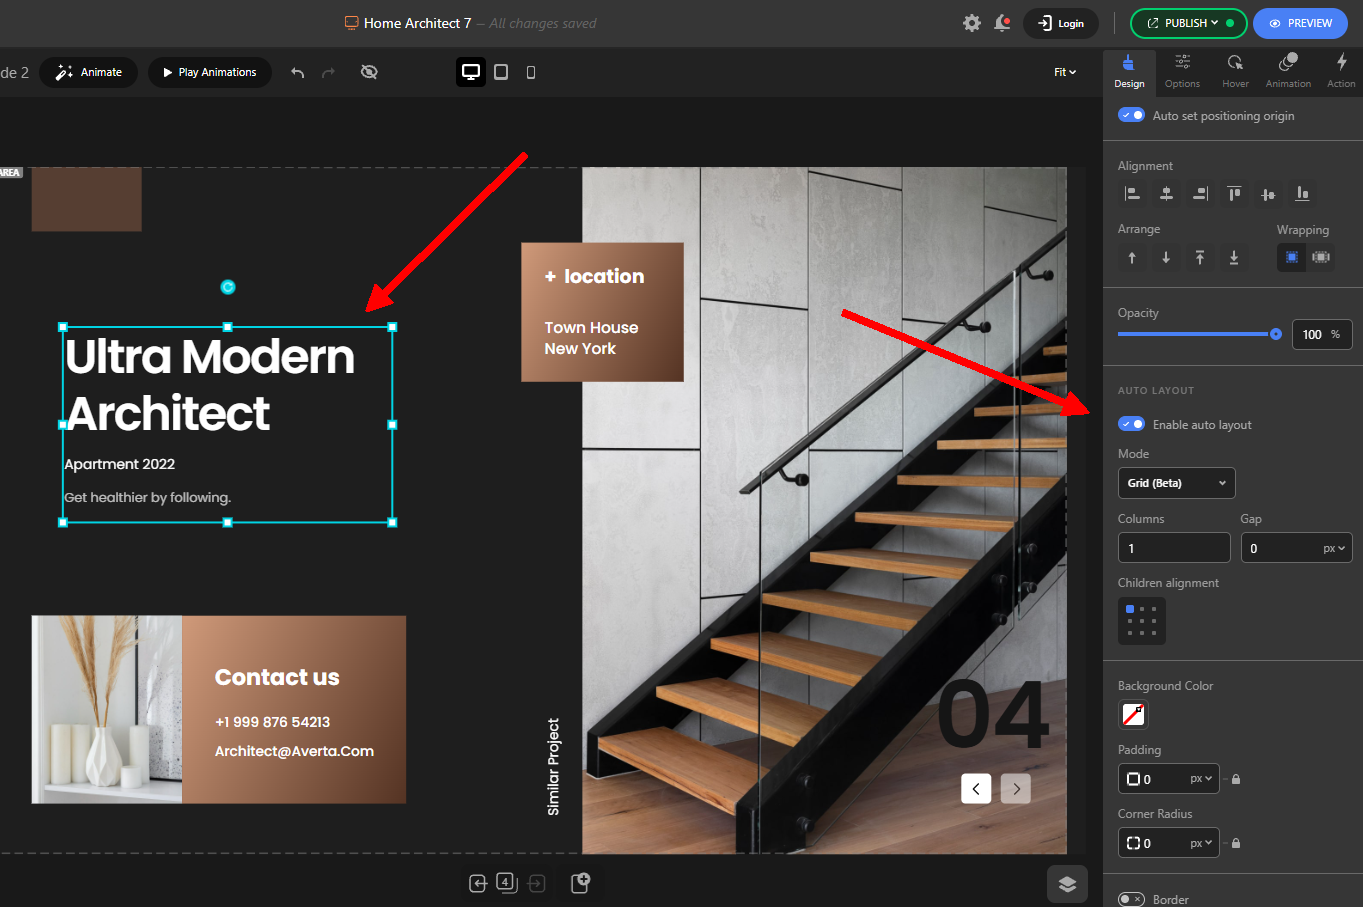
This means you don’t necessarily have to manually position every element inside a group.
For example, a group containing a title, description, and button can use a Flex layout to maintain a consistent vertical or horizontal arrangement. If you’re building a more structured collection of elements, Grid can provide another way to control their positioning.
Auto Layout becomes particularly useful when the content or size of individual elements changes because the layout can help maintain the overall structure without requiring you to manually reposition everything.
Managing Layer Order
When a design contains many layers, elements will naturally overlap.
Depicter lets you control the stacking order of layers so you can decide which element appears in front and which one stays behind.
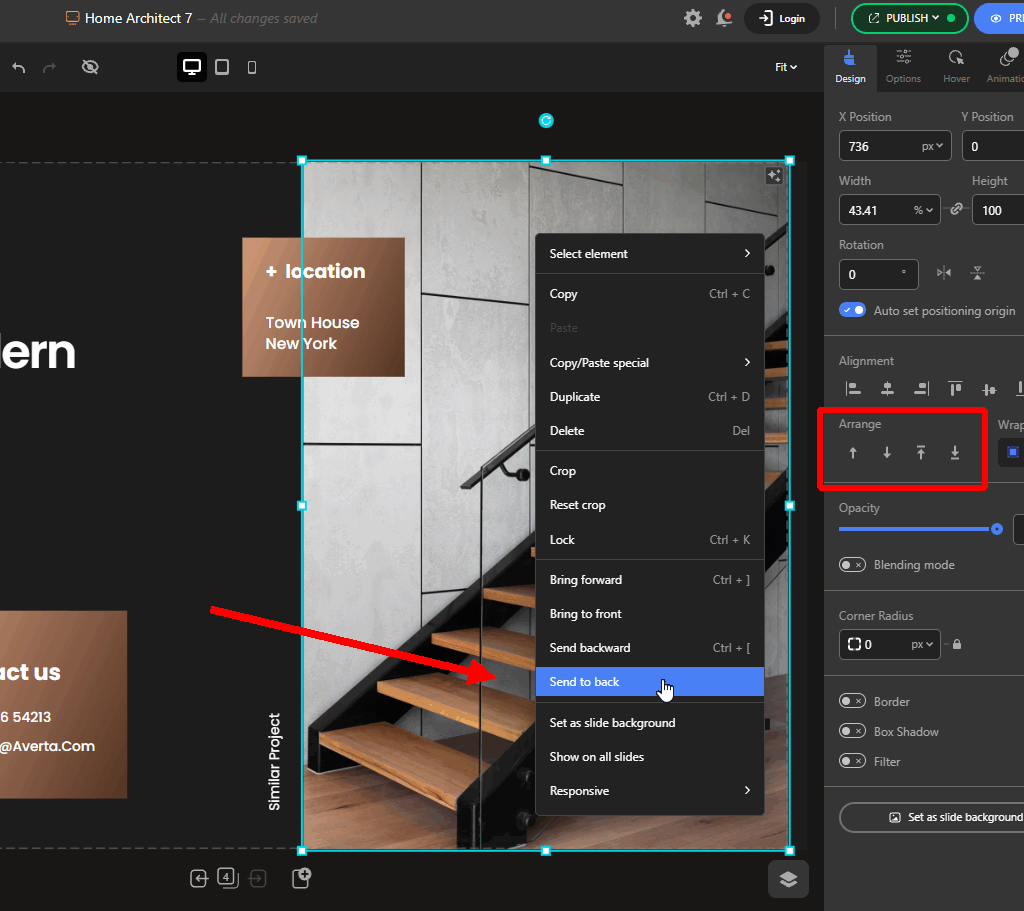
This is useful when working with combinations such as:
- Text over images
- Buttons over background shapes
- Decorative elements around content
- Multiple overlapping images
- Video and image compositions
By changing the layer order, you can control the visual hierarchy of your design without having to move the elements themselves.
Snapping and Smart Guides
Positioning elements manually can be difficult when you want them to line up perfectly.
Depicter’s automatic snapping helps by making elements snap to the edges and positions of other elements as you move them around the canvas.
For example, when moving a button, Depicter can help you align it with another element instead of relying entirely on visual estimation.
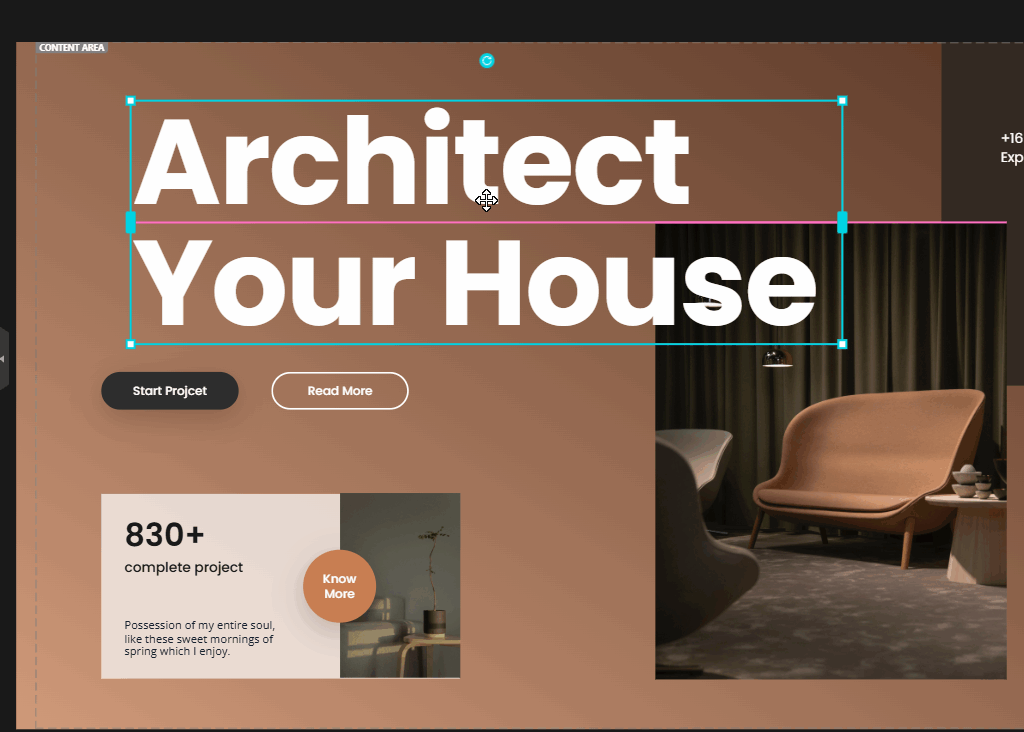
Snapping can also help maintain consistent spacing between elements, making it easier to create clean and balanced layouts.
Smart Guides and Pixel Measurements
Along with snapping, Depicter provides guiding lines and pixel measurements while you position elements.
These guides can show how far an element is from other layers and help you identify aligned positions or consistent spacing.
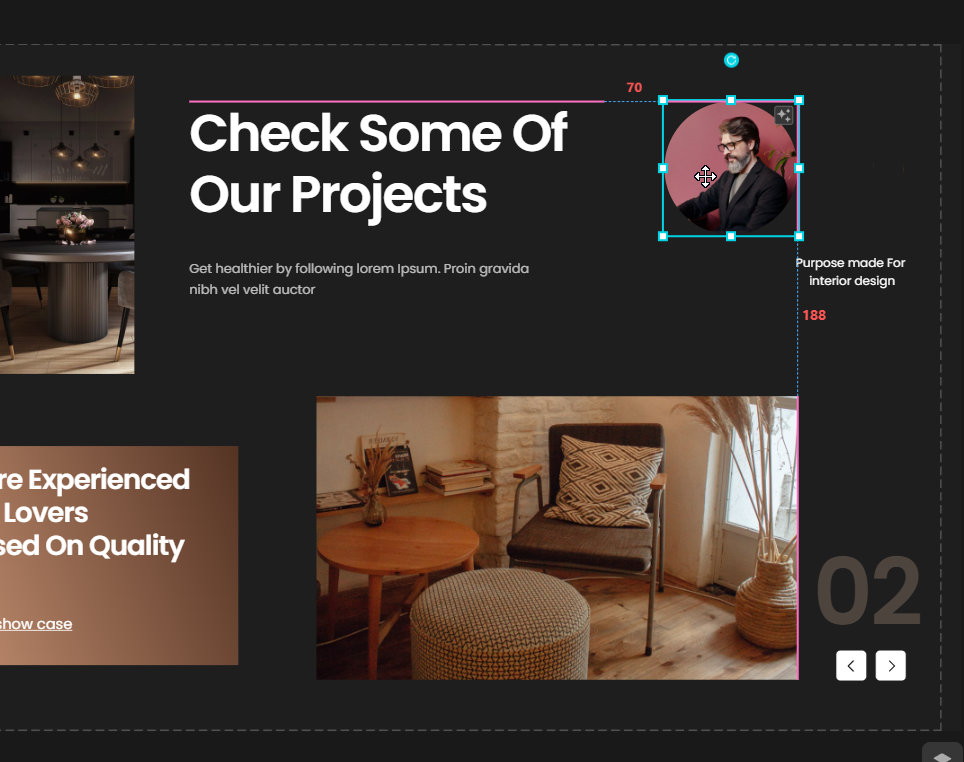
This is particularly useful when you’re trying to create a precise layout. Instead of guessing whether two elements are equally spaced or aligned, the visual guides give you immediate feedback while you move them.
Together, snapping and smart guides make precise positioning much faster.
Editing Images and Text Directly on the Canvas
Depicter also lets you perform common editing tasks without leaving the Visual Editor.
Editing Images
Double-click an image element to activate the image cropping controls. You can then crop the image directly on the canvas and immediately see how it fits within your design.
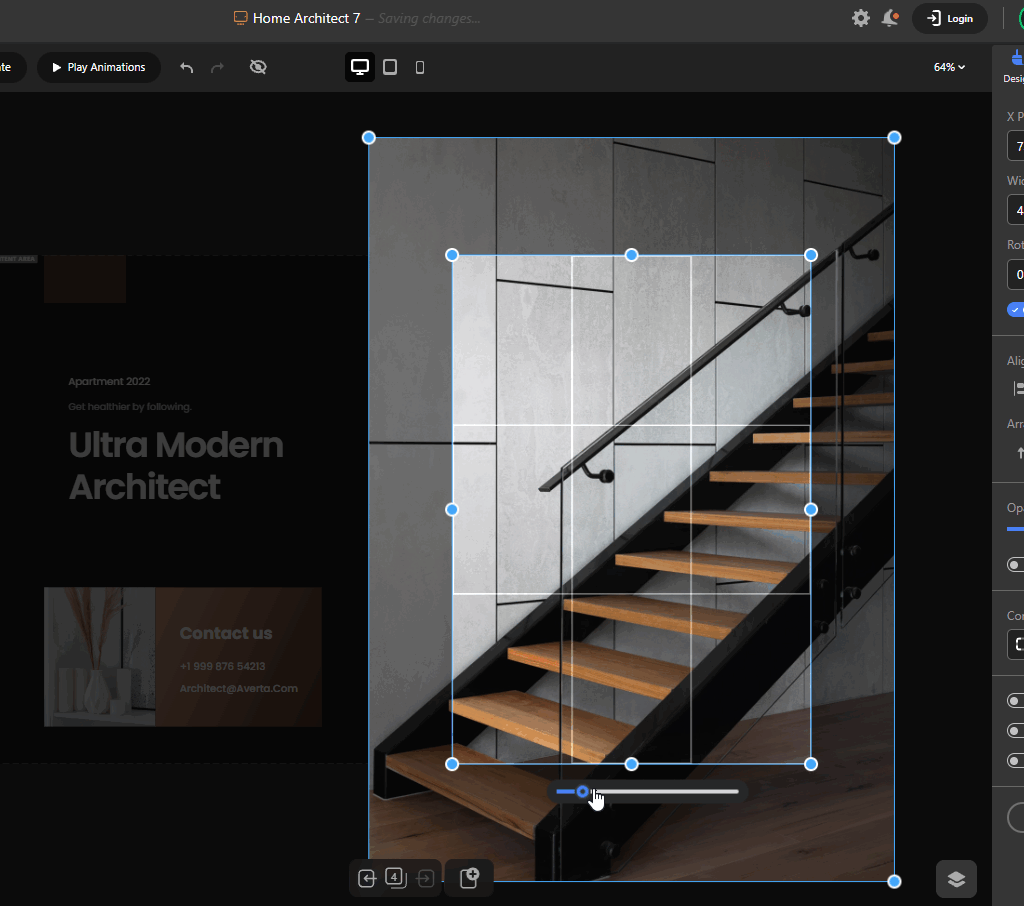
This makes it easier to adjust images to the exact composition you need without having to edit the source image separately.
Editing Text
Text can also be edited directly where it appears in your design.
Click a text element and you can change its content directly on the canvas. This applies to different types of text-based elements, including headings, text blocks, and button labels.
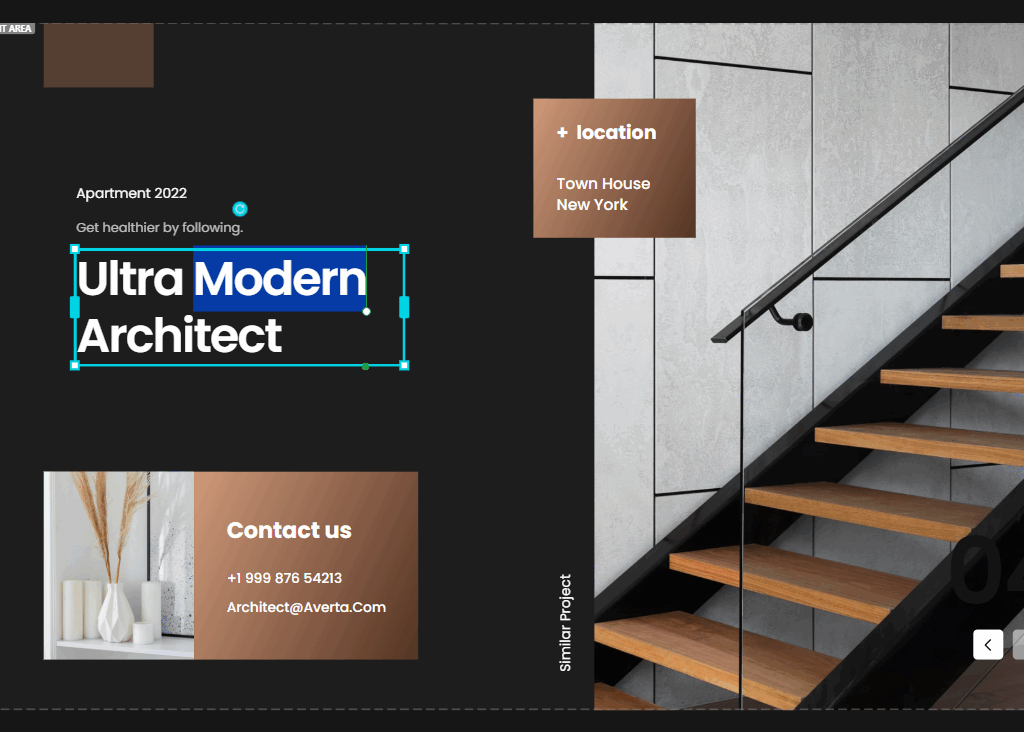
Instead of switching between the canvas and another editing interface for every text change, you can make the change directly where you see the result.
Replacing Images and Videos by Dragging
Depicter also makes replacing media straightforward.
If you already have an image element in your design, you can drag another image onto it to replace the existing image while keeping the element in place.
The same workflow can be used to replace a video with another video.
You can also drag an image or video directly onto the edge of the canvas to use it as a background image or background video.
This is particularly useful during the design process when you’re experimenting with different visual assets and don’t want to rebuild the layout each time.
Panning Around the Canvas
As your design becomes larger or more detailed, you may need to move around the canvas without moving any of your elements.
Depicter provides canvas panning for this purpose.
Hold the Space key and drag the mouse to move around the canvas. This lets you navigate different parts of a large design while keeping the elements exactly where they are.
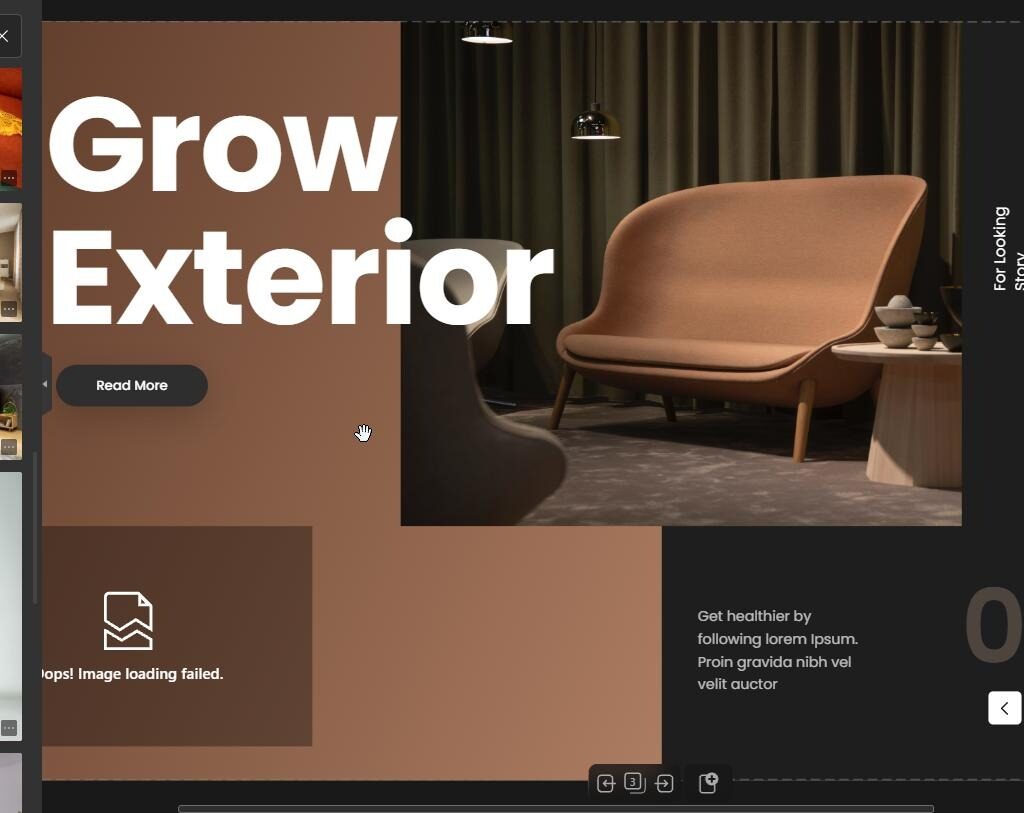
Notice that the mouse cursor will change to the universal “Hand” shape for panning.
Locking Elements
Once you’ve positioned or designed an element correctly, you may want to prevent it from being moved accidentally.
Depicter lets you lock selected elements so they remain in place while you continue editing other parts of the design.

This is particularly useful after selecting multiple elements with Marquee Selection or when working with background and decorative layers that you don’t want to accidentally modify.
You can use Ctrl + K on Windows or Command (⌘) + K on Mac to lock the selected elements.
Essential Keyboard Shortcuts
Keyboard shortcuts can make repetitive design tasks considerably faster. Instead of constantly switching between the mouse and menus, you can perform common actions directly from your keyboard.
| Action | Windows | Mac |
| Copy | Ctrl + C | ⌘ + C |
| Paste | Ctrl + V | ⌘ + V |
| Duplicate | Ctrl + D | ⌘ + D |
| Group | Ctrl + G | ⌘ + G |
| Lock | Ctrl + K | ⌘ + K |
| Delete | Delete | Delete |
| Move precisely | Arrow Keys | Arrow Keys |
| Move by larger increments | Shift + Arrow Keys | Shift + Arrow Keys |
| Pan canvas | Space + Drag | Space + Drag |
| Select multiple elements | Ctrl + Click | ⌘ + Click |
These shortcuts become especially useful once you’re working with more complex designs containing many layers. Combining keyboard shortcuts with canvas interactions such as Marquee Selection and snapping can make the entire editing process significantly faster.
Conclusion
Working with elements in Depicter is designed to make visual editing faster, more precise, and easier to manage. From adding and positioning layers to selecting multiple elements, grouping them, and organizing their layout, you can handle most editing tasks directly on the canvas.
Features such as Marquee Selection, Auto Layout, snapping, smart guides, direct editing, and keyboard shortcuts give you more control over your design while reducing repetitive work. Once you become familiar with these tools, building and refining sliders, hero sections, popups, and other designs in Depicter becomes much more straightforward.
Leave Comment