
Enhancing User Experience and Visual Appeal
Looking to make your WordPress website more dynamic and engaging? Adding a slider can be a great way to showcase your content and grab your visitors’ attention. In this tutorial, We’ll walk you through the step-by-step process of adding a slider to your WordPress website in 2024.
Sliders remain powerful tools for space optimization. By consolidating multiple content pieces into a single carousel, they allow you to showcase more information without overwhelming visitors. This is especially valuable on landing pages, where you aim to deliver a strong visual storytelling impact within a limited space. In the competitive landscape of web development, concise and engaging content presentation is crucial, and sliders can help you achieve it.
In addition to functionality, sliders are also great at showcasing your best work. If your website relies heavily on visual content like photography, design, or art, sliders can act as a captivating showcase right from the moment visitors arrive. They can even be themed around specific events or product launches, creating a targeted and impactful presentation. In 2024, with attention spans shrinking, grabbing visitors’ interest quickly is vital, and sliders can be your secret weapon.
Ultimately, WordPress sliders offer a blend of flexibility and interactivity. They can be customized to match your brand aesthetic and accommodate different media types, making them suitable for a wide range of websites and stores. By utilizing their space-saving capabilities, user engagement potential, and visual storytelling power, you can harness sliders to enhance both the functionality and visual appeal of your website. If you are looking to add a slider to your WordPress website, this article is for you.

How can you add a slider to your WordPress website?
Add a custom-coded slider to your website
If you don’t have experience with coding, creating a customized slider means you might have to hire a developer, which can add extra expenses and time to the process. This may not be the most feasible option for everyone, particularly if you have a specific design in mind that can be achieved with existing plugins.
For most scenarios, the convenience and flexibility of plugins make them a smarter choice.
Add a slider to your website using the page builder
Some page builders allow you to create sliders directly within your website’s pages, without installing a separate plugin. However, it’s important to keep a few things in mind when using this approach:
Slider blocks are often only available in the premium versions of page builders. This means you might need to upgrade to a paid plan to access this feature. The Slides widget of the Elementor is an example of this.
You may have limited customization options. Built-in slider blocks may not offer the same level of customization as dedicated slider plugins.
You may miss out on advanced features. Some slider plugins provide advanced features such as animation effects, responsive design, and integration with other plugins.
If you’re looking for a basic slider and don’t want to install an additional plugin, using your page builder’s built-in slider block can be a convenient option. However, if you require more customization options or advanced features, using a dedicated slider plugin may be a better option.
Add a WordPress slider to your Website Using a Plugin (Depicter)
There are many plugins in the WordPress slider category, each with different features and capabilities. Here are 5 of the best sliders in 2024:
It’s clear that we could write a detailed review for each of these WordPress slider plugins, as their functionality and features are diverse and extensive. Here, we’ll take a closer look at one of the best, Depicter.
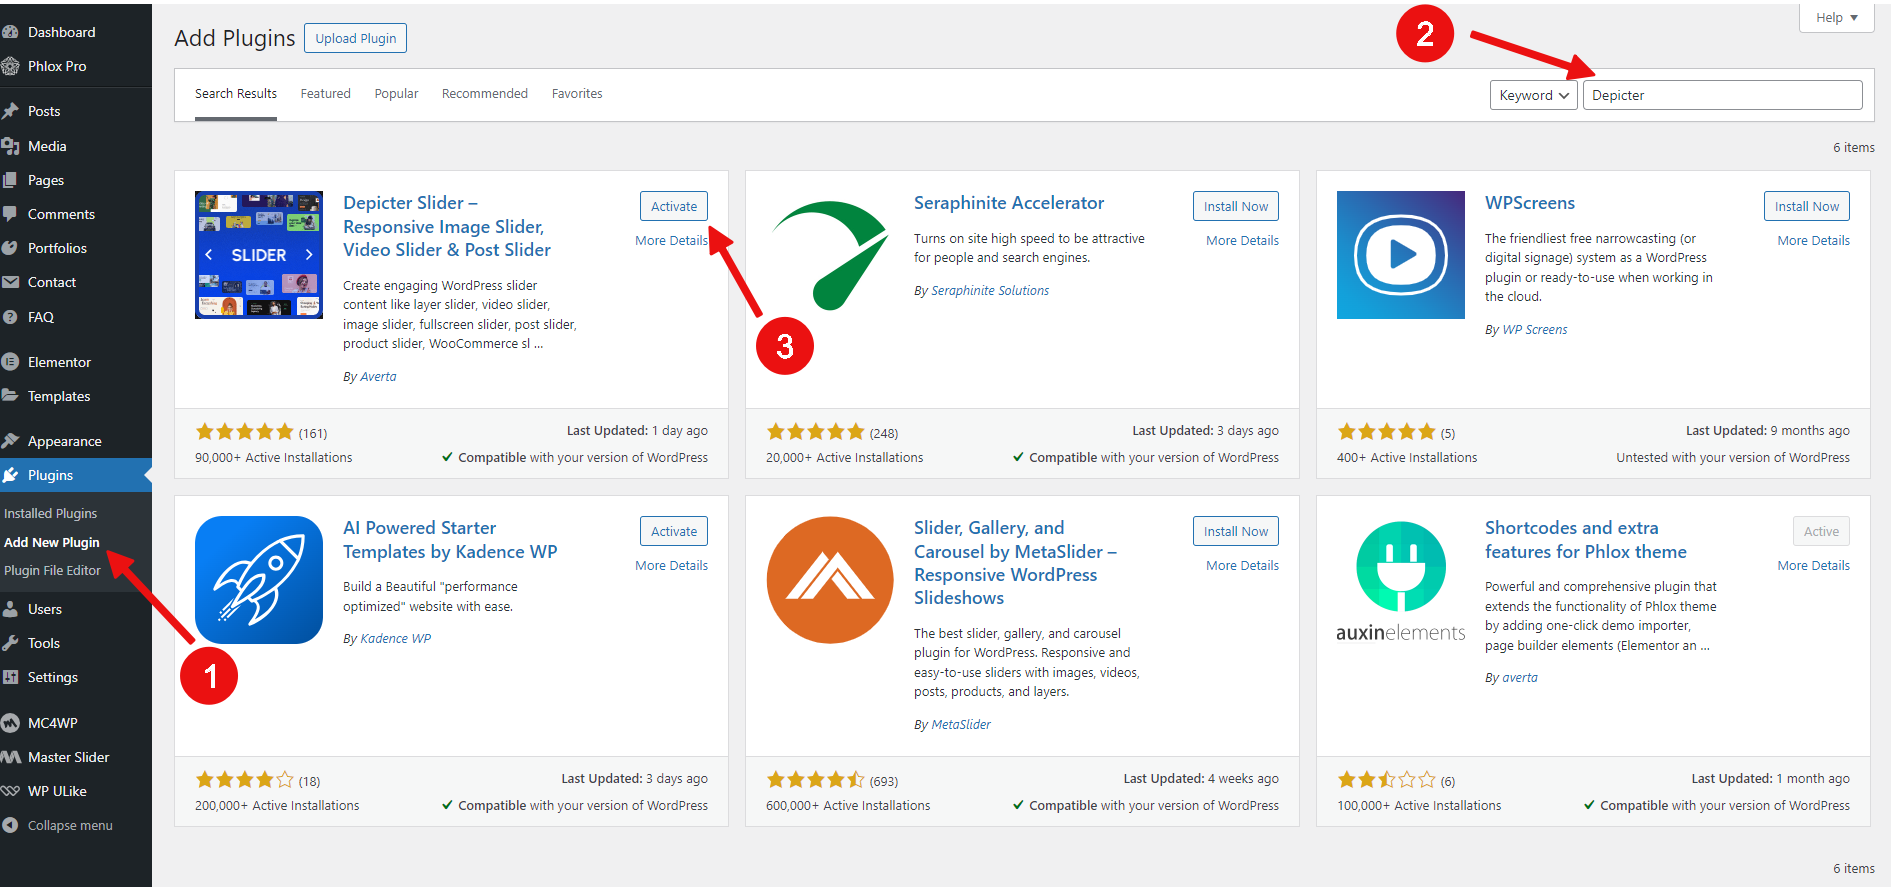
Step 1: Install Depicter
Go to your WordPress dashboard and navigate to the Plugins menu.
- In the Search Plugins field, enter Depicter.
- Click the Install Now button.
- After the plugin has been installed, click the Activate button.
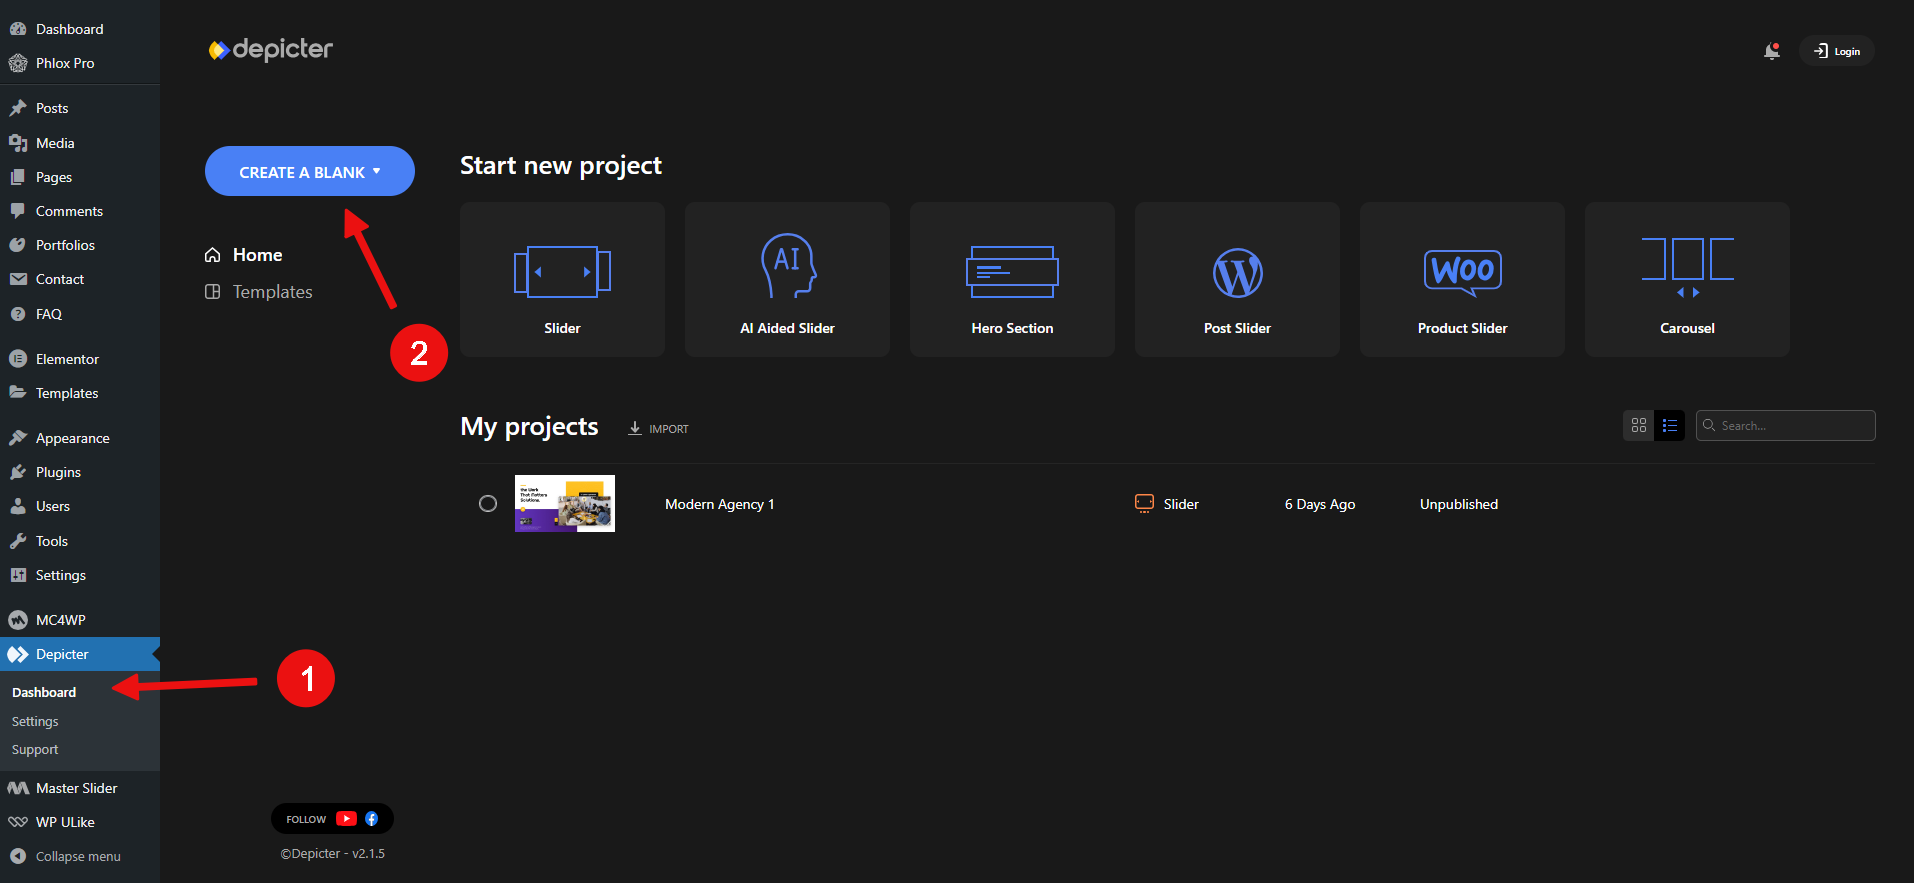
Step 2: Creating a slider
To create a blank slider:
- Go to the Depicter menu in your WordPress dashboard.
- Click the Create a Blank button.
- Enter a name for your slider and click the Create button.
Step 1: Install Depicter
Go to your WordPress dashboard and navigate to the Plugins menu.
- In the Search Plugins field, enter Depicter.
- Click the Install Now button.
- After the plugin has been installed, click the Activate button.
Once Depicter is installed, you can start creating sliders.
Step 2: Creating a slider
To create a blank slider:
Go to the Depicter menu in your WordPress dashboard.
- Click the Create a Blank button.
- Enter a name for your slider and click the Create button.
To use a pre-made template:
- Go to the Depicter menu in your WordPress dashboard.
- Click the Templates tab.
- Browse the available templates and select one that you like.
- Click the Import button.

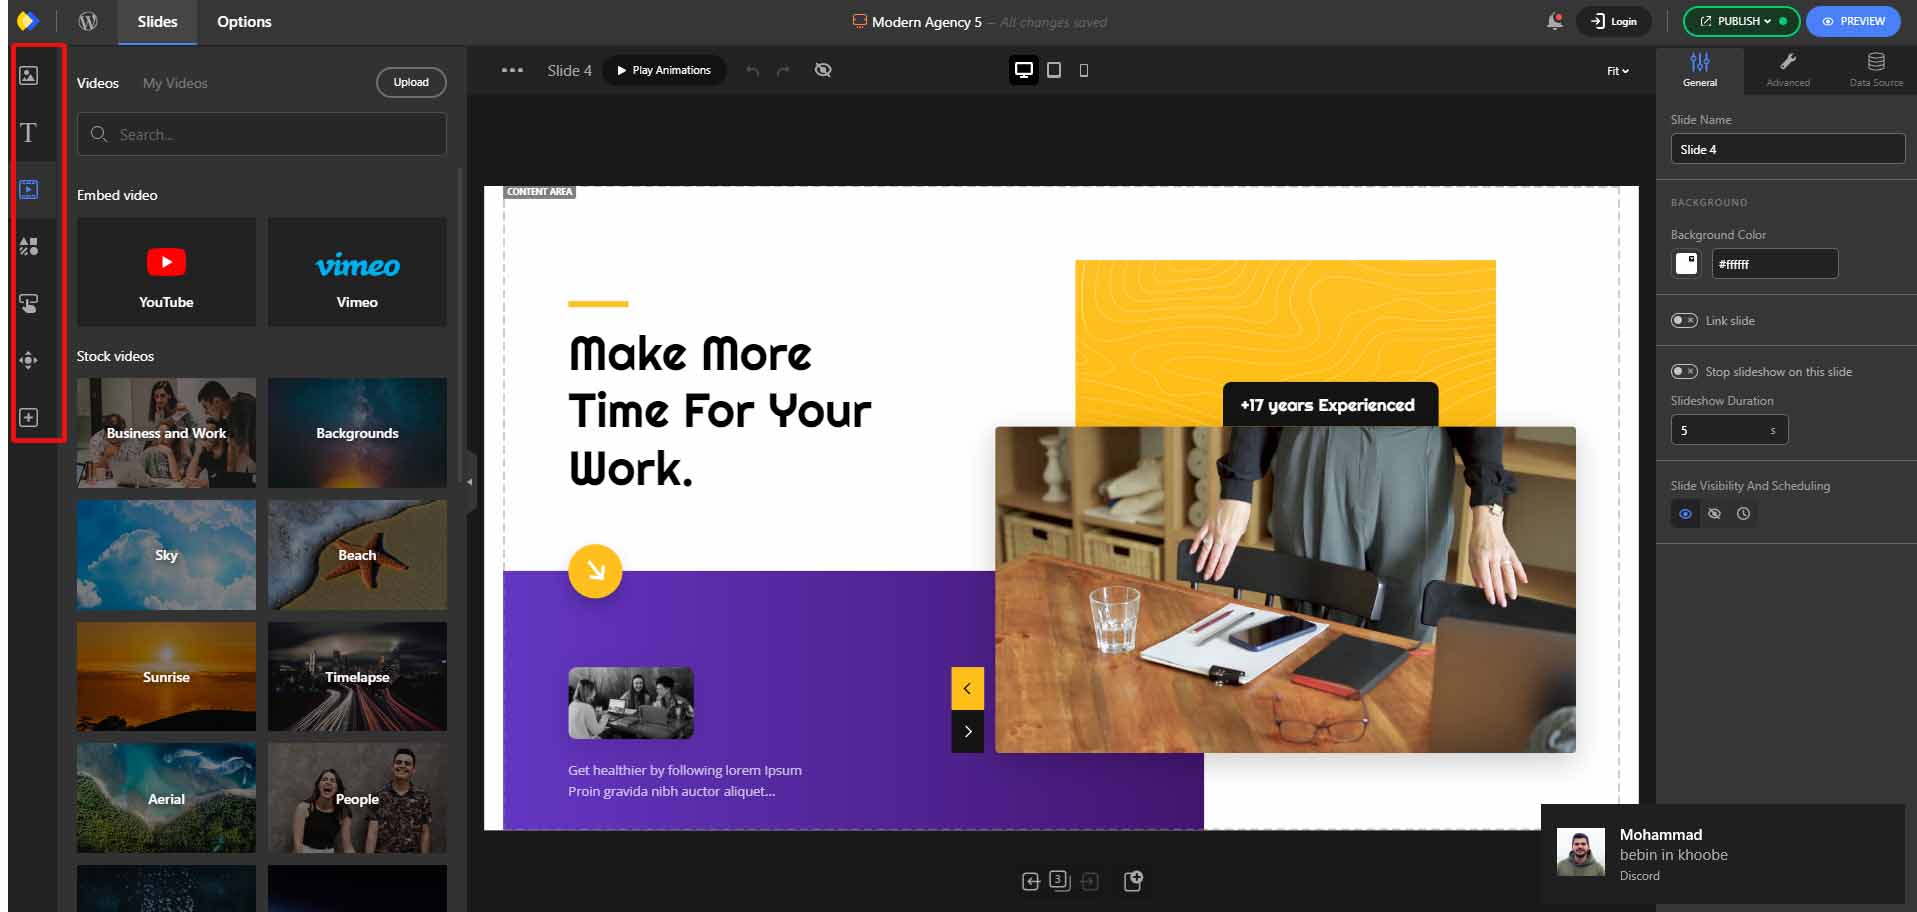
After creating or importing a slider, you can begin customizing it.
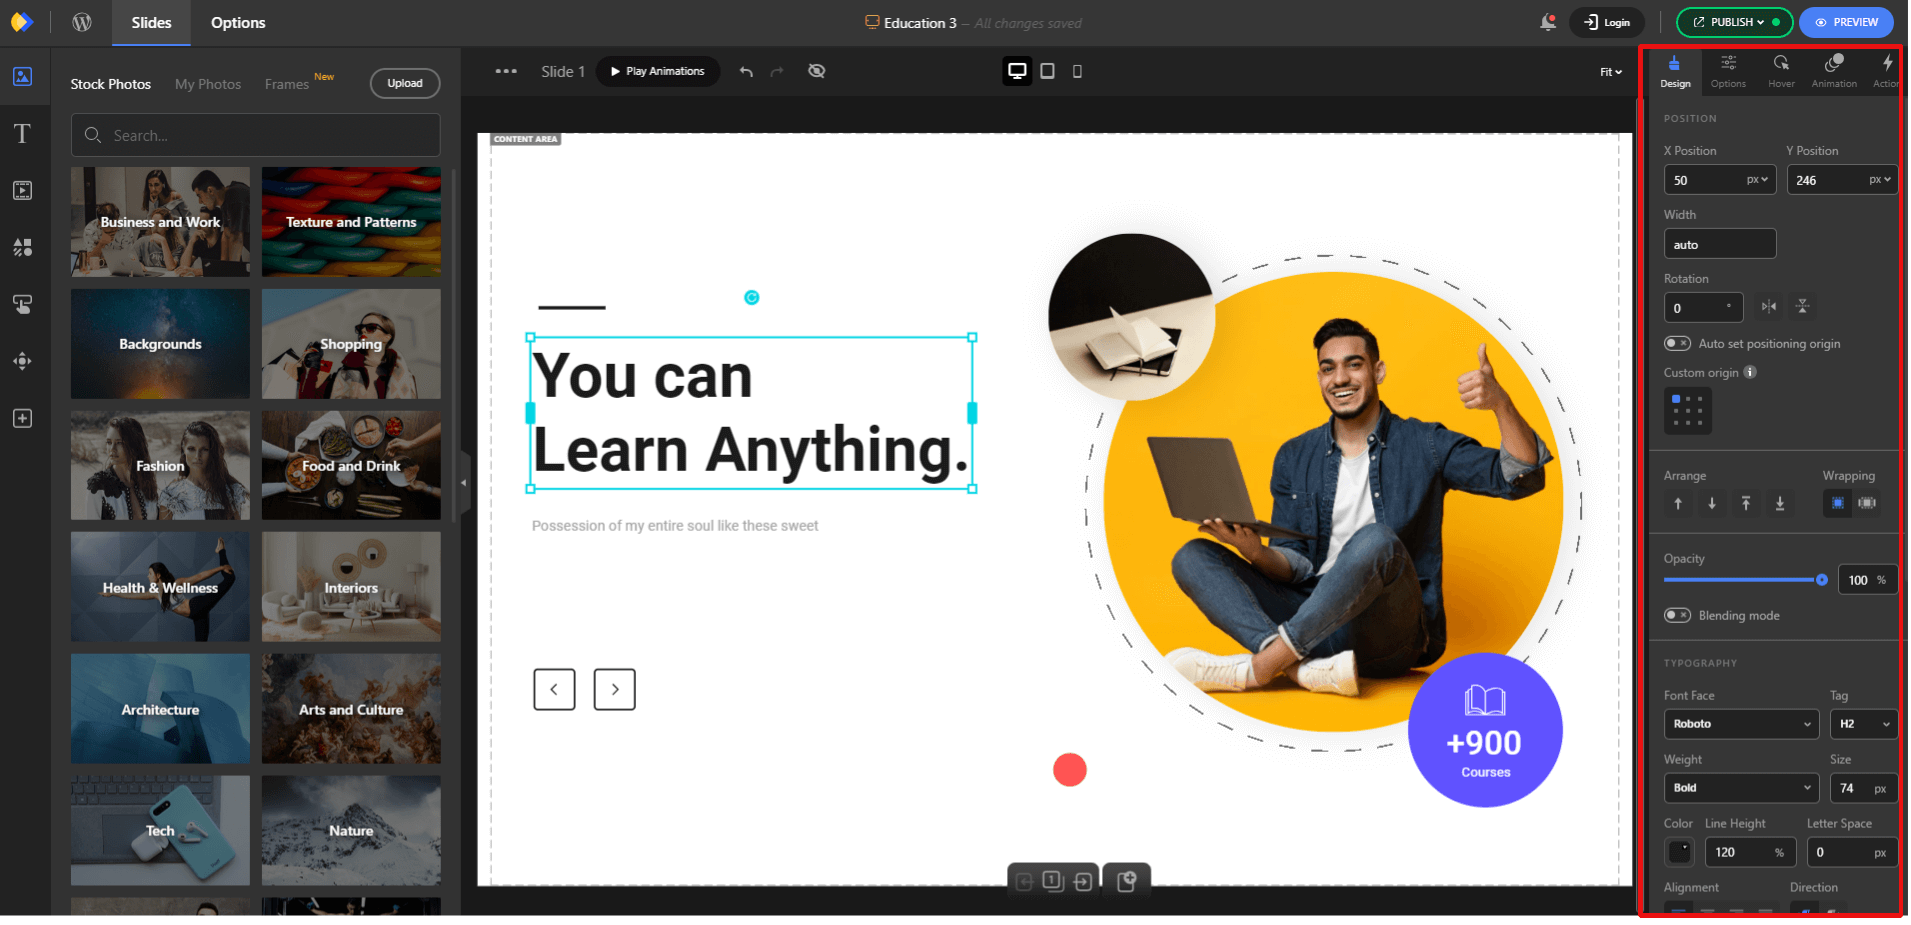
Depicter’s interface is entirely drag-and-drop, and by selecting any element, you will have access to all the options related to it.
Depicter’s top features
As you work with Depicter, you will realize that it offers a wide range of professional features. These include:
Drag-and-drop editor:
This makes it easy to create and modify sliders without any coding knowledge. Just drag and drop the elements you want to use onto the canvas, and then adjust their properties as needed.

Asset panel:
This provides access to a variety of pre-made assets, such as images, videos, and icons, which can save you time and effort when creating your sliders.
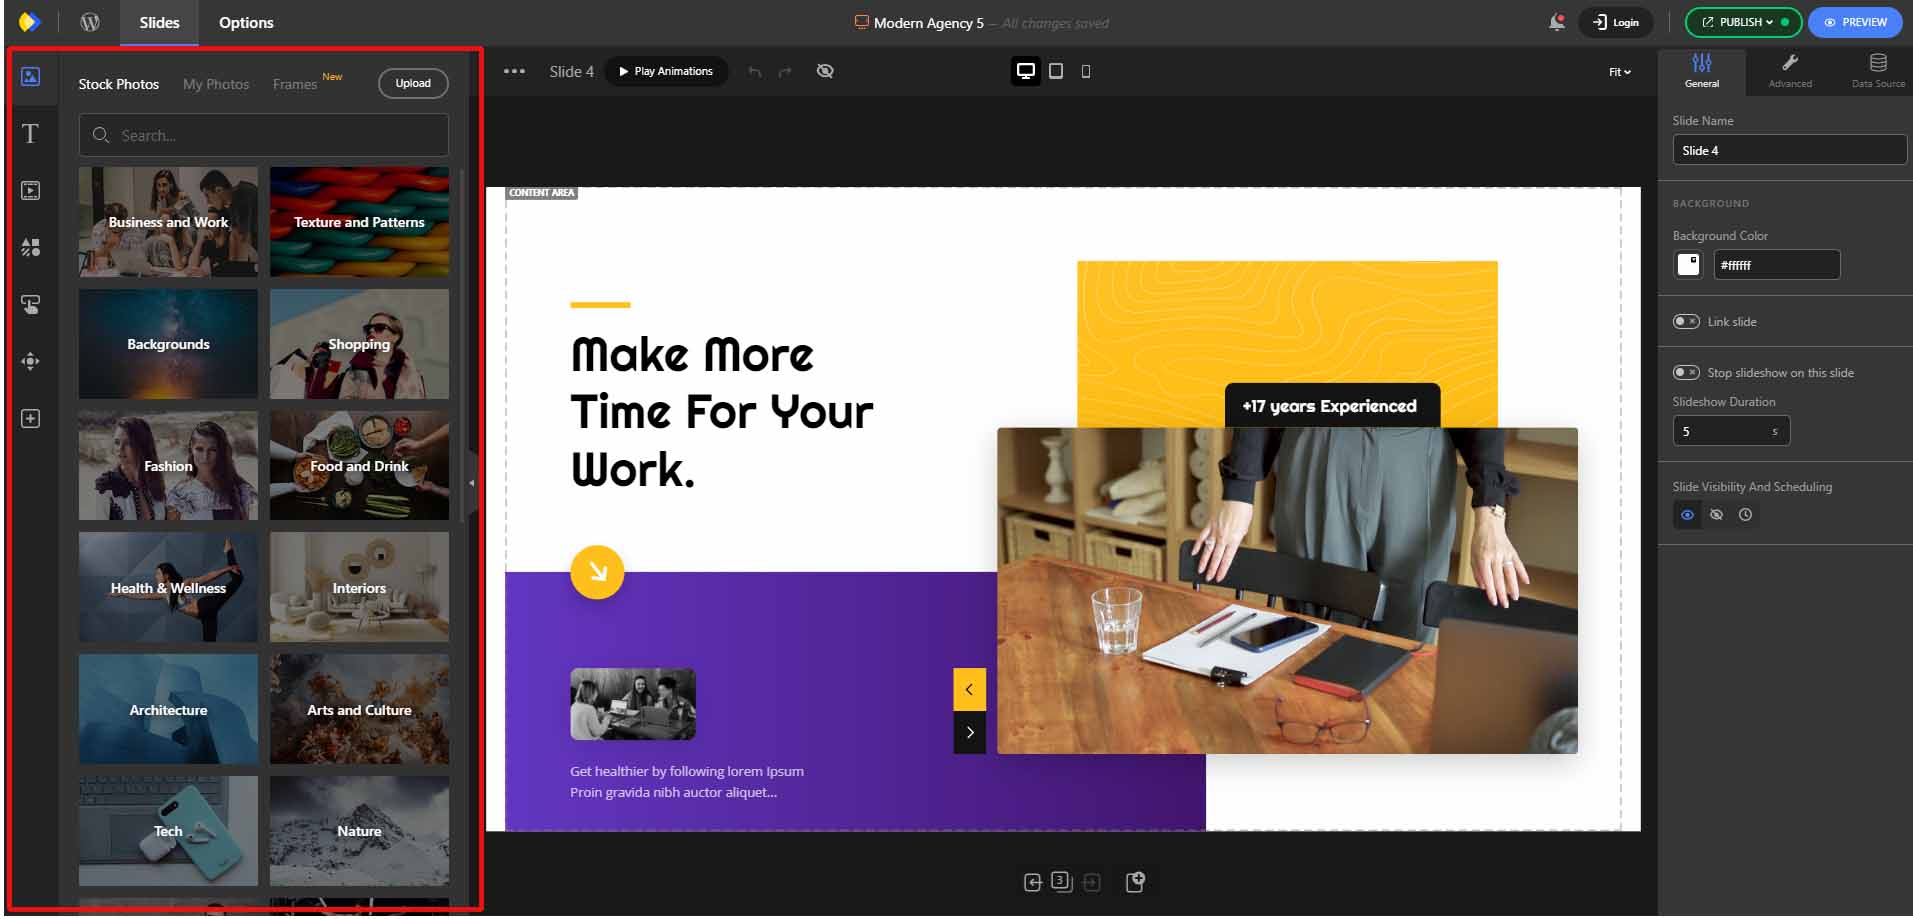
Image, video, text, shape, button, and navigation control elements:
These allow you to create a wide variety of sliders. You can use images to showcase your products or services, videos to tell a story, text to provide information, shapes to add interest, buttons to call to action, and navigation controls to help users navigate your slider.
Animations:
You can add animations to any element in your slider. This can help you to make your slider more engaging and visually appealing.

Dedicated options:
Each element in Depicter has its own dedicated options. This allows you to fine-tune the appearance and behavior of each element.
Once you’ve finished customizing your slider with images, text, colors, and other changes, you can then add it to your page. The method for doing this will vary depending on the page builder you are using.
There are two common ways to add a slider: using a shortcode or adding a dedicated slider element for your page builder. The latter is the recommended method.
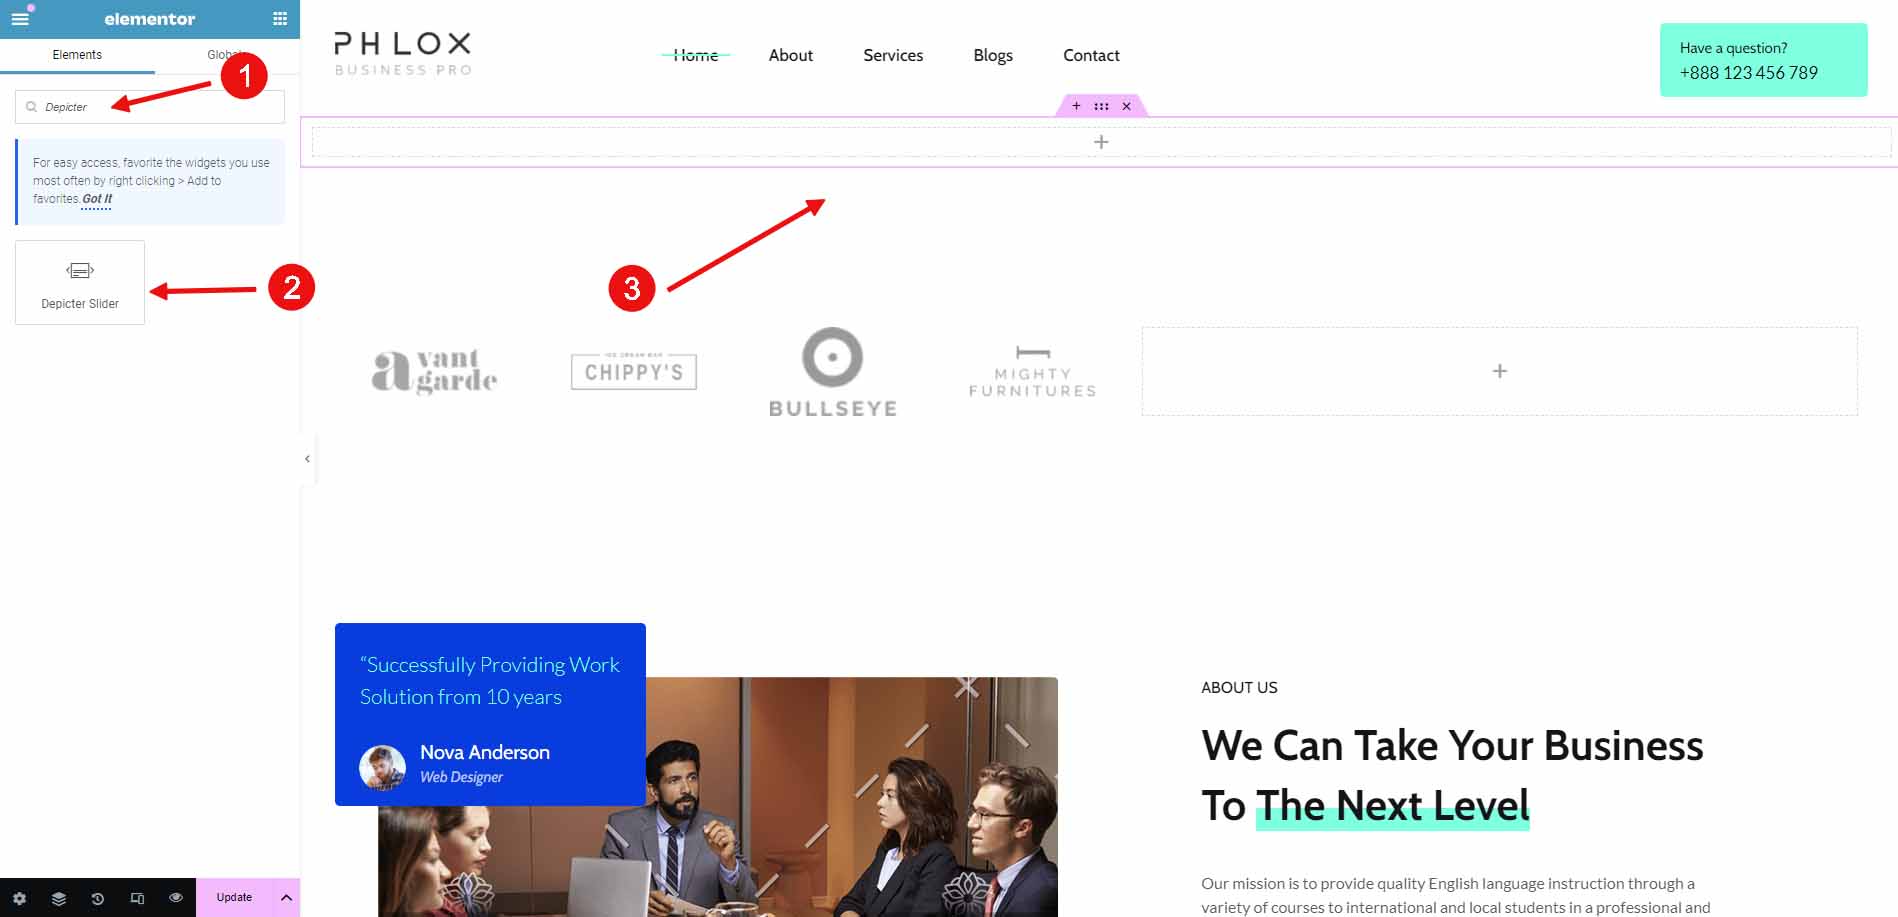
Fortunately, Depicter has elements dedicated to all popular page builders, which makes this process much easier. Here, we’ll go through an example using Elementor.
After opening the page in Elementor for editing, simply search for “Depicter Slider” in the list of widgets. Drag and drop it onto the page, then select your slider from the list of available sliders.
Save the page, and you’re done!
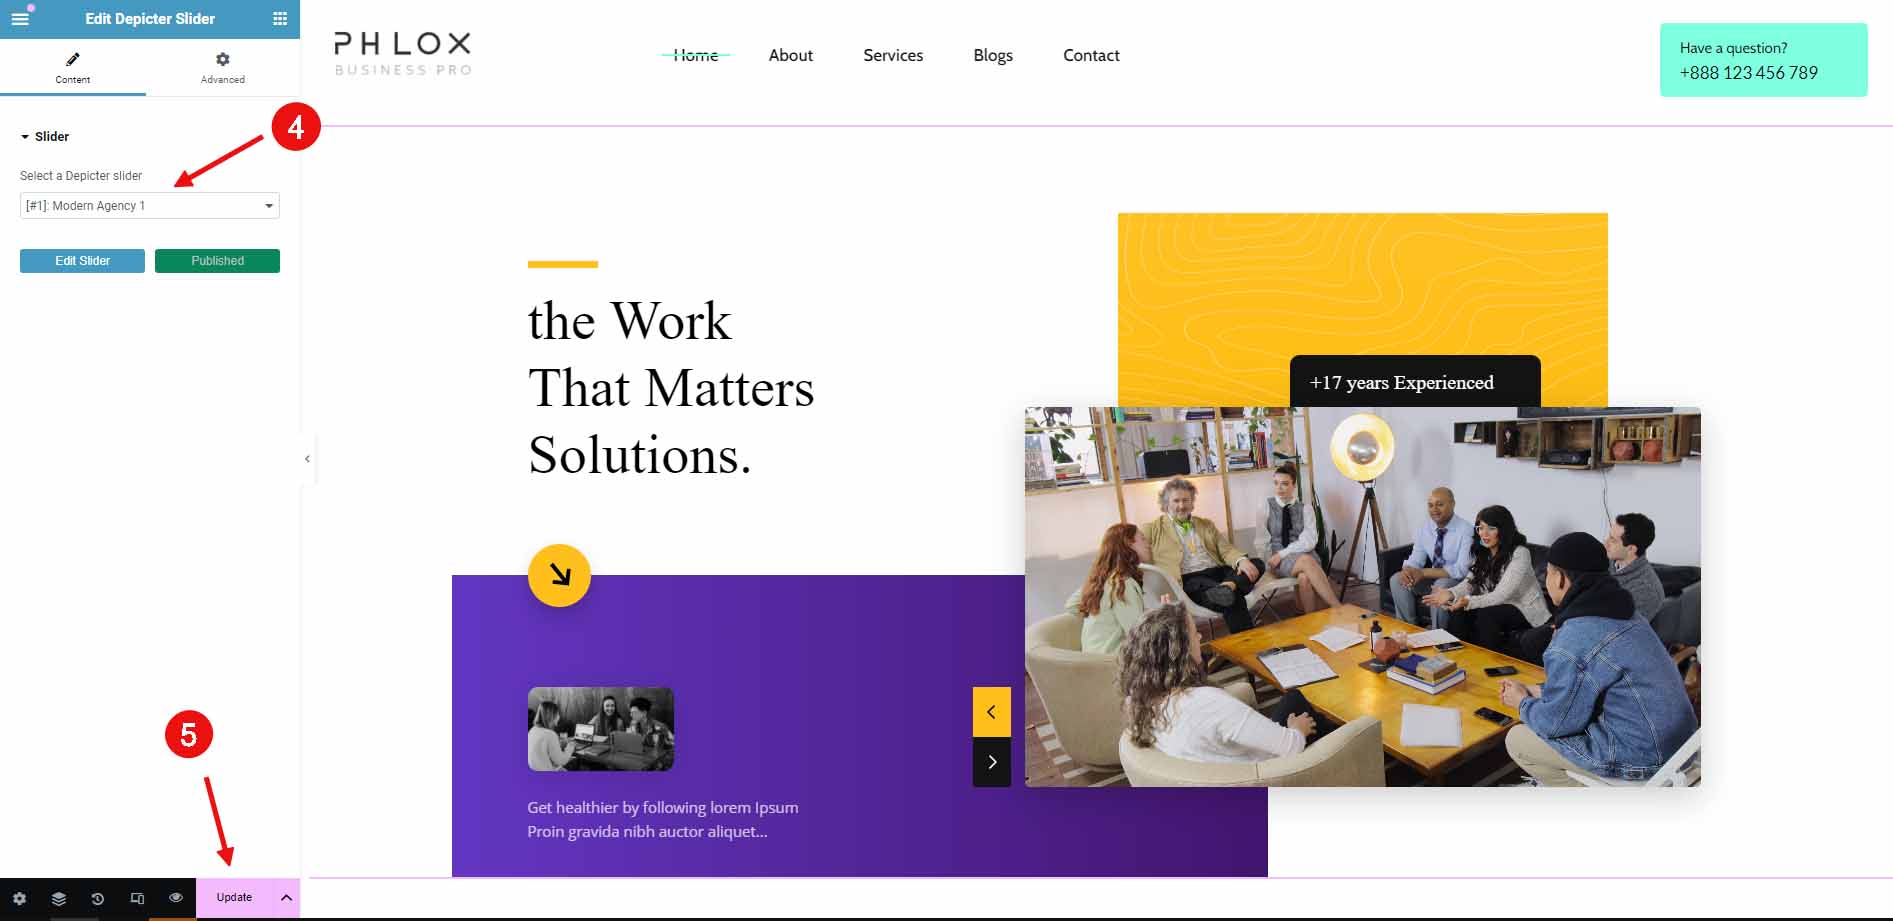
The result will look like this on the front end:

Leave Comment