In this post, we’ve compiled Best WordPress Black Friday Deals (2024). Whether you’re a seasoned WordPress user or just starting out, these deals will help you take your website to the next level. So, get ready to dive into the world of WordPress and discover the best offers of the year!
Featured Deals
Depicter
Featured
Best WordPress Popup, Slider, Notification Bar, Carousel, and Hero section Builder. The best lead generation tool for marketing agencies. Simply create a popup or notification bar, with coupons, counter, forms, and a lot more to increase sales or grow your email list. The best slider, carousel, and hero section for web agencies to create engaging content with ease. With 500+ pre-built templates for almost any purpose.
Built by Artbees, WPDone is a white-label custom development service for WordPress and WooCommerce offering a variety of solutions to meet specific client needs in areas such as Custom WP & Woo Development, Converting Design to WP, Theme Customization, Security & Performance Optimization, and Custom Design. Short Desc: Elevate your WP and WooCommerce projects with expert development, customization and optimization services.
Phlox is the best Elementor multipurpose theme with over 100,000 active installations. It has more than 250+ Complete Elementor demos that can be imported in 3 clicks and edited on Elementor. Simply find any templates you like, import it, replace the images and text with yours and it is done. If you are looking for a professional design Phlox would be a perfect option with 45000+ sales on ThemeForest!
This Black Friday & Cyber Monday, WP SMS is giving you 30% off to supercharge your engagement with timely SMS notifications and powerful marketing messages. Don't miss this chance to connect more effectively for less!
SellKit addresses a range of checkout challenges, such as low order values, slow conversions, and limited engagement. Supercharge your sales with customized checkouts, order bumps, progressive discounts, and intelligent coupons through SellKit. Short desc: Boost WooCommerce conversions with express checkout, sales funnels, order bumps, automated discounts and more.
This Black Friday & Cyber Monday, WP SMS is giving you 30% off to supercharge your engagement with timely SMS notifications and powerful marketing messages. Don't miss this chance to connect more effectively for less!
Best WordPress Popup, Slider, Notification Bar, Carousel, and Hero section Builder. The best lead generation tool for marketing agencies. Simply create a popup or notification bar, with coupons, counter, forms, and a lot more to increase sales or grow your email list. The best slider, carousel, and hero section for web agencies to create engaging content with ease. With 500+ pre-built templates for almost any purpose.
The biggest discount of the year! Take this opportunity to get some amazing deals on DJ-Extensions products – WordPress themes, Joomla templates and powerful extensions/plugins. Get 50% off all Joomla and WordPress products storewide, including themes, plugins, templates, extensions, and the Unlimited Plan.
Visualize dynamic data in smart tables using Ninja Tables. You can create all types of tables with the Advanced mode, Drag and Drop mode, or using the free table templates.
This plugin has multiple integrations - WooCommerce, Google Sheets, Fluent Forms, import-export function, custom filter, and many more.
Have fun creating tables with a simple interface, useful integrations, and a huge set of features.
Real Cookie Banner is a cookie and consent management plugin. Obtain consent to load services and set cookies for your visitors in accordance with the GDPR and ePrivacy Directive. In addition, content blockers help you to be compliant even if your theme, plugin or content loads styles, scripts or iframes that would transfer personal data. Start now with our guided-configuration and avoid legal risks!
Post SMTP is the most powerful and easy-to-use SMTP plugin for WordPress to enhance WordPress email deliverability. Supports all popular SMTP service providers, with features like email logs, failure notifications, a dedicated mobile app, and much more.
Coupon code: BFCM24
Save 24%
Validity: November 20 to December 06
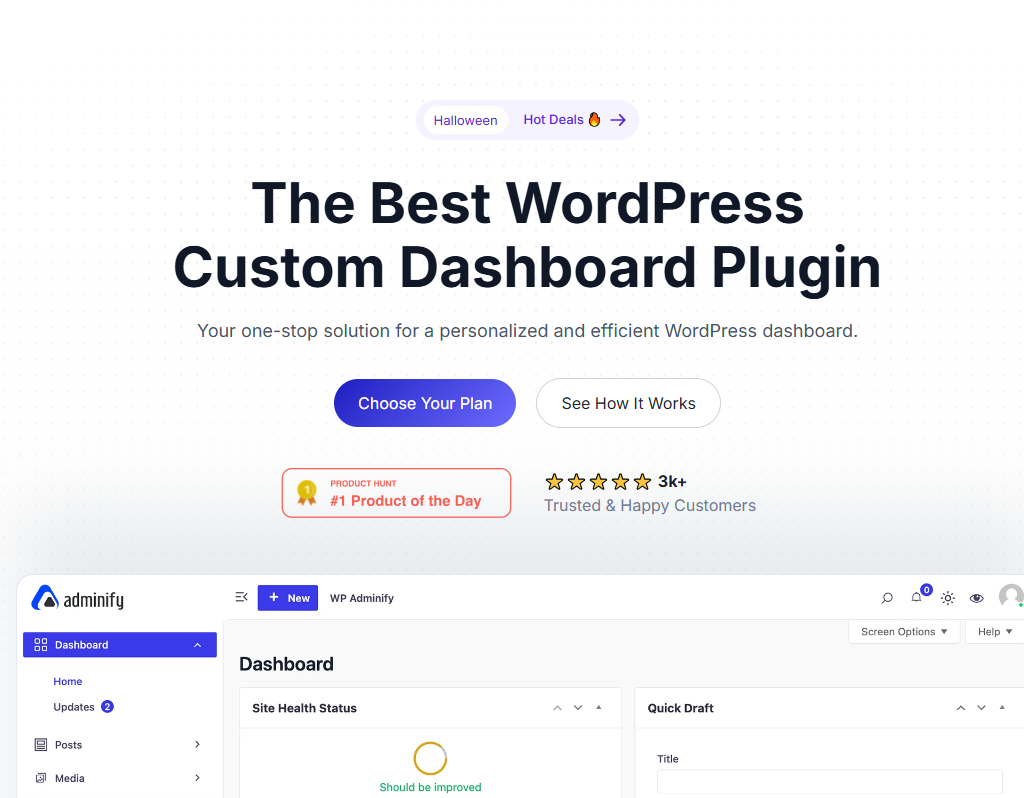
WP Adminify
Introducing WP Adminify, the ultimate WordPress dashboard customization plugin that offers a wide range of powerful features within an intuitive and user-friendly platform. With extensive dashboard customization, admin menu editing, dark mode, white label branding, and productivity tools, WP Adminify provides complete control over your dashboard, allowing you to skyrocket your productivity.
Nexter lets you launch stunning WordPress websites in minutes! With over 90+ Gutenberg Blocks, 22+ WordPress Extensions, and an ultra-light jQuery FREE theme. Creating your WordPress website has never been easier. Fast, simple, and versatile, It helps you build a strong, secure, and high-performance site with 1000+ WordPress Templates and a powerful theme builder.
LoginPress is the leading login page customizer plugin for WordPress. With LoginPress, you can easily customize your WordPress login pages, adding features like social login, enhanced security, and custom designs to match your brand. Recent updates let you set custom password error messages, enforce password resets, and even add YouTube backgrounds on the free version.
One of the most popular Elementor addons with over 150K users, this powerful tool eliminates the need for multiple plugins. It offers 1000+ Ready-to-Use templates and 120+ Elementor widgets, including Mega Menu Builder, WooCommerce Builder, Horizontal Scroll, and Popup Builder.
WowOptin is a comprehensive lead-generation tool designed to maximize conversions through customizable, no-code optins. With features like exit-intent pop-ups, smart triggers, and advanced audience targeting, it lets you engage with customers precisely when they're most likely to convert.
Eventin is a powerful Event Management Plugin for WordPress that simplifies Organizing Events. It features a Multivendor Event Marketplace with Multi-tiered Ticketing, RSVP Calendar, Recurring Events, and integrations with Google Meet, PayPal, and Zapier.
WholesaleX is here to make your regular WooCommerce store into a B2B (or B2B+B2C hybrid) powerhouse. It has features like user role creation, registration form builder, dynamic rules for pricing and discount management, private store, request a quote, subaccounts management, and more. The feature that sets WholesaleX apart is the dynamic rules system.
BuddyBoss Theme and Platform Pro is available at up to 70% off on both monthly and yearly plans for the first year. With this powerful tool, you can create an engaging online community featuring customizable branding, user profiles, groups, private messaging, forums, and seamless WordPress integration.
The WPB Accordion Menu is the best lightweight accordion menu plugin for user-friendly navigation. It will let you create sidebars, category lists, and off-canvas menus within seconds. This plugin gives a seamless experience that transforms your site’s usability.
BookingPress is the ultimate WordPress booking plugin, making the appointment booking process effortless. This Black Friday 2024, BookingPress is offering up to a 62% discount on its annual plans and introducing lifetime deals at very affordable rates. Additionally, BookingPress includes 45+ free add-ons with your purchase. Don't waste any time; grab this deal now!
Elevate pricing presentations with ARPrice - the advanced WordPress Pricing Table Plugin. User-friendly table builder, team showcase feature, ready-made templates, brand integration, and more. Boost conversions with 30% off on ARPrice During this BFCM Sale 2024!
Visualize dynamic data in smart tables using Ninja Tables. You can create all types of tables with the Advanced mode, Drag and Drop mode, or using the free table templates.
This plugin has multiple integrations - WooCommerce, Google Sheets, Fluent Forms, import-export function, custom filter, and many more.
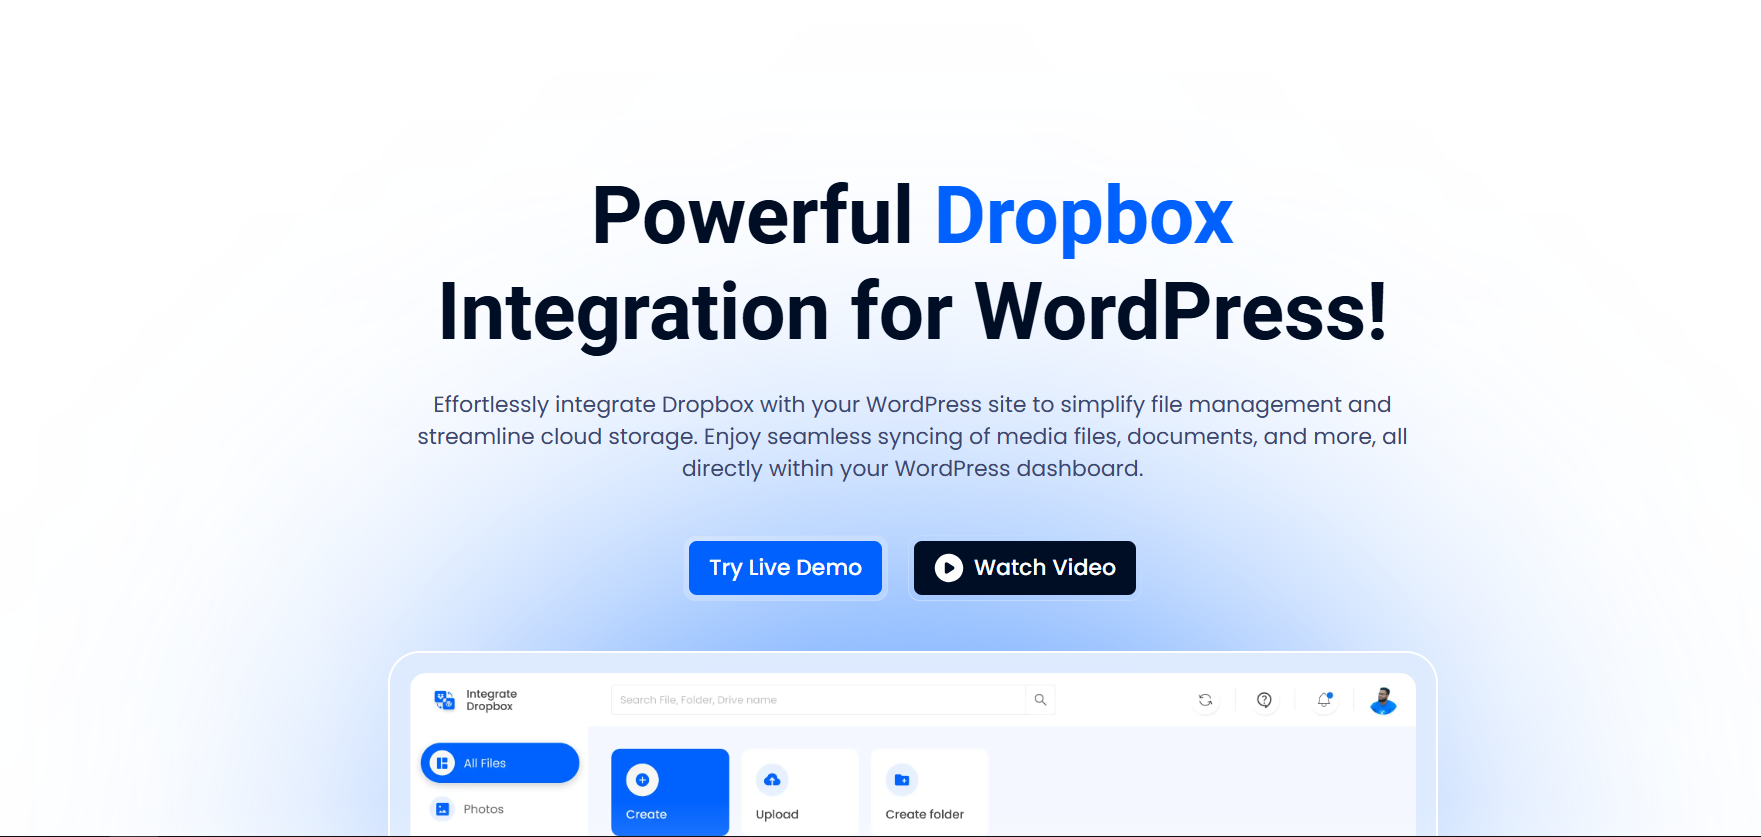
Integrate Dropbox - Manage, Browse, Slider, Media Player, Embed, Download, and View Your Dropbox Files Into Your WordPress Site.
The Integrate Dropbox plugin allows you to seamlessly connect your WordPress site with your Dropbox account. It enables you to manage and sync files between your site and Dropbox, making file storage and sharing more efficient.
Effortlessly connect Google Drive with WordPress using the Integrate Google Drive plugin. Browse, embed, upload, download, and share your files—all with zero coding. Showcase documents, images, and media on your site in just a few clicks. Save time and get your files in front of your audience fast. Get the must-have plugin now!
Wpmet is a prominent brand that has developed iconic WordPress products, including ElementsKit, MetForm, ShopEngine, and WP Social. These versatile products help millions of WordPress users extend the functionalities of their websites. Indulge in a spectacular 80% BFCM discount on all premium plugins from Wpmet. Seize the finest deal of the year!
Customize WooCommerce email templates with extra custom blocks. It allows you to add multiple languages, premade patterns, hooks, and custom fields to your outgoing transactional emails.
aBlocks is a powerful and intuitive Gutenberg block builder plugin for WordPress that transforms your website into a visually stunning and highly customizable platform. With aBlocks, you can effortlessly create beautiful layouts using customizable blocks, enabling you to enhance your content without any coding skills.
No matter the size of your business, Payment Plans WC is designed to elevate your WooCommerce store with cutting-edge features and functionality. Grab this exclusive BFCM deal Now!
Coupon code: BFCM24
Save 24%
Validity: November 20 to December 06
User Registration
Revolutionize your WordPress membership site with User Registration Pro this Black Friday! Score an incredible 35% off on the ultimate user registration plugin that turns visitors into engaged members. Create stunning custom registration forms with zero coding - just drag and drop! From modern frontend profiles to bulletproof spam protection, this all-in-one solution has everything you need.
PowerPack offers 90+ unique modules and 350+ ready-to-use templates that save time and make building websites with Beaver Builder easy. From simple headings to advanced login forms to header-footer, these modules help you create website layouts beyond the basics. Plus, with WooPack’s advanced WooCommerce modules, you can build beautiful, user-friendly eCommerce stores quickly and effortlessly.
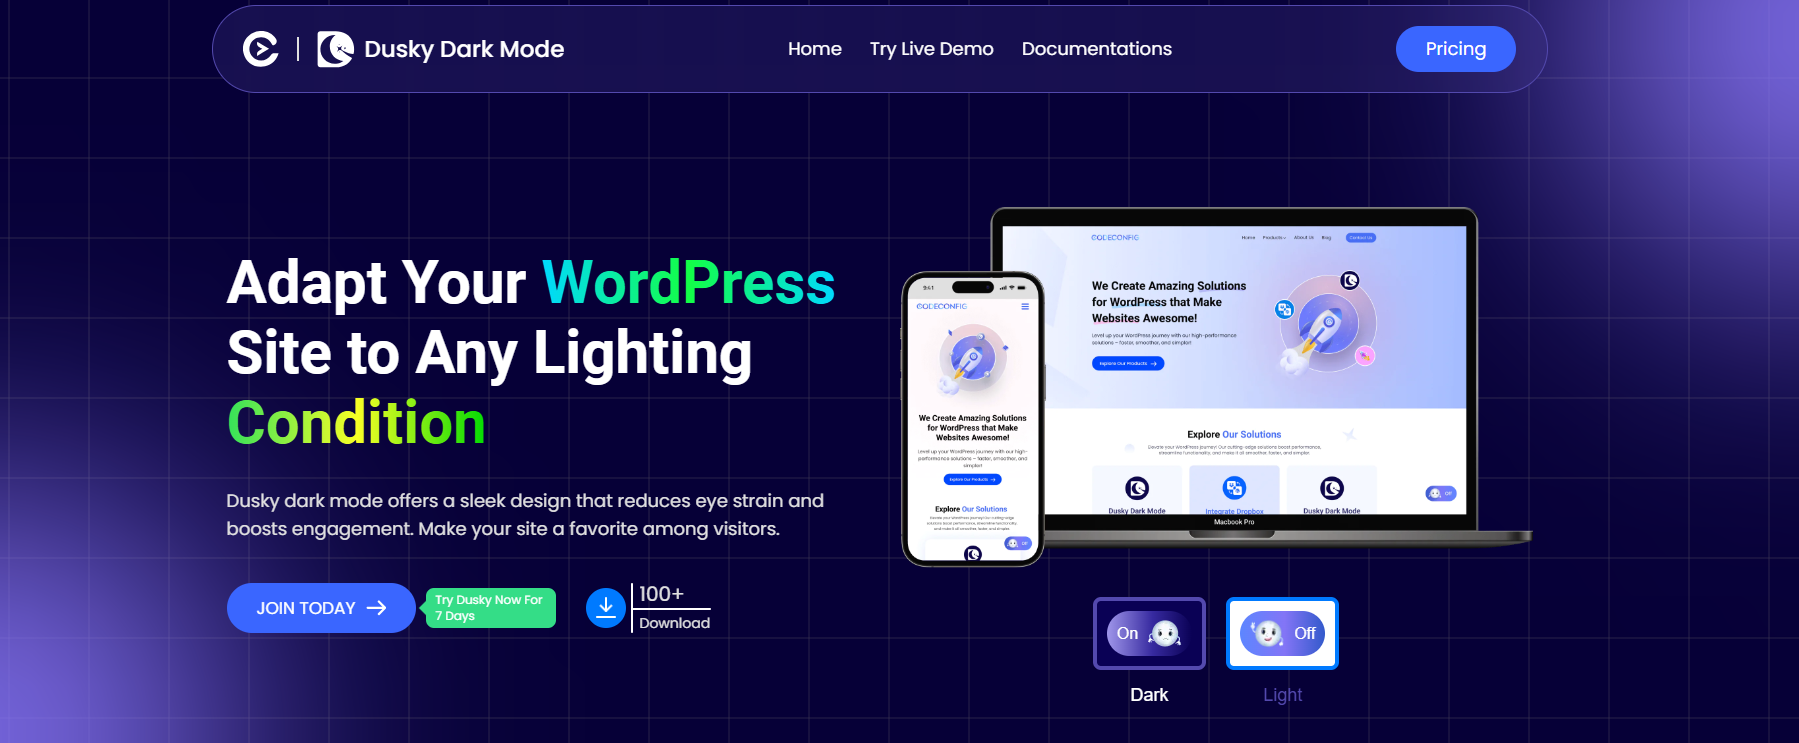
Turning on the dark mode has become the new trend in the current digital world. We are going to introduce you to the best dark mode plugin called Darklup, especially for WordPress lovers. Just grab the Darklup & enjoy all the special features of it.
Unlock the power of giving with the Free Gifts for WooCommerce plugin! Delight customers by offering free products during their shopping experience. Set up deals like "Buy One, Get One" or "Buy X, Get Y" and customize offers with flexible rules based on product choices, cart value, or sales periods to boost loyalty!
Track your store's performance with the WooCommerce Report Plugin, offering over 50 detailed reports through clear graphs and stats. Covering orders, customers, stock, and taxes, it provides easy access to sales summaries, product reviews, coupons, and more. Customize and filter reports to focus on what matters most!
Real Media Library helps you with media management. Organize thousands of uploaded files into folders, collections and galleries. A real file manager that allows you to manage large amounts of files such as pictures, videos or documents in WordPress. Media library folders for everyone!
NitroPack is the leading all-in-one performance optimization service for WordPress, helping 180K+ site owners achieve lightning-fast load times, pass Core Web Vitals, and boost their bottom line. This Black Friday only, boost your site speed, Core Web Vitals, and user experience on desktop and mobile for a fraction of our regular prices. Get Up to 35% Off All NitroPack Plans.
Enhance your Elementor experience with over 60 powerful widgets and extensions. Elevate your website with dynamic elements such as animated headlines, progress bars, flip boxes, and image hover effects. Unleash your creativity with unique layouts using our Header & Footer builder, custom CSS, floating effects, and display conditions.
The Best WordPress Dark Mode Plugin For WordPress. Dusky Dark Mode is designed to be compatible with most WordPress themes. You can easily check its compatibility by installing the plugin and testing it on your website. Dusky Dark Mode is fully compatible with popular page builders like Gutenberg and Elementor.
WP Travel Pro offers advanced features that make managing and customizing your travel website simple. Use an improved itinerary builder to create customized tour packages, accept safe payments via well-known gateways, and take advantage of seamless integration with the best travel themes and SEO plugins.
WowRevenue is a WooCommerce sales booster plugin designed to maximize your store’s average order value. Using its campaign builder, you can set up, manage, and track multiple discount campaigns such as buy X get Y, product mix and match, frequently bought together, and more.
Essential Addons for Elementor - The best elements library for Elementor with over 2 million+ active users, offering 100+ advanced elements to take your Elementor website-building experience to the next level.
All-in-One Bundle is designed for those looking for a comprehensive BuddyBoss experience, combining the Theme, Platform, and both App versions for seamless web and mobile functionality. This complete bundle is available for $3999, saving you $1000.
WP Client Portal is an all-in-one client and project management tool for WordPress, enabling you to manage dedicated client portals, secure file sharing, and project collaboration—all from your WordPress dashboard. With WP Client Portal, businesses can provide a professional, client-focused experience, utilizing advanced privacy controls and customizable access.
Make your WooCommerce store more customer-friendly with the WPB Request a Quote for WooCommerce and Elementor plugin. Perfect for stores offering customizable or bulk products, simplifying the inquiry process, and easy pricing requests. Streamline custom pricing management and boost sales in your store!
Get a complete membership website creation and management package with ARMember at a 40% discount. Manage levels, restrict content, integrate payments, and enable marketing, all in one place. Grab the deal of a lifetime and set up your robust membership business with 54+ inbuilt add-ons and 40% off on a premium add-on bundle today!
Create amazing image sequence animations with ease using our powerful WordPress plugin. Our freemium tool lets you add professional visual effects to any page or post, making it perfect for dynamic home pages and landing pages. With Scrollsequence, you can take your website to the next level and keep your visitors engaged.
The Radio Player plugin lets you stream live audio on your WordPress site easily. It supports live radio, podcasts, and custom audio streams and is compatible with MP3, Shoutcast, IceCast, Radionomy, and more. With a fully customizable player and playlist management, it's the perfect tool to elevate your site's audio experience.
ElementsKit is actively used by 1+ million users for its friendly UI and comprehensive features. Its 87+ freemium and premium widgets, 14+ modules, 98+ ready pages, and 791+ sections, make ElementsKit a reliable and full-fledged Elementor addon.
Luckily, this BFCM you can save up to 40% on all its premium packages. So, grab this discount before it’s too late.
myCred is a flexible points management and gamification plugin for WordPress, enabling rewards, leaderboards, and badges to boost user engagement and loyalty
Coupon code: BFCM24
Save 24%
Validity: November 20 to December 06
GS Team Members
The WordPress Team Showcase plugin is your complete solution for displaying team members with over 50 customizable templates, including Grid, Circle, Horizontal, Table, Slider, Popup, and more. This SEO-friendly plugin features easy re-ordering, a Shortcode Generator with live preview, and fully responsive layouts.
Unleash the future of online education with Masteriyo LMS - now at an incredible 60% off this Black Friday! Create, manage, and sell courses lightning-fast with WordPress's most intuitive learning management system. Built for speed and simplicity, Masteriyo helps you launch your online course empire in minutes, not hours.
Managing customer support is an important thing for every business. Especially when you are using WordPress because no all-in-one support solution exists. Here we come to solve this problem. Introducing Hive Support - The First Self-Hosted Help Desk, Live Chat & AI Chat Bot Plugin for WordPress.
Bit Integrations is a no-code WordPress plugin that automates your website with 230+ platforms, making it the largest connector plugin for WordPress. With just three simple steps, users can quickly create automation workflows in under two minutes.
Simplify the ordering process with the WooCommerce Product Table Plugin! Display products in a clean, searchable, and responsive table for quick ordering and easy navigation. Ideal for restaurants, music shops, wholesale stores, or catalogs.
Managing your WordPress sites shouldn’t be complicated. With MainWP, it's easier than ever.
Simplify WordPress site management with MainWP. This Black Friday, save $50 on the Yearly Pro Plan and lock in the discount every year. Stay subscribed to access all premium extensions—current and future—that save you hours. Don't miss out; join MainWP today!
Maximize your control over the WordPress admin bar with the Admin Bar Editor. Customize the backend and frontend experiences by hiding, renaming, or reordering menu items based on user types. Add personalized links and icons, customize the appearance, and build hierarchical menus with up to three levels.
Beaver Builder is a leading WordPress page builder that helps you create websites and landing pages in minutes. Trusted by over 1,000,000 sites, it’s a reliable tool for your business. Experience the power of drag-and-drop website building and craft stunning, professional-grade websites without the need to know how to code.
Gutenify helps users create fully customizable websites without coding. It offers a range of pre-built blocks, themes, and samples for simple site design and launch. Important features include a customizable carousel, slider, FAQ, testimonial, service listing, and WooCommerce element blocks.
Max Addons is a powerful addon for Bricks Builder, packed with 50+ creative elements to help you build any type of website easily. From personal blogs to professional business sites, you’ll find the perfect elements to match your style and needs. Every element is created with a focus on ease of use, flexibility, and creativity.
WPCafe is a versatile Restaurant Management Plugin for WordPress that enables Online Food Ordering, Reservations, and Customizable Menus. It features Pickup/Delivery options, QR Code Ordering, and easy WooCommerce integration.
Paymattic is an all-in-one plugin for WordPress payments and donations. With pre-built templates, it's easy to create forms and process transactions in seconds.
Paymattic offers you 13 payment methods covering 150+ currencies. With subscription payments, customer management, and eLearning integrations, Paymattic is a must-have plugin for your business.
The new BuddyBoss App Lite, designed for courses and quizzes, is perfect for educators and mobile learning. Priced at $99/month or $999/year (2 months free), it’s also available with DFY Service for $1999. For a complete solution, the BuddyBoss App Full Version is now 20% off with free publishing, offering engagement tools, notifications, and in-app purchases.
Get up to 35% OFF in any Modular premium plan and start managing all your WordPress websites from one place. Saving time and improving your web maintenance services with bulk updates and plugin and theme management, cloud backups, vulnerability checks, uptime monitor and client reports.
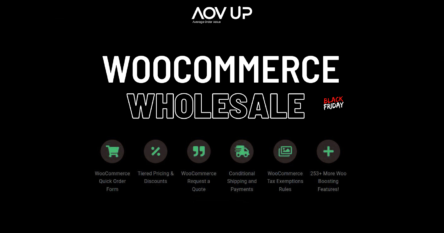
WooCommerce Wholesale B2B Suite allows you to create a robust wholesale system on your WooCommerce store to sell to B2B or B2C and B2B. Stand-out features include wholesale registration, tax exemptions, tiered pricing, wholesale order form, sales agent management, and more.
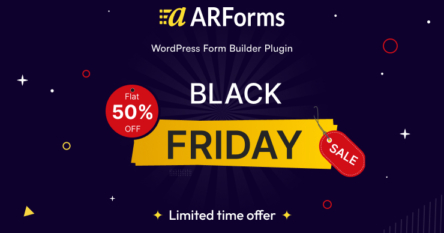
Generate advanced, multi-step forms with ARForms - WordPress form builder plugin. Use the built-in form templates with the visual builder, conditional logic, math logic, payments, email integration, invisible spam security, and a lot more. Create pop-up forms as well with the same Plugin. The 17+ add-ons are available with ARForms at 50% off. Grab the deal!
The WP Ultimate CSV or XML Import & Export plugin is a powerful and versatile data import-export tool, designed to streamline your WordPress website development process., Whether you're looking to migrate content from one WordPress site to another, update product listings, or manage large sets of data efficiently, WP Ultimate CSV or XML Import & Export is the solution you need.
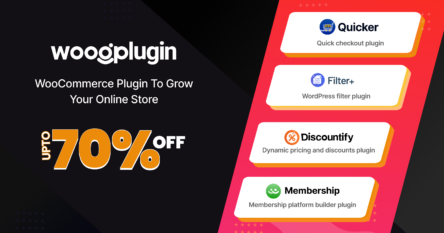
Supercharge your WordPress site with WoooPlugin’s ultimate bundle! Get blazing-fast speeds with Quicker, filter products seamlessly with Filter Plus, boost sales through Discountify’s automated discounts, and secure exclusive content with Ultimate Membership. These plugins don’t just add features—they transform your site into a high-performing, customer-driven powerhouse.
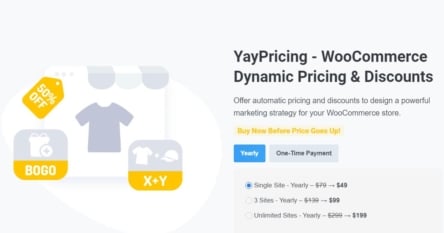
A WooCommerce Dynamic Pricing & Discounts offers a list of pricing rules to create flexible pricing strategies and promotional campaigns. YayPricing allows users to set up various discount rules, including percentage-based discounts, bulk discounts, buy-one-get-one (BOGO) offers, tiered pricing, and more.
Academy LMS is a lightning-fast and easy-to-use LMS plugin for WordPress. With this next-gen LMS plugin, any WordPress website can seamlessly transform into a comprehensive eLearning platform. You can effortlessly create unlimited courses and quizzes, access in-depth analytics, and offer premium courses.
No matter the size of your business, License Manager for WooCommerce is designed to elevate your WooCommerce store with cutting-edge features and functionality. Grab this exclusive BFCM deal Now!
Coupon code: BFCM24
Save 24%
Validity: November 20 to December 06
Everest Forms
Transform your website's forms from boring to brilliant with Everest Forms Pro this Black Friday! For a limited time, grab the most powerful WordPress form builder at an incredible 50% discount. Say goodbye to complex coding and hello to effortless form creation with intuitive drag-and-drop builder.
With PowerPack Elementor Addons, you can elevate your Elementor websites using 70+ innovative, advanced, and SEO-friendly widgets. Choose from a wide range of widgets and over 150 beautiful pre-built templates to match your design vision and create stunning, high-performing websites with ease.
Better purchasing experience always matters for the growth of your WooCommerce sales. Purchasing experience means how your customers feel while buying products from your online shop. Choose the WP Guidant to make your store's shopping journey more interesting and user-friendly.
Bit Form is a SUPER fast, Advanced & lightweight form builder for WordPress. It loads only 15KB JS & CSS for the normal contact form.
Users can easily create Multi Step Form, Conversational Form, Order Form, Land Page Form, Partial Form Submission & more.
Phlox is the best Elementor multipurpose theme with over 100,000 active installations. It has more than 250 Complete Elementor demos that can be imported in 3 clicks and edited on Elementor. Simply find any templates you like, import it, replace the images and text with yours and it is done. If you are looking for a professional design Phlox would be a perfect option with 45000+ sales on ThemeForest!
Responsive theme is a fast, lightweight, and fully customizable theme, which includes 250+ Responsive Starter Templates to easily build any website of your choice. It’s compatible with all the leading WordPress plugins like Elementor, WooCommerce, form plugins, and many more. Use coupon code BFCM40 and grab a solid 40% discount on all plans across the Responsive theme store.
Black Friday & Cyber Monday Special! Get 50% OFF on the All Themes Bundle from SKT Themes. Enjoy 390+ premium WordPress themes, complete with 1 year of support, sample content, PSD design files, and much more. The sale price is just $69 (normally $139), and no coupon code is required.
HashThemes is a renowned software company that develops free/premium WordPress themes and plugins. They are known to create WordPress themes with slick design and amazing features to allow users to build the website of their imagination. They follow the latest web development trends and all their WordPress themes have modern and intuitive UI.
Halloween is just around the corner, and the WordPress community is offering some spooktacular discounts on their top products. Whether you’re looking for a new theme, plugin, hosting plan, or page builder, you’ll find incredible deals in this roundup. Get ready to save big and prepare for the scariest night of the year with the best WordPress Halloween deals 2024.
Top WordPress Plugins Deals
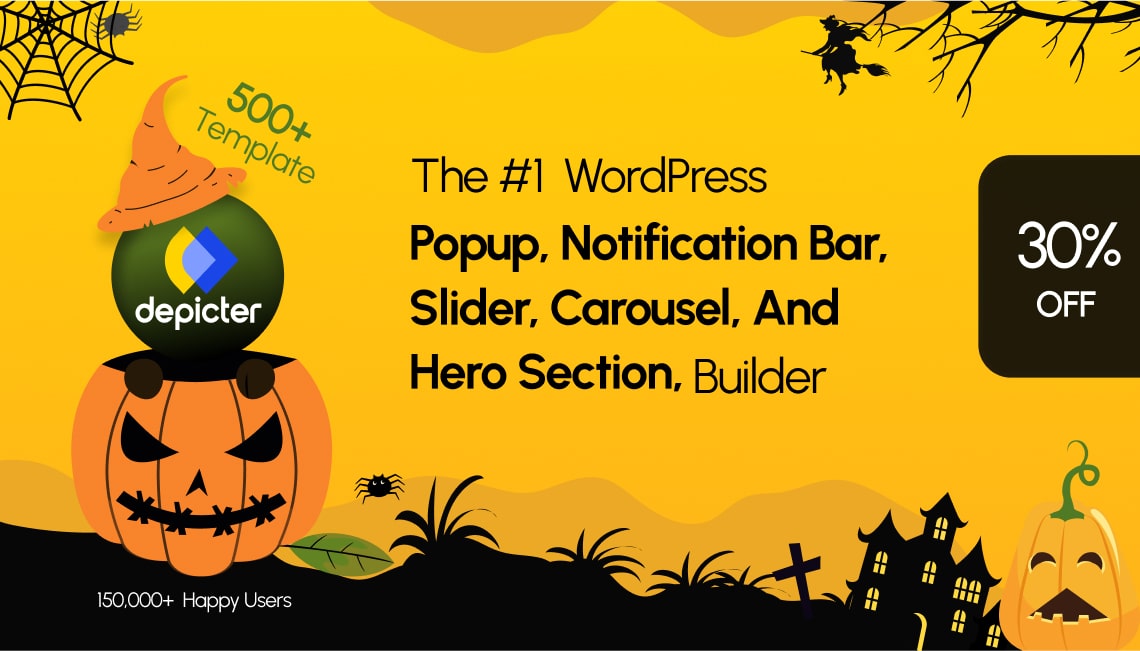
Depicter
The #1 Popup, Notification bar, Slider, Carousel, and Hero section builder in WordPress by Averta (150,000 happy users can’t be wrong!) Depicter is a powerful WordPress plugin designed to simplify the creation of visually appealing popups, notification bars, sliders, carousels, and hero sections. With over 150,000 active installations, Depicter’s user-friendly drag-and-drop interface and extensive template library empower users of all skill levels to design stunning visuals without any coding knowledge. Experience lightning-fast performance, video support, mobile responsiveness, SEO optimization, and seamless integration with your WordPress website. One of the Best WordPress Halloween Deals (2024).
Coupon code: HALLOWEEN24 Validity: October 23 to October 31 Discount: 30% on all Pro plans
DJ-Extensions.com offers WordPress and Joomla development solutions, including extensions, templates, themes, and services. DJ-Extensions is known for their high-quality products, technical support, and regular updates.
Coupon code: SPOOKY24 Validity: 28th October to 4th November Discount: 40% Off
At HashThemes, you can find a variety of WordPress themes and plugins, some for free and some premium. They make sure to stay updated with the latest web development trends to provide you with stylish and user-friendly designs. This makes it effortless for you to create the website you’ve been imagining. Some of the popular WordPress themes created by HashThemes are: Total, Square Plus, and Viral Pro. This Halloween, they are offering a discount of 40% on all their premium WordPress themes.
Coupon code: Halloween2024 Validity: 25th October, 2024 to 3th November, 2024 Discount: 40% Off
Fluent Support is your go-to solution for a seamless helpdesk experience. Manage unlimited agents with ease, customize notifications, and integrate with AI models—all from within your WordPress dashboard. You can simplify your support flow with shared inboxes, internal notes, automation, and saved replies. Enjoy affordability and scalability where customer support is made simple.
Coupon code: Auto-applied Validity: October 17 to November 04 Discount: Flat 40% Off
WowRevenue is a WooCommerce sales booster plugin designed to maximize your store’s average order value. Using its campaign builder, you can set up, manage, and track multiple discount campaigns such as buy X get Y, product mix and match, frequently bought together, and more.
In addition to creating attractive product bundles and offering customized discounts for individual products, the plugin also increases your conversion rate with cool features like countdown timers and animated add-to-cart.
Coupon code: Auto-applied Validity: October 21 to November 02 Discount: 65% Off
The Ultimate Addons for Elementor plugin is a must-have for any website using the Elementor page builder. It comes with 40+ widgets and extensions, 100+ creative and customizable website templates, and 200+ section blocks to speed up your workflow.
Ultimate Addons is a popular plugin currently used by over 646,396 web professionals to enhance their web design capabilities with Elementor.
Coupon code: Auto-applied Validity: 28 Oct to 1 Nov 2024 Discount: Up to 40%
Unlock a 20% discount on the BuddyX theme this Halloween! BuddyX is the perfect WordPress theme to build your online community with ease. Use the coupon code SPOOKYTREATS at checkout to claim your discount. Whether you’re launching a social network, forum, or membership site, BuddyX has all the features you need. Don’t miss out on this exclusive offer—start creating your community today! The sale ends soon!
Coupon code: Auto-applied Validity: 24th October 2024 and ends on 2nd November 2024 Discount: 20% Off
SureTriggers is the #1 automation platform that helps online businesses and web agencies save time, boost productivity and increase revenue. Connect over 850 apps and WordPress plugins like WooCommerce and Elementor, to automate complex processes and focus on growing your business. Best of all, SureTriggers is 90% cheaper than Zapier, delivering unbeatable value!
Coupon code: SPOOKY20 Validity: 22 Oct to 3 Nov 2024 Discount: 20% OFF on Annual plans
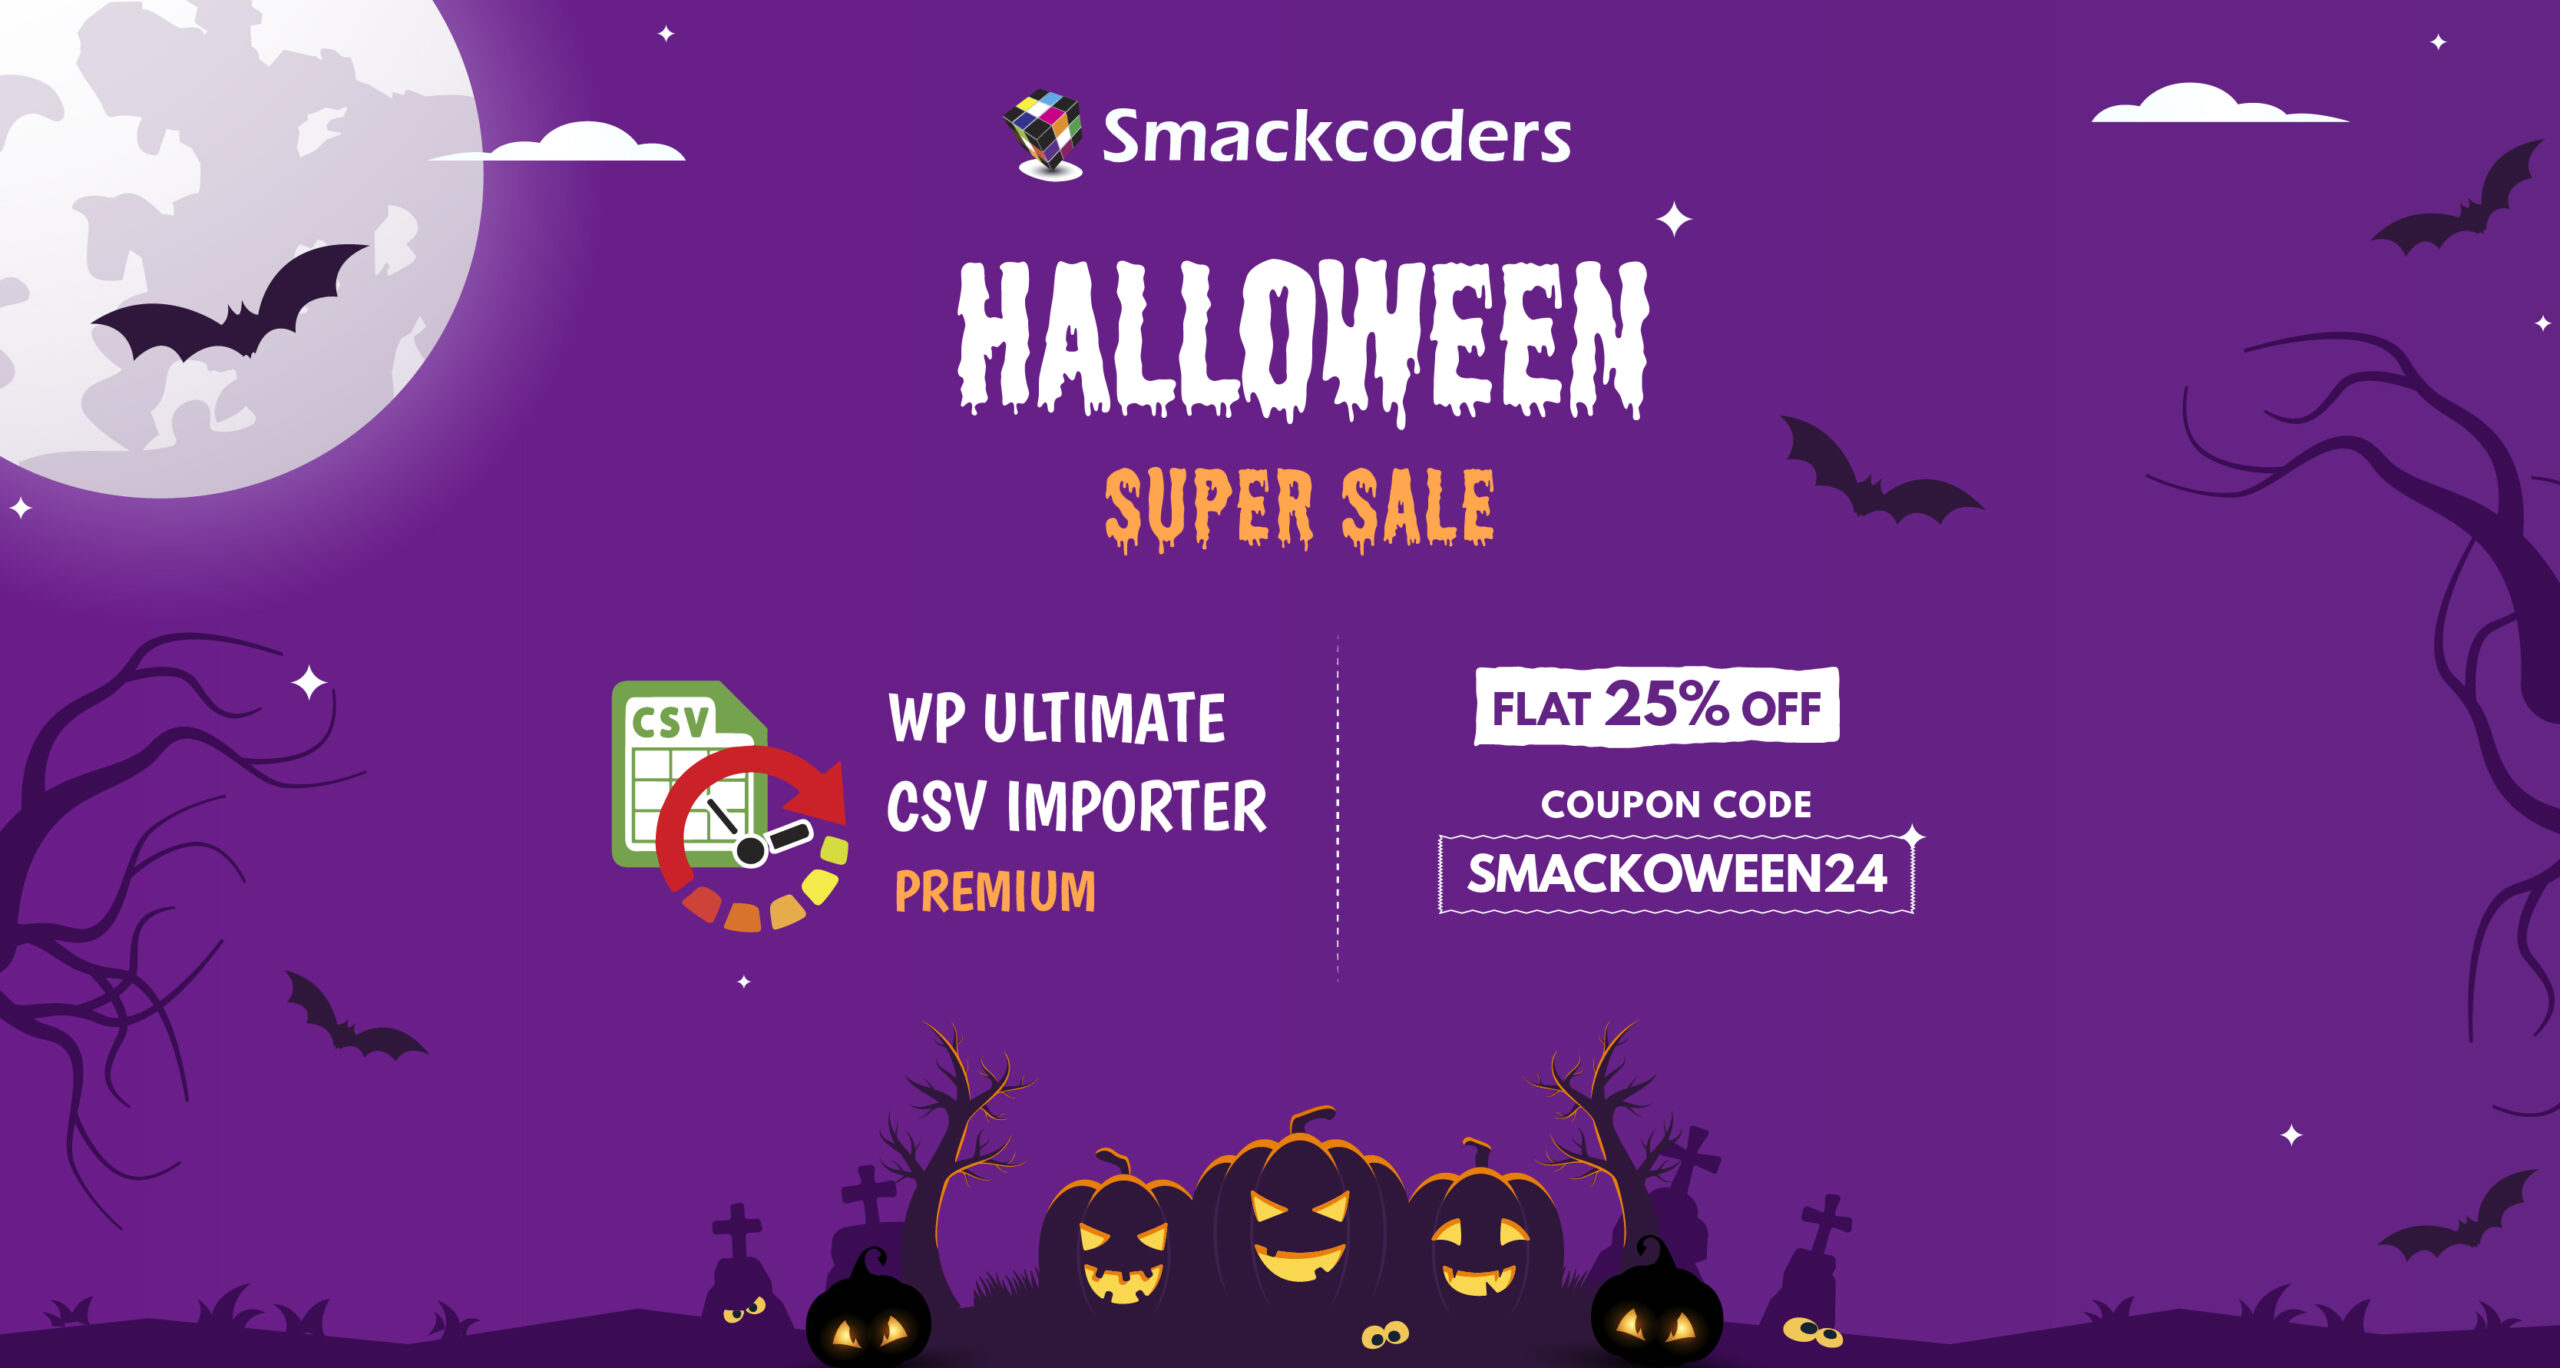
The WP Ultimate CSV or XML Import & Export plugin is a powerful and versatile data import-export tool, designed to streamline your WordPress website development process., Whether you’re looking to migrate content from one WordPress site to another, update product listings, or manage large sets of data efficiently, WP Ultimate CSV or XML Import & Export is the solution you need
Coupon code: smackoween24 Validity: October 22, 2024 to November 8, 2024 Discount: 25% Off
Looking to organize your WordPress site with a sleek, collapsible menu? WPB Accordion Menu is a lightweight plugin that adds user-friendly navigation to your site. Perfect for sidebars, category lists, and more. This plugin helps create a sleek menu that enhances user experience. Take advantage of this spooky Halloween deal and transform your site’s navigation today!
Coupon code: HALLOWEEN35 Validity: 23th October, 2024 to 7th November, 2024 Discount: 35% Off
Make your WooCommerce store even more user-friendly by adding a “Request a Quote” feature with WPB Request a Quote for WooCommerce and Elementor. This quote request a quote plugin is perfect for stores selling customizable or bulk products. It streamlines the inquiry process and gives customers an easy way to request pricing. It’s never been easier to manage custom pricing on your site!
Coupon code: HALLOWEEN35 Validity: 23th October, 2024 to 7th November, 2024 Discount: 35% Off
Supercharge your WordPress websites with blazing-fast and ultra-secure hosting powered by LiteSpeed Enterprise, NVMe (faster SSD), and the hassle-free Easy WordPress Manager.
This Halloween, HostWP.io is offering a spooktacular deal!
Get a frightful 30% discount on all yearly AND monthly WordPress hosting plans for 12 months. But that’s not all! Enjoy 30% OFF on new domain registrations as well.
Coupon code: SCARY30 Validity: 16th October, 2024 to 4th November, 2024 Discount: 30% OFF
Integrate Dropbox is a powerful plugin that seamlessly connects WordPress with Dropbox, allowing users to manage their media files efficiently and save hosting space
Coupon code: HALLOWEEN40 Validity: 24th October, 2024 to 3rd November, 2024 Discount: 40% OFF
It is the ultimate WordPress dashboard customization plugin that combines multiple powerful features inside one intuitive and easy-to-use platform. From extensive dashboard customization and admin menu editing to dark mode, white label branding, and productivity tools, WP Adminify gives you complete control over your WordPress dashboard. Whether you’re a freelancer, agency, or WordPress power user, with WP Adminify, you can work faster, cleaner, and create a more efficient and personalized WordPress experience.
Coupon code: Auto-applied Validity: 18th October, 2024 to 4rd November, 2024 Discount: Up to 55%OFF
Are you looking to create beautiful websites without spending a lot of money? This Halloween, SKT Themes has a fantastic deal for you! Get 50% off our All Themes Bundle Package—a collection of 390+ premium WordPress themes. Access a wide range of themes for any niche, including business, eCommerce, blogs, and more. Whether you want a sleek corporate site or a dynamic online store, we’ve got you covered.
Coupon code: Auto-applied Validity: 7th October, 2024 to 31st December, 2024 Discount: 50% OFF
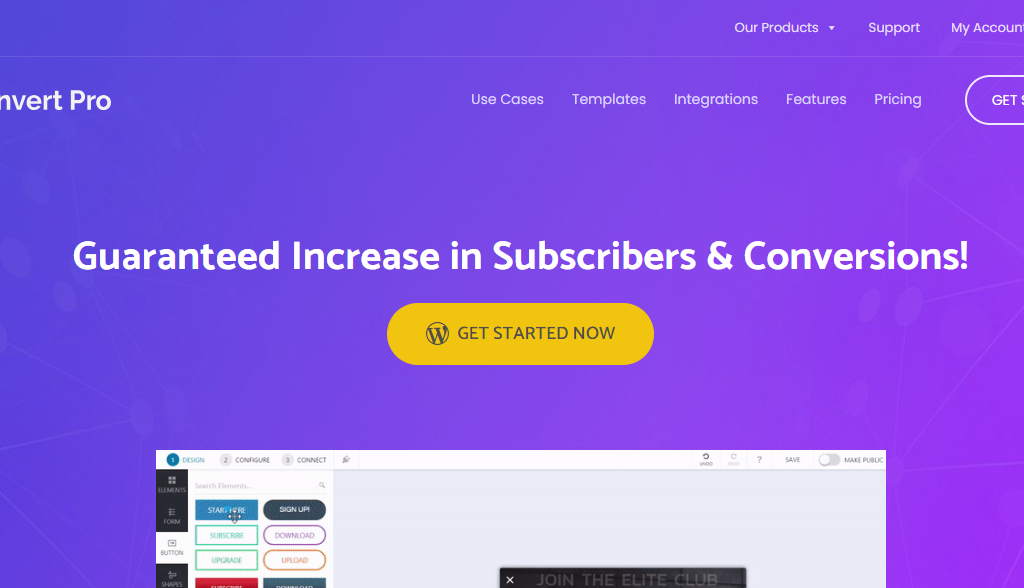
Convert Pro is a leading WordPress plugin designed to help you maximize your website’s lead generation potential. With its extensive library of professionally designed templates and intuitive interface, Convert Pro simplifies the process of creating high-converting popups, slide-ins, opt-in forms, and other lead generation elements.
You’ve probably seen websites where you’re able to switch between two images or videos, revealing a dramatic change or a before and after comparison? Those are called a Before-After Slider!
A before-after slider can be a game-changer for your website, whether you’re showcasing product transformations, comparing design concepts, or simply adding an interactive element.
If you’re wondering how to create a before and after slider? / how to add before and after slider to website? / how to make before and after photo slider? This article is for you.
In this easy-to-follow tutorial, we’ll guide you through the process of creating your own Before After Slider.
We’ll cover everything from choosing the right tools to customizing the slider’s appearance and functionality.
By the end, you’ll have a stunning slider that will wow your visitors and make your website stand out.
An Amazing Collection of Before and After Templates
Before After Slider Elements Explained- Video Tutorial
Create stunning before-after sliders with Depicter. Perfect for clinics, fitness, beauty, and more.
In this video, we’ll show you how to design interactive before-after sliders with Depicter to compare images easily.
What Is a Before-After Slider?
A before after slider lets you show two images side by side so visitors can easily compare them. It’s especially popular for showing changes or improvements, like a room makeover or a product upgrade.
The cool part? Visitors can control the slider themselves, moving it to see the “before” and “after” images, which makes the experience more interactive and fun.
People love being able to see these comparisons. For viewers, it’s not just interesting, it also helps them make decisions.
For example, if you’re showing a product’s transformation or comparing two different items, the slider can help customers decide if they want to buy.
Being able to see how something looks before and after modifications is a huge factor in convincing people about the quality of your service or product.
These sliders work on various platforms, including WordPress, and they’re versatile. You can use them for different purposes, whether you’re comparing photos, showing off project results, or demonstrating a product’s features.
No matter what kind of website you have, a before after slider adds a dynamic way to engage your audience and boost customer trust.
Benefits of Using a Before and After Slider on WordPress
Using a before after slider on your WordPress site can make a big difference. It helps you show visitors the changes or improvements in your work, which can really grab their attention.
Here are a few key benefits:
Easy to Use: Adding a before-after slider to WordPress is simple. With plugins like Depicter, you don’t need any coding knowledge. You can have a slider ready in just a few clicks.
Better Engagement: When visitors can control the slider themselves, it makes their experience more interactive. They can see the transformation at their own pace, which keeps them more interested in what you’re showing.
Builds Trust: Showing clear, real results—like a before-and-after shot of a completed project or a product upgrade—helps customers trust you more. They can see the actual difference your service or product makes, which can help them decide to make a purchase.
Works on Any Website: A before-after slider can fit into any type of website. It’s a flexible tool that can showcase your work in a way that’s easy to understand.
Using a before-after slider on WordPress is an easy and effective way to show your visitors the value of your products or services.
Before-After Slider Elements Explained- Ultimate Guide
When Do Before and After Sliders Appear? (Before After Slider Use Cases)
Before-after sliders are useful when you need to show a clear comparison between two images. They work great in many different fields and can be used for all kinds of projects.
Here are some common situations where you’ll see them:
Beauty Clinics: Many beauty clinics use before-after sliders to show how treatments have improved someone’s appearance. It’s a great way for potential customers to see real results.
Dental Clinics: Dentists often use these sliders to show the difference between a patient’s teeth before and after treatment, like braces or teeth whitening.
Fitness Programs: Fitness trainers use before-after sliders to highlight the progress their clients make. It’s a powerful way to show the impact of workout programs.
Home Renovations: When it comes to home improvement, showing the transformation of a space is important. Before-after sliders help customers see the dramatic changes in a room or building.
Photography: Photographers use sliders to compare edited and unedited photos, helping people understand the value of their editing work.
E-commerce: If you sell products that improve or transform something—like cleaning supplies, skincare products, or even software—a before-after slider can help show customers how well the product works.
In each of these cases, before-after sliders make it easy to present changes in a clear and engaging way.
By letting visitors control the slider themselves, they get a more interactive experience that helps them see the full effect of the transformation.
Before and After Slider Best Practices
Using a before-after slider can make your website more engaging, but to get the best results, there are a few things you should keep in mind.
Here are some tips to help you create an effective and easy-to-use slider:
Use High-Quality Images: Make sure your before and after images are clear and high-quality. Blurry or low-resolution images can make it hard for visitors to see the differences, which defeats the purpose of using the slider.
Choose Images That Show Real Change: Pick images that clearly show the transformation you want to highlight. The bigger the difference between the “before” and “after,” the more impactful the slider will be.
Keep It Simple: Don’t overload your slider with too many extra elements like text or graphics. The main focus should be on the images. If you want to add text, keep it short and relevant to the comparison.
Ensure Mobile Responsiveness: Make sure your before-after slider looks good and works well on mobile devices. Many visitors will be viewing your site on their phones, so your slider needs to be easy to use on smaller screens.
Place It in the Right Spot: Put your before-after slider where it makes the most sense, like on a product page or a portfolio. It should be in a place where visitors are already looking for proof of results or examples of your work.
Test It First: Before going live, test your slider to make sure it works smoothly. Check that the slider moves correctly, the images load quickly, and the controls are easy to use. This will give visitors the best experience possible.
By following these simple best practices, your before-after slider will not only look great but also be effective in showing the value of your work or product.
How to Create a Before After Slider in WordPress (Easy Steps)
Creating a before-after slider on WordPress is easier than you might think. Although I have to say the cool thing about Depicter is that you have two options:
A. Create a before after slider using a ready-made template.
B. Create a before after slider from scratch.
In this tutorial we’ll explore both starting from creating before after slider using a ready-made template.
Design a Before and After Image Slider Video
A. Create a Before and After Slider Using a Template
Creating a before and after Slider using a template is easy, Just follow these simple steps:
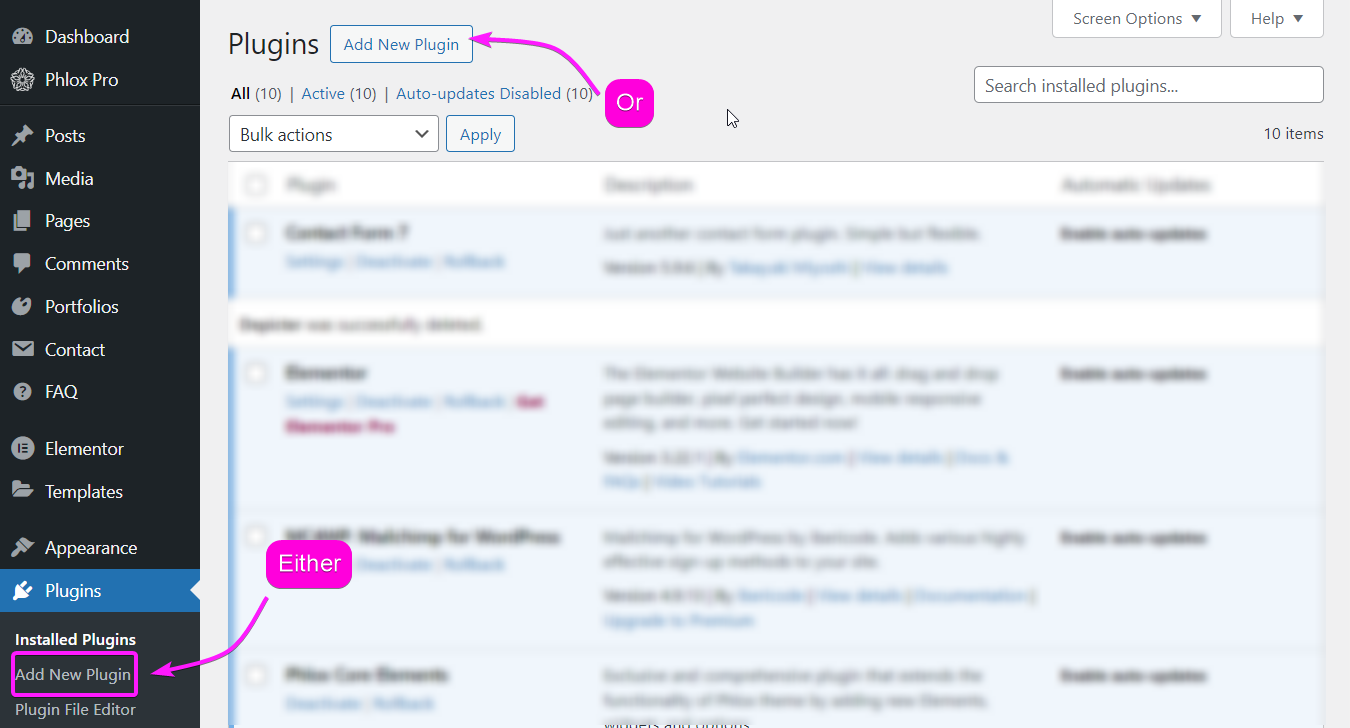
1. Installing the Before After WordPress Plugin (Depicter)
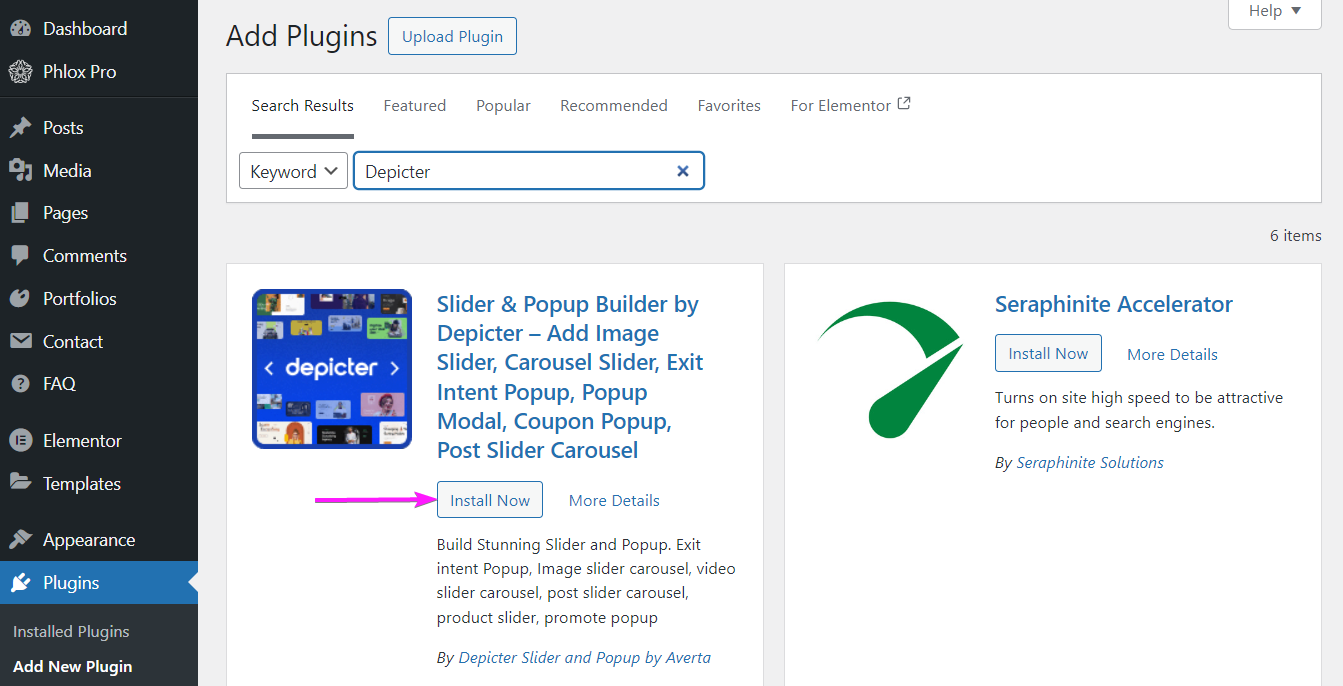
To install the Depicter plugin, go to plugins in your WordPress dashboard, click on “Add New Plugin” and Search for Depicter.
Once you find it, install and activate it and you’re good to go.
2. Find and Import a Ready-Made Template
In the Depicter dashboard, head to templates then search “before after” in the search bar; That way you can see Depicter’s numerous before after WordPress ready-made templates.
Find a template and import it.
3. Customize the Template
Once you’ve imported the template, you can customize everything to match your needs.
4. Preview and Publish Your Slider
Now that you’ve made some changes, hit Preview to see how your slider looks. Nice, right? If you’re happy with it, you’re good to go!
Hit publish!
B. Create a Before and After Slider From Scratch (No Coding Required)
With Depicter, even when you’re creating a slider from scratch, you wouldn’t bee needing any coding skills. Just follow these simple steps:
1. Create a Slider from Scratch
Want to start from scratch instead of using a template? No problem! Head back to the Depicter dashboard and click Create a Blank. Then, choose the Hero Section to get started.
Add a background image.
From the left sidebar, find the Before-After Element and click on it to add it to your slider.
Drag and drop your before-and-after images onto each side of the slider.
Now, feel free to add other elements like text, icons, or anything else you want. Customize them to fit your style.
2. Add Effects and Controls
With the before-after slider selected, you can enable some cool effects in the options menu:
Turn on Blend and choose from its different effects.
Enable Start on Hover—this makes the slider follow your mouse when you hover over it, giving it a smooth interactive feel.
Play around with the other settings, like changing the controls color to match your design. The best part? You can see all your changes live as you make them.
3. Preview and Publish
Once you’re happy with everything, click Preview to see the final result. Once you’re happy with it, hit publish and you’re good to go.
Conclusion
To wrap things up, adding a before-after slider to your WordPress website can really make a difference by grabbing attention and showing off what you do.
Whether you’re showing changes, comparing looks, or just adding something fun, a good before after slider makes your site more interesting and helps people trust your work.
With a tool like Depicter, making these sliders is super easy, even if you don’t know how to code.
After reading this tutorial, you now know how to create amazing sliders that will impress your visitors and make your website stand out. Give it a try and see how it makes your site better!
Have you ever landed on a website or blog and been greeted by a friendly message offering a discount or exclusive content? That’s the power of a welcome popup! These targeted messages can be a game-changer for your website, grabbing new visitors’ attention and sparking valuable engagement.
In this guide, we’ll show you how to create a welcome popup using Depicter, a user-friendly WordPress plugin. We’ll walk you through the entire process, from installation to customization, ensuring your popups deliver the right message at the right time.
What is a welcome popup?
A welcome popup is a personalized greeting that appears when a visitor first lands on your website. It captures attention, provides value, and encourages engagement.
Welcome popups are a powerful tool to boost your business. Offering incentives like discounts or exclusive content can quickly convert new visitors into loyal customers.
How to create a welcome popup with Depicter?
Installing Depicter
Depicter is easy to install. Just go to the ‘Plugins’ menu in your WordPress dashboard, click ‘Add New,’ search for ‘Depicter,’ and click ‘Install Now.’ Activate it, and you’re ready to start creating and customizing your popups.
Importing a Template
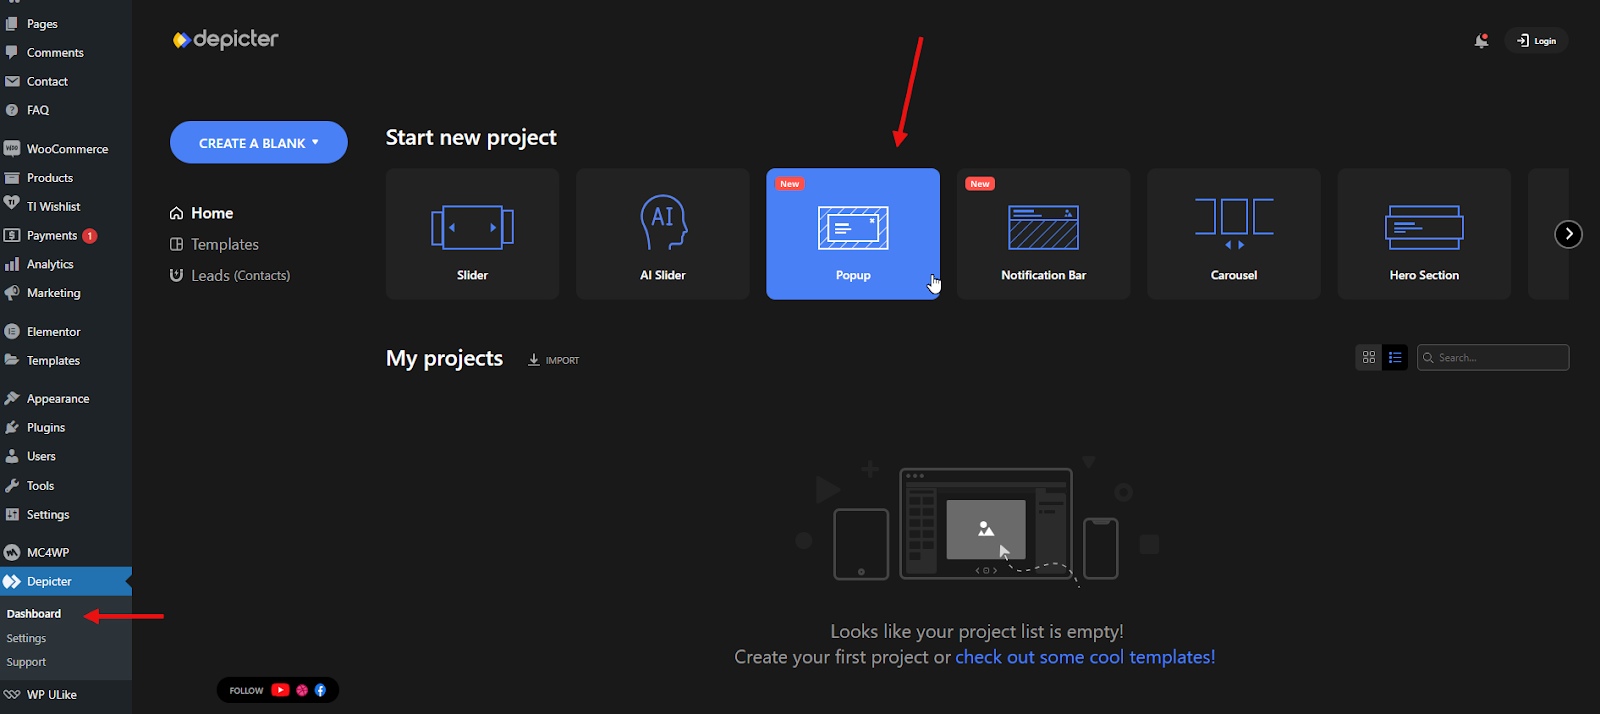
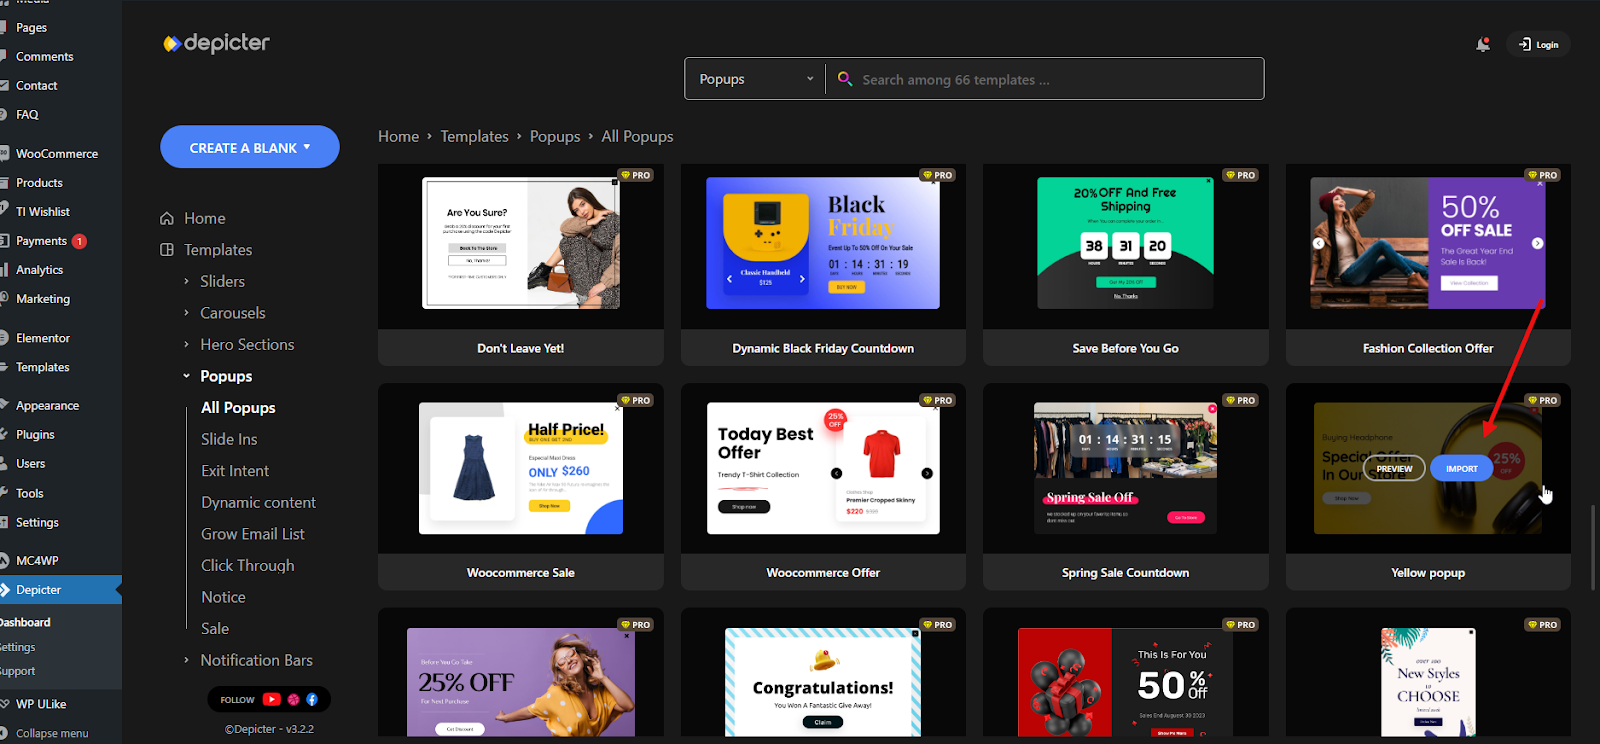
After installing the plugin, we’ll access the Depicter dashboard. This dashboard provides tools to create a variety of visual elements like sliders, popups, carousels, and notification bars. To streamline the process, we’ll start with a pre-designed template for our popup. You can find these templates by clicking on the ‘Popup’ option at the top of the dashboard.
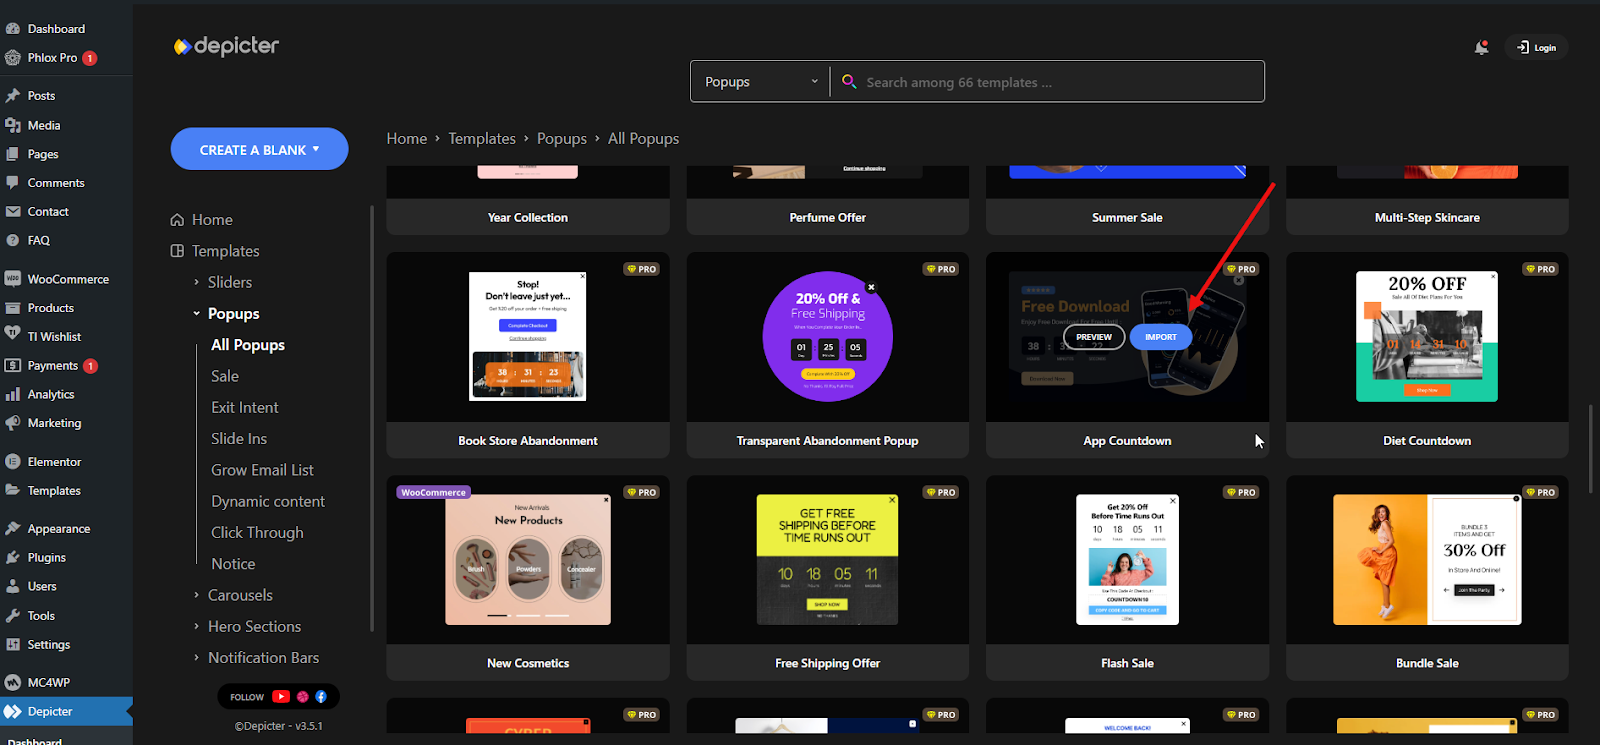
We can preview each one by using the ‘preview’ button. To import any of them, simply click the ‘import’ button. In a few seconds, the import process will finish and take you to the Depictor editor.
Here, we can customize our pop-up exactly the way we want using the various tools and options that Depictor provides.
Customizing the Template
To learn more about creating a pop-up from scratch and using Depictor’s tools to personalize it, I recommend watching this video.
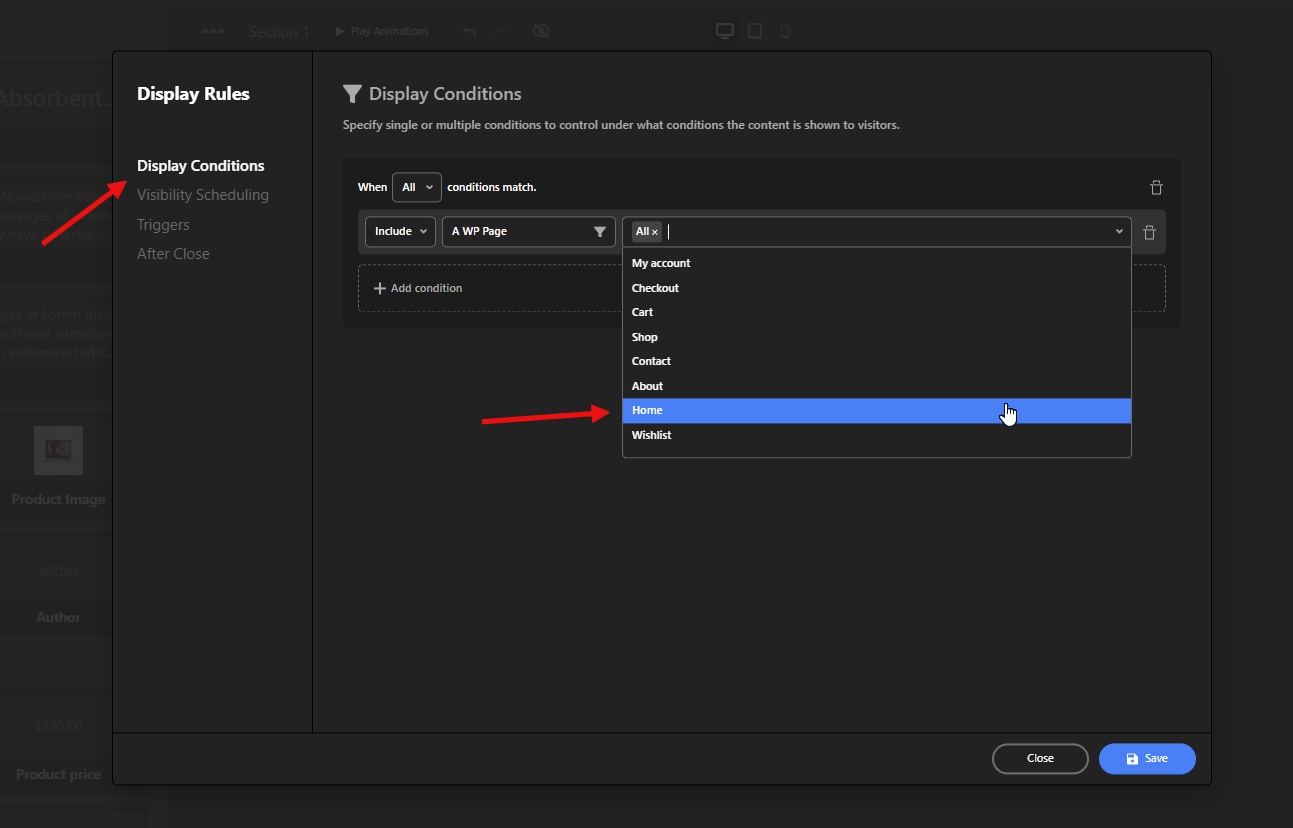
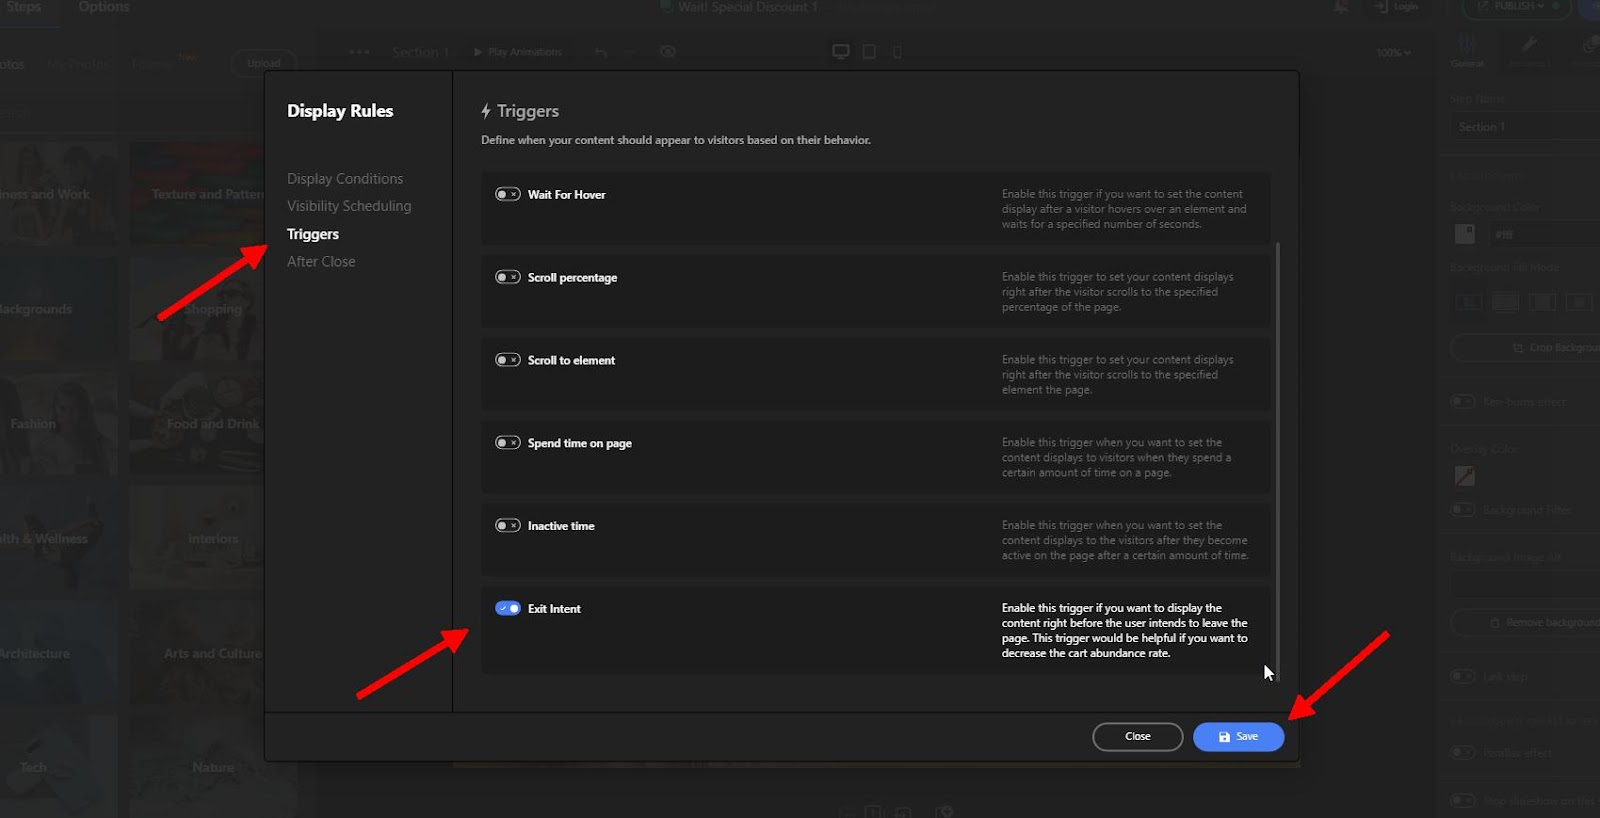
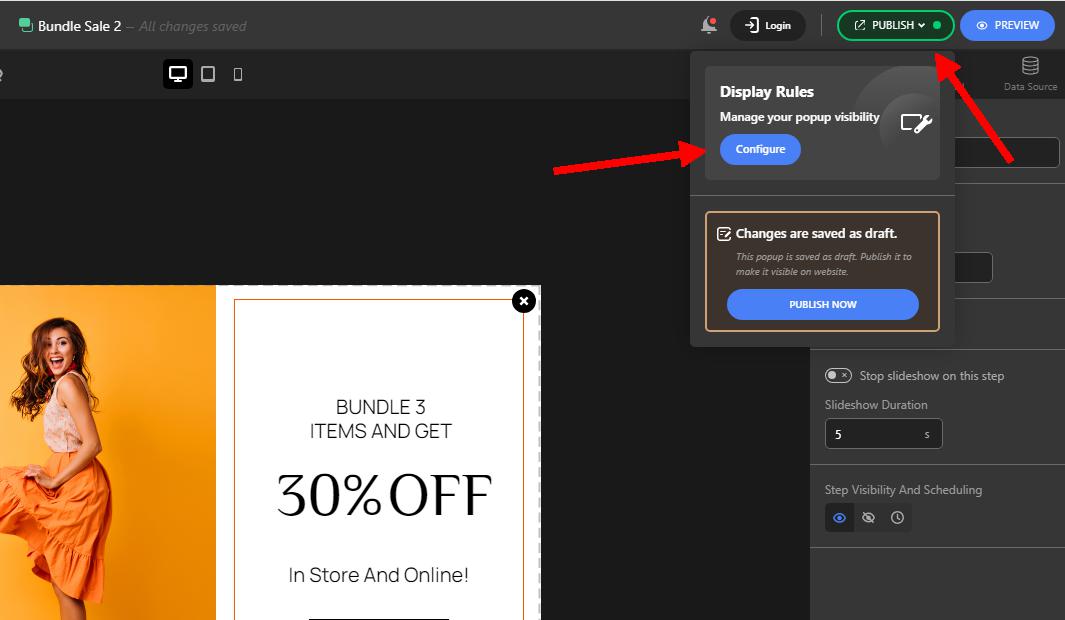
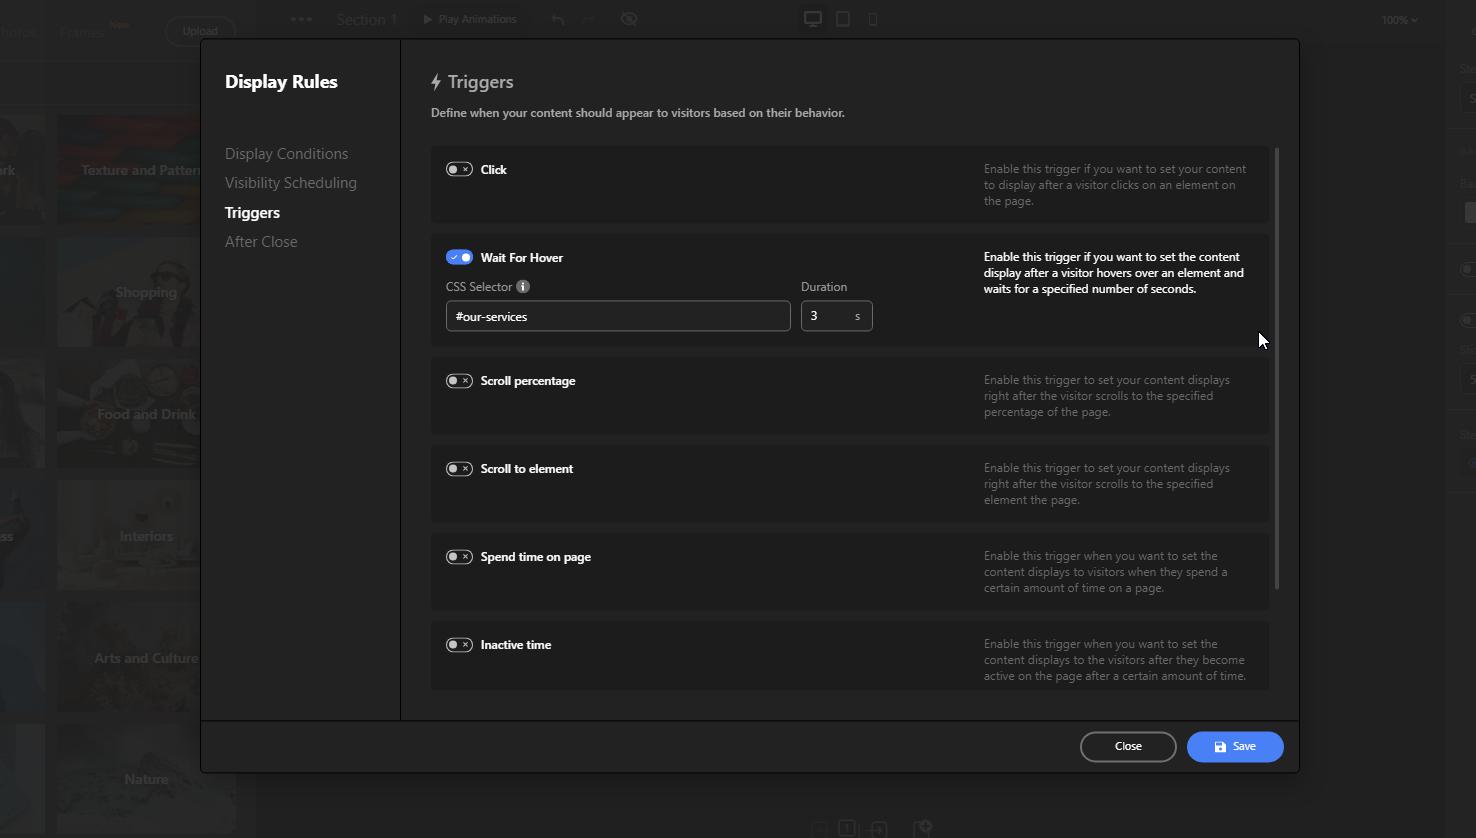
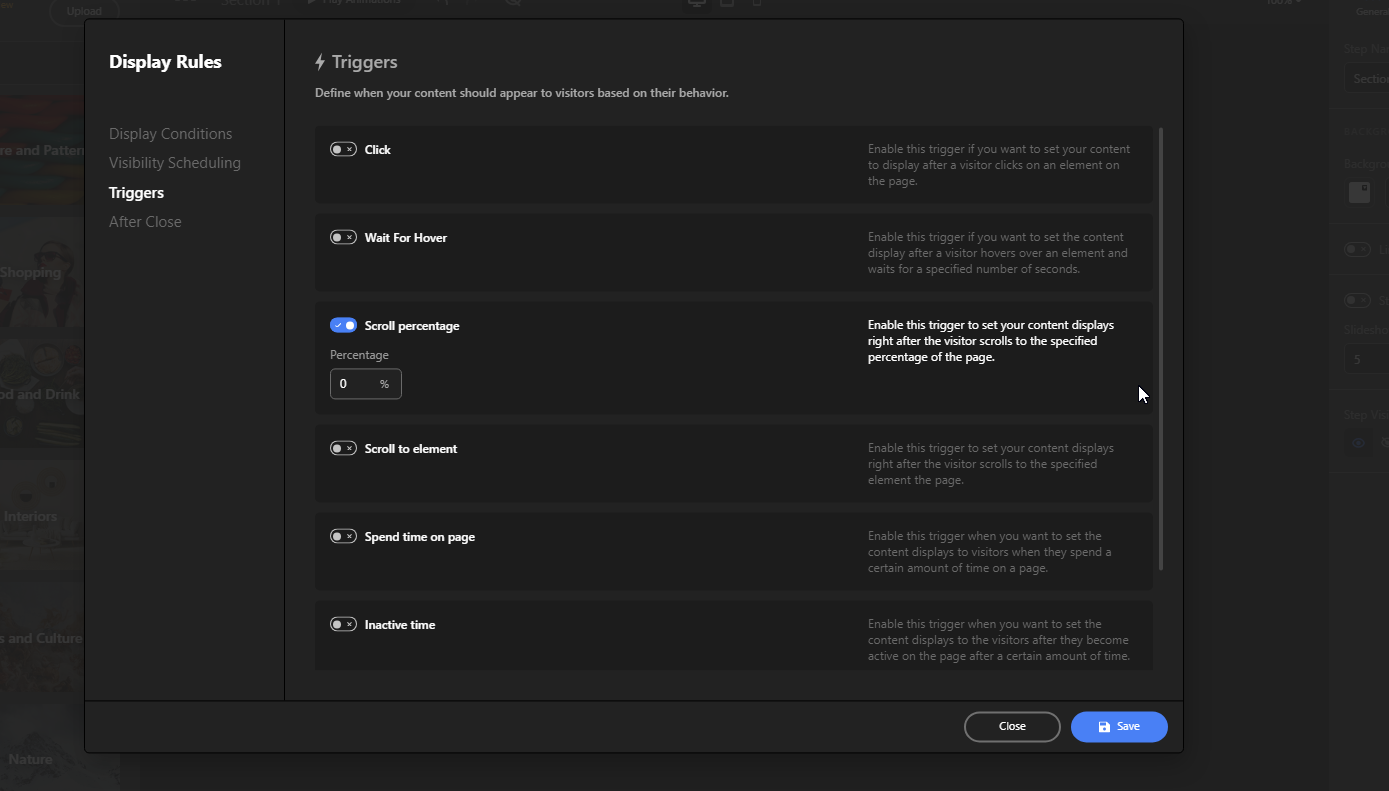
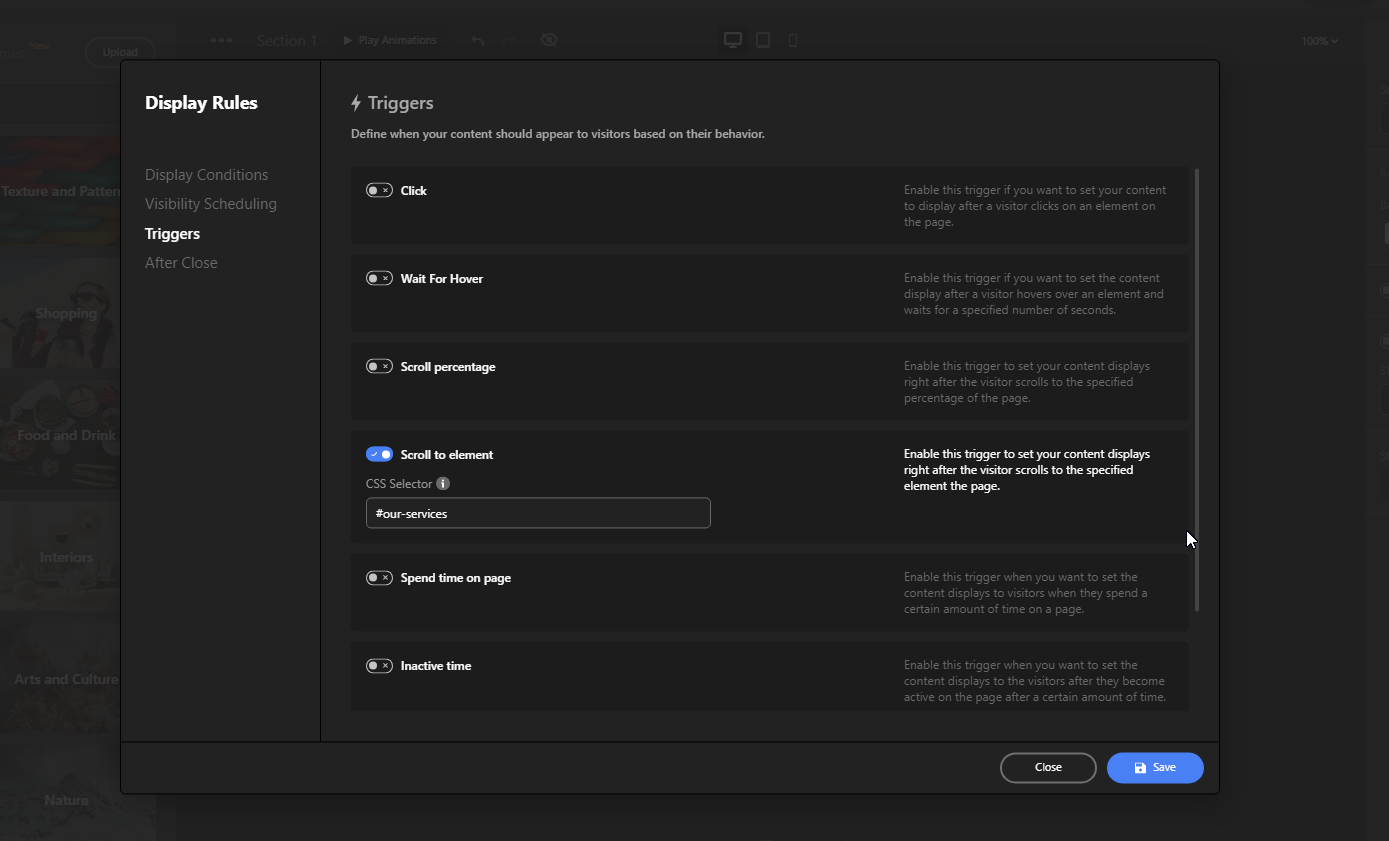
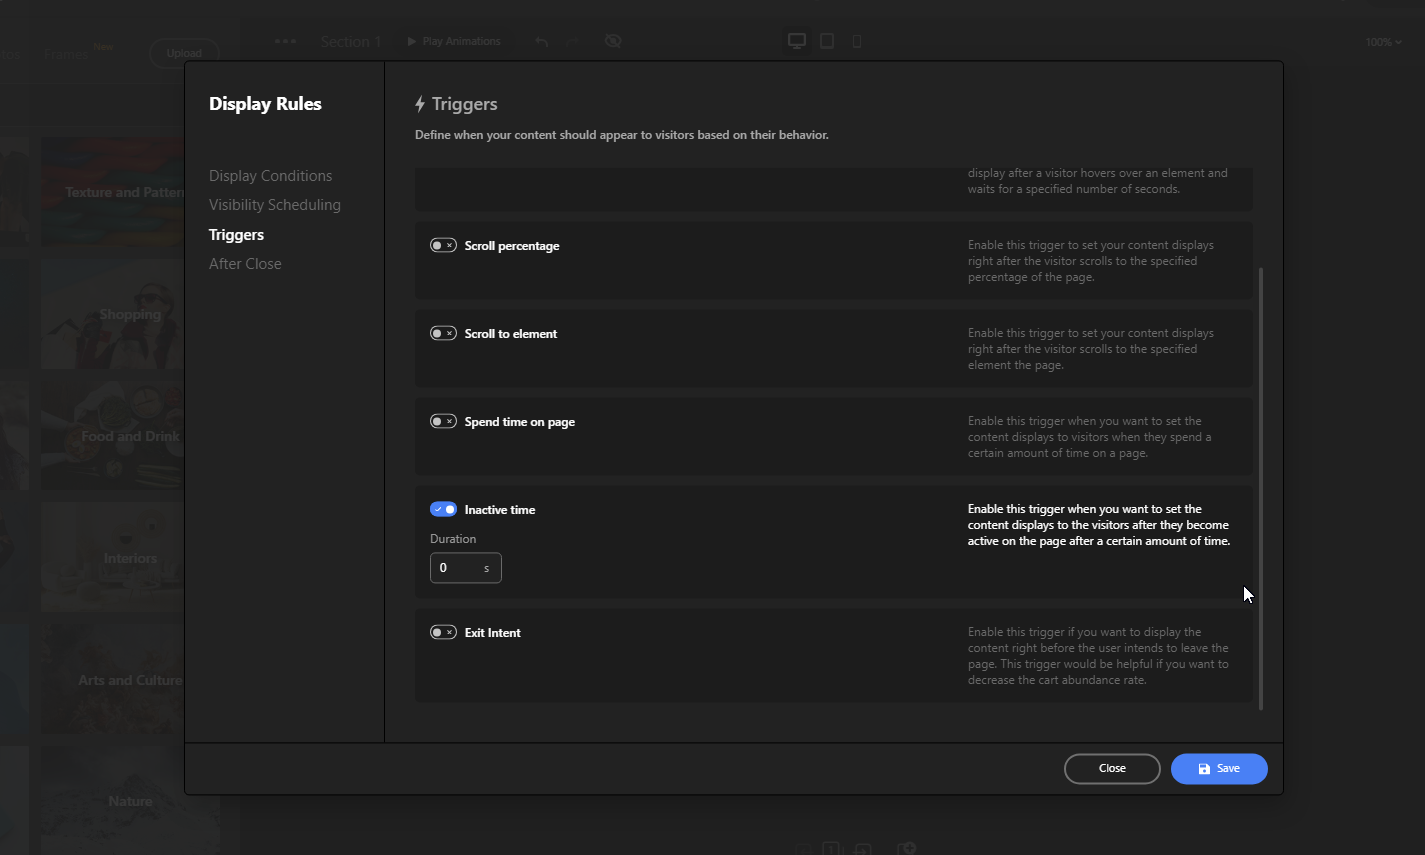
To control how the pop-up is displayed, we need to configure the Display Rules. To do this, click the ‘publish’ button, and then in the ‘Display Rules’ section, click the ‘Configure’ button.
These four sections allow you to customize how the pop-up is displayed. In the first section, we’ll specify where on the website the pop-up should appear. For this example, we’ll choose the Home page.
You use the second section to schedule when the popup will appear. I suggest reading this article for more details.
In the ‘after close’ section, you can determine what happens to the popup once it’s closed.
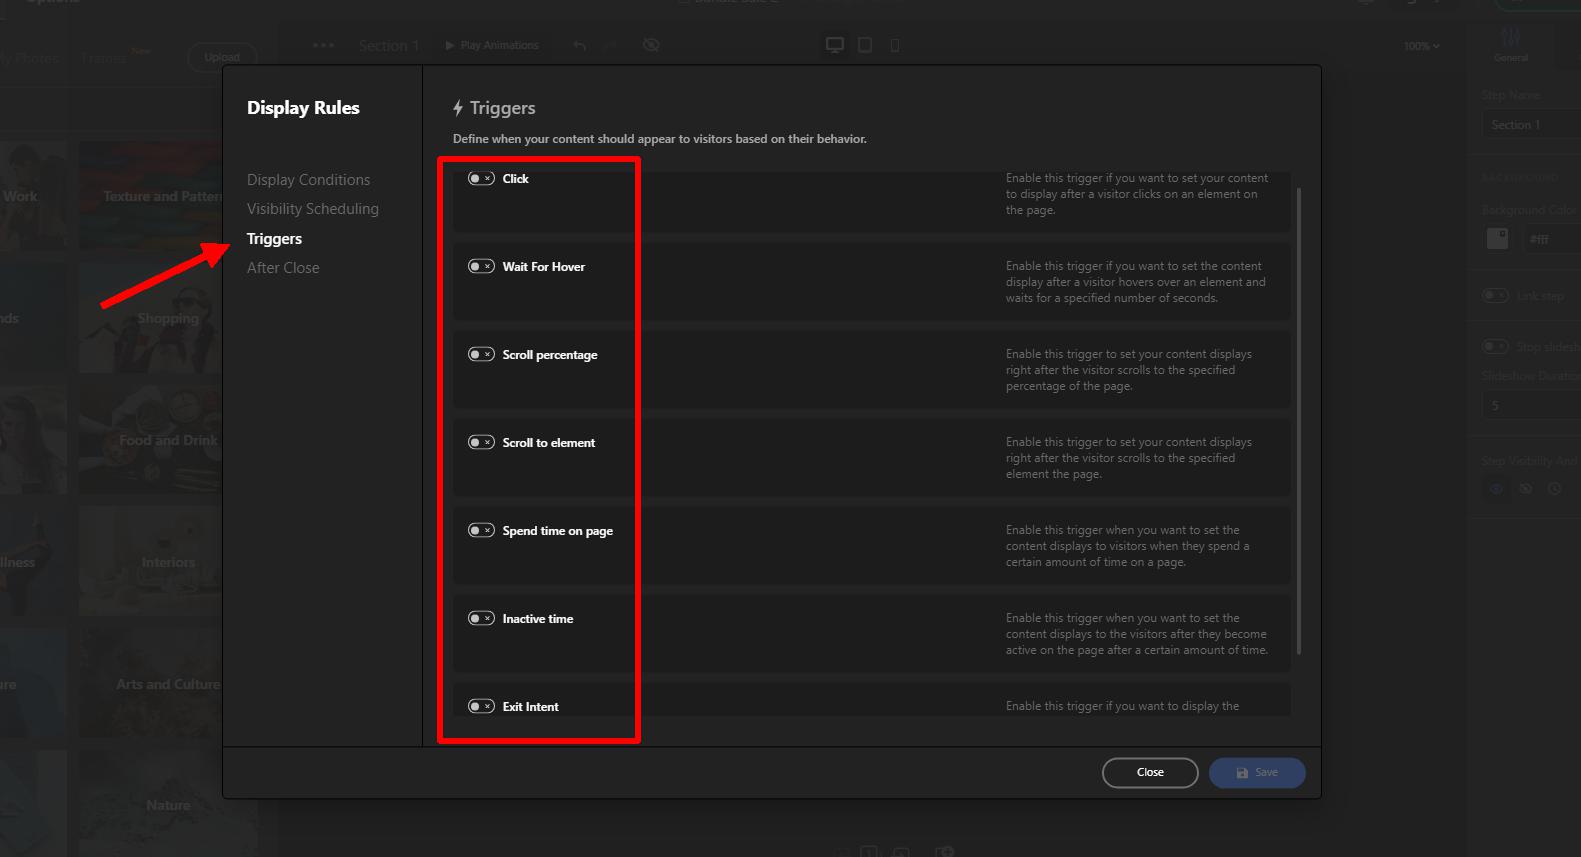
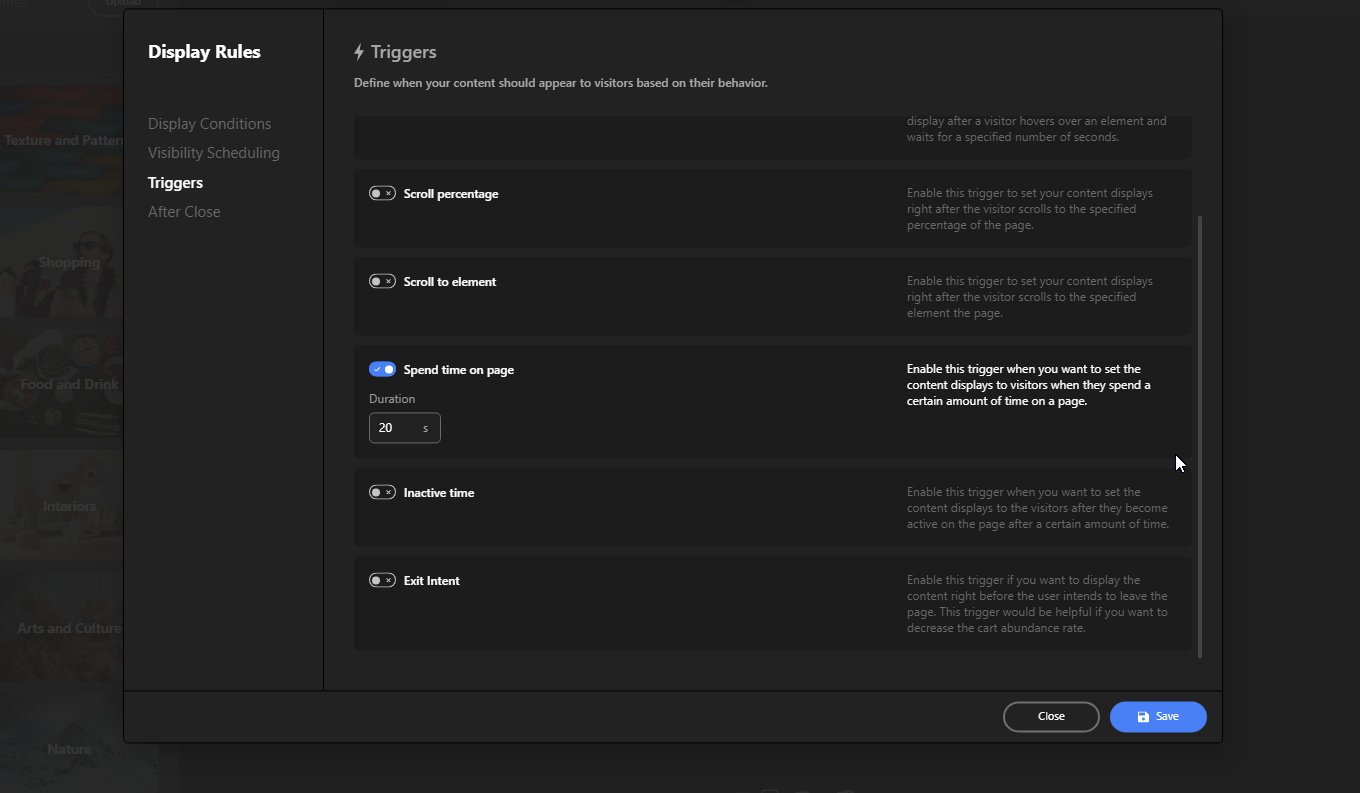
Next, in the ‘Triggers’ section, we’ll set the conditions for when the pop-up should appear. For this example, we’ll use the ‘Spend Time on page’ option and set it to 3 seconds.
Finally, we’ll save the changes and click the ‘Publish Now’ button under the publish menu.
After a visitor opens the homepage of the website, our pop-up will display after 3 seconds.
Conclusion
Welcome popups are a powerful tool for any website owner. They provide a valuable opportunity to greet new visitors, showcase your offerings, and convert them into engaged users. With Depicter, creating and customizing your own welcome popups is a breeze.
This guide has walked you through the process of installing Depicter, selecting a pre-designed template, and customizing it to your liking. Furthermore, you’ve also learned how to configure display rules and triggers to ensure your popups appear at the most impactful moments.
Now it’s your turn! Take advantage of Depicter’s user-friendly interface and create a compelling welcome popup that drives results for your website. Finally, and most importantly, don’t forget to check out the resources provided for further inspiration and best practices.
Are you looking for information on How to Schedule a Popup in WordPress? In today’s digital landscape, effective marketing requires strategic engagement with your audience. One powerful tool for capturing attention and driving conversions is scheduled popups. By strategically timing the appearance of popups, you can deliver targeted messages to your visitors at the optimal moment, increasing the likelihood of action.
In this guide, we’ll walk you through the steps of scheduling a popup using Depicter, empowering you to leverage this effective marketing tool for your WordPress website.
Why Schedule a Popup in WordPress?
Scheduling popups on your website can be a powerful option for targeted marketing and improved user experience. By strategically timing the appearance of popups, you can create limited-time offers that generate urgency and excitement among your audience, promote products or services relevant to specific holidays or seasons, and ultimately drive conversions and improve your overall user experience.
How to Schedule a Popup in WordPress with Depicter
Depicter is a versatile WordPress popup builder plugin that empowers you to create and schedule stunning, high-converting popups for your website. With its intuitive drag-and-drop interface and extensive customization options, Depicter makes it easy to design popups that capture attention and drive results.
Installing Depicter
Installing Depicter is a breeze. Simply navigate to the “Plugins” menu in your WordPress dashboard, click “Add New,” and search for “Depicter.” Once you find the plugin, click “Install Now” and then “Activate.” That’s it! Depicter is now ready for you to create and customize your popups.
Creating a Scheduled Popup
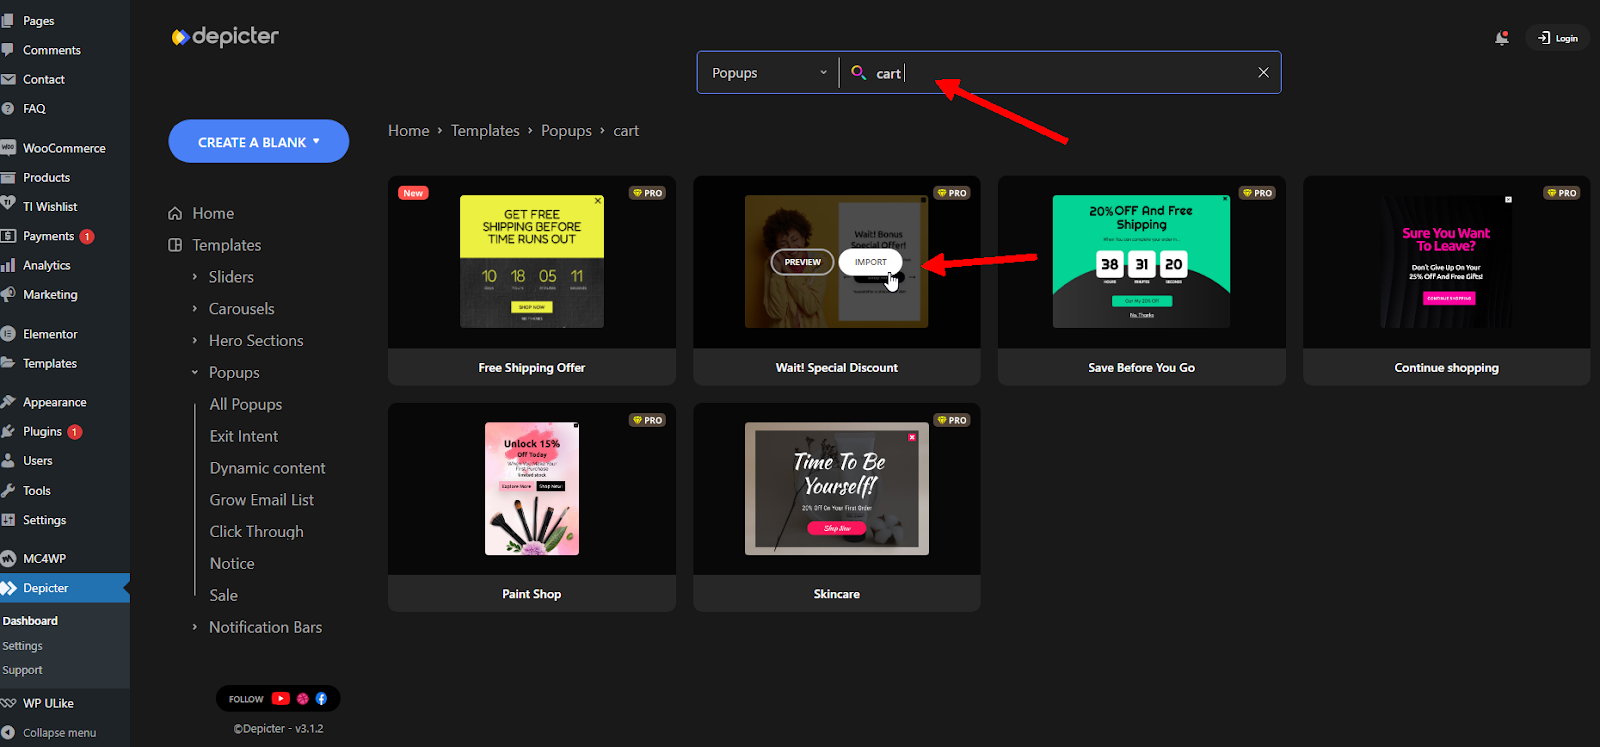
After installing Depicter, go to the “Popup” menu in your dashboard to access the collection of ready-made templates.
Choose one of the available options and simply click the ‘Import’ button. After a few seconds, the popup will be imported for you and you will be redirected to the Depicter editor.
Here, you can fully customize all the details of your popup using Depicter’s completely drag-and-drop editor. To learn more about creating a popup from scratch, you can watch the following video.
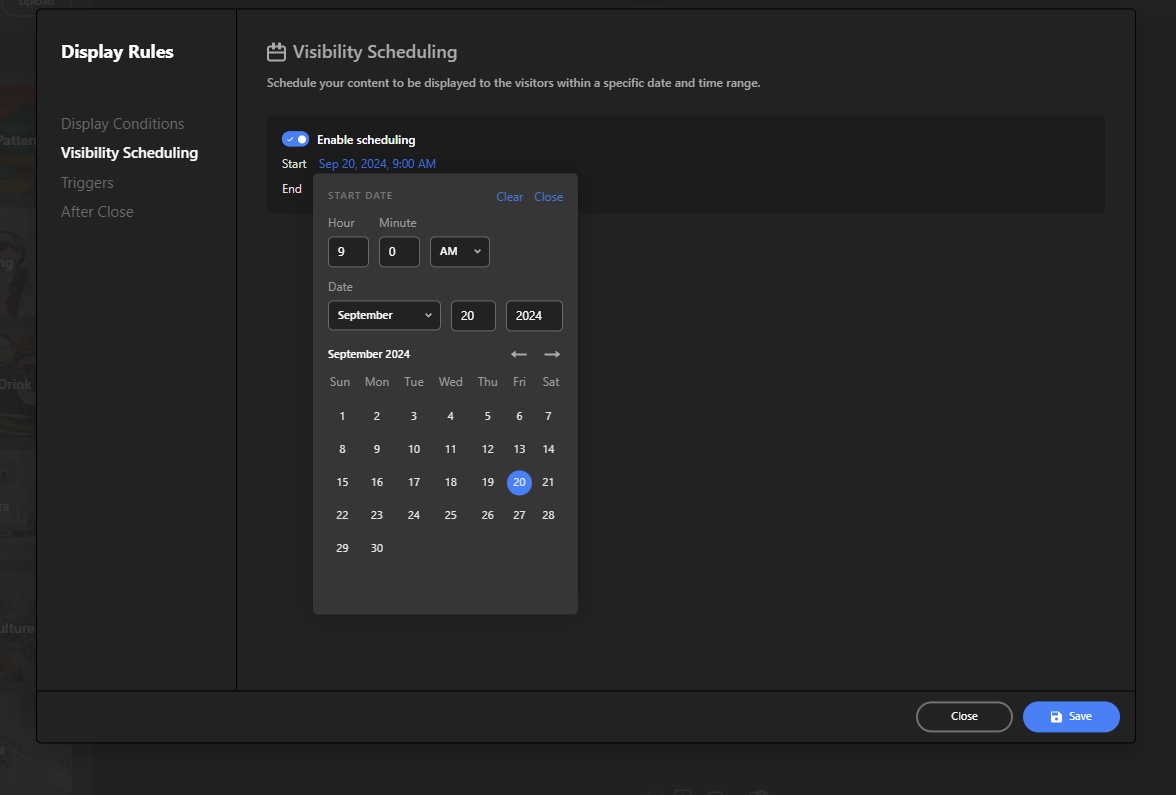
After confirming your popup, click on the ‘Configure’ option in the ‘Publish’ menu to set up the display rules.
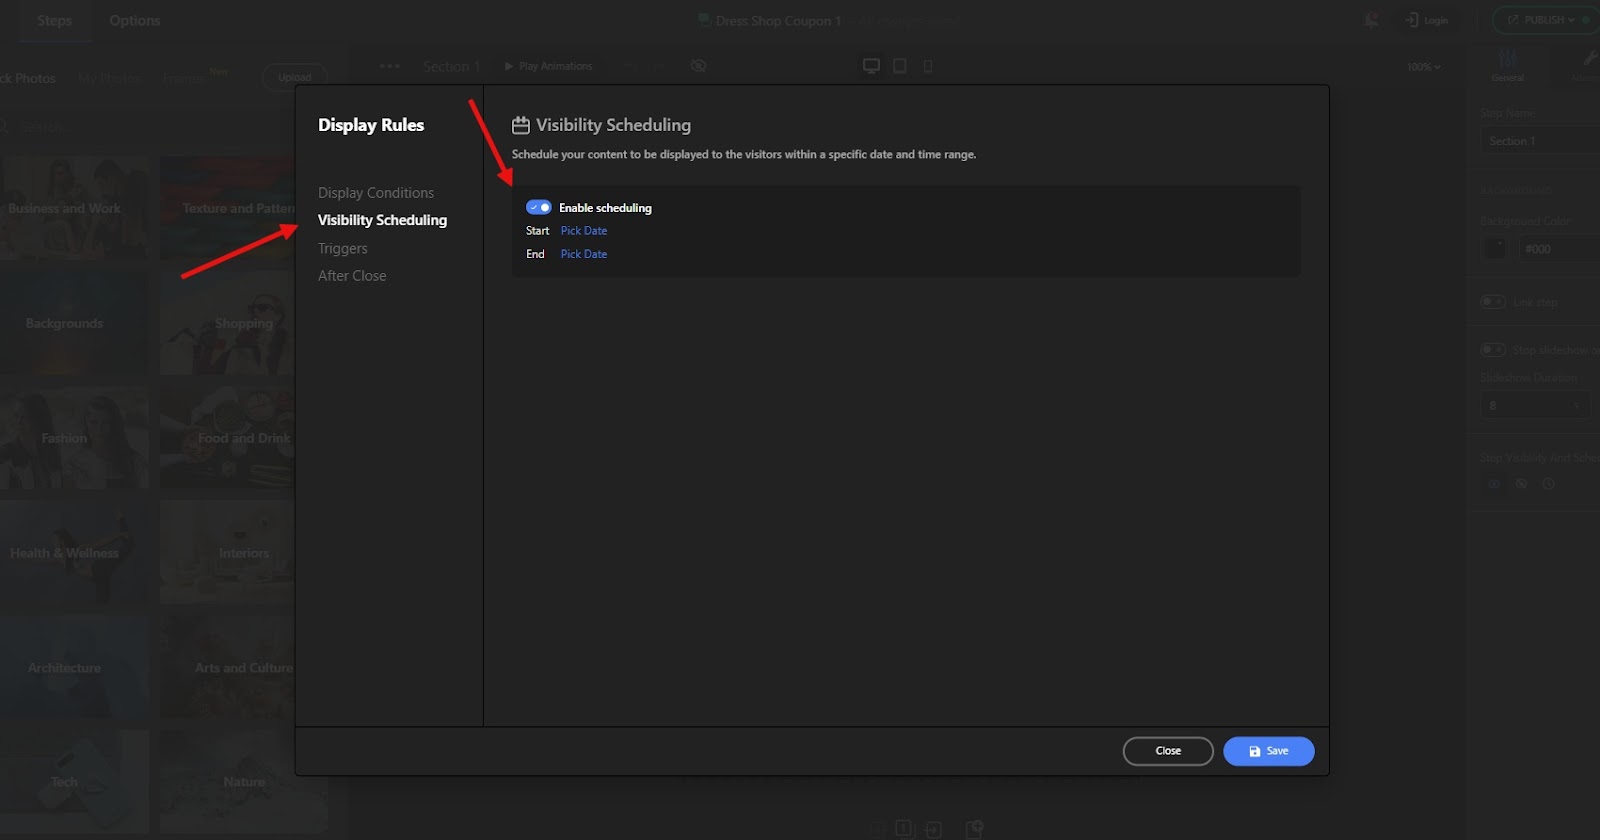
To schedule your popup to appear at specific times, go to the ‘Visibility Scheduling’ menu and check the ‘Enable Scheduling’ box. This will allow you to set a start date and end date for when the popup will be visible to your visitors.
For full control over the popup’s display, you can specify an exact start and end date and time. This allows you to schedule the popup to appear at any moment you choose.
Your popup is now ready to go! Click ‘Save’ to store your changes, and then ‘Publish’ to make it live. The popup will be displayed on your website at the precise start and end times you’ve set.
Conclusion
You’ve gained the knowledge to create and schedule effective popups using Depicter. With the ability to target your audience, and deliver timely messages, scheduled popups can significantly enhance your website’s engagement and conversions.
Remember, the key to successful popup marketing lies in creating relevant and non-intrusive experiences for your visitors. Plan your popup’s content, design, and timing carefully and you will build stronger relationships with your audience and drive meaningful results.
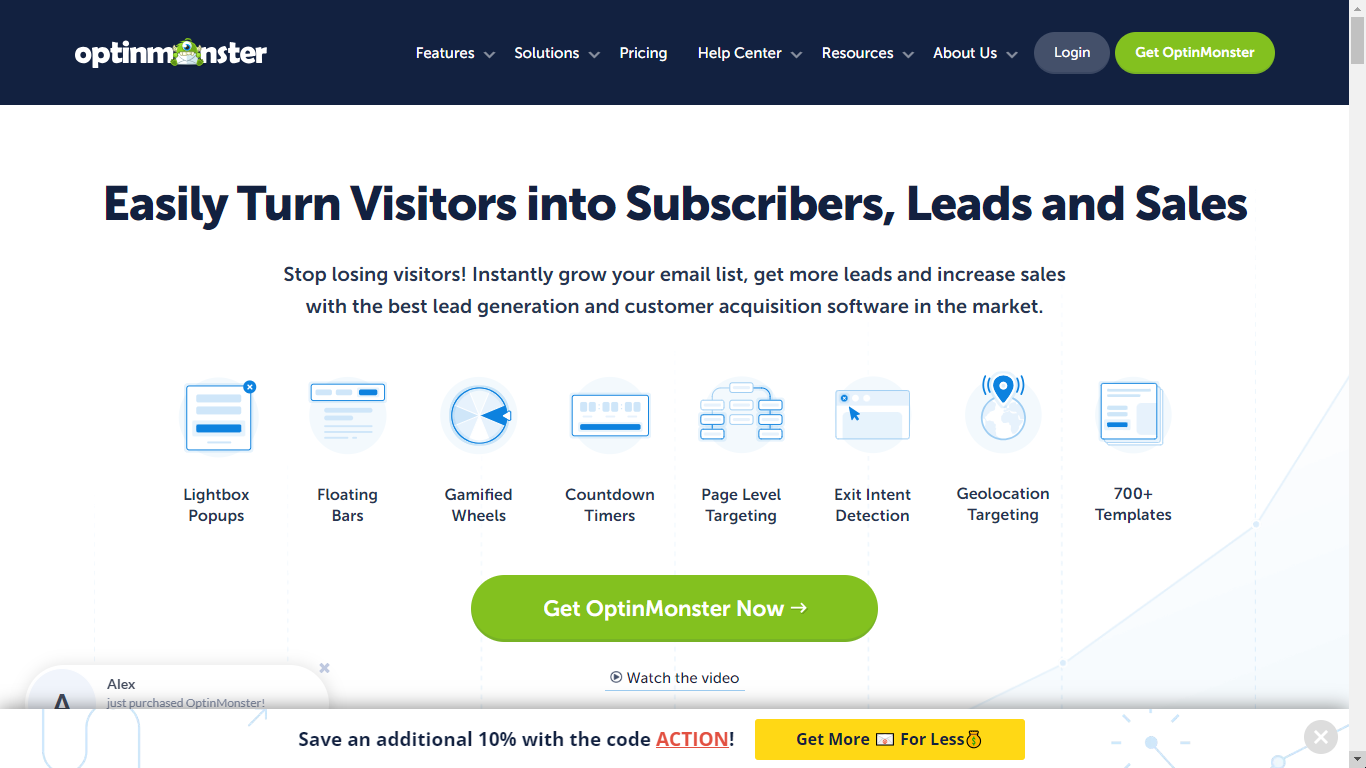
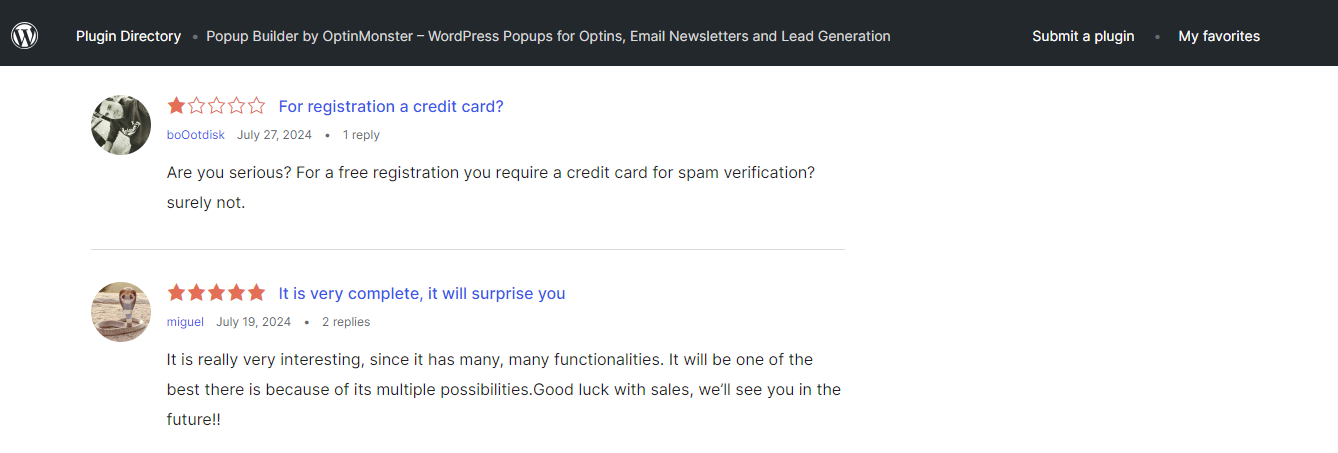
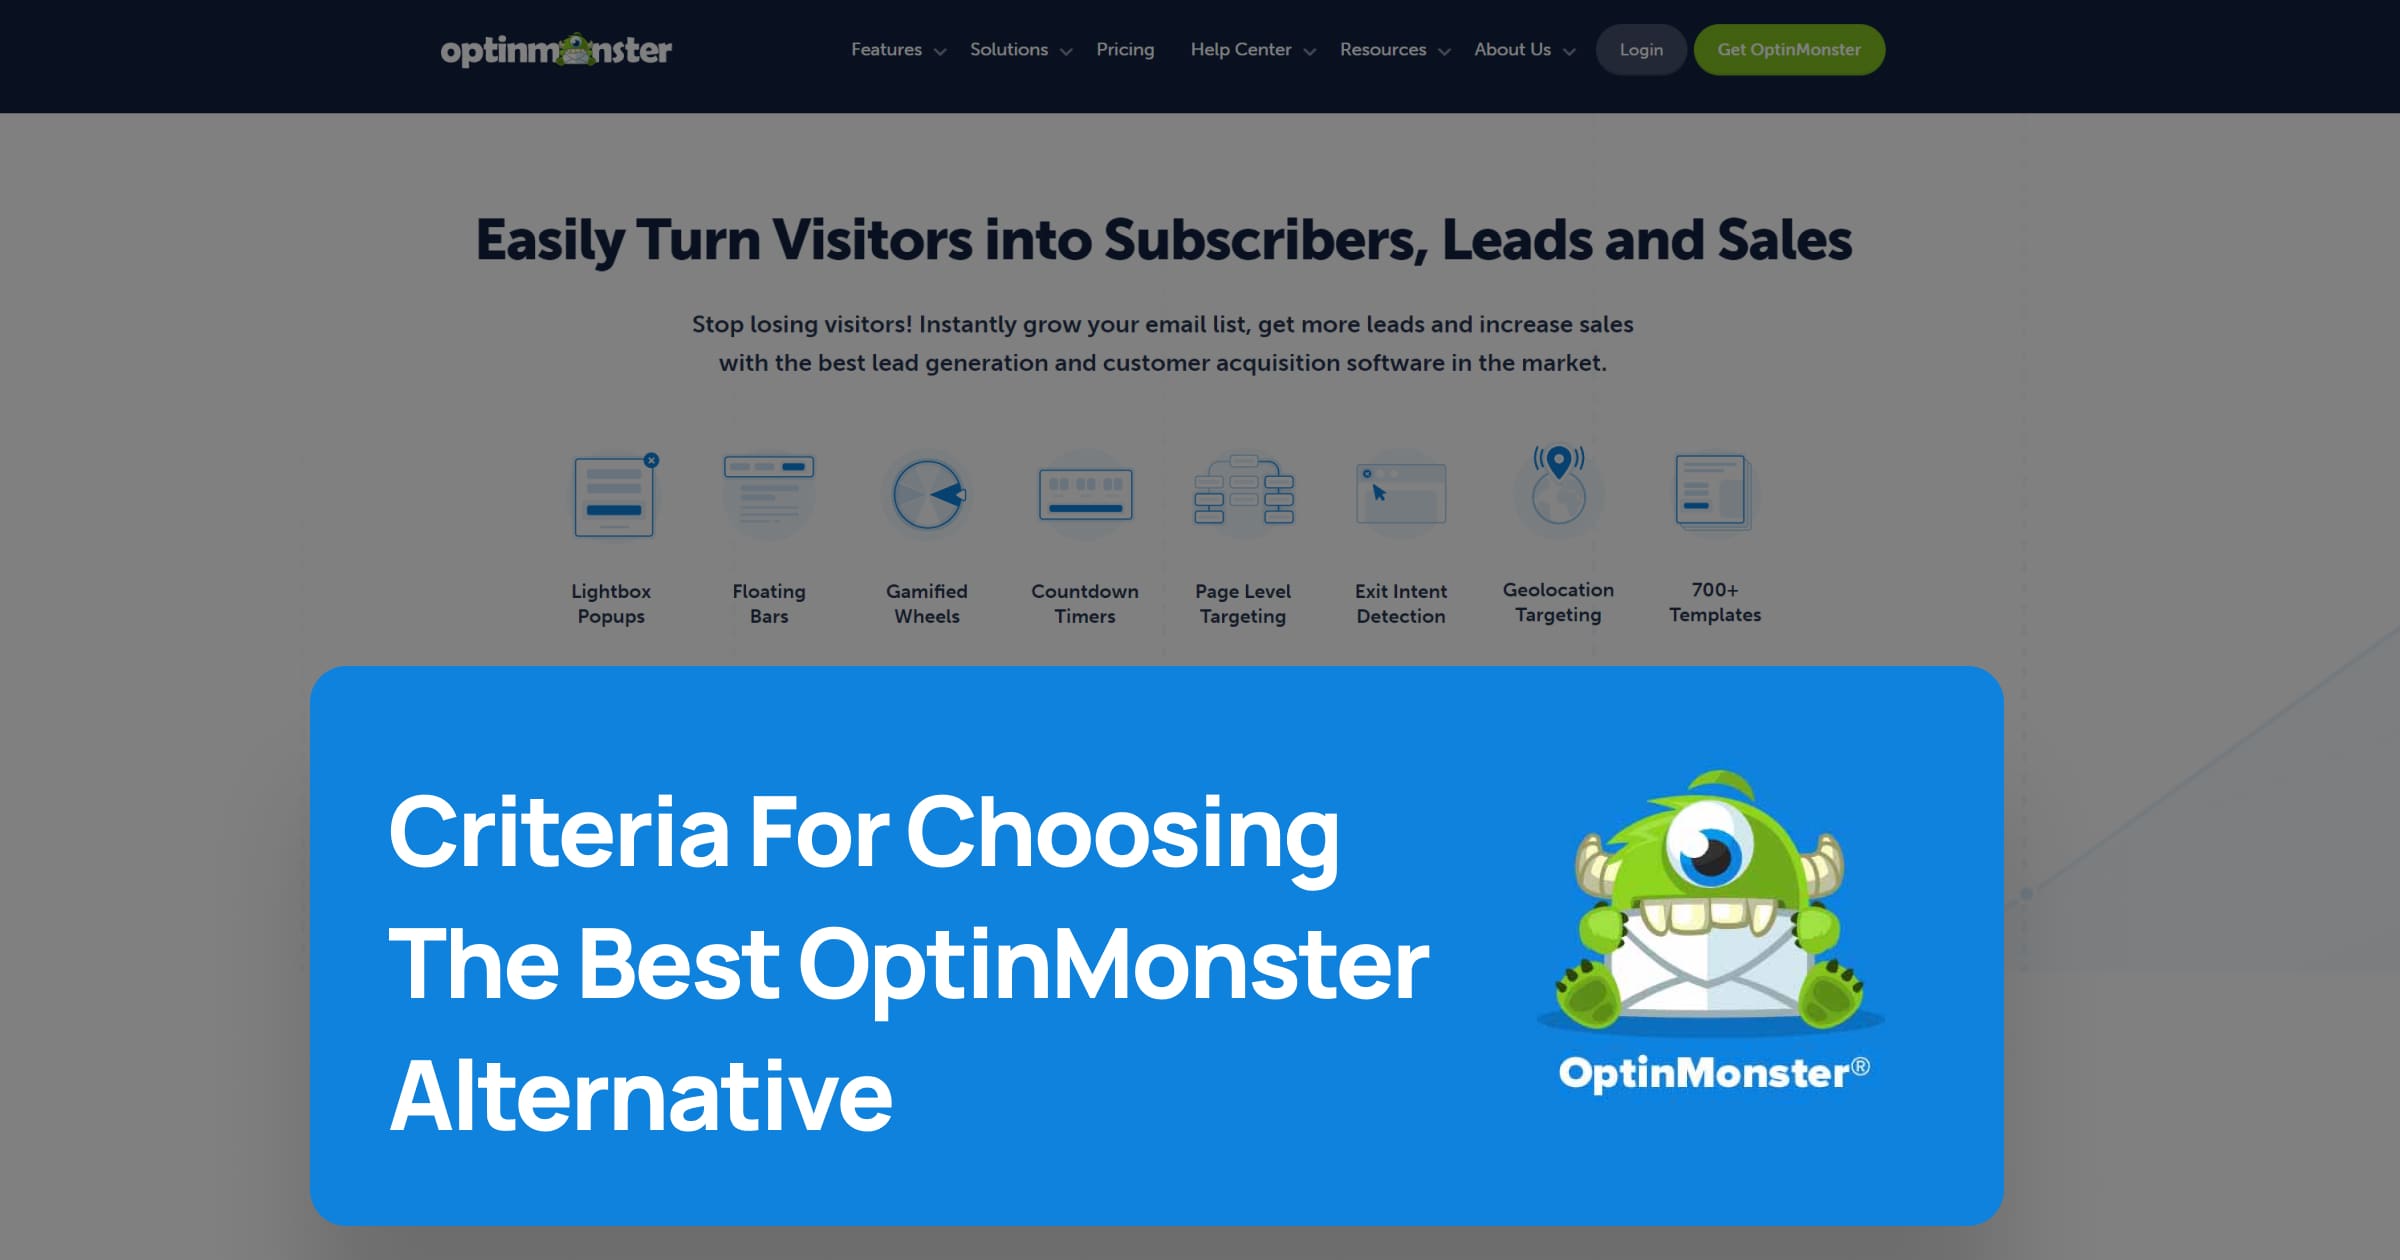
If you’re looking for Optinmonster altenative, you’re definitely not alone. Many users have turned to OptinMonster alternatives that are more user-friendly, budget-friendly, or even free.
Fortunately, there are plenty of options to explore. To make your search easier, I’ve compiled a list of the most popular and reliable OptinMonster alternatives. Take a look at the options below to find the right fit for your business.
So, why are potential and current OptinMonster users seeking alternatives?
For those considering OptinMonster, some common concerns include the lack of a free trial, the high cost, and the need for paid integrations.
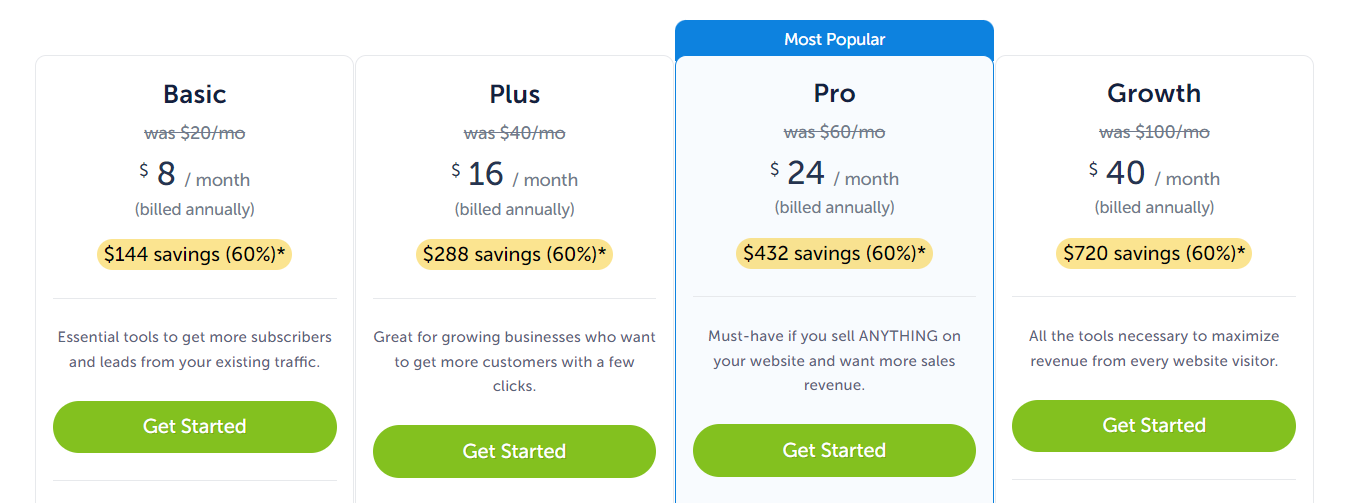
OptinMonster doesn’t offer a free trial, and its pricing plans range from $20 to $100 per month. This can be a significant expense for many businesses, prompting OptinMonster to run continuous discount offers to attract users.
Additionally, integrating with popular apps like Klaviyo, HubSpot, and Google Analytics requires the Pro plan, which starts at $60 per month. If you’re on the basic plan, these crucial integrations aren’t available.
Existing users also have their reasons for seeking alternatives, with the most common being the high costs and concerns over security vulnerabilities.
Upgrading to higher-tier plans may seem like a solution, but many users find they’re paying more for just a few additional features.
For instance, advanced features like exit popups and UTM tracking are only available in the Pro plan, while spin-to-win popups require the Growth plan at $100 per month.
Security is another concern. Not long ago, a significant security flaw was discovered in OptinMonster that potentially exposed sensitive information from over a million websites. Although this issue has been resolved, it has led some users to explore other options.
If these issues resonate with you, it might be time to consider an alternative to OptinMonster.
Best Optinmonster Alternatives:
Depicter __ The best free OptinMonster alternative with great features.
Thrive Leads __ A flexible OptinMonster alternative for growing your email list.
DOW! (Formerly Sumo) __ An easy-to-use OptinMonster alternative with built-in marketing tools.
Convert Pro __ A strong OptinMonster alternative with useful integrations.
Bloom by Elegant Themes __ A basic OptinMonster alternative for Elegant Themes users.
Leadpages __ A simple OptinMonster alternative with good landing page and pop-up options.
Privy __ A complete OptinMonster alternative for lead generation and marketing.
Design a WordPress Popup From Scratch with Blazing Animations!
Depicter is a powerful, flexible, and user-friendly OptinMonster alternative plugin, offering many advanced features for free.
Whether you’re looking to create engaging popups, schedule them for specific events, or trigger them based on user actions, this Optinmoster alternative plugin provides the tools you need to boost conversions and engage your audience effectively.
Key Features of Depicter
Build popups: Create beautiful and eye-catching popups to capture leads.
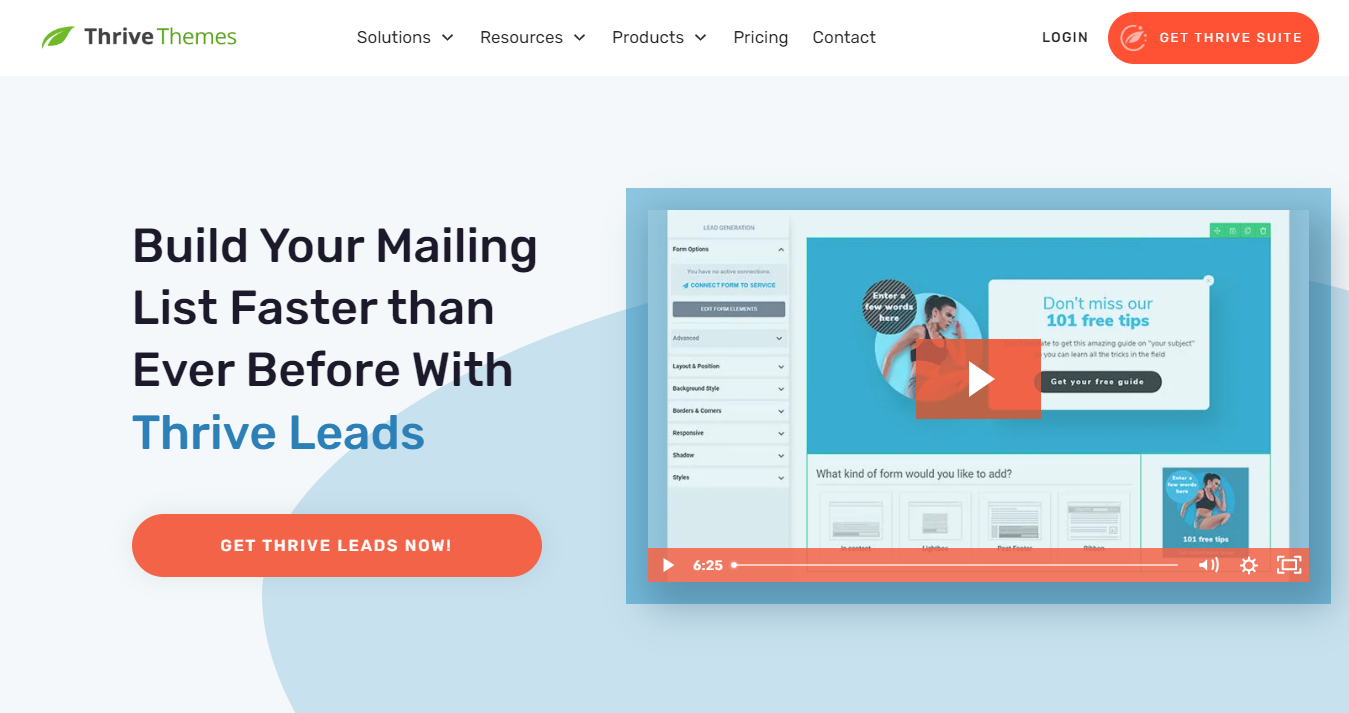
If you need an OptinMonster alternative, Thrive Leads is a great choice. It’s perfect for WordPress users who want to improve lead generation with customizable forms.
Thrive Leads offers various popup options, like lightbox popups and sticky bars. It’s simple to use, with drag-and-drop design and A/B testing to see what works best.
With flexible pricing options, Thrive Leads can fit your needs. Here’s a quick look at its key features.
Thrive Leads Key Features
Maximizes Lead Generation: Thrive Leads is a powerful tool designed to enhance lead generation on WordPress sites.
Diverse Popup Options:
Lightbox Popups: Capture attention with eye-catching popups.
Sticky Ribbons (Hello Bars): Stay visible as users scroll for a less intrusive approach.
In-Line Forms: Integrate seamlessly with your content.
2-Step Opt-In Forms: Use micro-commitments to increase conversions.
Slide-In Forms: Appear from the side for a subtle engagement.
Widget Area Forms: Place forms in widget areas of your site.
Screen Filler Overlays: Cover the entire screen for maximum impact.
Content Lockers: Restrict access to content until a form is completed.
Scroll Mats: Engage users based on their scrolling behavior.
Yes/No & Multi-Step Forms: Offer interactive options to boost engagement.
Advanced Triggers:
Control the display of your forms based on factors like time on page or scroll depth.
Integrated A/B Testing:
Compare different designs to determine which performs best.
Ease of Use:
Drag-and-drop design makes setup simple, even for beginners.
Fully integrated with WordPress for easy installation and management.
Excellent Support:
Responsive support team available to assist with any issues.
Pros:
Highly customizable
One-time payment options available
Advanced targeting capabilities
Detailed analytics for performance tracking
Cons:
No free plan available
No A/B testing in the lower plan
Pricing may be higher compared to some alternatives
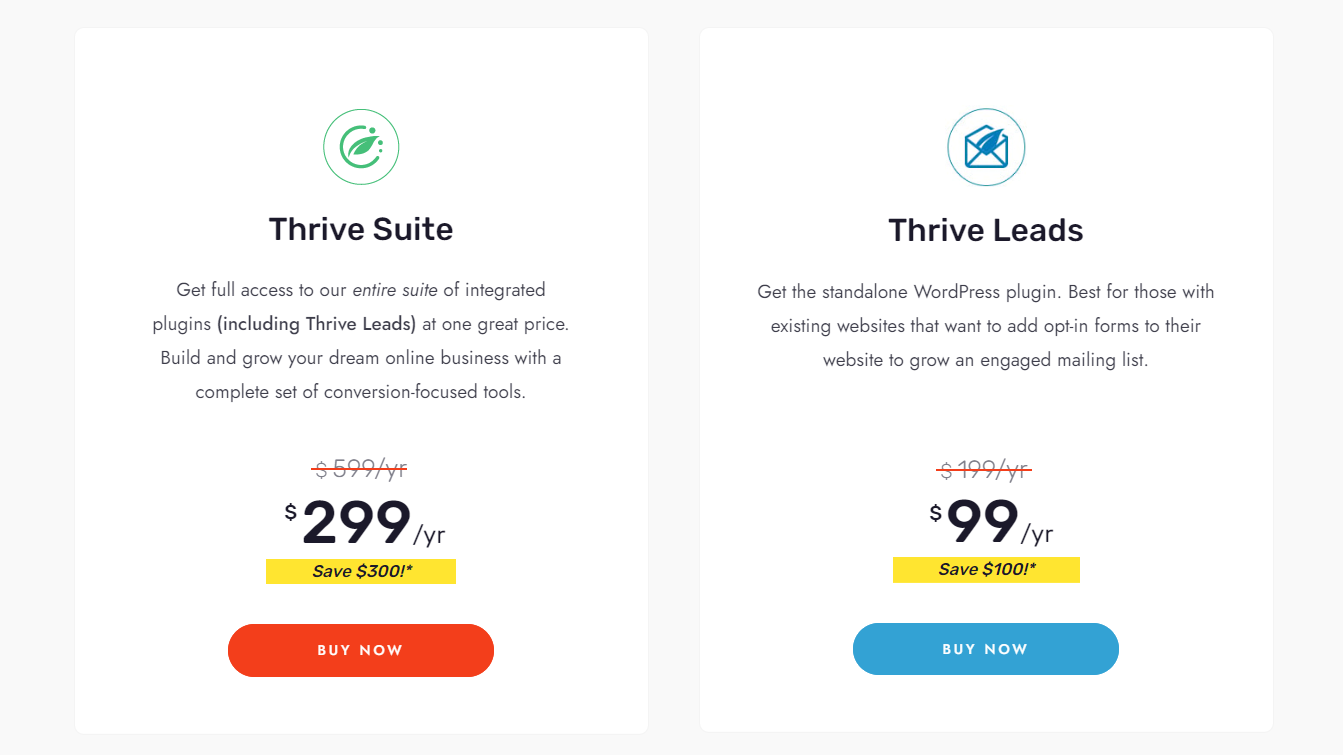
Pricing Options:
Thrive Leads: $99/year for standalone plugin, ideal for adding opt-in forms to existing websites.
Thrive Suite: $299/year for full access to all Thrive plugins, including Thrive Leads, suitable for building and growing an online business with a comprehensive set of tools.
How to Create a WordPress Notification Bar From Scratch!
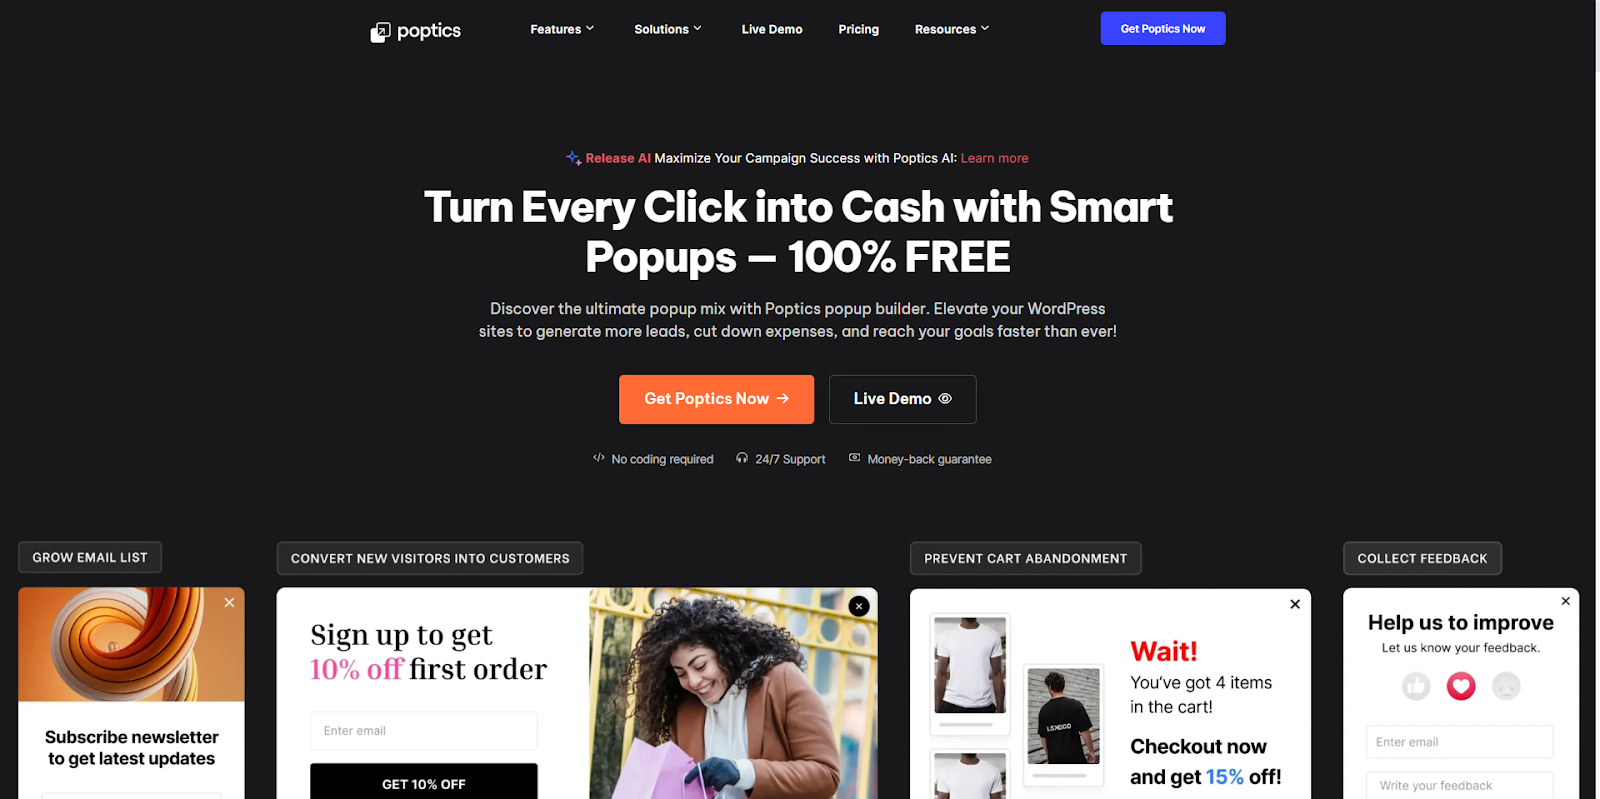
Poptics is an AI-powered WordPress popup builder that helps you grow sales, collect leads, and promote offers without slowing down your site. It includes ready-made templates, smart triggers, and WooCommerce tools to reach the right visitors at the right time. If you want a simple setup and strong conversion results, Poptics is a solid choice.
Popptics Key features:
Drag-and-drop builder: A user-friendly interface to create popups without coding knowledge.
Unlimited popups: No limits on the number of campaigns you can create or page views.
Pre-designed templates: A library of ready-made layouts to get started quickly.
Customizable styles: Allows for extensive customization to match your brand.
Smart triggers: Display popups based on user actions like exit-intent, time delay, scroll depth, and clicks.
Targeting options: Show popups based on specific pages, user location, device, or user behavior.
Email list growth: Build your subscriber list with email opt-in forms.
Autoresponder email: Automatically send a reply to users who submit their email.
Promotions: Easily create popups to showcase special offers and discounts.
Conversion analytics: Track impressions, clicks, and conversions to measure campaign performance.
A/B testing: Test different versions of your popups to find what works best.
Mobile responsive: Popups are designed to work on all devices.
Email marketing services: Integrates with platforms like Mailchimp, FluentCRM, and ActiveCampaign.
Why Choose Poptics?
With its user-friendly interface, powerful targeting options, and a library of customizable templates, Poptics Popup Builder offers the best solution for creating compelling pop-ups.
Poptics Pros and Cons
Pros:
Designed for beginners with a drag-and-drop interface.
Supports creating many types of popups, including lightboxes, slide-ins, floating bars, and countdown timers.
Includes built-in analytics to monitor views and conversions.
Allows for scheduling when popups appear and is compatible with WordPress multisite installations.
Cons:
Limited free version
Paid upgrade needed for advanced features
Pricing:
Free Plan: Offers basic targeting and lead collection capabilities.
Paid Plan: Costs $59/month for a single domain, with 1 year email support, including all features.
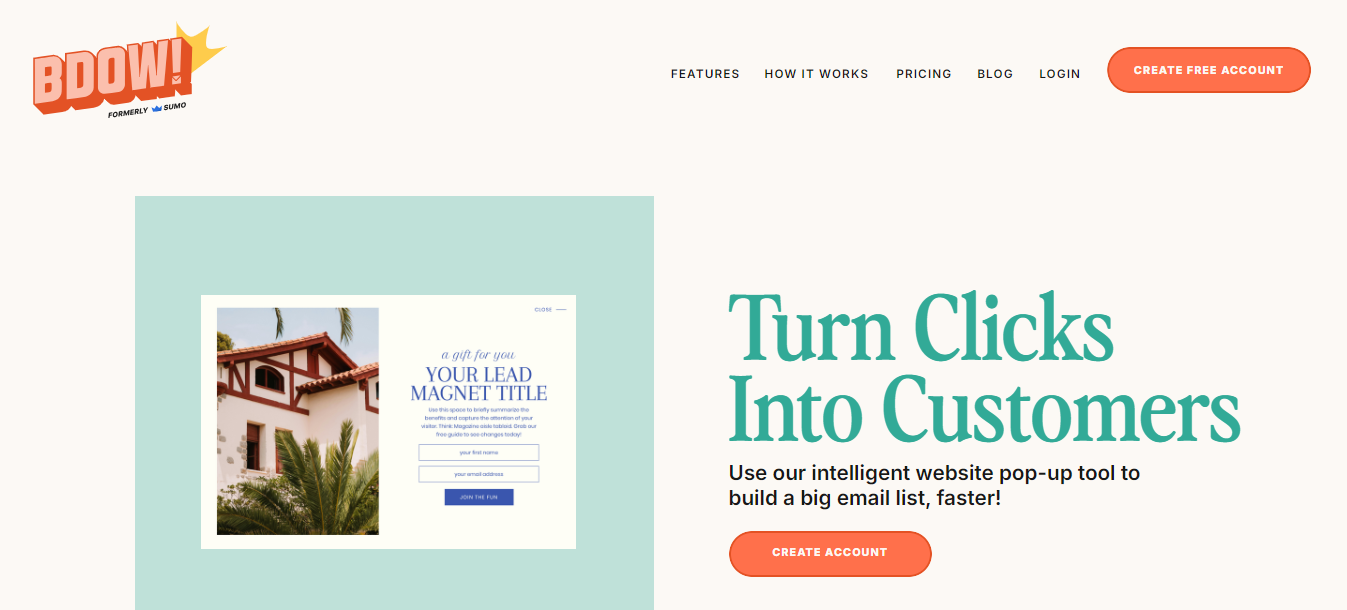
BDOW (formerly known as Sumo) is a solid OptinMonster alternative, particularly if you’re interested in integrating basic popups with other marketing features like email campaigns.
Available as both a WordPress plugin and for other website platforms, BDOW offers a range of tools to help grow your email list and engage visitors.
Best Features:
Email List Building Popups: Create effective popups to capture email leads.
Customizable Popups: Tailor popups to match your website’s design.
Premade Popup Templates: Access a gallery of ready-to-use popup templates.
Simple Email Integration: Easily connect with popular email marketing apps.
A/B Testing: Run A/B tests to see which popups perform best.
Why Choose BDOW?
Free Signup Forms: Build and publish signup forms on your website at no cost.
Upgrade for Advanced Features: While the free version is limited, you can upgrade for more advanced lead generation tools.
Affordable Option: If you’re looking for a free or low-cost OptinMonster alternative, BDOW is worth considering.
BDOW (Formerly Sumo) Pros and Cons
Pros:
Free Signup Forms
Customizable Popups
Premade Templates
Simple Email Integration
A/B Testing
Affordable Paid Plan
Cons:
Limited Free Version
Paid Upgrade Needed for Advanced Features
Pricing:
Free Plan: Offers basic signup forms to get started.
Paid Plan: Costs $49/month for up to 100,000 monthly visitors and unlocks advanced features.
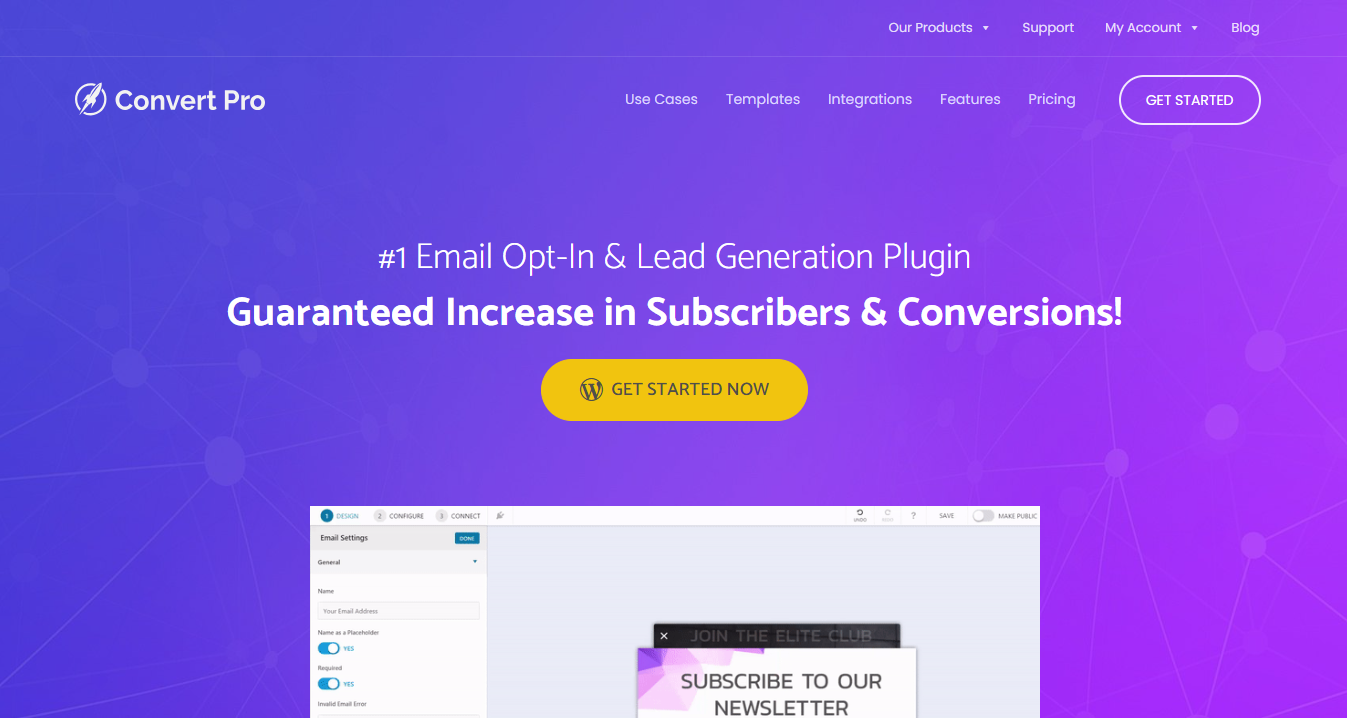
Convert Pro is another strong OptinMonster alternative, designed to help you create high-converting popups and opt-in forms with ease.
With its intuitive drag-and-drop editor and a range of ready-to-use templates, Convert Pro makes it simple to design and deploy effective marketing campaigns.
Convert Pro Key Features:
Drag and Drop Editor: Easily create and customize popups and forms without any coding.
Ready-to-Use Templates: Choose from a variety of pre-designed templates to get started quickly.
Google Analytics Integration: Track and analyze your popup performance directly in Google Analytics.
30+ Mailer Integrations: Seamlessly connect with over 30 email marketing platforms.
Exit Intent Popups: Capture leads right before they leave your site with exit-intent popups.
On-Click Popups: Display popups when users click on specific elements on your site.
Info-bar / Slide-in: Create attention-grabbing info bars and slide-in forms.
After Post / Inline CTAs: Add call-to-action forms after blog posts or within your content.
Yes/No Forms: Engage visitors with interactive yes/no forms.
Full Screen CTAs: Use full-screen call-to-actions to maximize engagement.
Page Level Targeting: Target specific pages or sections of your site with tailored messages.
Split / A/B Testing: Test different versions of your popups to find the most effective one.
Referrer Detection: Customize your popups based on the source of your visitors.
Device Detection: Show different popups depending on the visitor’s device.
AdBlock Detection: Detect and engage users with ad-blockers installed.
Product Updates: Stay up-to-date with the latest features and improvements.
Premium Support: Get priority assistance whenever you need help.
Unlimited Website Usage: Use Convert Pro on an unlimited number of websites.
Convert Pro Pros and Cons
Pros:
User-Friendly Interface
Ready-to-Use Templates
Comprehensive Integration
Advanced Popup Options
Highly Customizable
A/B Testing
Affordable Pricing
Strong Support
Cons:
No Free Plan
Upfront Cost for Lifetime Plan (The one-time payment for the lifetime plan might be a higher upfront cost for some users)
Limited Advanced Features for Lower Plans
Pricing:
Annual Plan: $89 per year.
Lifetime Plan: $349 one-time payment.
Convert Pro offers great features at a reasonable price, making it an excellent choice for boosting your website’s conversions and growing your email list.
If you’re using Divi, this Optinmonster alternative is for you. Bloom by Elegant Themes is a straightforward tool for creating email opt-in popups to help grow your email list.
While it doesn’t offer advanced features like a visual drag-and-drop builder or exit-intent popups, it’s still a solid option for basic needs.
If you’re already using other Elegant Themes products like Divi, Bloom can be a valuable addition to your toolkit.
Bloom Key Features:
6 Opt-In Form Types: Includes Popup, Fly-in, Below Post, Inline, Locked Content, and Widget forms (Note: Bloom does not support notification bars).
Template-Based Design: Choose from pre-made templates for your forms (No drag-and-drop customization).
20+ Email Marketing Integrations: Supports popular services like Mailchimp and ActiveCampaign.
Display Settings: Control when and where your popups appear on your site.
Post-Submission Options: Choose to show a success message or redirect users to a custom URL after they submit the form.
Bloom Pros and Cons
Pros:
Seamless Integration with Divi
Simple and Straightforward
Multiple Form Types
Template-Based Design
Affordable Access
Wide Email Integration
Flexible Pricing Options
Cons:
Limited Advanced Features
No Notification Bars
Best for Existing Users
Lacks a Drag-and-Drop Builder
Pricing:
Yearly License: $89 per year for access to all Elegant Themes products, including Bloom, Divi, Extra, and Monarch, with one year of support and updates.
Lifetime License: $249 one-time payment for lifetime access to all Elegant Themes products, with lifetime support and updates.
Bloom’s simplicity and integration with Elegant Themes make it a good choice for users who are already invested in the Elegant Themes ecosystem (eg. Divi)
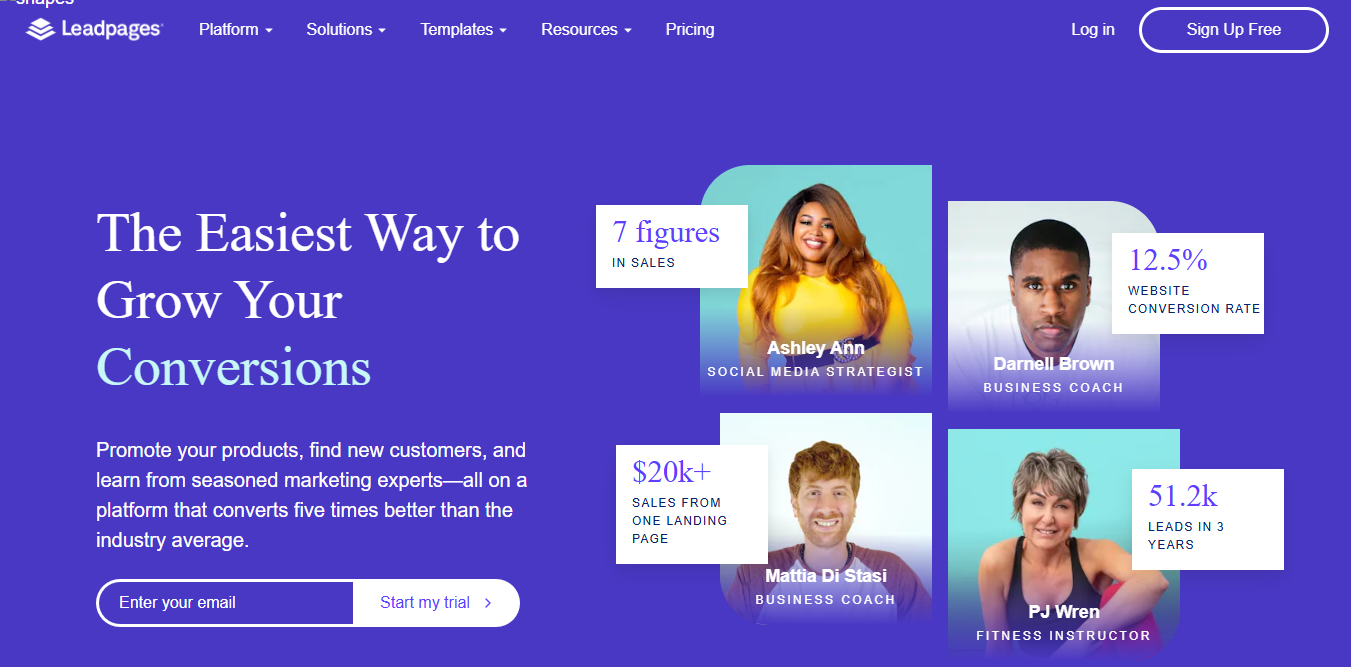
Leadpages is a another platform that offers a range of tools to help you grow your online presence and capture leads.
With its drag-and-drop interface, you can easily create landing pages, pop-ups, and alert bars without needing any coding skills.
This makes it an excellent choice for beginners and those who want to quickly set up effective lead-generation campaigns.
Key Features:
Landing Page Builder: Easily create custom landing pages with a drag-and-drop interface.
Pop-Up Builder: Design pop-ups that trigger based on clicks, time delays, or exit intent.
Alert Bars: Add attention-grabbing alert bars to your site.
Drag-and-Drop Interface: Place elements like text, images, and buttons exactly where you want them.
Email Marketing & CRM Integration: Connect seamlessly with your existing marketing tools.
Template Library: Access a wide range of templates sorted by conversion rates, helping you choose the most effective designs.
Weekly Coaching Sessions: Get free training and coaching to maximize your use of Leadpages.
Leadpages Pros and Cons
Pros:
Beginner-Friendly
Offers a variety of tools, including a landing page builder, pop-up builder, and alert bars
Extensive Template Library
Easily connects with popular email marketing tools and CRMs
Weekly Coaching Sessions
Free 14-Day Trial
Cons:
Higher Cost
Limited Features on Standard Plan (like A/B testing and support for multiple users)
No Advanced Customization
Pricing:
Standard Plan: $37/month – Includes 1 site, unlimited traffic & leads, free custom domain, free hosting, mobile-responsive site templates, lead notifications, tech support, and 40+ integrations.
Pro Plan: $74/month – Includes everything in the Standard Plan plus online payments, unlimited A/B testing, advanced integrations, and support for 5 users.
Leadpages offers a free 14-day trial for both plans, allowing you to test out its features before committing.
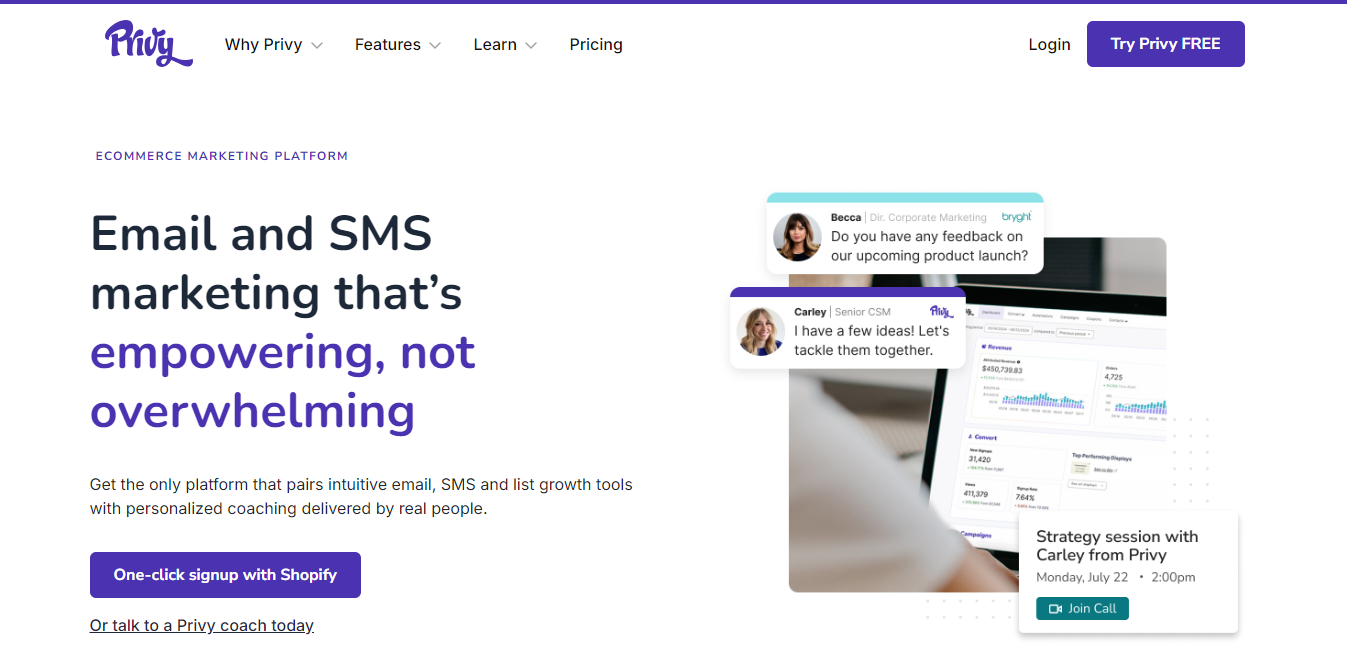
Privy is a comprehensive alternative to OptinMonster, combining lead generation with built-in marketing tools.
With Privy, you can capture leads, send them directly to an integrated email app, and nurture them through email and SMS campaigns.
While it may have fewer lead generation features compared to some other tools, Privy’s all-in-one approach makes it a strong option for businesses looking to streamline their marketing efforts.
Website Banners and Bars: Add banners and notification bars to your site.
Targeted Coupons and Offers: Offer personalized discounts and promotions to visitors.
Email and Phone Number Capture: Gather contact information to grow your marketing list.
Email and SMS Marketing: Use built-in tools to send promotional campaigns directly from Privy.
Privy Pros and Cons
Pros:
Combines lead generation with built-in email and SMS marketing tools
Allows you to create personalized coupons, offers, and notification bars
Offers a free plan for capturing up to 100 emails
Integrated Campaigns
Includes essential tools for creating popups, banners, and bars
Cons:
Limited Lead Generation Features
Costs increase as your email contact list grows
Limited design flexibility
Pricing:
Free Plan: Capture up to 100 emails at no cost.
Paid Plan: Pricing increases based on the number of email contacts. For example, managing 3,000 contacts will cost $75/month.
Privy is a cost-effective OptinMonster alternative, offering both lead generation and marketing features for the price of one. It’s a great choice for businesses on a budget that want an all-in-one solution.
Criteria for Choosing the Best OptinMonster Alternative For Maximum Lead Generation!
When looking for an OptinMonster alternative, it’s important to focus on the features that matter most to your business. Here are some key factors to consider:
Ease of Use
A user-friendly interface is crucial, especially if you’re not a tech expert. Look for plugins with drag-and-drop editors and simple setup processes, so you can start creating popups, notification bars, and forms quickly without needing extensive technical knowledge.
Customization
Your website is unique, and your lead generation tools should be too. Choose an alternative that allows you to customize popups, forms, and notifications to match your brand’s style.
This includes options for setting triggers, controlling where and when popups appear, and personalizing messages based on visitor behavior.
Integration
Seamless integration with your existing tools is a must. Whether you’re using an email marketing service, CRM, or analytics tool, your OptinMonster alternative should connect smoothly with these platforms.
This ensures that your lead generation efforts are well-coordinated and that you can easily manage your contacts and track your results.
Affordability
Cost is often a deciding factor, especially if you’re looking for a free OptinMonster alternative. While some plugins offer basic features for free, others provide more advanced options at competitive prices.
Compare pricing plans to find an option that fits your budget without compromising on essential features.
Security Considerations
Security is a top priority for any website. While OptinMonster is generally safe, it’s important to ensure that any alternative you choose also offers robust security measures.
Check for regular updates, secure coding practices, and features that protect your site and data from potential threats.
By focusing on these criteria, you can find an OptinMonster alternative that not only meets your needs but also enhances your ability to generate leads and grow your business.
Comparing the Optinmonster Alternatives
Below is a table comparing the key criteria for each OptinMonster alternative you chose for your article: Depicter, Thrive Leads, BDOW (formerly Sumo), Convert Pro, Bloom by Elegant Themes, Leadpages, and Privy.
Criteria
Depicter
Thrive Leads
BDOW (Formerly Sumo)
Convert Pro
Bloom by Elegant Themes
Leadpages
Privy
Drag-and-Drop Builder
Yes
Yes
No
Yes
No
Yes
No
Notification Bars
Yes
Yes
Yes
Yes
No
Yes
Yes
A/B Testing
No
Yes
Yes
Yes
No
Yes
No
Exit-Intent Popups
Yes
Yes
No
Yes
No
Yes
No
Advanced Triggers
Yes
Yes
Yes
Yes
No
Yes
Yes
Number ofPre-Built Templates
420+
220+
60+
+60
100+
250+
60+
Other Platform Support
No
No
Yes
Yes
No
Yes
Yes
Free Plan Available
Yes
No
Yes
No
No
No
Yes
Pricing (Paid Plans Starting From)
$30/year
$99/year
$49/month
$89/year
$89/year
$37/month
$75/month
All-in-One Marketing Tools
No
No
No
No
No
No
Yes
24/7 Support
Yes
Yes
No
No
No
No
No
Conclusion
Finding the right OptinMonster alternative can make a big difference in growing your business and capturing more leads. Whether you’re looking for something more affordable, easier to use, or packed with features, the options listed here offer great choices for different needs and budgets.
Think about what’s most important to you—whether it’s ease of use, customization, integration with other tools, cost, or security. By focusing on these key areas, you’ll be able to pick a tool that fits your website perfectly and helps you reach your goals.
Explore these alternatives and choose the one that best suits your needs to boost your lead generation efforts and grow your business.
Below is a table comparing the key criteria for each OptinMonster alternative you chose for your article: Depicter, Thrive Leads, BDOW (formerly Sumo), Convert Pro, Bloom by Elegant Themes, Leadpages, and Privy.
Staying connected with your audience is important, right? One of the most effective ways to ensure timely and direct communication is through SMS.
Whether you want to send order confirmations, notifications, or marketing messages, having the right SMS plugin is crucial.
In this article, we’ll dive into the top 3 WordPress SMS plugins in 2024, helping you choose the best one for your needs.
What to Look for in a WordPress SMS Plugin?
When choosing an SMS plugin for WordPress, it’s essential to consider the features it offers. Look for plugins that provide:
Easy integration with your WordPress site
Automated messaging capabilities
Customizable templates
Scheduling options
Delivery reports and analytics
Top 3 WordPress SMS Plugins in 2024
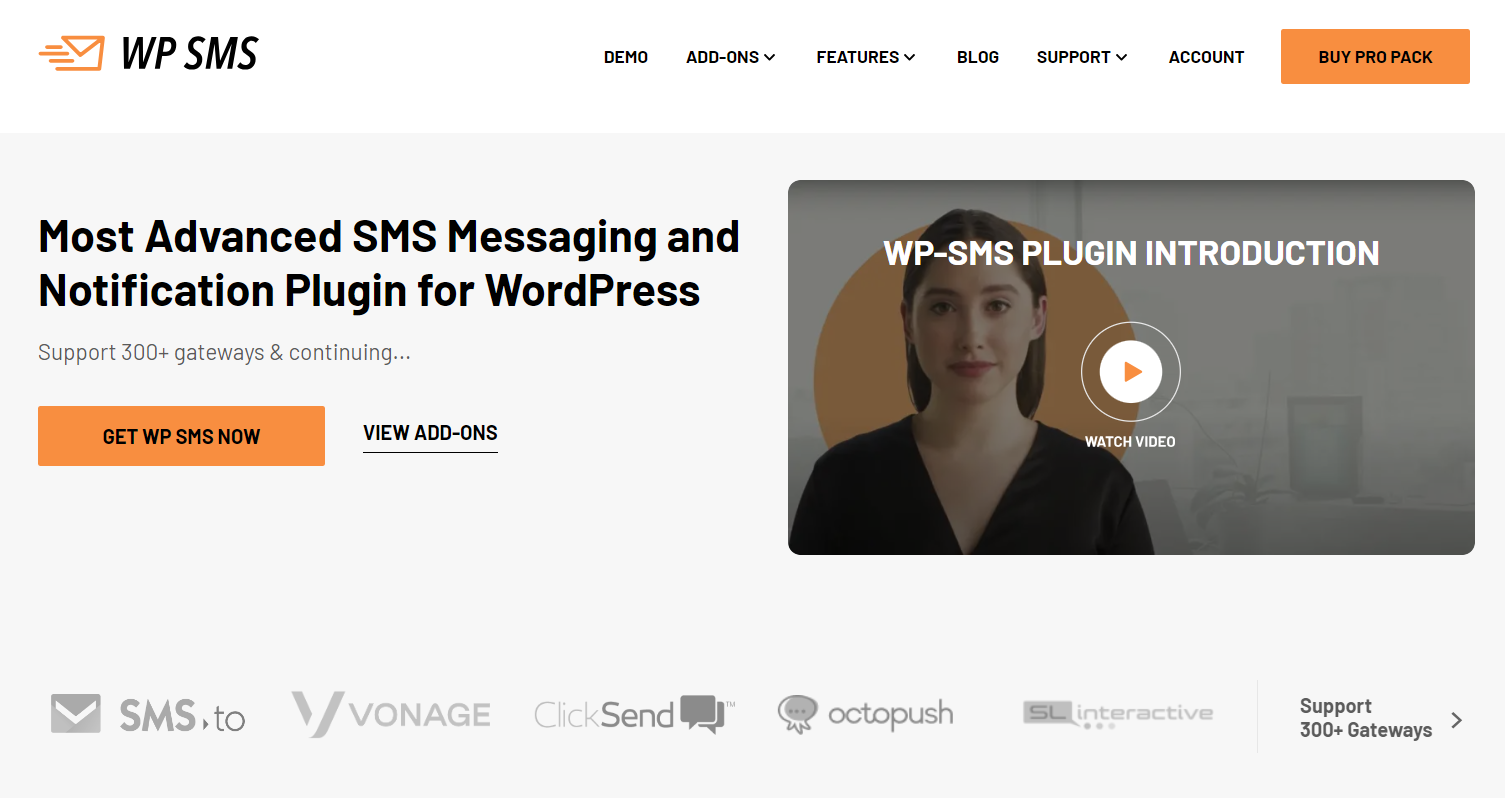
1. WP SMS
WP SMS is a highly popular plugin known for its ease of use and versatility. Through more than 300 SMS gateways including Twilio, Plivo, Clickatell, BulkSMS, and Infobip, you can effortlessly send messages to your users, subscribers, and WooCommerce customers. Whether you need to notify users about new posts, products, or order updates, WP SMS is the solution to your communication needs.
Key Features of WP SMS
Supports over 300 SMS gateways
Complies with GDPR
Easy integration with WooCommerce and Contact Form 7
SMS scheduling and bulk messaging
Delivery reports and analytics
Messaging Button
Pros and Cons of WP SMS
Pros:
Highly customizable
Extensive gateway support
User-friendly interface
Cons:
Some advanced features require a premium subscription.
Pricing Structure of WP SMS
The plugin is free to use with the premium version starting from $39/year.
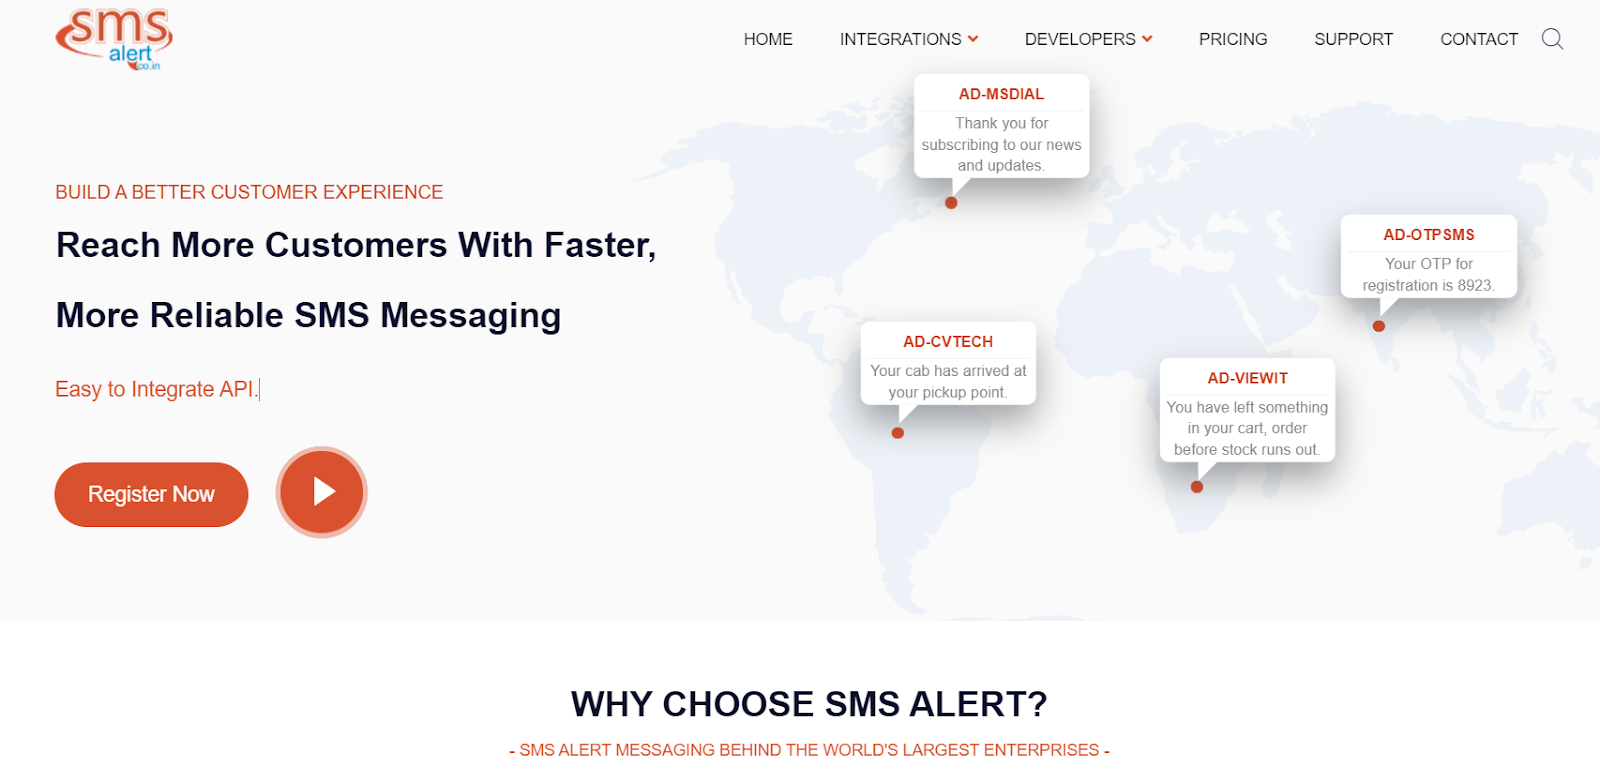
2. SMS Alert
Alt: SMS Alert website
The SMS Alert Plugin for WooCommerce is designed specifically to enhance communication for e-commerce businesses.
By integrating this plugin into your WooCommerce store, you can send instant SMS notifications, ensuring that both customers and administrators stay informed about order statuses, transactions, and more.
Key Features of SMS Alert
Order notifications for customers and admins
OTP verification
Customizable SMS templates
Delivery reports
Bulk SMS Capability
Pros and Cons of SMS Alert
Pros:
Excellent for WooCommerce users
Easy to set up and use
Reliable delivery and reporting
Cons:
Limited to WooCommerce-related features.
Requires a subscription for advanced features.
Pricing Structure of SMS Alert
The plugin is available for free with basic features and offers a premium version with advanced functionalities
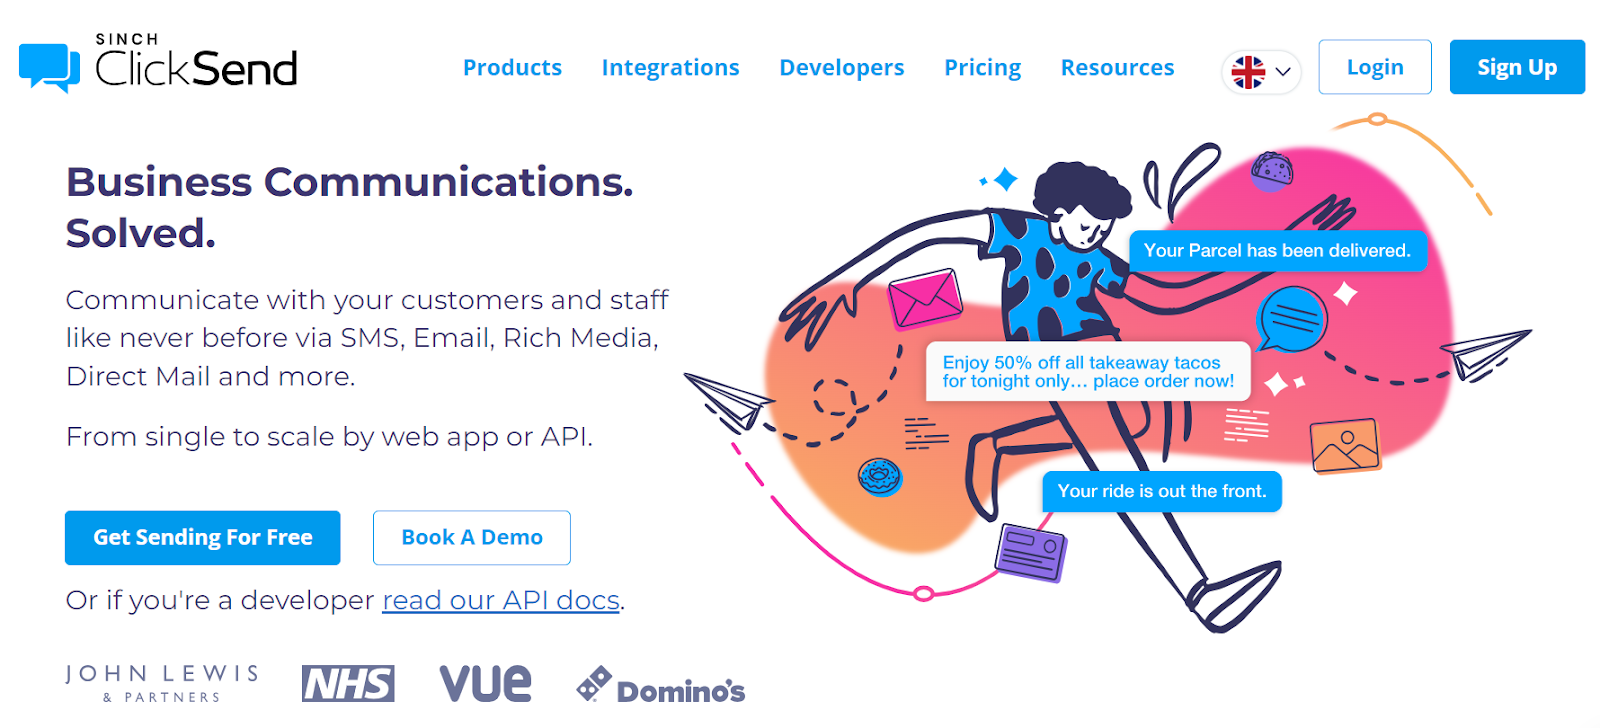
3. ClickSend
ClickSend plugin is designed to enhance your communication strategy by integrating SMS, email, and voice messaging capabilities directly into your website.
It could be a good option for businesses seeking an all-in-one solution for sending notifications, marketing messages, and more.
Key Features of ClickSend
SMS, email, and voice messaging
API integration
Detailed analytics and reporting
Scheduling and automation features
Two-Way Messaging
Pros and Cons of ClickSend
Pros:
Multi-channel messaging support
API for custom integrations
Reliable and fast delivery
Cons:
Complex setup
Higher cost for multi-channel messaging
Pricing Structure of ClickSend
The ClickSend SMS plugin operates on a pay-as-you-go pricing model.
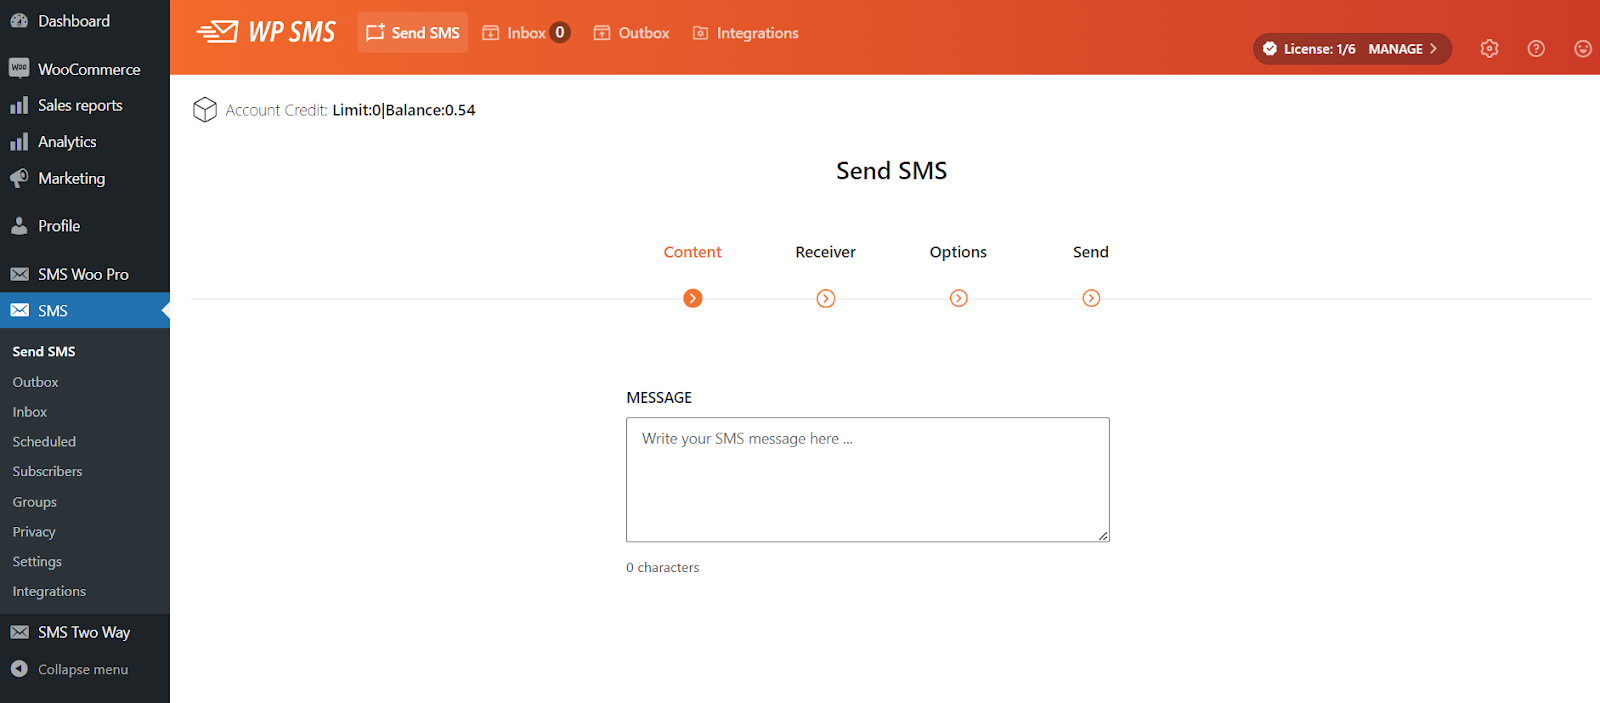
How to Install and Set Up a WordPress SMS Plugin?
Choose Your Plugin
Select the SMS plugin that best fits your needs.
Install the Plugin
Navigate to your WordPress dashboard, go to Plugins > Add New, and search for your chosen plugin. Click “Install Now” and then “Activate”.
Configure Settings
Follow the plugin’s setup wizard to configure settings such as API keys, gateway integration, and messaging templates.
Test the Plugin
Send a test SMS to ensure everything is working correctly.
Go Live
Once configured and tested, start using the plugin for your SMS needs.
What Are the Benefits of Using SMS Plugins for WordPress?
Enhanced Communication
SMS provides a direct and immediate way to reach your audience, ensuring important messages are seen quickly.
Increased Engagement
Personalized SMS messages can significantly increase customer engagement and response rates compared to emails.
Improved Customer Support
Use SMS for order updates, appointment reminders, and customer support notifications to enhance the overall customer experience.
Best Practices for Using SMS Plugins on WordPress
Compliance with Regulations
Ensure your SMS campaigns comply with local regulations, such as obtaining consent from recipients and providing opt-out options.
Crafting Effective SMS Messages
Keep messages concise and to the point. Personalize where possible and include a clear call-to-action.
Monitoring and Analytics
Regularly review delivery reports and analytics to gauge the effectiveness of your SMS campaigns and make necessary adjustments.
Conclusion
Whether you need simple notification services or a comprehensive marketing tool, there’s a plugin to fit your needs. WP SMS, SMS Alert, and ClickSend each offer unique features and benefits.
Evaluate your requirements, compare the options, and select the best plugin to achieve your communication goals in 2024.
FAQs
What is a WordPress SMS plugin?
A WordPress SMS plugin integrates SMS messaging capabilities into your WordPress site, allowing you to send notifications, alerts, and marketing messages directly to users’ mobile phones.
Are SMS plugins secure?
Yes, most SMS plugins implement security measures to protect your data and ensure secure messaging. Always choose plugins from trusted developers and regularly update them.
Can I use multiple SMS plugins on my website?
While it is possible, using multiple SMS plugins can complicate your setup and lead to conflicts. It’s generally best to choose one comprehensive plugin that meets all your needs.
How do I choose the right SMS plugin for my needs?
Consider your specific requirements, such as the type of messages you want to send, integration needs, budget, and user reviews. Compare features and pricing plans before making a decision.
Do SMS plugins support international messaging?
Many SMS plugins support international messaging through various gateways. Check the plugin’s documentation to ensure it supports the regions you need to reach.
If you have an online shop it’s essential to know how to increase your sales by reducing cart abandonment Abandoned cart recovery is a powerful strategy for boosting sales and revenue. The average cart abandonment rate is around 69.57%, meaning nearly seven out of ten customers leave their carts without completing the purchase. This represents a significant opportunity for businesses to reclaim lost sales. By implementing effective abandoned cart recovery strategies, you can re-engage customers, provide additional information or incentives, and ultimately convert abandoned carts into completed orders. This process offers benefits beyond recouping lost sales. By analyzing abandoned cart data, valuable insights into customer behavior, preferences, and purchasing challenges can be uncovered. This information can be used to optimize product offerings, improve the checkout process, and enhance overall customer experience. Furthermore, abandoned cart recovery strategies can foster customer loyalty by showcasing your dedication to exceptional service and meeting customer needs.
Reasons for Shopping Cart Abandonment
Cart abandonment is a significant challenge for online retailers, with a substantial portion of shopping carts left unfinished. Understanding the reasons behind this behavior is crucial for optimizing the checkout process and increasing conversions. Several factors contribute to cart abandonment, impacting businesses across various industries. By identifying and addressing these issues, retailers can improve customer satisfaction and drive sales.
Surprise shipping costs. If you tack on a shipping cost at the end of the checkout process, expect a higher cart abandonment rate. Generally, customers like transparency, so it’s important that you provide an accurate figure. If an unexpected charge is added at the end, it’s definitely going to affect your cart abandonment rate.
Price comparisons. This one’s fairly obvious: if a customer finds the same product being sold at a cheaper price elsewhere, they’ll probably abandon their carts and buy from another place.
Change of mind. A customer may have a mood shift midway through their purchase. If they decide against buying, they will simply abandon their carts and close the website.
Lack of payment options. Another reason why customers may abandon their carts is if you fail to provide them with a suitable payment option. Payment options should be shown prominently on your website instead of on the last checkout screen.
Overly complicated checkout. This one’s equally important. You have to ensure that the checkout page is not overly complicated, otherwise you risk disillusioning customers.
How to Reduce Abandoned Cart Sales
To reduce abandoned cart sales, focus on understanding and addressing the root causes of this issue. Here are key strategies:
Optimize the Checkout Process
Simplify the checkout: Reduce the number of steps and fields required to complete a purchase.
Offer multiple payment options: Provide various payment methods to accommodate customer preferences.
Display total costs upfront: Clearly communicate all costs, including shipping and taxes, before checkout.
Ensure website speed and reliability: A slow or error-prone website can frustrate customers and lead to abandonment.
Build Trust and Confidence
Display trust badges and security seals: Assure customers that their information is safe.
Offer clear return and refund policies: Build customer confidence by outlining your policies clearly.
Provide Excellent Customer Experience
Offer outstanding customer support: Be available to assist customers with any questions or concerns.
Personalize the shopping experience: Tailor recommendations and offers to individual customers.
Implement effective abandoned cart recovery strategies: Re-engage customers with targeted emails or messages.
Understand and Address Customer Concerns
Analyze abandoned cart data: Identify common reasons for abandonment, such as unexpected costs or product availability issues.
Offer incentives: Provide discounts, free shipping, or other incentives to encourage completion of the purchase.
Address price concerns: Highlight product value or offer competitive pricing to overcome price objections.
Utilize Exit-Intent Popups
Exit-intent popups are a powerful tool for recovering potential customers on the brink of leaving your website. When visitors indicate an intent to leave, strategically timed popups can effectively capture their attention and provide a compelling reason to stay.
Key benefits of using exit-intent popups:
Recover abandoned carts: Remind customers about items left in their cart with a personalized offer or discount.
Capture email addresses: Offer valuable content or exclusive deals in exchange for email sign-ups.
Conduct exit surveys: Gather valuable feedback from departing visitors to improve your website and products.
Promote specific offers: Highlight limited-time promotions or new products to entice customers to stay.
Best practices for effective exit-intent popups:
Timing is crucial: Ensure popups appear only when a visitor is about to leave, avoiding interruptions.
Offer value: Provide incentives or information that genuinely benefits the visitor.
Keep it simple: Use clear and concise messaging to avoid overwhelming the user.
Test and optimize: Experiment with different popup designs, offers, and triggers to find what works best.
How to add Exit-Intent Popups to your online shop to Reduce Cart Abandonment with Depicter
Installing Depicter
To learn how to install Depicter, check out this video:
The following video helps you get started with the Depicter Popup Builder. It gives a good overview of how it works. While there’s a lot more to learn about the builder, this video will give you a solid foundation:
Importing a template
Depicter offers a comprehensive library of pre-configured popup templates that are pre-designed and optimized for your online shop. These templates provide a solid foundation for rapid development, eliminating the need to build popups from scratch. To access these templates, navigate to the dedicated popup section within the dashboard.
For instance, by searching for the term ‘Cart’, we can specifically list pre-designed templates tailored for exit-intent popups. From there, we can select a template and import it with a single click.
The next step is to configure the Display Rules and Trigger settings. For Display Rules, we simply need to specify that our popup should only be shown on either the Cart page or the Checkout page.
Next, we activate the ‘Exit Intent’ trigger from the Triggers menu. This means that with the settings we’ve configured, our popup will appear on either the Cart or Checkout page as soon as the user attempts to leave the page. Our goal is to recapture the user’s attention by displaying a special offer, such as a discount before they abandon their purchase. By using Depicter and following these steps, we can easily achieve that.
Here is the final result:
Conclusion
By understanding the reasons behind cart abandonment and implementing effective recovery strategies, online retailers can significantly boost sales and improve customer satisfaction. Recovering abandoned carts is not only about reclaiming lost revenue but also about gaining valuable insights into customer behavior and preferences. Depicter Popup Buidler is the ultimate option for streamlining the process of creating and managing effective popups, helping you recover more abandoned carts and increase overall sales.
FAQs
Why is cart abandonment a problem?
Cart abandonment represents lost sales and revenue for online businesses.
How can I reduce cart abandonment?
By implementing a combination of strategies, such as optimizing the checkout process, building trust, and using exit-intent popups, you can effectively reduce cart abandonment.
What is an exit-intent popup?
An exit-intent popup is a message that appears when a visitor is about to leave a website.
How can I use exit-intent popups to recover abandoned carts?
Offer incentives or reminders about abandoned items through exit-intent popups to encourage customers to complete their purchases.
Scroll popups, or display popups after page scroll, offer a strategic approach to engaging website visitors at the optimal moment. By strategically timing the appearance of a popup scroll as a user navigates through your content, you can deliver highly targeted messages and calls to action that resonate with their interests. This technique not only enhances user experience but also drives conversions, email sign-ups, and overall website engagement. When implemented effectively, scroll popups can significantly boost lead generation and increase customer satisfaction.
What is a Scroll Popup?
Unlike traditional popups that appear immediately upon a website visitor’s arrival, scroll popups are designed to display at a specific point during the scrolling journey. Often called scroll advertising, this targeted approach ensures your message reaches visitors who are already engaged with your content, increasing its relevance and effectiveness.
Here’s how it works: Imagine a website visitor is reading a blog post about healthy recipes. As they scroll down and reach the section with dessert options, a popup offering a free e-book on healthy desserts appears. This targeted message is more likely to capture the visitor’s attention and encourage them to sign up compared to a generic popup that showed up upon arrival.
Benefits of using Scroll Popups
Scroll popups offer several advantages over traditional popups that appear immediately upon a website visit. They are less disruptive and respect the user’s experience. By appearing after a user has engaged with content, scroll popups are perceived as less interruptive, increasing their acceptance rate.
Scroll popups allow for highly targeted messaging. A scroll trigger mechanism based on your strategy makes it possible to control when the popup appears based on the user’s scrolling behavior, you can deliver offers and content that directly relate to what the user is interested in. Imagine an online clothing store. As a visitor scrolls past a section showcasing summer dresses, a scroll popup might appear offering a 15% discount on sundresses. This timely offer capitalizes on the user’s interest in the product category and increases the likelihood of a purchase.
On a blog about healthy living, a scroll popup could be triggered after a reader finishes an article about the benefits of meditation. The popup could then offer a free meditation guide or invite the reader to subscribe to a wellness newsletter, providing additional value and encouraging engagement.
This relevancy significantly boosts conversion rates, a critical factor for the success of any online shop or service.
Finally, scroll popups can improve lead generation efforts. By capturing user interest at a specific point in their website journey, you increase the likelihood of them converting into a lead or customer.
Key differences between scroll popups and normal popups:
Timing: Scroll popups appear at a specific point in the user’s scrolling journey, while normal popups appear immediately upon arrival.
Disruption: Scroll popups are generally perceived as less disruptive to the user experience.
Conversion rates: Scroll popups often have higher conversion rates due to their relevance and timing.
How to Create a Scroll Popup with Depicter Popup Builder?
We’ve included a video to help you get started with the Depicter Popup Builder. It gives a good overview of how it works. While there’s a lot more to learn about the builder, this video will give you a solid foundation:
Design a WordPress Popup From Scratch with Depicter
Installing Depicter
To learn how to install Depicter, check out this handy video:
This video will guide you through the installation process step by step. It’s a great way to get started with Depicter and start creating your own popups:
How to Install Depicter Slider on WordPress
Exploring Trigger Options for Depicter
Out of the seven options available for triggering Depicter popups, five can be utilized to activate scroll popups. In this section, we will delve into the first option in detail and provide a general overview of the remaining four. A comprehensive explanation of each option would need a separate, in-depth article.
To access the Display Rules section for configuring popup visibility settings:
Click the “Publish” button.
Click the “Configure” button associated with the popup you want to modify.
From the dropdown menu, select the “Triggers” section.
Wait for Hover
Enable this trigger if you want to set the content display after a visitor hovers over an element and waits for a specified number of seconds.
To display a popup on scroll page as soon as a user hovers over a specific section on your website:
Assign a unique CSS selector to the section:
In your Elementor Page Builder, while editing the page, select the relevant section.
From the available options, assign a unique ID to the section.
By assigning a unique ID to the section and using it as the CSS selector in Depicter, you instruct Depicter to display the popup when the user hovers over that specific section. This ensures that the popup appears only when the user interacts with the intended area of the webpage.
Set the CSS Selector trigger in Depicter:
In the Depicter triggers section, locate the “CSS Selector” field.
Enter the ID you assigned to the section in the previous step.
Save the settings.:
By assigning a unique ID to the section and using it as the CSS selector in Depicter, you instruct Depicter to display the popup when the user hovers over that specific section. This ensures that the popup appears only when the user interacts with the intended area of the webpage.
Scroll percentage
Enable this trigger to set your content displays right after the visitor scrolls to the specified percentage of the page.
Scroll to element
Enable this trigger to set your content displays right after the visitor scrolls to the specified element the page.
Spend time on page
Enable this trigger when you want to set the content displays to visitors when they spend a certain amount of time on a page.
Inactive time
Enable this trigger when you want to set the content displays to the visitors after they become active on the page after a certain amount of time.
Conclusion
Scroll popups represent a powerful tool for enhancing website engagement and driving conversions. By strategically timing of your message for the popup scroll with page, you can deliver a more relevant and impactful user experience. Scroll popups can dramatically boost your bottom line by capturing more leads, expanding your email list, and driving overall business growth when implemented effectively.
While there are various types of scroll popups possible with the Depicter Popup Builder, understanding the core benefits and implementation strategies is crucial for maximizing their potential. Experiment with different triggers, design elements, and call-to-actions to find the optimal approach for your audience.
FAQs
What is the difference between a scroll popup and a regular popup?
Scroll popups appear after a visitor has scrolled down a specific portion of a webpage, while regular popups appear immediately upon arrival. Scroll popups are generally less intrusive and have higher conversion rates due to their targeted nature.
How do I know where to place my scroll popup?
The ideal placement of a scroll popup depends on your website’s content and goals. Consider where your target audience is most likely to be engaged and receptive to your message. Experiment with different scroll percentages or specific elements to find the optimal position.
Can I use scroll popups on mobile devices?
Yes, scroll popups are responsive and can be effectively used on mobile devices. However, it’s essential to consider the smaller screen size and adjust the popup design accordingly.
What are some best practices for creating effective scroll popups?
Keep the popup design simple and focused.
Use clear and compelling call-to-actions.
Offer valuable content or incentives to encourage conversions.
Test different popup positions and triggers to optimize performance.
Ensure the popup is mobile-friendly.
Can I use multiple scroll popups on a single page?
Yes, you can use multiple scroll popups on a page, but it’s essential to avoid overwhelming users. Consider the timing and relevance of each popup to ensure a positive user experience.