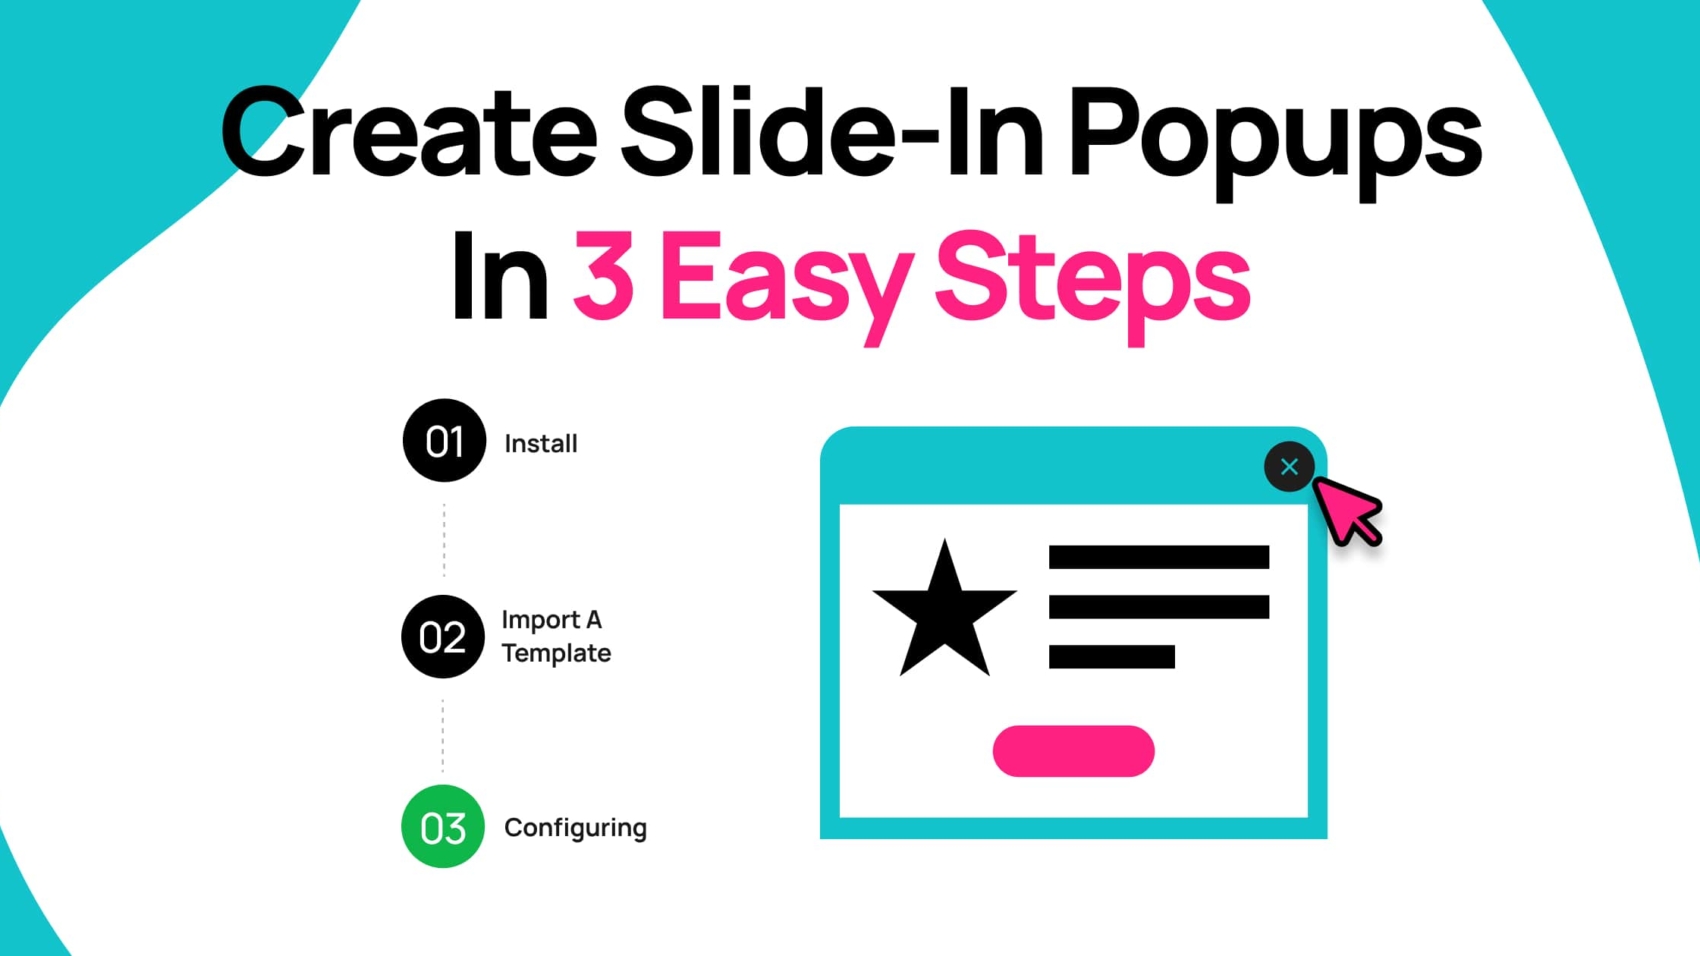
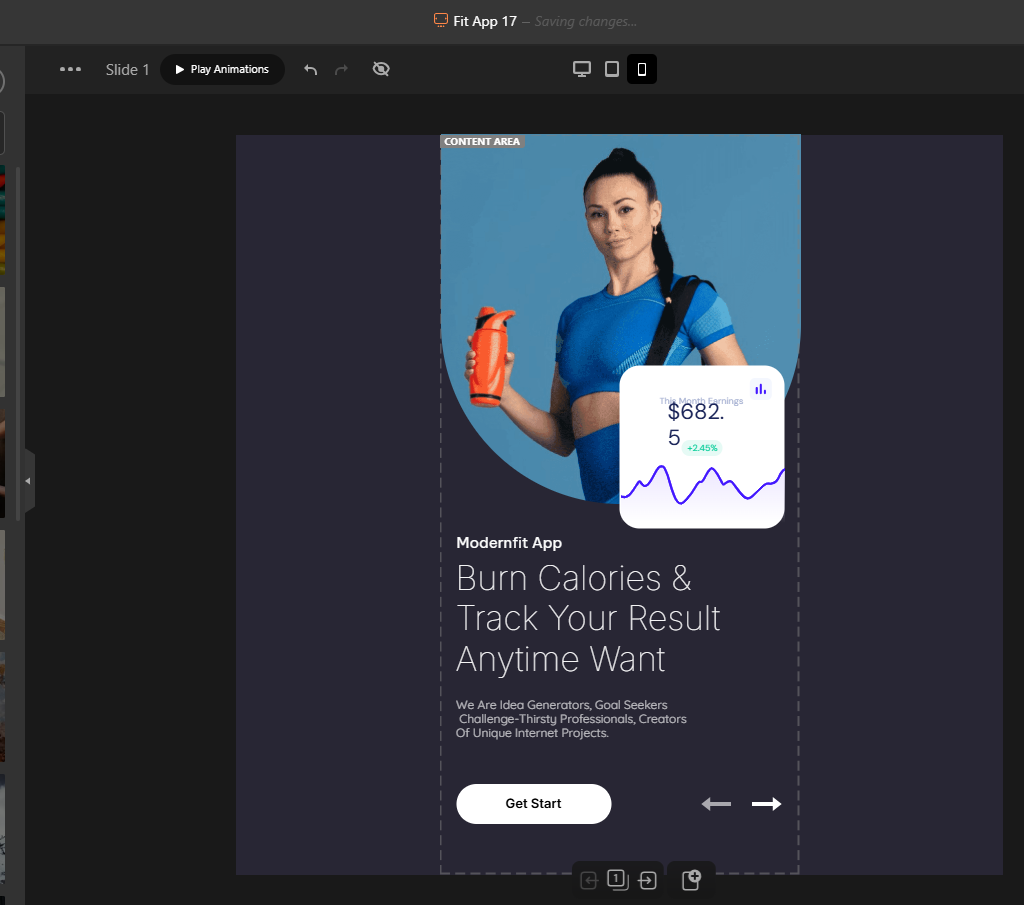
Slide-in popups offer a less intrusive way to engage website visitors. Appearing from the side or corner, they present a brief call to action without disrupting the browsing experience. This allows you to capture leads, boost sales, and increase conversions politely.
Slide-ins are versatile and suitable for many purposes. They can replace most other popup types when you want a lower impact on your site’s metrics and avoid blocking conversion pages or the user interface.
With Depicter Free Popup Builder, creating these effective slide-ins is a quick three-step process.
Step 1: Install Depicter Free
Log in to your WordPress dashboard.
Go to Plugins > Add New.
Search for “Depicter” then click Install and Activate.
Here is a video showing the whole process:
Step 2: Import a Template
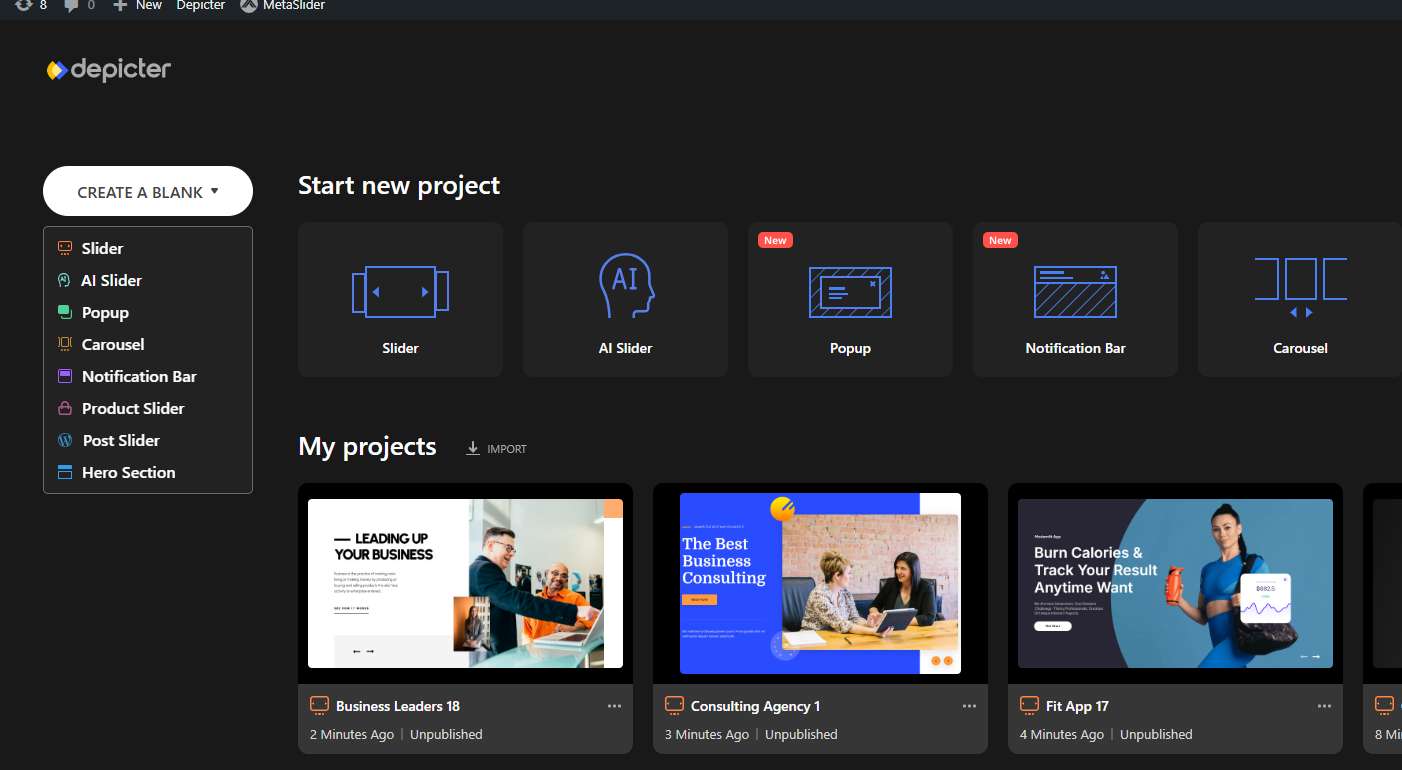
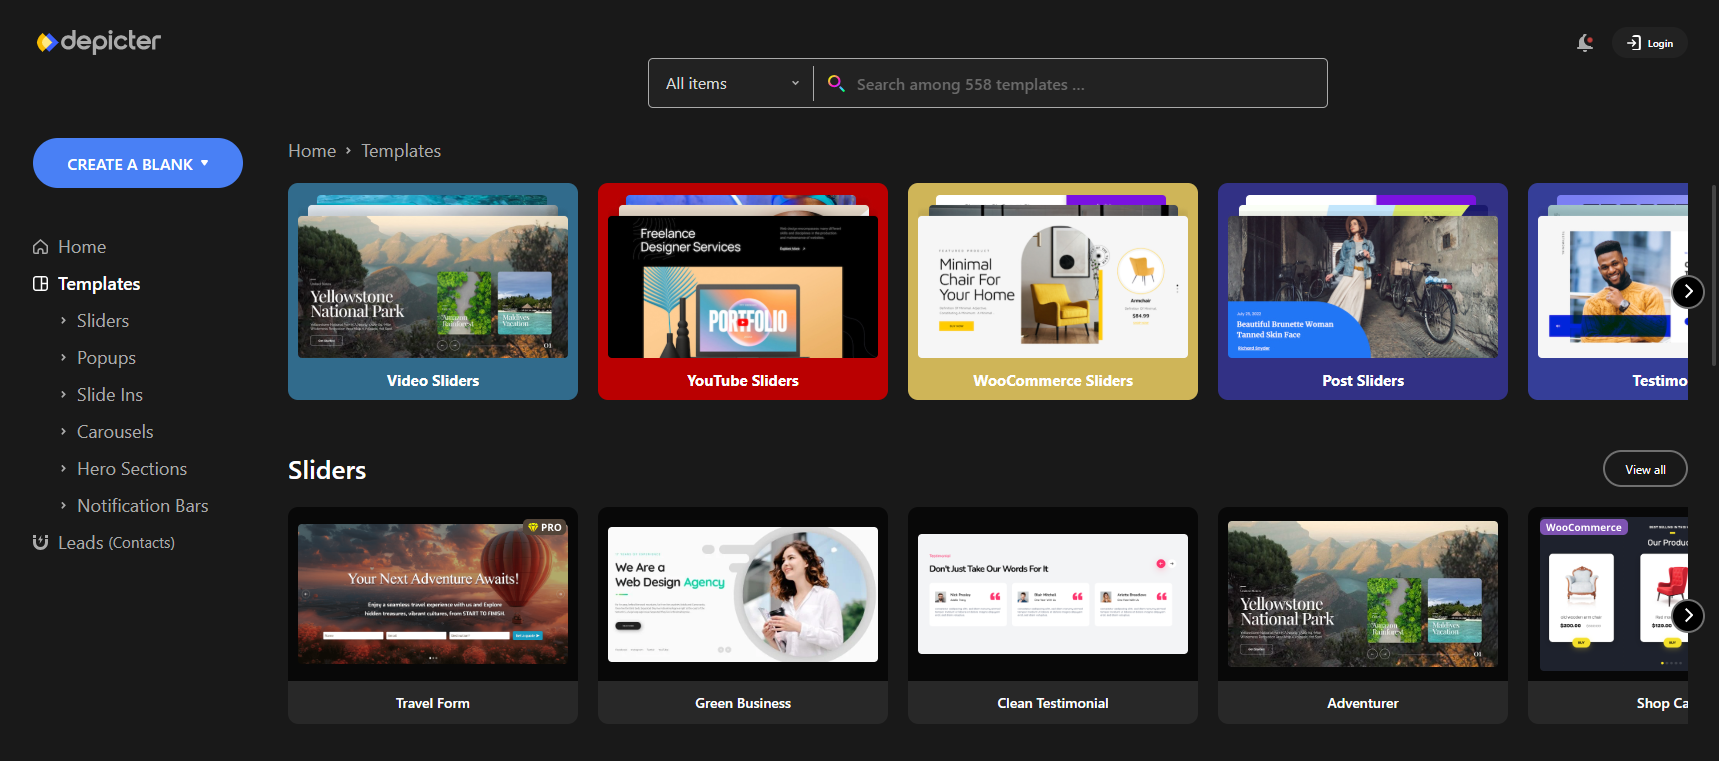
Depicter offers an extensive, high-quality selection of templates, including a variety of free popup templates, designed to help you create popups quickly and efficiently. After entering the Depicter dashboard, navigate to the top menu where the feature categories are listed, and select the “Popup” option to get started.
You can search through the ready-made templates using keywords or browse through the categories on the left side. Once you’ve found the template you like, simply click the Import button.
After a few seconds, the import process will finish, and you’ll be taken to the Depicter editor. Here, you can customize every detail of your popup using the wide range of features Depicter offers. To get a better understanding of the editing process, watch the video below.
Step 3: Configuring Display Rules
That’s all there is to it! Now, the only thing left is to set your preferred Display Rules, which determine where, when, and to whom your popup will appear.
To do this, click the Publish button, then hit Configure under the Display Rules section to open the settings window.
In this example, we want the Slide-in Popup to appear for everyone, but only on the Shop page. We’ll set this up in the Display Condition section, just as shown in the image.
Once you save the settings, your Slide-in Popup will be displayed on your website’s Shop page like this.
If you’d like to learn to do more with your Popups, we recommend checking out these articles:
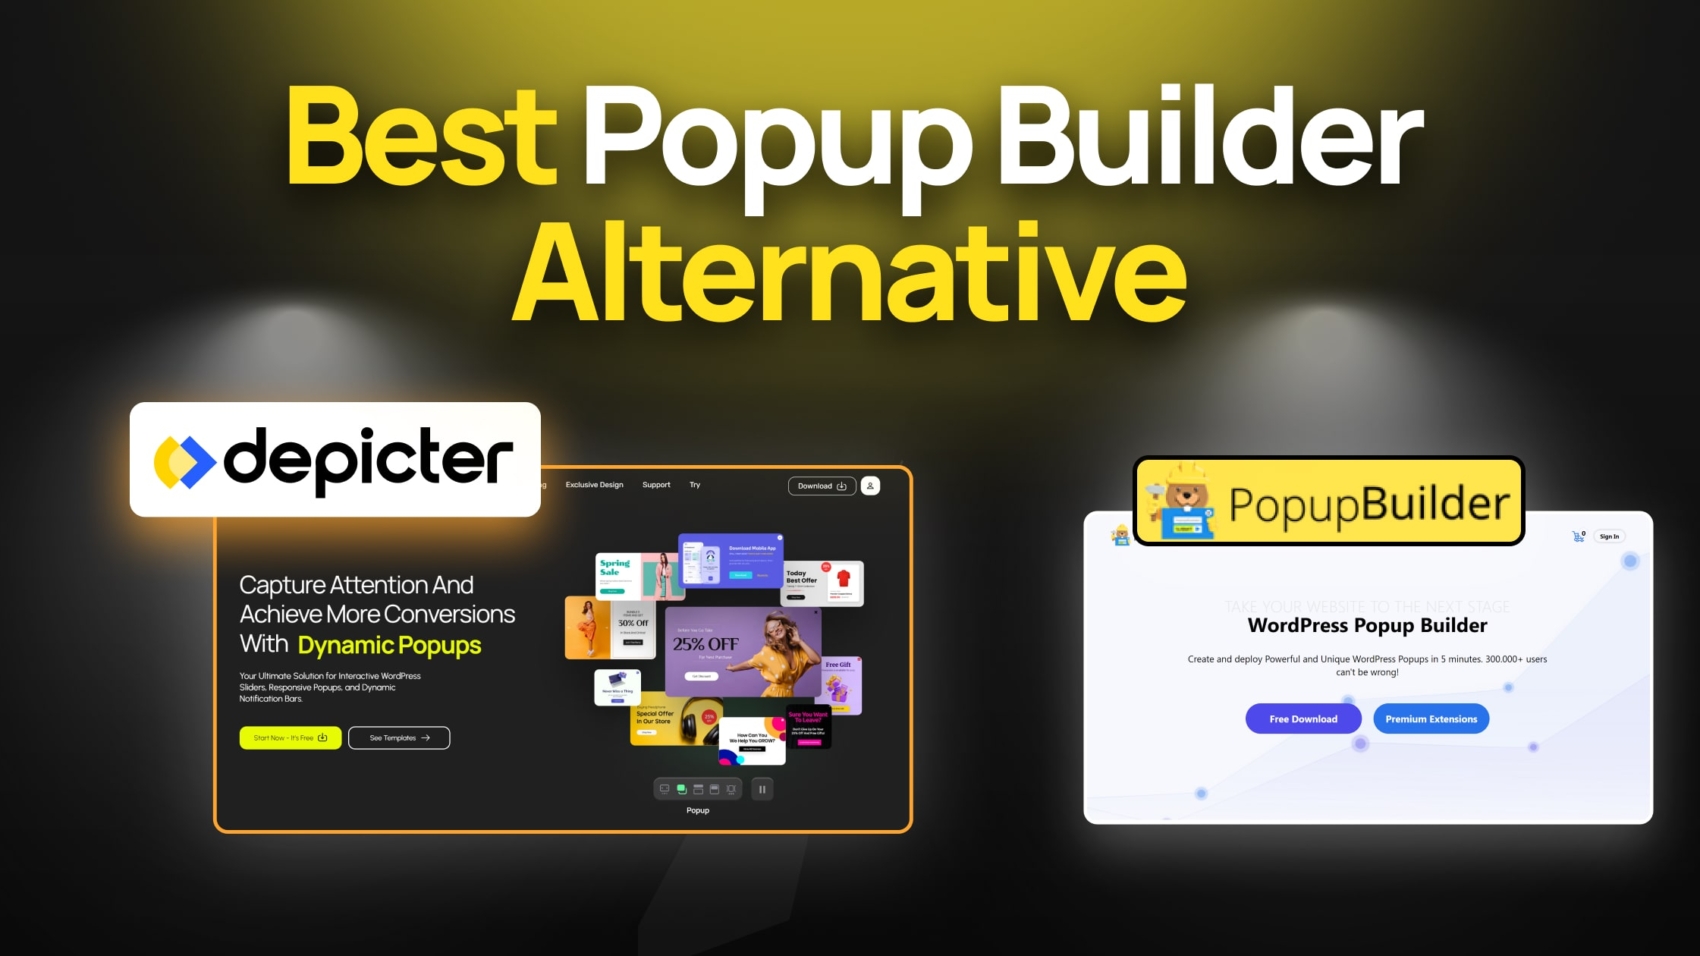
What are the Reasons to Consider an Alternative to Popup Builder?
When it comes to choosing a Popup builder plugin for WordPress, having the right tools, flexibility, and user experience can make all the difference. A good Popup builder should make the process of creating and managing Popups easy, efficient, and enjoyable, helping you engage visitors and boost conversions without unnecessary frustration.
While Popup Builder (the plugin) has been around for a while, it falls short in several important areas that modern website owners expect. Throughout this article, we’ll take a closer look at where Popup Builder struggles and why exploring a stronger alternative like Depicter could be a smarter move for your site.
Lack of Editor
Having a built-in drag-and-drop editor is very important for any WordPress Popup Builder plugin. It helps users quickly design and customize Popups without coding, making the process faster, easier, and more flexible. A good editor also improves the user experience by giving full creative control.
However, the Popup Builder plugin does not include a built-in editor. This is a big downside because users have less freedom to design Popups easily and may need extra tools or plugins, which can slow down their workflow and website.
You might think that because the default WordPress editor opens up, anything you add there will show up in your Popup — but that’s not the case. Whatever you enter in that editor has no connection to your Popup and won’t be displayed.
On the other hand, Depicter offers an advanced drag-and-drop editor along with professional design tools, giving you a high level of customization over every Popup element. It includes powerful features like free resizing and positioning of elements on its editor canvas, various layout options such as full-width, fullscreen, or boxed designs, auto-snapping for easier arrangement, and flexible group, grid, and flex structures. On top of that, it provides auto-responsive capabilities, rich design customization options, and a wide selection of animation effects to make your Popups stand out.
With these kinds of tools at your fingertips, creating polished and personalized Popups becomes faster and much more enjoyable.
Considering that Popup Builder doesn’t even have its own editor, Depicter clearly comes out on top and delivers a much better experience, especially for users who are looking for a more modern and professional solution.
No Templates
Another key feature that greatly improves user experience is having ready-to-use templates. Templates allow users to start with professional designs and simply tweak them, instead of building every Popup from scratch. This saves time, ensures better design quality, and makes life much easier, especially for beginners. However, the Popup Builder plugin does not offer any pre-made templates, making it harder and more time-consuming for users to create polished Popups quickly.
Depicter excels in this area by offering over 500 professional, ready-made templates across various categories and with a wide range of functionalities. Right from the Depicter dashboard, you can browse through these templates, and with just one click, import any of them to start building immediately.
This huge collection of templates not only saves time but also inspires creativity, giving users a strong starting point for almost any type of design they need.
Almost No Responsive Options
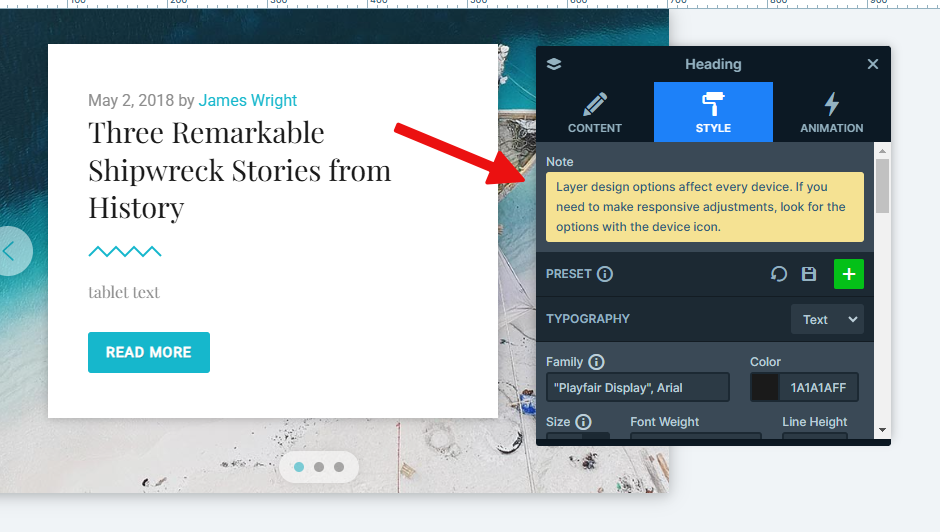
Having professional responsive options in a Popup Builder means that Popups automatically adjust to look perfect on different devices like mobiles, tablets, and desktops. It includes settings for custom sizes, positions, visibility controls, and design tweaks for each screen type. You should consider these features based on your website audience because a large portion of visitors might come from mobile devices, and delivering a smooth, optimized Popup experience can greatly impact engagement and conversion rates. Now, can we say that the Popup Builder has these options? Absolutely not. Take a look at the following image. This is all you get for the responsive options.
Depicter addresses this perfectly with fully responsive design options. You can easily create device-specific layouts, control visibility per device, and tweak sizes, positions, and designs for mobiles, tablets, and desktops individually.
No matter what device your visitors use, Depicter ensures a seamless, professional-looking Popup experience.
Pricing
A fair and reasonable price is important for a Popup Builder plugin because it makes the tool accessible to a wider range of users and ensures good value for the features offered.
Popup Builder offers three pricing plans, which mainly differ based on the number of websites you can use the plugin on. The cheapest plan costs $49.95 per year and allows usage on up to two websites.
However, considering that Popup Builder lacks some important features and feels outdated compared to many modern alternatives, its overall value for money is quite low.
Price often plays a major role when people are deciding which plugin or service to choose. Even if some features are available for free, one of the first questions users ask is, “How much does the full version cost?”
Depicter offers a free version that covers all your basic Popup-building needs, and when you’re ready to upgrade, the Pro version for a single website costs just $39 per year. Best of all, Depicter unlocks all premium features at once — no gradual access or hidden paywalls. When you buy the Starter plan, you get everything you need right away for one website.
Having clear, fair pricing without confusing tiers creates a better experience and shows that Depicter truly values its users.
Depicter Offers Even More
With a variety of powerful tools like exit-intent Popups and smart triggers, Depicter helps you grab your visitors’ attention right when they’re about to leave.
It makes it easy to create highly effective Popups that deliver personalized messages and special offers tailored to your audience.
Instant Feedback
When working with visual design tools, getting immediate feedback is key to making the creative process faster, easier, and more enjoyable.
Depicter offers a powerful live preview and an interactive editor that allows users to see their changes in real time. User experience is crucial for WordPress plugins, and a good plugin should not only be easy to use but also let users instantly see the results of their work. That’s where Depicter really shines. With its live preview feature, you can see exactly how your Popup or page will look as you edit it, without needing to constantly save, refresh, or switch between tabs.
Whether you’re browsing templates inside the dashboard or actively designing a Popup in the editor, Depicter gives you one-click access to live preview, making the design process smoother and more intuitive. Thanks to its interactive editor, all your changes are auto-saved and immediately reflected when you open the live preview, creating the shortest and most seamless visual feedback loop possible.
While speed and efficiency matter, having real-time feedback through a live preview and an interactive editor is a game-changer for anyone serious about building great websites.
The Powerful Visual Output Suite
Having a versatile set of output options is essential for anyone who wants to create engaging and dynamic content on their website.
One of Depicter’s biggest strengths is the wide range of visual outputs it offers. Both during the creation process—inside its powerful editor—and at the final display stage, Depicter provides users with more tools, more options, and more flexibility than many other plugins. Whether you’re designing a simple slider or a complex Popup, the experience stays smooth and professional.
Here are some of the visual output types Depicter supports:
Slider
Popup
Carousel & Testimonials
Notification Bar
Product & Dynamic Sliders
Hero Section
Beyond these, Depicter also packs an impressive range of advanced features that help users build even more powerful and customized content. A truly flexible plugin should empower users to create whatever they imagine, and Depicter does exactly that with options like:
Flexible Layouts and Position Settings
Various Layers and Elements
Advanced Animations, Transitions, and Navigation Controls
Multi-Step Popups for deeper interaction
Fully Responsive Design Modes
Built-in Form Element for capturing leads and boosting conversions
Dynamic Content integration with Blog Posts and Shop Products
A massive library of premium-quality Image and Video assets
Advanced Call to Action features that can be attached to any Popup element
Having all these options in one place gives creators the freedom to design stunning visuals without the need for multiple plugins or complicated setups.
When flexibility and creativity come together in a single tool, it unlocks endless possibilities for building better, more engaging websites—and Depicter delivers exactly that.
Support and Community
Good support can make a huge difference when you’re using a tool to build and grow your website.
Depicter shows a strong commitment to its users by offering 24/7 support across several channels. Whether you run into a quick question or need more detailed help, there’s always a way to get assistance. You can reach out through live chat for fast answers from the Depicter team, explore the detailed Help Center filled with articles, tutorials, and a ticketing system, or post your questions on the WordPress Forum, where the Depicter team actively responds. Plus, the team stays connected through their YouTubeand Facebook communities, where users can ask questions, share feedback, and get helpful tips.
Having multiple support options means you’re never left figuring things out on your own, and it really helps create a stronger, more helpful user community.
Tutorials
Providing video tutorials is a smart way for any plugin or service to help users understand features, master the tools, and discover new possibilities. Depicter does a great job in this area with its active YouTube channel, where it regularly uploads videos. Every week, they release fresh content to introduce new features, explain existing options, showcase templates, and guide users step-by-step through different capabilities. These videos help users get more out of Depicter and create better results faster.
Conclusion
Choosing the right Popup Builder can make a big difference in how your website connects with visitors and drives results. After seeing where Popup Builder falls short — and how Depicter shines with its powerful editor, rich templates, advanced features, great support, and fair pricing — the decision becomes easy. Depicter not only covers everything that Popup Builder lacks but also takes the experience to a whole new level.
If you’re serious about building beautiful, effective Popups without unnecessary headaches, Depicter is hands down the better investment for your website’s future.
Timing your popups strategically allows you to engage website visitors more effectively. By timing when popups appear, you can deliver targeted messages that capture attention and encourage action.
With Depicter, scheduling popups on your WordPress website is a straightforward process. This allows you to create limited-time offers, promote seasonal products, and ultimately improve user experience and drive conversions.
Depicter is a WordPress Free Popup Builder plugin that makes it easy to create and schedule effective popups. Its intuitive interface and customization options enable you to design popups that deliver the right message at the right time.
Search for “Depicter” then click Install and Activate.
Here is a video showing the whole process:
Step 2: Import a Template
Depicter provides you with a large and professional collection of templates, including free Popup templates to make the popup creation process as fast as possible for you. Once you’re in the Depicter dashboard, in the top bar, which shows the different categories of Depicter’s features, click on the “Popup”.
On the next page, where you’ll see all the available popup templates, you can search for a specific keyword or use the categories on the left to filter the templates. Here, we’ll easily import one of the templates by simply clicking the “Import” button.
The import will be done in a few seconds, and then you’ll be taken to the Depicter editor. To get familiar with how the Depicter editor works for building and designing a Popup from start to finish, you can watch this video.
Step 3: Schedule the Popup
To set up the schedule, follow these steps: click the “Publish” button, then click “Configure” in the “Display Rules” section.
In the “Display Rules” window that appears, activate the scheduling option within the “Visibility Scheduling” area.
Finally, click on the “Start” and “End” options and select your desired start and end date and time for the Popup to be displayed from the drop-down menus.
Here, we’ve selected the time range of 2:59 PM to 3:02 PM, and as you can see, precisely within that timeframe, our Popup is displayed on the website according to the settings we configured.
If you found this tutorial helpful, be sure to check out our other useful articles about Depicter:
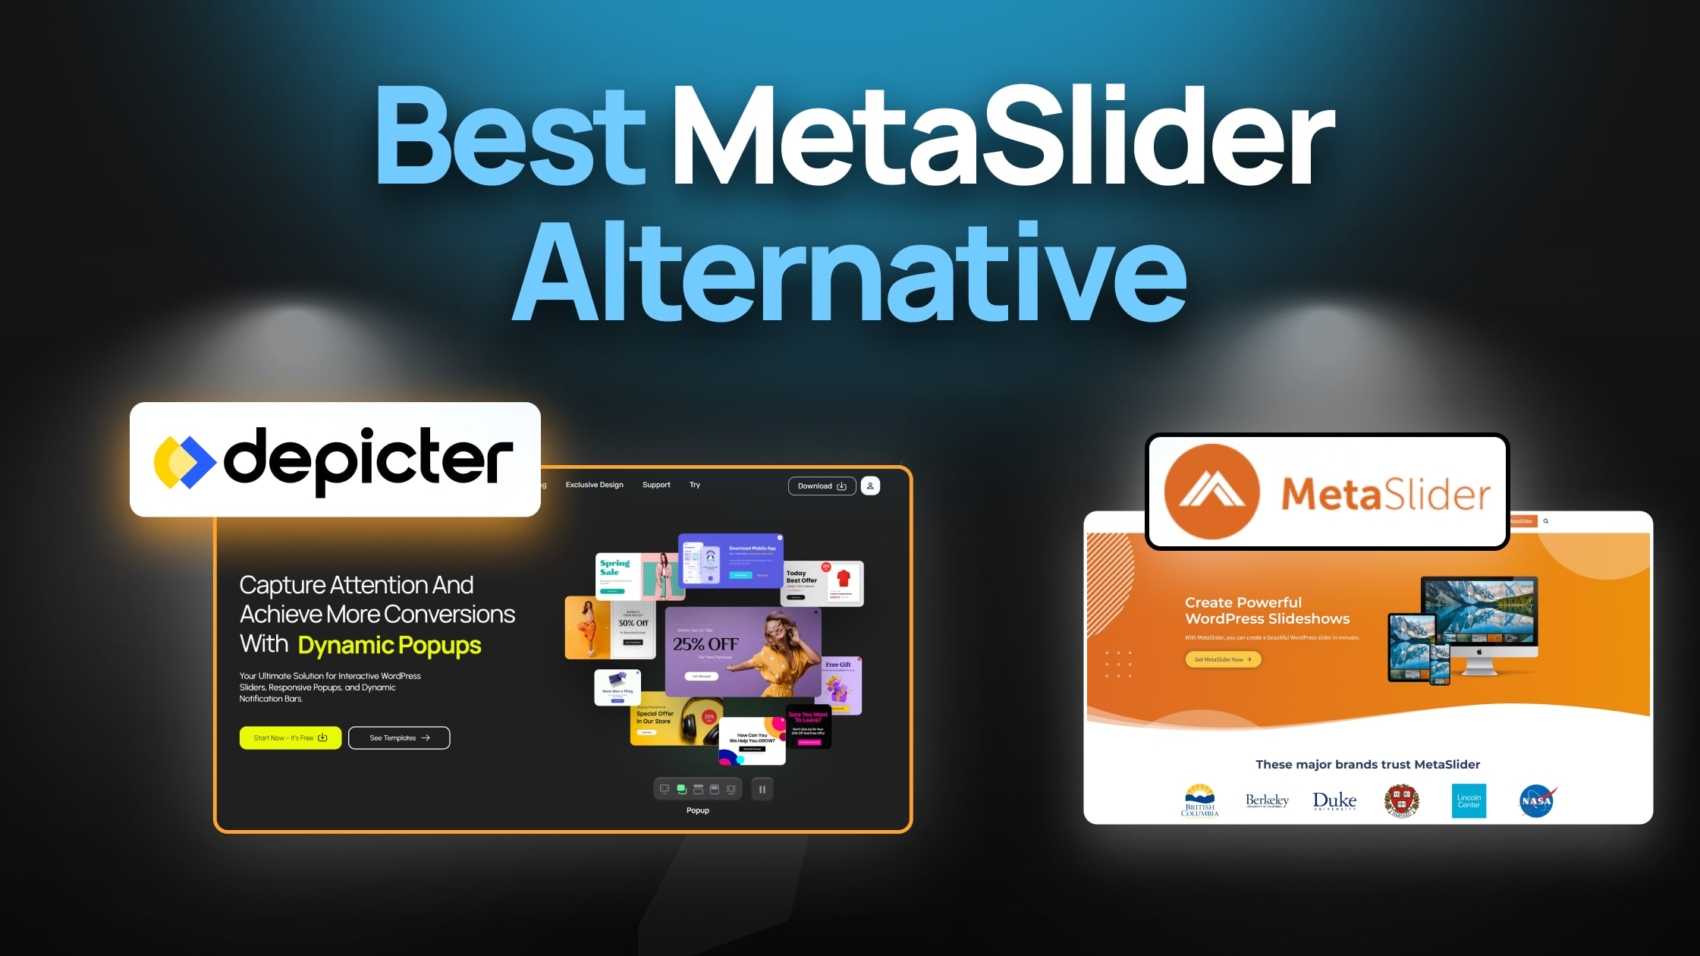
Meta Slider is one of the most popular slider plugins for WordPress, and it has over 600,000 active installs. It has been in the WordPress community since 2020 and is very well known as a website slider plugin. In this article, we will see why you might need to consider another slider plugin and what the Best MetaSlider Alternative is.
What are the Reasons to Consider an Alternative for MetaSlider?
Have you ever found yourself working on a really old computer, and you look around and everyone else is using powerful computers and super modern laptops with cool features, and you wonder if it’s time to upgrade your tools? That’s exactly the feeling you get if you’ve worked with WordPress Meta Slider plugin. Everything about this plugin is simple and old-fashioned. Even if you like your tools to be simple and straightforward, MetaSlider is still an old and limited option for creating an image slider for your website.
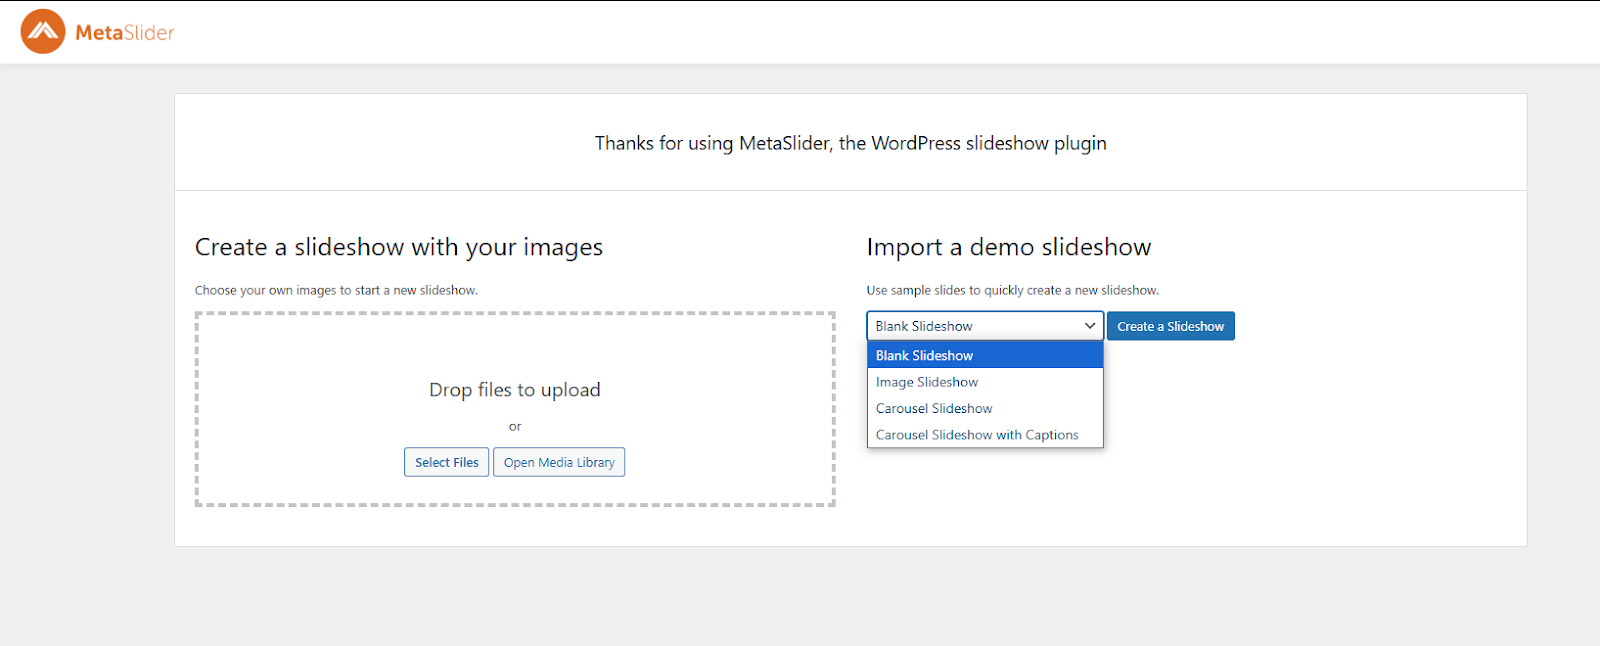
Slider Types
With MetaSlider you have 3 options to start with:
Image slideshow
Carousel slideshow
Carousel slideshow with captions
Basically, all the MetaSlider outputs fall into two categories: simple image sliders, and carousels. And all the different slider modes are just these two categories with minor changes.
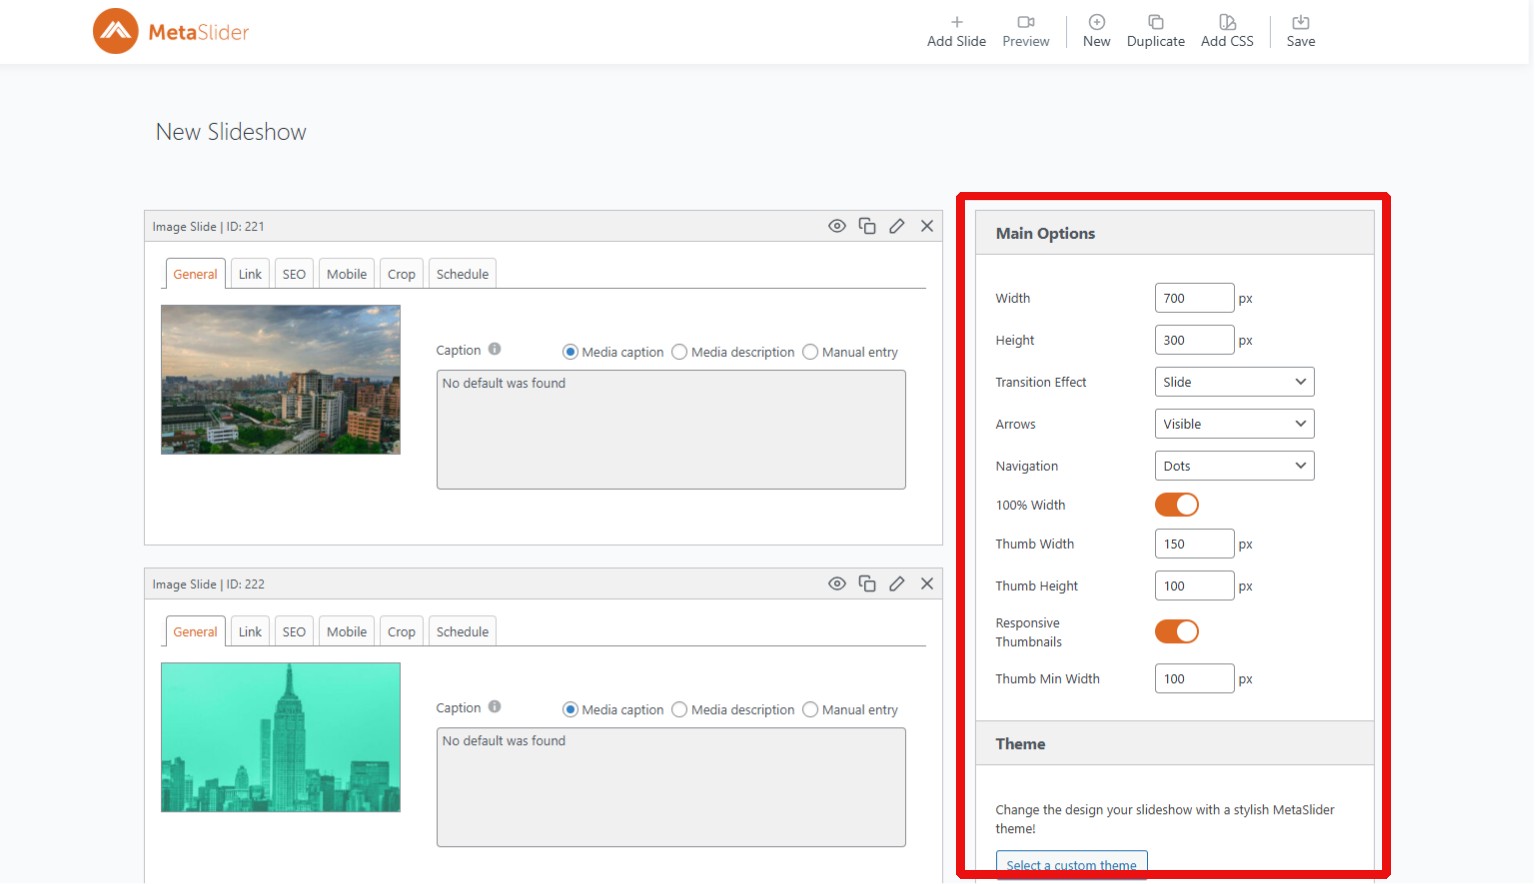
General Options
MetaSlider gives you a limited number of options in a sidebar when you’re adding slides. The total number of options is under 50, and they’re pretty basic. There’s not a clear way to organize these options, and you can’t do much with them. You’ll find things like width and height, showing or hiding navigation arrows, turning autoplay on or off, and other simple stuff. And there aren’t different slider layouts, like full-width, full-screen, or boxed. Plus, there’s no way to categorize the options; everything the slider lets you do is just there on the page.
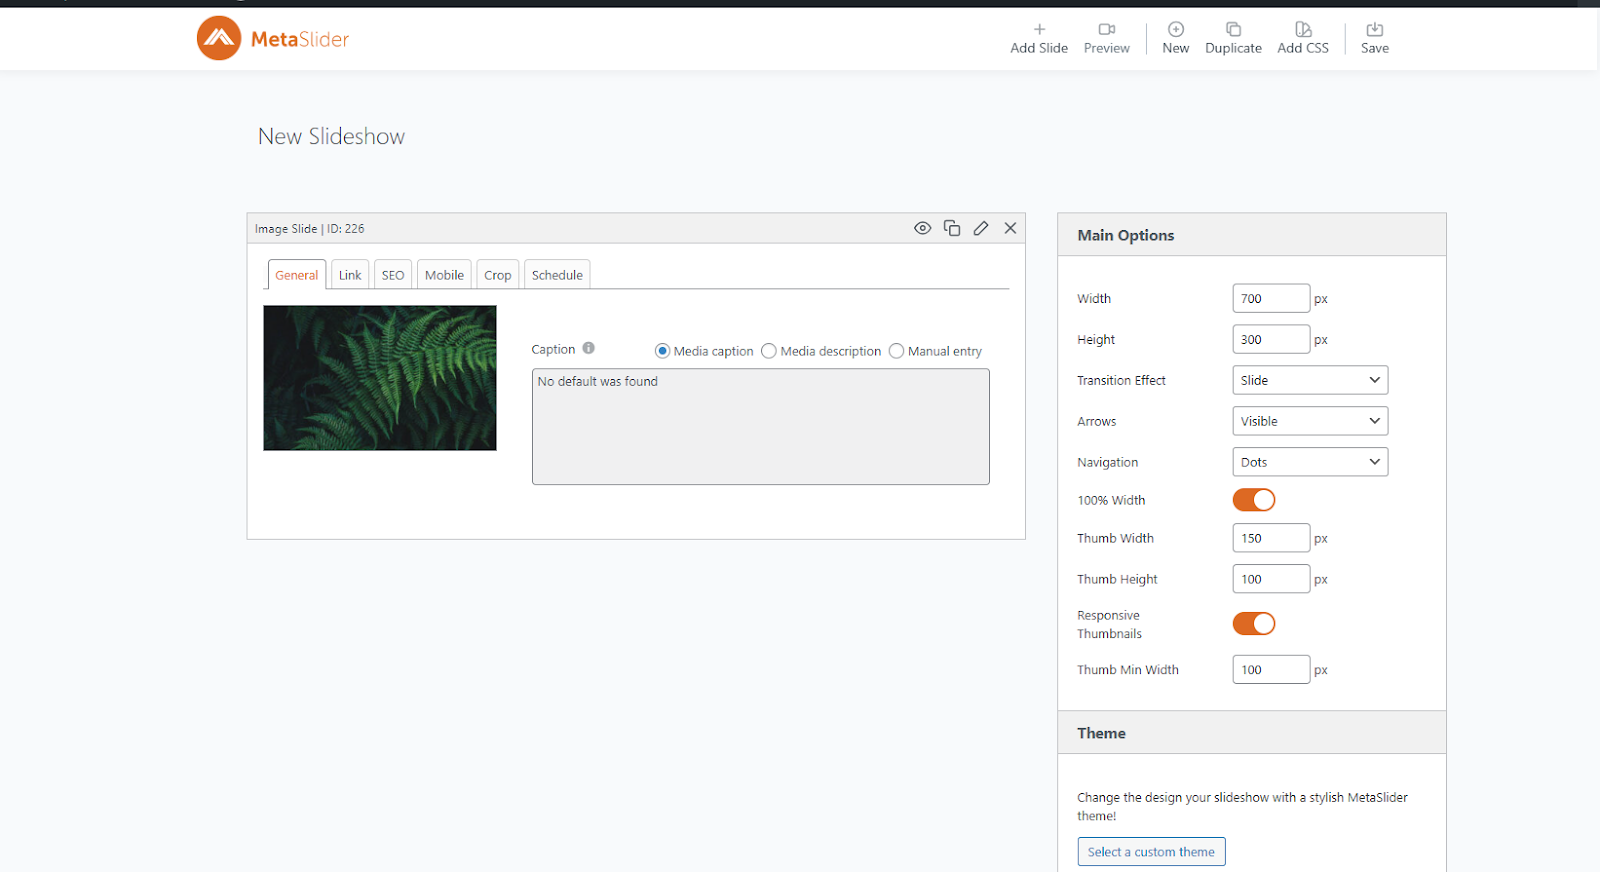
Editor
There’s no advanced editor here. You get three basic sections: a top bar with buttons for adding slides, previewing, duplicating, or saving, a ‘New Slide Show’ area for adding slides, and a sidebar with general options. These general options, as mentioned earlier, cover all the overall slider settings. When you click ‘Add Slide,’ the WordPress Media Library opens. MetaSlider gives you a few options for what to add, including Image, Video, Post Feed (which is for creating dynamic sliders), and lastly, Layer Slide.
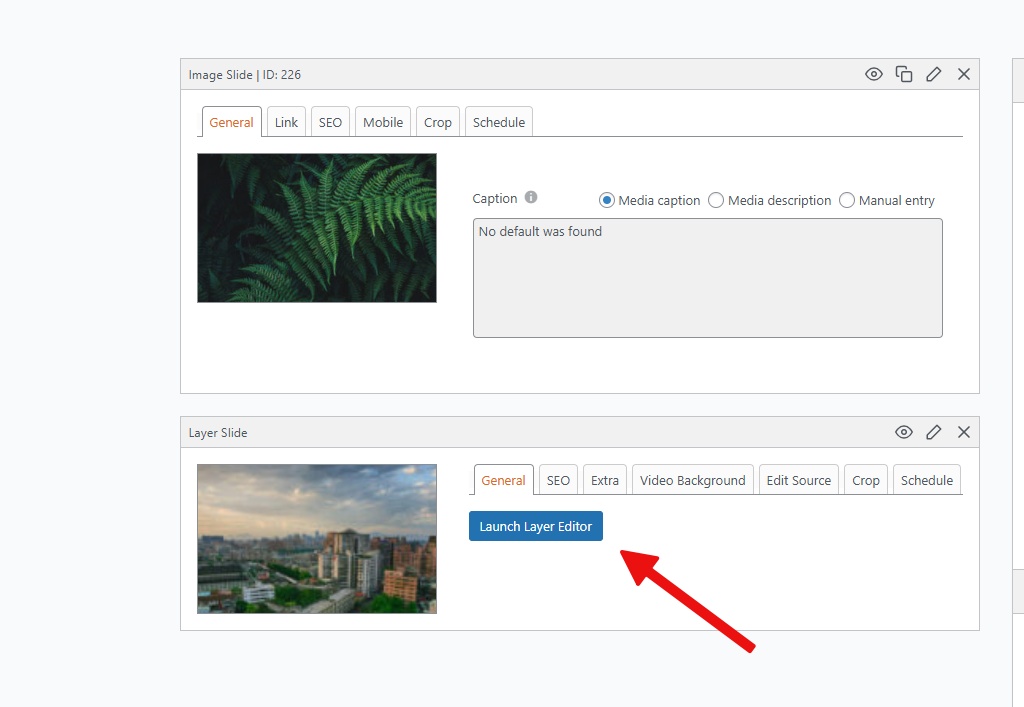
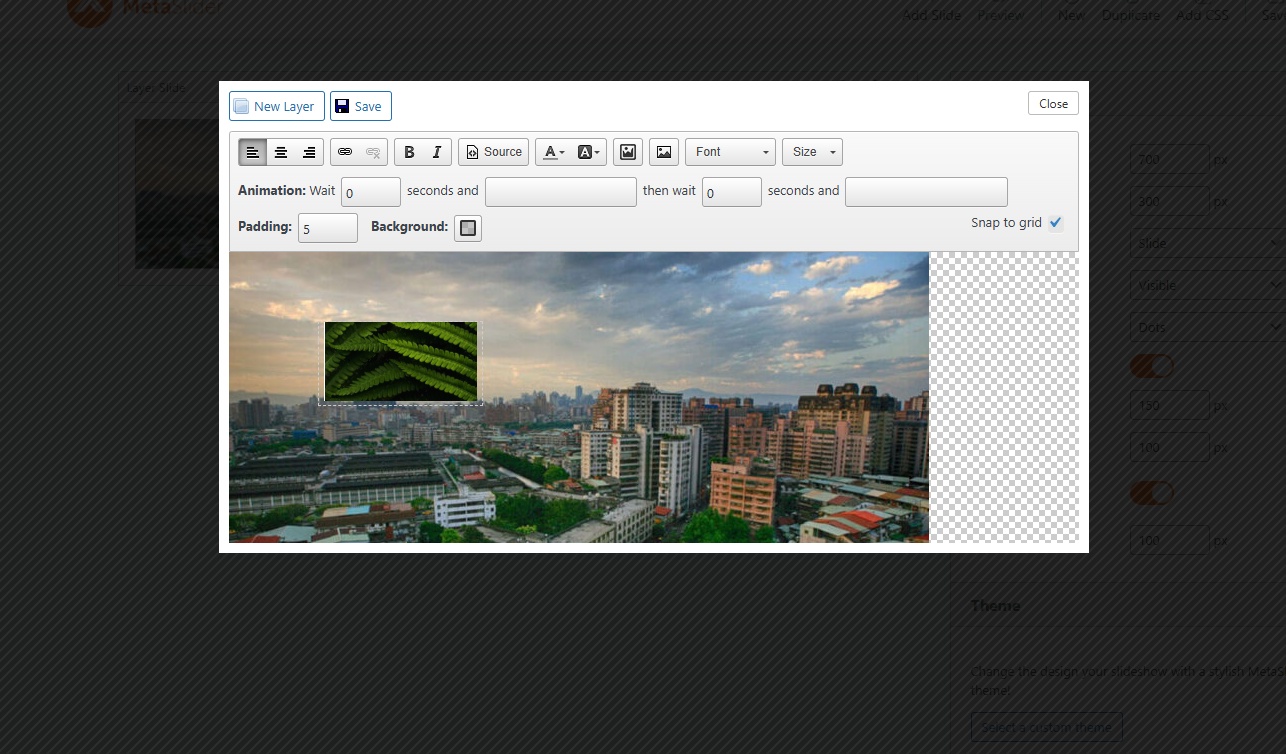
If you pick the Layer Slider option, you can edit that slide in what’s called a Layer Editor.
When you open the Layer Editor, the only thing this feature adds to your slide is the ability to put pictures or text next to each other as layers. And for that, you get very basic options, and the process is confusing. For example, to add anything, you have to add an empty layer first, then add the picture or text you want inside that layer.
This is not a modern WordPress slider editor. It offers limited features to the user, and in practice, it gives the user only very basic options for controlling the display and behavior of the slider.
Elements
You won’t find elements here. This is a very simple plugin, and it gives you basic tools to make the most straightforward kind of slider. Since there’s no editor, and no real ‘element’ options to add to your slide, you can forget about making fancy sliders with advanced features like buttons, shapes, text, complex layered combinations, and so on.
Responsive Design
MetaSlider doesn’t have responsive design options. And there’s a reason for that. What you get from MetaSlider is a simple image slider. There aren’t layers or different elements in the slides. So, responsive design doesn’t really mean anything. Basically, the slider just gets smaller on smaller screens.
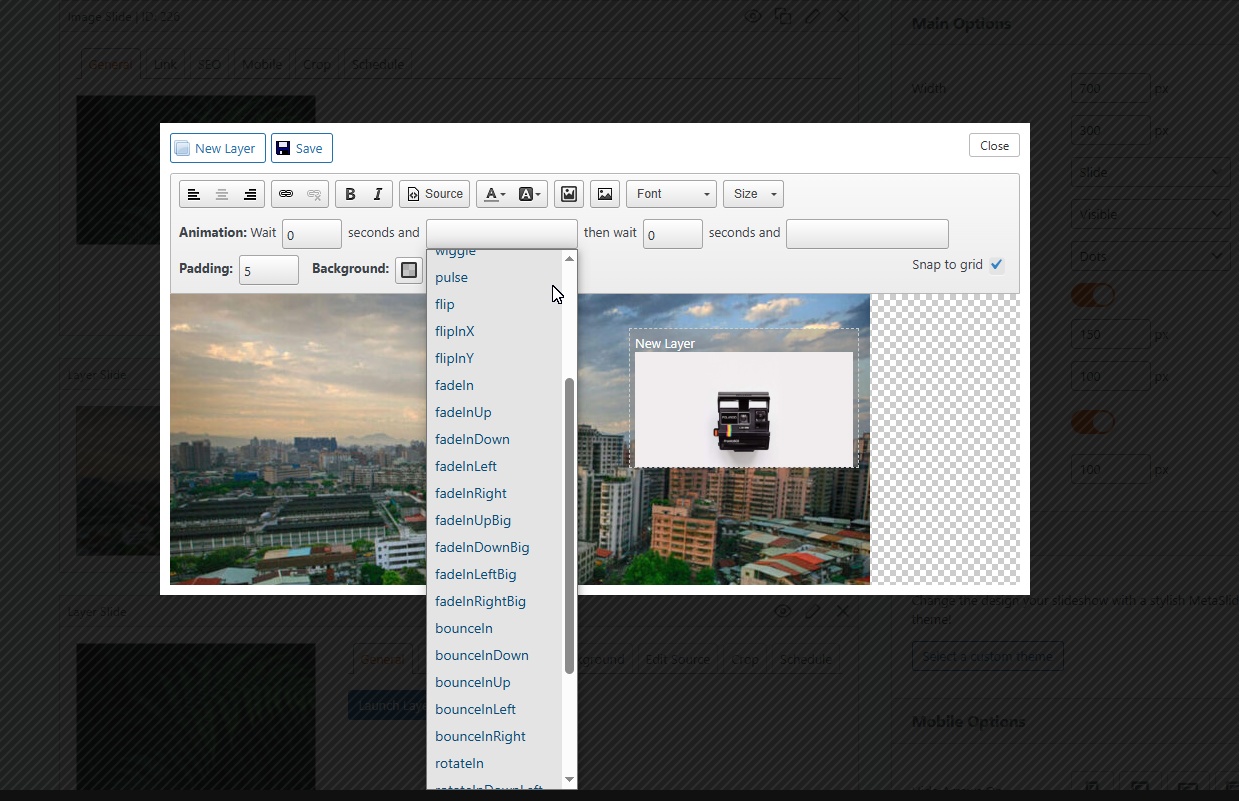
Animations and Transitions
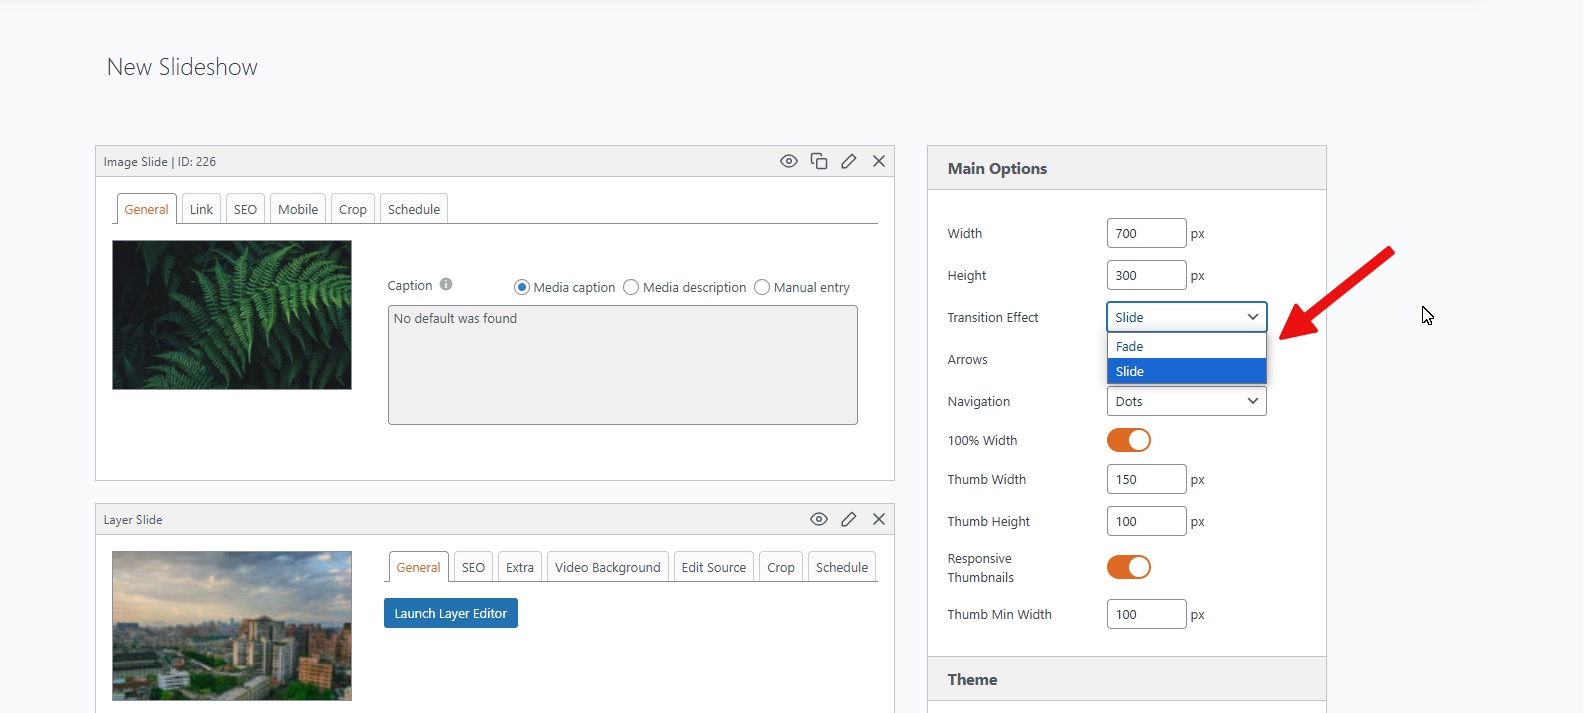
MetaSlider gives you some animation and transition options in two places.
First, in the general slide settings under “Transition Effect,” you get two choices: Slide and Fade. Second, when working with Layer Slides, you can pick a pre-set entrance animation for each layer.
But that’s it. There are no advanced or modern visual effects, and you can’t even change the parameters of the options you do have.
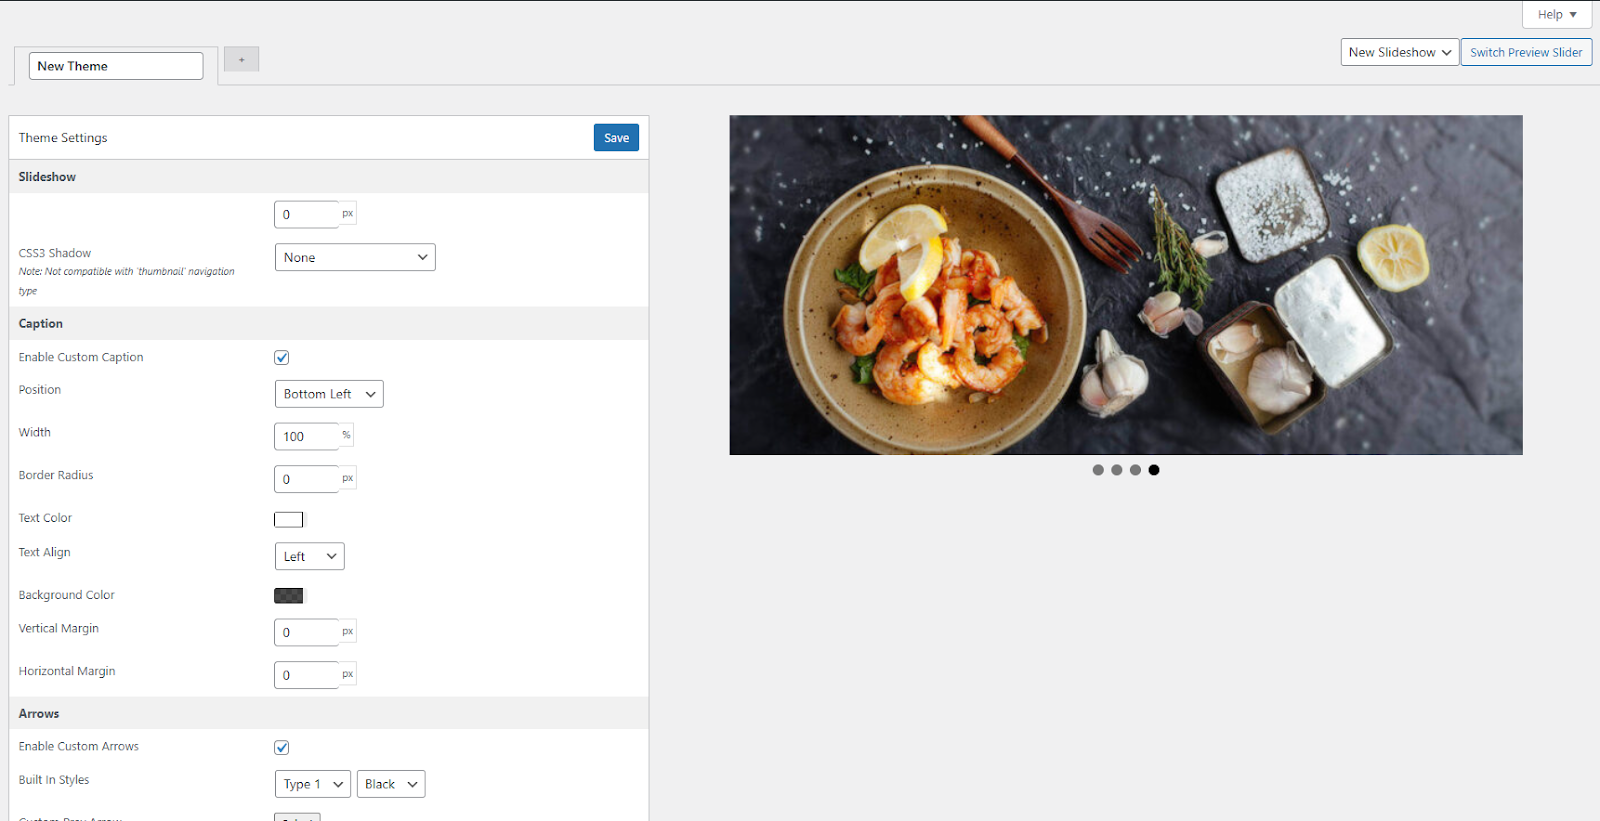
Templates
MetaSlider doesn’t have ready-made templates for users. There’s not much more to explain in this section. It only has a ‘Theme Editor’ section. This section lets you save a specific set of general slider settings. You can then use those saved settings when creating future sliders.
Pricing
When you look at the price of MetaSlider for a website, you realize that it has a very low purchase value given the features and capabilities you’re supposed to get. You have to pay $39.50 for a one-year MetaSlider license.
Depicter, The Best MetaSlider Alternative
Depicter is modern, up-to-date, powerful and versatile in every way, from its dashboard to its UI and the end-to-end process that guides you through creating a slider.
There are many reasons why Depicter is a better option than MetaSlider. To start, let’s look at each of the sections mentioned for MetaSlider and see how Depicter handles them.
Slider Types
Depicter gives you different options for creating sliders, including:
Slider
AI Slider
Carousel
Hero Section
Each of these options has different structures, layouts, and general settings for how they appear, and they’re divided into various subcategories. And, with the variety of settings each option provides, you could say Depicter’s output is more than what you initially see when choosing.
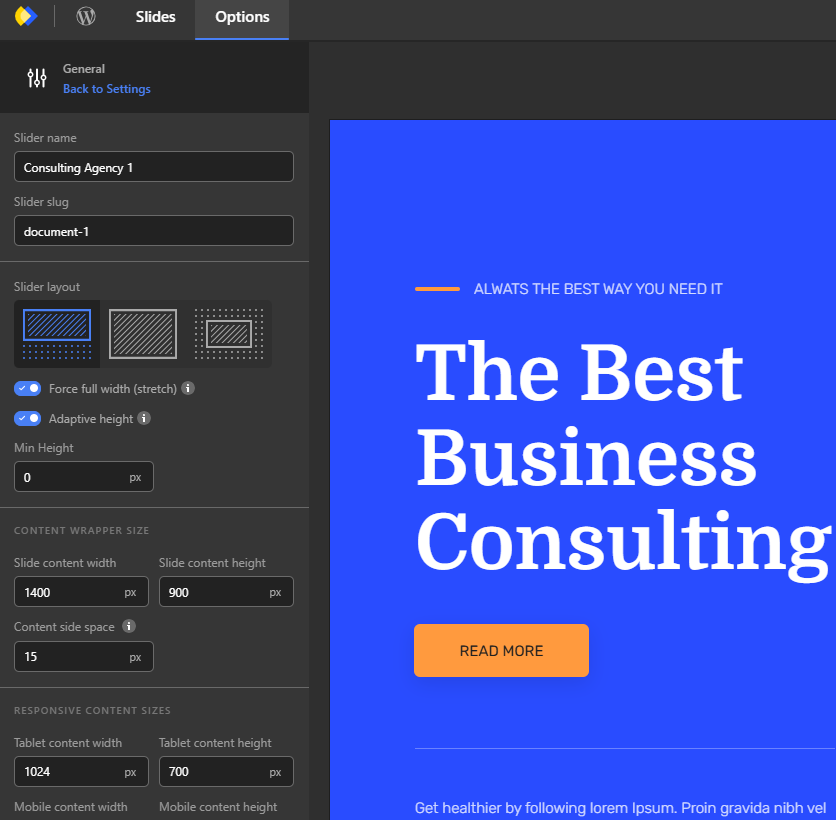
General Options
Depicter gives you control over all parts of a slider. To do this, it puts all the options into categories in its own panel, and for each subcategory, it also includes related general and detailed options.
In the end, by combining all of these, Depicter gives you complete control over all parts of a slider.
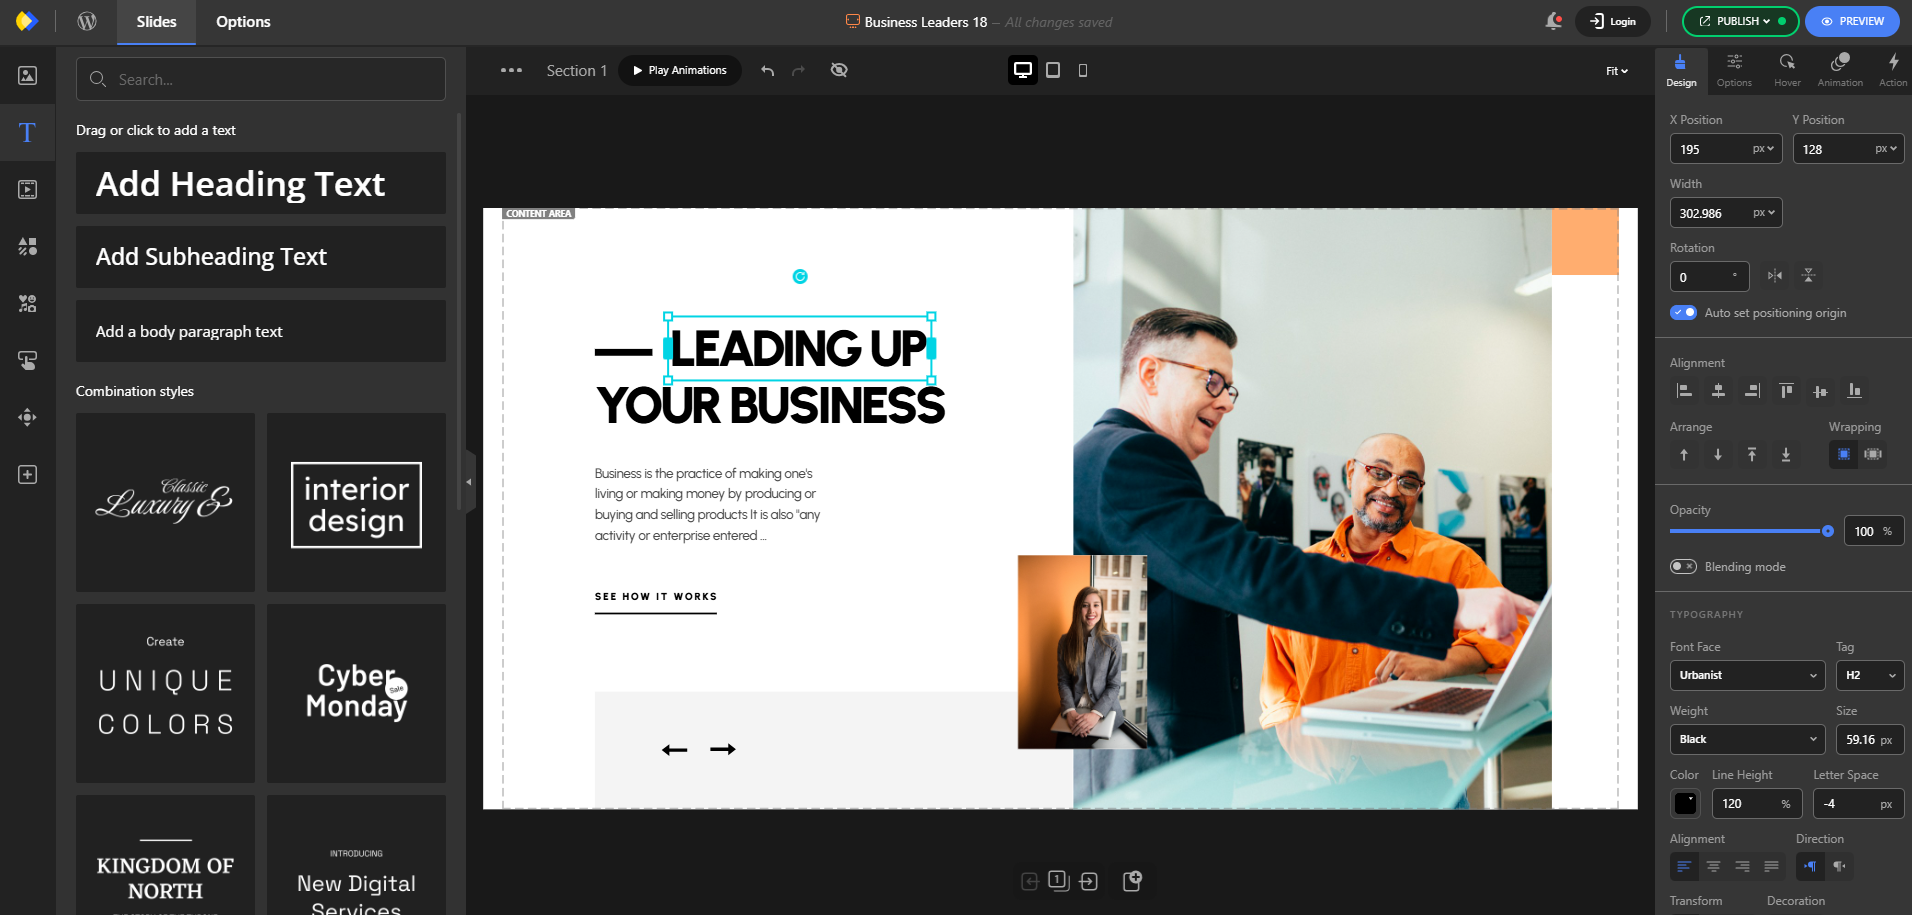
Editor
Depicter’s editor is designed for visual control. To begin, it uses a complete drag-and-drop system. This level of drag-and-drop functionality is not always found in even widely used, current WordPress page builders. This allows you to freely resize any element and position it exactly where you need it. Depicter also provides tools and features to use various layouts for the elements within the slider. These include familiar layouts like Grid and Flex, as well as the ability to group elements, snapping guides for precise element movement, and other helpful tools.
You also have access to the Version History feature. That’s correct. Depicter lets you revert to previously saved versions of your slider. So, you don’t have to worry about losing changes or needing to return to earlier versions of your slider. With a single click, you can restore a previously saved version.
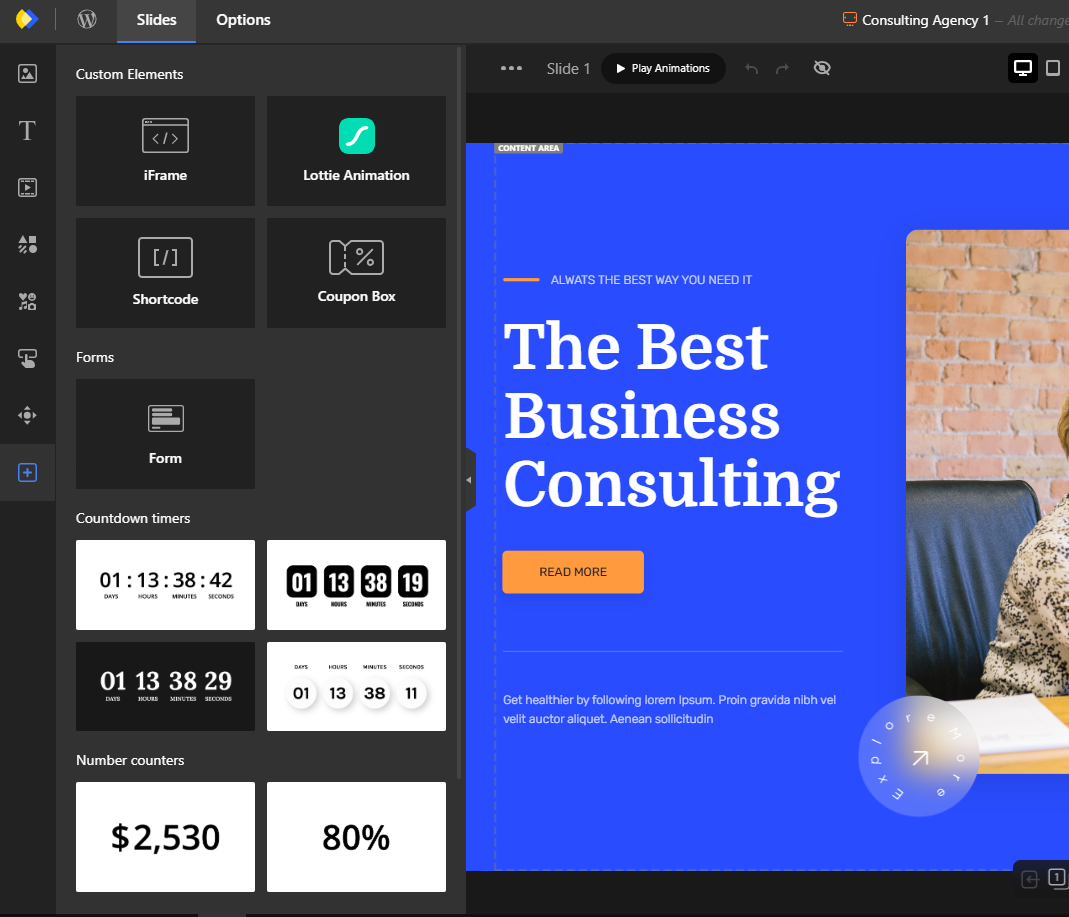
Elements
You can add anything you want to your slider as a layer using Depicter. From the simplest layers like images, videos, and text, to buttons, shapes, icons, navigation controls, and timelines. And, all of these come in various shapes, sizes, and forms. Depicter also lets you use more advanced layers, such as:
Masks
Stories Progress Bars
Slideshow Play/Pause
Scroll Down Indicators
Lottie Animations
Shortcodes
Coupon Boxes
Forms
Number Timers
Before After Comparisons
So, you have a complete set of everything you need to build sliders, from the simplest to the most advanced, with unique features.
Responsive Design
Depicter’s approach to responsiveness allows you to create distinct design variations tailored to each specific screen size. This means you have the flexibility to determine precisely which elements are visible on each device, and you can also control their behavior. For instance, you can specify whether elements should resize automatically to fit the screen or maintain a fixed position.
Furthermore, you’re not limited to just element visibility and behavior; you can also hide entire slides or modify aspects like colors, all on a screen-size-specific basis. In addition, Depicter provides control over slide backgrounds and how those backgrounds fill the available space, giving you the ability to customize these aspects independently for each screen size.
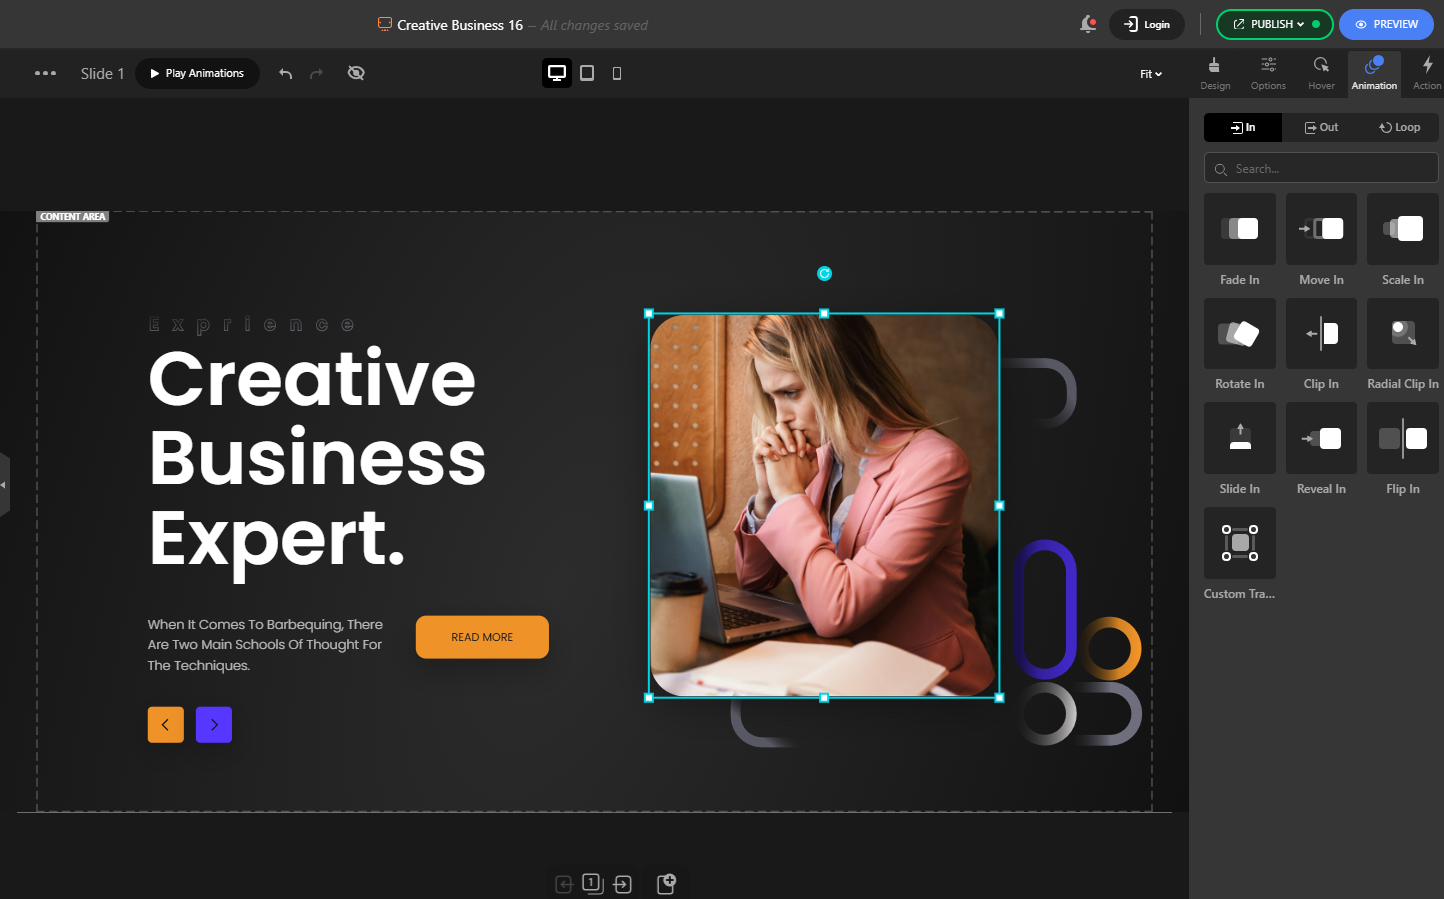
Animations and Transitions
Depicter provides a comprehensive suite of animation and transition features, enabling users to create visually engaging sliders. Users can apply animations to individual elements, including fade-ins, scaling, and custom transformations, with granular control over timing and easing. Advanced features like Lottie animations and masks offer further creative possibilities.
For slide transitions, Depicter provides customizable effects, adjustable direction, and background animations, including parallax effects that interact with mouse movement or page scrolling. The visual editor simplifies the process of creating and managing these animations and transitions, offering a high degree of customization and a wide variety of options to suit diverse design needs.
Templates
Ready-made templates are useful for speeding up development, bypassing the design phase, and simply making things easier for the user. MetaSlider lacks this feature; it does not provide templates.
In contrast, Depicter offers a collection of over 550, including free slider templates. These are high-quality WordPress slider templates, organized into various categories to suit different purposes and occasions. Furthermore, despite the extensive variety and large number of templates already available, Depicter consistently updates this collection. This ensures users have access to up-to-date designs that reflect current trends and seasonal events.
Depicter Unique Features
So, what does Depicter have that MetaSlider doesn’t? Here are some of Depicter’s unique features:
It has an AI Slider that makes slider creation faster by generating content.
It includes a popup builder, distinct from its sliders, with its own options.
You can build notification bars, too, with their own specific tools.
Wonder how to grow your email list? Depicter allows you to generate leads by integrating forms into sliders, popups, and notification bars.
Pricing
For $39 per year, you can get Depicter Pro for one website. This includes access to all pro features, and the range of visual tools makes it a worthwhile purchase.
Conclusion
In summary, while MetaSlider remains a popular choice for creating a website slider, its basic functionality limits its potential in today’s web design landscape. For a truly modern and feature-rich experience, Depicter stands out as the best MetaSlider alternative. Its drag-and-drop editor, diverse elements, strong responsiveness, extensive animations, and vast template library provide a significant upgrade. Depicter’s unique features, such as AI-powered sliders and integrated lead generation, further solidify its position. With a comparable price point, Depicter delivers greater value, empowering users to create sophisticated sliders. If you’re looking for a powerful and versatile replacement for MetaSlider, Depicter is the clear choice.
We see a lot of image files on websites, like JPGs and PNGs. But, there’s another one called SVG. What makes it special is that it’s not made of pixels, it’s made of code. That means you can resize it without it getting blurry. It stays clear no matter how big you make it, which is really handy for web graphics.
What is an SVG File and How to Get One?
Technically, an SVG file is an XML-based vector image format. This means it uses text to describe the image’s shapes, lines, and colors. Because it’s text-based, software can read and manipulate the image. So, for example, you might use an SVG file in a website slider on your website, where you need a logo or icon to stay sharp at any size.
You can get SVG files in a few ways:
Create Your Own: Vector graphics editors like Adobe Illustrator or Inkscape let you design SVGs. You draw shapes, lines, and add colors, and the software saves it as an SVG file.
Download from the Internet: Many websites offer free or paid SVG files. You can find icons, logos, and other graphics. Search for “free SVG icons” or “SVG graphics” to find these resources.
Convert Other Images: Some online tools and software can turn JPGs or PNGs into SVGs. This process isn’t always perfect, especially with detailed photos, but it can work for simple graphics.
Pros and Cons of Using SVG Files on a Website
When you’re crafting beautiful WordPress sliders, or any website graphics for that matter, you’ll want to think about more than just general design. You’ll need to consider the type of image file you’re using. SVGs offer some unique advantages, but they also have potential drawbacks. Here’s a quick look at the pros and cons:
Pros:
Scalability: SVGs stay sharp at any size. This helps with logos or icons, which need to look good on different screens.
Small File Size: For simple graphics, SVGs are often smaller than other image files. This can make your website load faster.
Interactive: Because SVGs use code, you can add animations or interactivity.
Search Engine Friendly: Search engines can read the text inside SVG files, which can help with SEO.
Cons:
Complexity: For detailed photos, SVGs can get large. A JPG or PNG might be better.
Browser Compatibility: Most browsers support SVGs, but older ones might not.
Editing: You need vector graphics software to edit SVGs.
Performance: Complex SVGs can slow down a website.
Security: SVGs use XML code, and they can be vulnerable to security threats if not handled carefully.
How to add custom SVG files in Depicter
WordPress, by default, doesn’t allow you to upload SVG files. This is mainly because SVGs use XML code, and that code can contain malicious scripts. If someone uploaded a harmful SVG, it could create security problems for your site. This is a general safety measure.
However, if you create your own SVGs or get them from a trusted source, you might want to use them on your website. In these cases, you are safe.
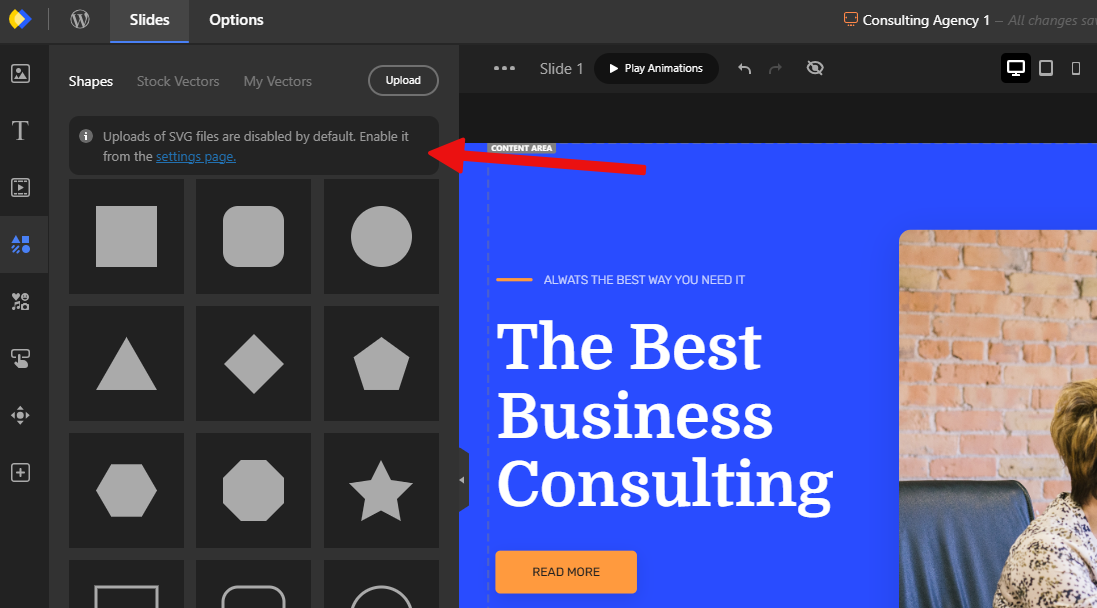
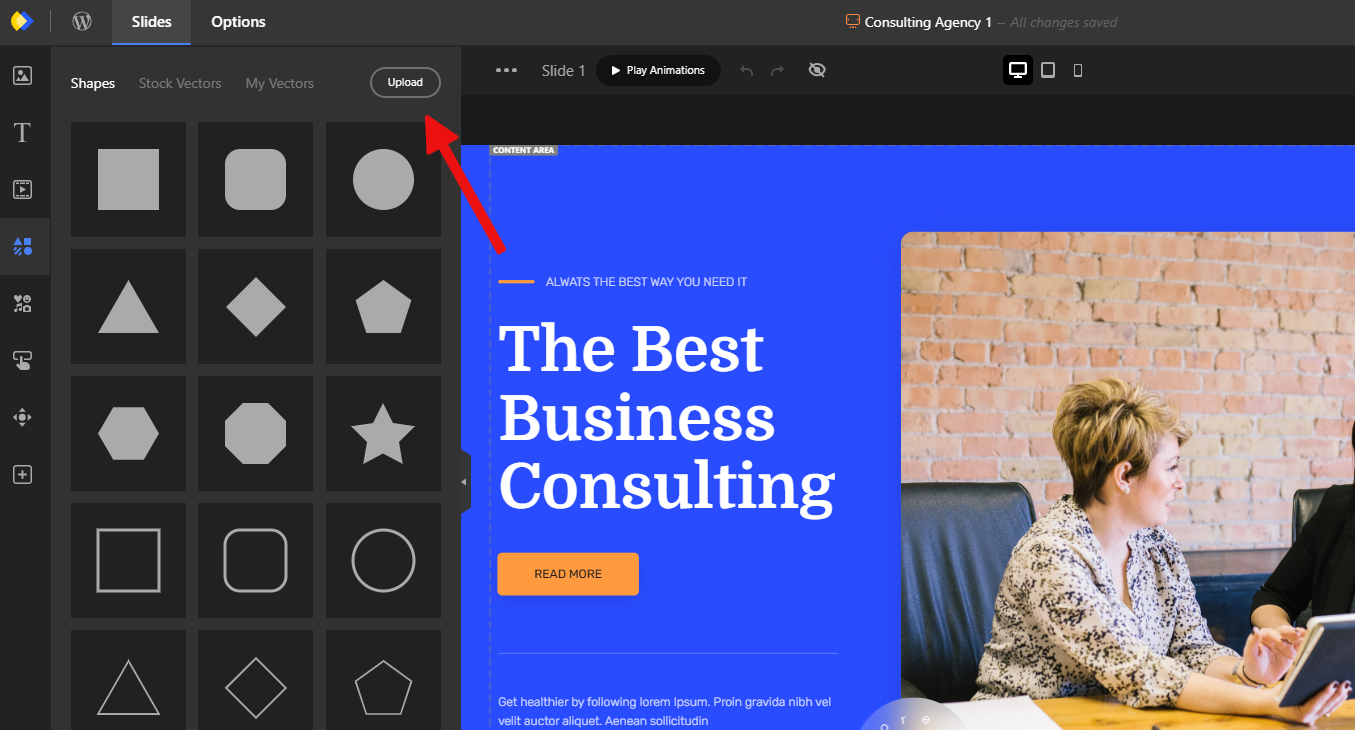
If you go to the Shapes and Vectors menu and try to upload an SVG file, you’ll see Depicter shows a message that SVG uploads are disabled.
Enabling SVG Upload in Depicter
Inside its settings panel, you’ll find an option to enable SVG uploads. This lets you use your own or reliable SVGs without the default WordPress restrictions.
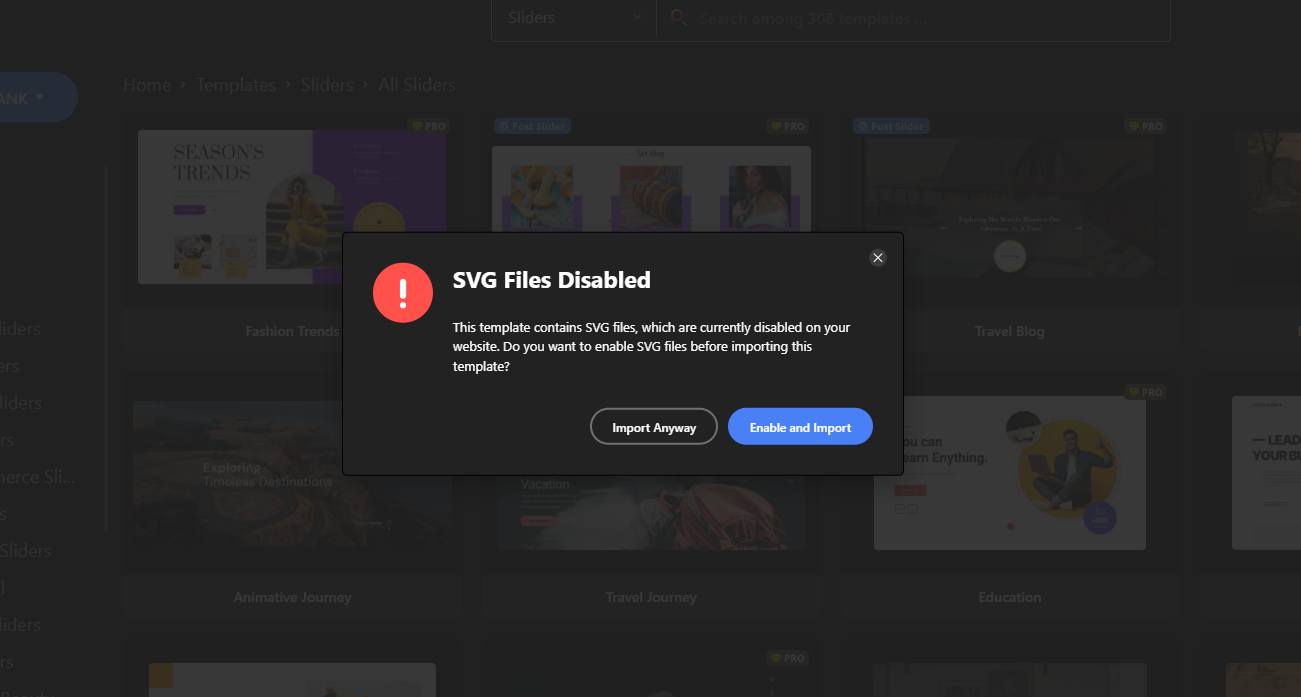
Before you do that, if you import a slider template and it has SVGs, Depicter will let you know. Then, it can turn on SVG uploads for you if you want to import everything.
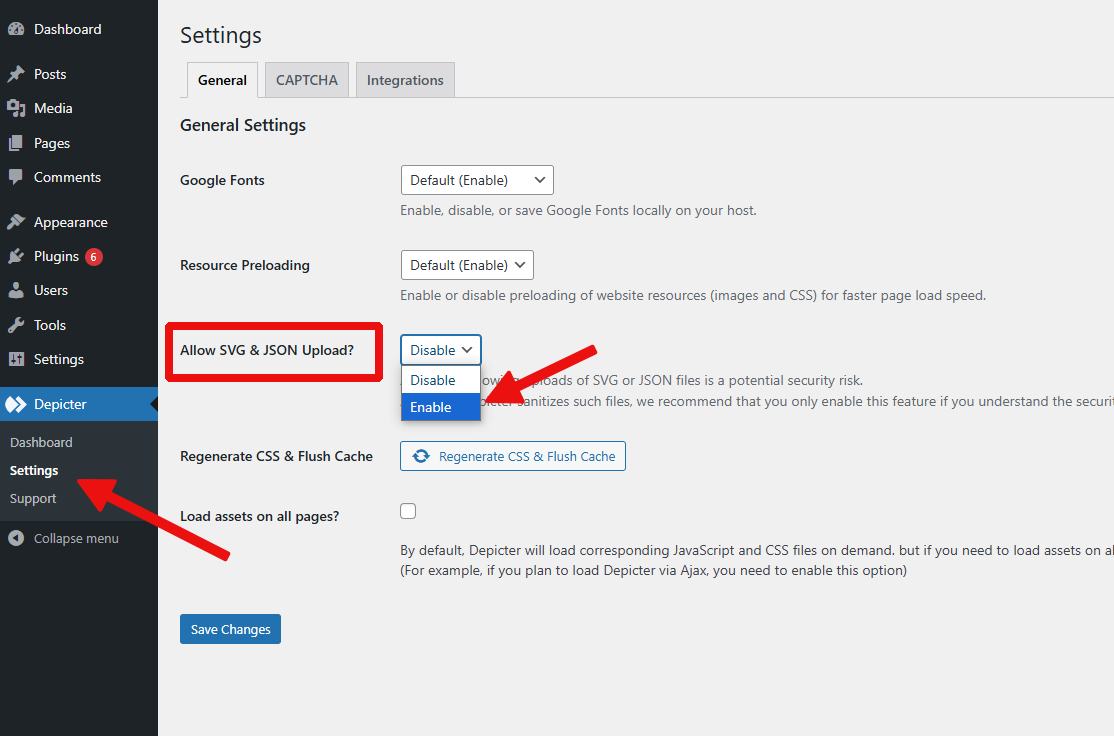
To enable SVG upload, navigate to Depicter’s Setting page and enable the “Allow SVG & JSON Upload” option.
After enabling this option, you can upload the SVG file.
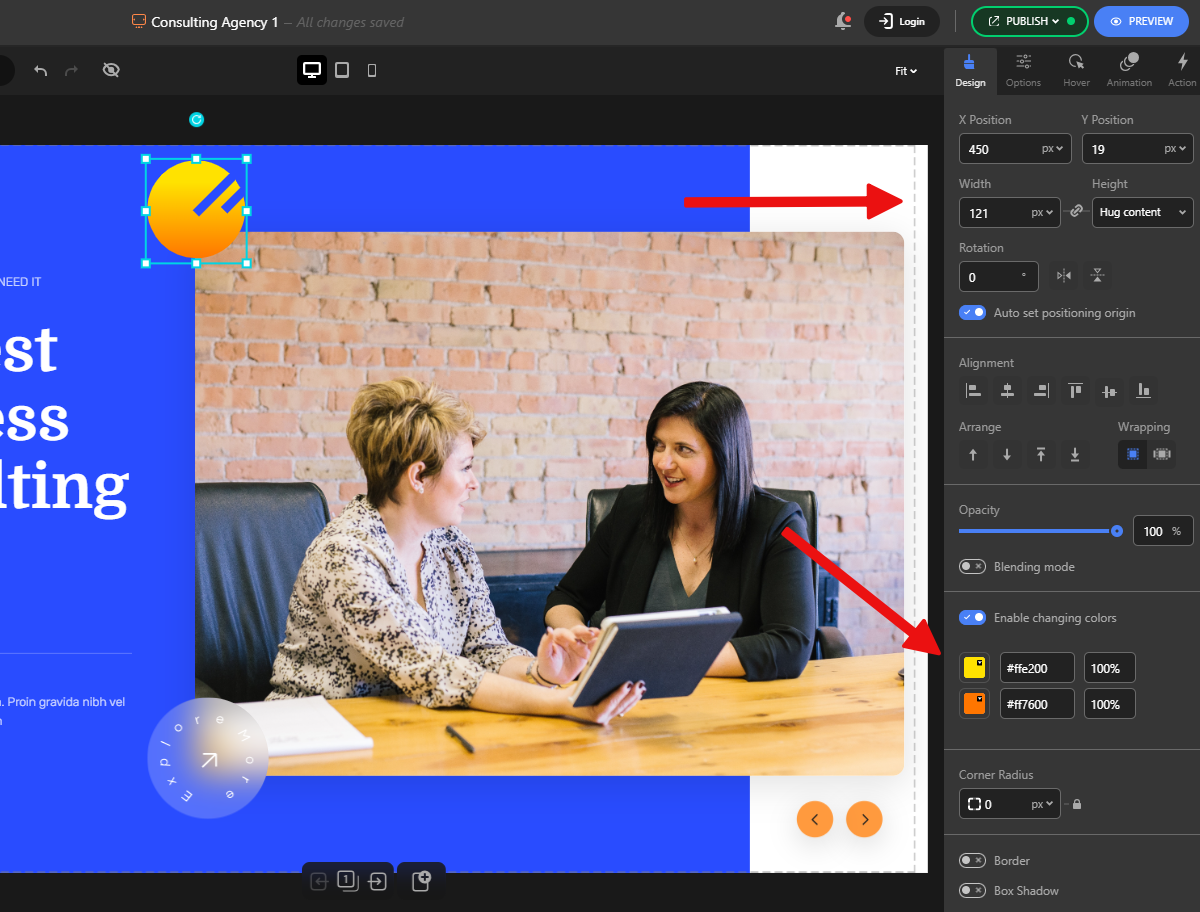
After selecting the SVG file, you bring it into the Depicter editor
Depicter’s editor lets you customize your SVG shape. You can resize it, change its colors, and use other shape and vector editing features.
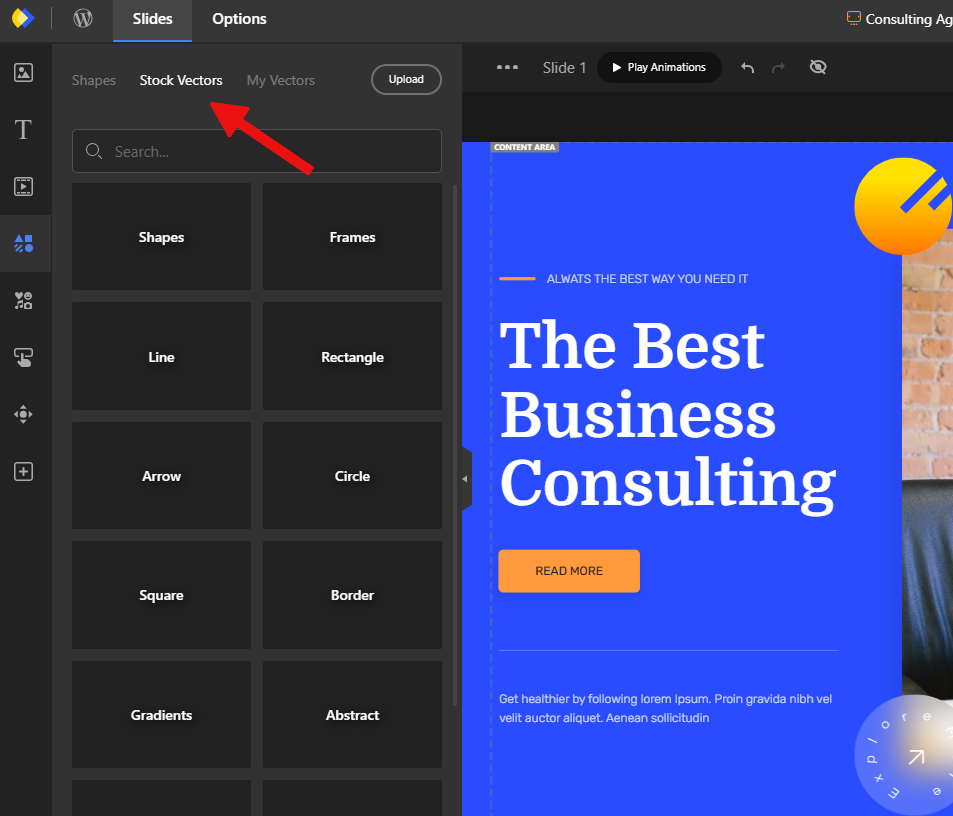
And also remember that you can use existing SVG files from the Stock Vector menu.
Don’t forget to save your changes, and you are done.
Conclusion
In short, SVGs offer a useful way to add sharp, scalable graphics to your website, especially within an image slider where consistent clarity across different screen sizes is crucial. While WordPress disables uploads by default for security, Depicter provides a way to safely use your own SVGs or those from trusted sources. You can enable uploads in Depicter’s settings, and the plugin even helps with importing templates that include SVGs. Once uploaded, Depicter’s editor gives you control over customizing your SVG files. Whether you’re creating your own or using stock vectors, SVGs can be a valuable addition to your website’s design, provided you understand their benefits and potential security considerations.
A website slider is a common visual element among website owners and for good reason. They’re a dynamic way to showcase content, whether it’s a carousel of product images, rotating testimonials, or a visually engaging header. A quality slider plugin lets you create these displays, offering various layouts and options.
WordPress users looking to add sliders to their sites often encounter Smart Slider and Depicter. Both plugins aim to solve the same problem: creating engaging visual content. And, they share some basic features, like layer-based editing and template libraries.
Both Smart Slider and Depicter aim to provide robust slider solutions for WordPress, but they approach the task with different capabilities and features. While they share the goal of creating eye-catching sliders, their editing experiences, feature sets, and approaches to responsive design vary. In this article, we’ll examine these differences to understand why Depicter stands out as a strong alternative to Smart Slider.
Do Depicter and Smart Slider have anything in common?
Depicter and Smart Slider share some core functionalities. Both are WordPress plugins designed to create visual sliders. They allow users to build different types of sliders, including but not limited to a content slider, offer layer-based editing, and provide template libraries. And, they both address responsive design, though with different approaches. So, while they offer similar basic features, how they implement those features, and the additional tools they provide, differ significantly.
Editor
In the Smart Slider editor, the layout uses a row and column system, similar to common page builders.
We need to clarify whether this is an advantage or a limitation. It might be stated that because this system is used in page builders, it’s an advantage for the slider editor experience. However, in practice, due to the inherent difference between a page and a slide, freedom of movement, resizing, repositioning, and design are the most important issues. After spending some time with Smart Slider, you’ll find that you don’t feel comfortable with its editor, because it hinders creativity for creating the visual effects needed for a modern slider. Yes, it’s true that a feature like Absolute Position exists, which allows you to take layers out of their default state and move them freely within the slide, but this feature is very weak and implemented with many limitations. The default state in Smart Slider is called ‘default layers’.
Default layers can’t move on top of each other and will push other layers lower when their own content needs more space.
This editing experience is similar to page builders.
For example, if you’ve created a row and two columns in a slide, added some elements, and briefly prepared your slide, and then decide that the slide structure needs to change (for example, add another column and add a few more elements outside the current layout structure), you’ll have a lot of trouble changing the row and column options to implement the new changes. These issues together make the Smart Slider editor experience a tiring and limiting one.
A True Drag & Drop Editor
On the other hand, Depicter, with a completely drag-and-drop editor, provides a completely free and comfortable experience for novice users to create slides with different designs. It allows you to implement elements in any framework you like.
In this process, you have key features like Snapping, Resize, Rotate, and the important ability to group slides, which has several advantages. One of them is moving and even resizing multiple elements together, preventing an element from changing position relative to other elements, and most importantly, the Auto Layout feature. By enabling the Auto Layout feature, you can have a layout based on Flex and Grid layouts for grouped elements.
This isn’t the only advantage of the Depicter editor over the Smart Slider editor; the entire Depicter editor experience is more modern and intuitive. The placement of the assets panel, options panel, canvas, functional buttons, settings menu, and dedicated right-click menu all together provide an excellent user experience for both novice and professional users.
Lack of CTA features
Here, we also mention the CTA (call to action) topic, which is an important feature for sliders. In Depicter, you can set completely separate operations with different triggers for any element on the page using the dedicated Action menu. For example, when you click a button, it can display or hide an element, go to a specific slide, play a video or sound, or even execute your custom JS code. So, you can imagine how seriously the entire CTA topic is considered in the Depicter editor, while in Smart Slider, you can only assign a link to a button, that’s it.
Also, easy layer swapping, resizing, positioning, coloring, and even rotating different elements in different responsive modes, changing the slide background image for different responsive sizes, the ability to choose between Responsive Resize mode and normal mode for the behavior of individual layers when resizing the slider, and the ability to customize the width and height of a specific slide for a specific responsive mode are other advantages of Depicter.
Available Layers
When you talk about layers, you’re talking about different elements with different features that a user gets to make a slider. Smart Slider says it has 24 layers, but when you look at the list, you see things like “Row,” which is a layout element, listed as a layer. And you see each of these listed as separate layers:
Text
Heading
Animated heading
Highlighted heading
List
But those are all just text. And these are listed as separate layers:
Image
Image Box
Image Area
Caption
And those are all basically images.
Depicter has everything Smart Slider has in its element set, plus these:
Masks
Shapes
Navigation arrows and Control sets
Stories Progress Bar
Line Time
Slideshow Play/Pause
Scroll down Indicator
Lottie Animation
Shortcode
Coupon Box
From
Number Timers
Before After comparison
And each of those has its own features and is separate from the other Depicter layers.
If you compare the two, Depicter gives you more options for making different kinds of sliders than Smart Slider does.
Dynamic content
Both of these plugins support Dynamic Content for crating a content slider. Smart Slider introduces support for various WordPress plugins as separate sources. For example, support for Events Manager or NextGEN Gallery is introduced as separate sources. While they are all actually Custom Post Types, in Depicter, all default and basic items like Post, Page, and Product are available to users, and support for any other plugin is available to the user in the form of a source called Custom Post Type.
Also, Depicter’s unique feature is its support for the ACF plugin (Advanced Custom Fields) for creating an ACF slider. In fact, using this plugin, any post type that the user creates, along with any custom field and custom taxonomy it may have, can be used in Depicter to create dynamic content. Both of these plugins support Dynamic Content. Smart Slider introduces support for various WordPress plugins as separate sources.
For example, support for Events Manager or NextGEN Gallery is introduced as separate sources. While they are all actually Custom Post Types, in Depicter, all default and basic items like Post, Page, and Product are available to users, and support for any other plugin is available to the user in the form of a source called Custom Post Type.
Also, Depicter’s unique feature is its support for the ACF plugin (Advanced Custom Fields). In fact, using this plugin, any post type that the user creates, along with any custom field and custom taxonomy it may have, can be used in Depicter to create dynamic content.
And of course, the very useful Google Reviews option is also among the sources available in Depicter.
Responsive Design
When it comes to responsiveness, both of these plugins offer similar and different capabilities to the user. But the main question is, can the user have different structures, layouts, and designs for the slider’s layers for different device sizes?
Smart Slider has some good features in this area, like text replacement for different responsive modes, or the Font Size modifier capability, and also Custom Breakpoints. But with a closer look, you’ll see there are limitations. For example, for text, other than size, you can’t change any other typography options.
Layout Design for Different Responsive Modes
The most important thing is that you can’t change the layout design for different responsive modes. Basically, you have to say that due to how the elements are implemented in Smart Slider, which relates to how its editor works, you can’t have an optimized layout for a responsive size, or that this isn’t easily possible.
Yes, it’s true, there are different options like ‘Hide On’ and Align in Smart Slider that are specific to responsive design. But the main issue, which is having different layouts and different designs for sizes other than desktop, isn’t well covered in Smart Slider.
On the other hand, Depicter, with all the capabilities that Smart Slider has, can also do these things in the area of responsive design:
Completely separate layer layouts in each responsive mode. This means you can make changes for each responsive mode completely separate from what you designed in desktop mode, and have a completely separate and independent design, not just changing the layer positions.
Changing the size, position, color, and even rotation of different elements in different responsive modes.
Changing the slide background image for different responsive sizes.
The ability to choose between Responsive Resize mode and normal mode for the behavior of individual layers when the slider size changes.
The ability to customize the width and height of a specific slide for a specific responsive mode
Template Library
When we talk about ready-made templates, we’re considering fast development, skipping the design stage, and overall user convenience. In this area, variety and giving the user freedom of choice are key factors. Smart Slider offers about 180 templates, which limits user selection, and it doesn’t look like this collection gets updated regularly with more items.
On the other hand, Depicter, with over 550 templates, provides a very high-quality and extensive collection of diverse WordPress slider templates with different categories for various purposes and occasions. And despite having a wide variety and a large number of templates, this collection is constantly updated. Depicter provides up-to-date designs that match current trends and also seasonal occasions for users.
Depicter Unique Features
After all the comparisons we’ve made, we should now talk about Depicter’s unique features. These are capabilities Depicter has that Smart Slider doesn’t, which is another reason to choose Depicter over Smart Slider.
Each of these features could be examined in a separate article, and here, we’ll just give a brief overview.
AI Slider
Using the AI Slider Wizard, the entire slider creation process is optimized with artificial intelligence. Content related to your topic and what you entered in the prompt stage is loaded for you. Finally, with just a few simple clicks, a slider is created and ready for you.
Popup Builder
Completely separate from its slider capabilities, Depicter, if not the best popup builder available for WordPress, is certainly among the best. It offers a distinct output compared to its sliders, with its own unique features, settings, outputs, and templates.
Notification Bar Builder
With Depicter, you can also create a WordPress notification bar for your website. This is another type of output from Depicter’s visual capabilities, with its own options, features, details, and templates.
Leads
Using Depicter’s Leads feature and combining its Form element with sliders, popups, or notification bars, Depicter becomes one of the best lead generation tools. Powerful marketing capabilities are provided here.
Pricing
The starting price for purchasing Smart Slider 3 Pro is $49 for the Standard plan for one website, while the starting price for Depicter Pro for one website per year is $39.
Given all the details, Depicter’s advantages in shared areas and its unique features not found in Smart Slider mean Depicter offers higher purchase value.
Conclusion
In the end, while both Smart Slider and Depicter offer tools to build sliders, their differences become clear. Depicter provides a more flexible editing experience, allowing for greater creative freedom. Its wider selection of layers and a rich slider template collection, with robust responsive design capabilities, gives users more control over their slider creations. And, Depicter’s unique features, like the AI Slider and integrated popup builder, add value beyond basic slider functionality. Considering these points, along with its competitive pricing, Depicter emerges as a strong and versatile alternative to Smart Slider, offering a more comprehensive solution for WordPress users looking to enhance their websites with dynamic visual content.
Think of this not-so-nice scenario: You’re opening a library full of exciting books, but visitors keep complaining that the doors are too slow to open, the bookshelves crash randomly, and sometimes, they can’t even enter.
That’s what happens when a content-heavy website (one with lots of images, videos, and files) is hosted on a poor server. Choosing the right WordPress hosting is important here. It ensures everything runs smoothly, loads fast, and stays accessible anytime.
In this guide, we’ll explore how to find the perfect hosting for websites packed with content, just like a well-maintained digital library.
Key Factors to Consider While Choosing a Host
Storage & Bandwidth
Websites with lots of images, videos, and files need large storage space, especially if you wish to host everything natively. To explain it better, a blog with only text needs very little storage, but a photography website with thousands of high-quality images requires much more space.
Bandwidth, on the other hand, is like a highway. Traffic flows smoothly if only a few cars (visitors) are on it. But if too many vehicles flood a single-lane road, there’s a jam.
Websites with high traffic need unmetered bandwidth so that thousands (or millions) of visitors can access the content without slowdowns. That’s why dedicated CPU cores are essential for such sites.
When dealing with a content-heavy site, particularly one with numerous high-resolution images, consider how you’ll present those visuals. Instead of static galleries, dynamic content slider functionality can enhance user engagement. Plugins like Depicter offer visually appealing content slidersthat can be optimized for performance, ensuring your images are showcased effectively without excessive load times. This is especially useful for photography or portfolio websites where visual impact is crucial.
Speed & Performance
Nobody likes a slow website. If a page takes too long to load, visitors leave. Fast websites keep people engaged.
Server Location Matters: If your audience is in India, but your server is in the US, it will take longer. Hosting providers with multiple server locations or edge caching facility can help reduce delays.
SSDs vs. HDDs: Websites using SSD (Solid-State Drive) storage load way faster than old-school HDDs (Hard Disk Drives), just like how a smartphone is much quicker than an old, slow desktop computer.
CDNs (Content Delivery Networks): CDNs store website files in different locations worldwide so visitors get fast-loading content no matter where they are. In case you don’t know, YouTube uses a CDN to ensure videos load quickly, even if you’re watching from a different country.
While CDNs optimize delivery of static content, the way you present that content also impacts speed. For example, using optimized sliders, including a free WordPress slider option, can significantly improve user experience. Depicter, for instance, offers features that allow for efficient image loading and performance, ensuring that even visually rich sliders don’t slow down your site.
Reliability & Uptime
Would you visit a store if its doors were randomly locked at different hours? Nope. Similarly, if a website is down often, people stop visiting. Uptime is the percentage of time a website is available.
Good hosts promise 99.9% uptime, meaning your site stays online almost all the time.
Redundancy Measures: If one server fails, another should take over immediately—like a backup generator kicking in during a power cut.
Security & Data Protection
The internet isn’t always safe. Just like you lock your house to protect valuables, websites need security to prevent hackers from stealing data or shutting them down.
DDoS Protection: Some hackers try to overload a website with traffic to make it crash—like hundreds of people forcing their way into a small room. DDoS protection blocks such attacks.
Encryption & Backups: If your phone gets lost, you’d want a backup of your photos, right? Websites also need automatic backups so nothing is permanently lost. SSL encryption ensures private data (like passwords) stays safe.
Other Essential Features for a Smooth Experience
Daily Backups – Saves copies of your website in case of accidents.
One-Click WordPress Installation – No coding required. Makes launching a site as easy as installing an app.
Staging Environment – Allows you to test changes before going live, like a practice exam before the final test.
Types of Hosting & Their Suitability
Different websites need different types of hosting, just like different vehicles serve different purposes.
Shared Hosting (Not Ideal for Big Websites)
Imagine a dorm room shared with ten noisy roommates. It’s cheap but crowded. In shared hosting, multiple websites share the same server, making it slow and unreliable for content-heavy websites.
VPS Hosting (Better, But Limited Growth)
Like renting a private apartment—fewer people, better speed, but still limited space. Good for growing websites but not the best for huge traffic.
Dedicated Hosting (Powerful, But Expensive)
This is like owning a mansion—full control and maximum power, but costly. Large businesses with massive websites prefer this.
Cloud Hosting (Best for Scaling Up Quickly)
Imagine a hotel that automatically expands rooms when more guests arrive. Cloud hosting adjusts to website traffic, making it the best choice for growing sites.
Managed WordPress Hosting (Best for WordPress Websites)
If you use WordPress, managed hosting (like InstaWP Live) is great. It includes security, backups, and performance optimization, so you don’t have to do everything yourself.
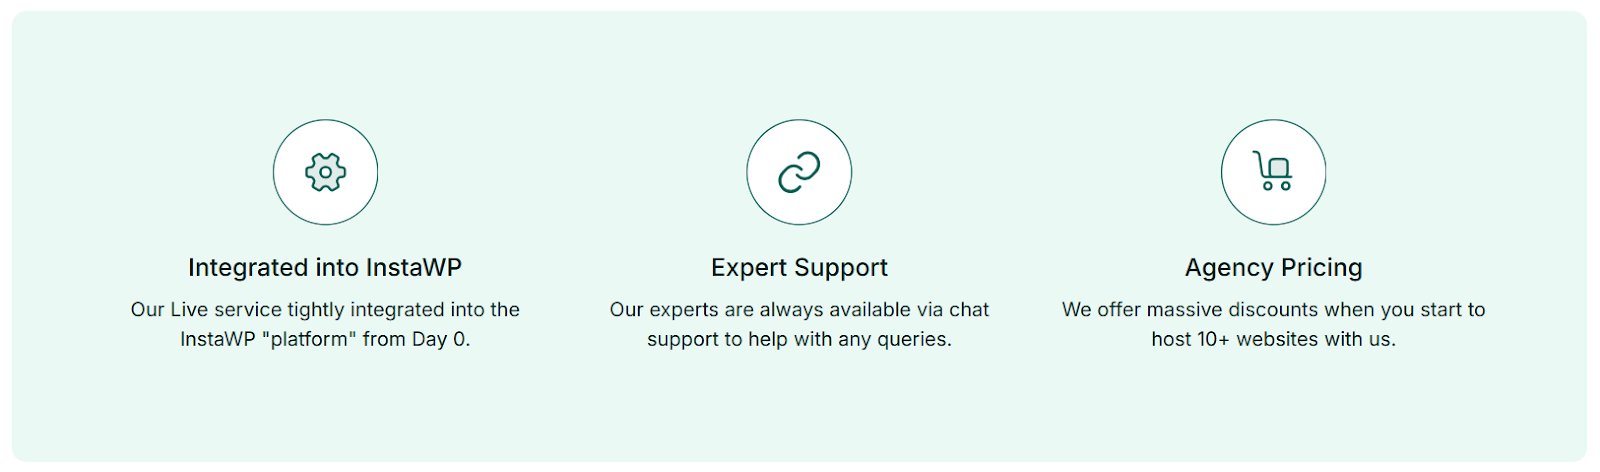
More about InstaWP Live
InstaWP Live is the ultimate choice for content-heavy sites, offering scalable storage, unmetered bandwidth, and ultra-fast speeds with edge caching and a global CDN. Its 99.99% uptime, DDoS protection, and real-time failover ensure reliability, while expert 24/7 support keeps everything running smoothly.
In fact, it’s that rare service provider that lets you purge your server cache in one click for instant updates and faster performance. You can even purge plugin-level caches with it super fast.
How does InstaWP Live improve website speed?
InstaWP Live uses edge caching, built-in CDN, and optimized servers to keep websites blazing fast. It’s like giving your website a turbo boost so visitors don’t have to wait. Whether your audience is in the US, Europe, or Asia, InstaWP Live ensures your pages load in seconds.
Can I easily upgrade my hosting plan with InstaWP Live?
Yes. InstaWP Live offers scalable plans, meaning you can start small and upgrade as your website grows. Imagine starting a small bakery and expanding into a full-sized café when more customers arrive—the same concept. Upgrading is quick, seamless, and hassle-free.
Understanding Hosting Budget & Cost
Shared Hosting – Cheapest ($2–$10/month) but slow for big websites.
VPS Hosting – Mid-range ($10–$50/month), good for growing sites.
Dedicated Hosting – Expensive ($80–$500/month), best for large businesses.
Cloud Hosting – Flexible pricing ($5–$100/month), adjusts based on usage.
Managed Hosting –Mid-range to Expensive ($20–$100/month), excellent for content-heavy sites. Hosting providers like InstaWP Live have $18/month plans and the rate goes down by up to 50% when you host more sites with the same provider.
How to Get the Best Deal?
Compare Prices – Don’t just pick the first option. Check multiple providers.
Look for Discounts – Many hosts offer big discounts on annual plans.
Check for Hidden Costs – Some providers charge extra for backups, SSL, or migrations.
Choose a Scalable Plan – Start small and upgrade later instead of overpaying.
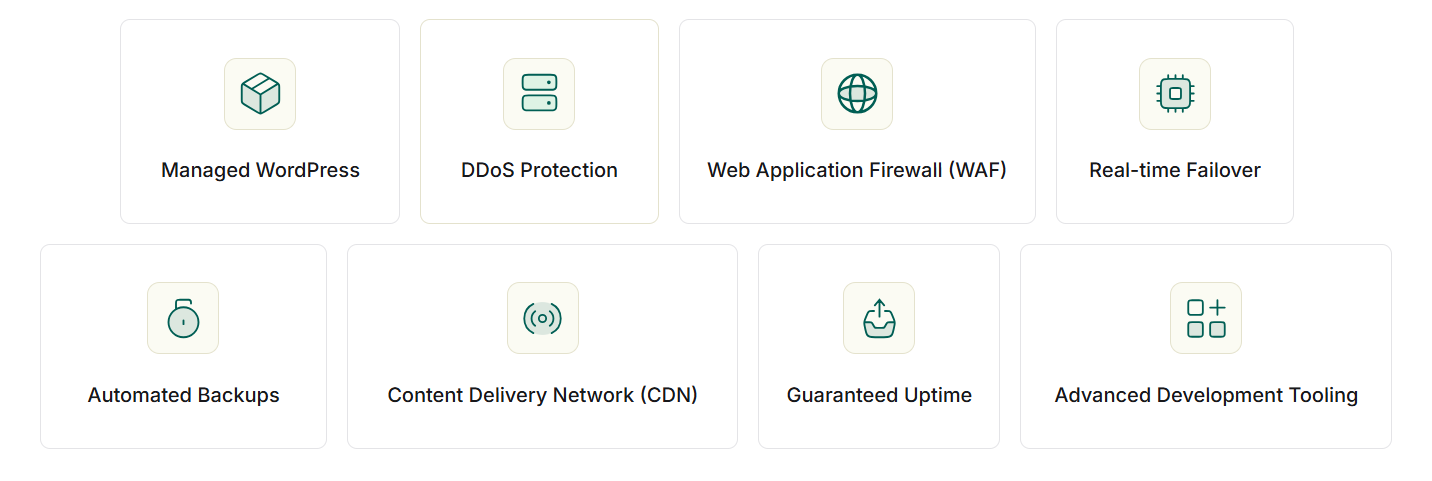
Best Hosting Features for Content-Heavy Websites
To handle heavy content smoothly, your hosting should have these features:
SSD Storage: Speeds up website loading times
CDN Integration: Ensures content loads fast worldwide
Edge Caching: Stores frequently accessed files closer to users
Load Balancing: Distributes traffic so one server isn’t overwhelmed
Scalable Plans: Allows easy upgrades when your website grows
PHP Workers & Object Caching: Optimizes database performance, reducing lag
Customer Support needs to be Amazing
Web hosting isn’t always smooth sailing. Sometimes, websites crash, pages don’t load, or there’s a mystery error that makes everything disappear. In such moments, a hosting provider with 24/7 support becomes your best friend.
What to Look for in Customer Support?
24/7 Live Chat & Phone Support – So you can get help anytime, just like a 24-hour emergency helpline.
Fast Response Time – A good provider should reply in minutes, not hours.
Knowledgeable Staff – Imagine asking for help with a tricky math problem, and your teacher doesn’t know the answer. Hosting support should be well-trained to solve all website issues.
Community & Documentation – Some hosts offer tutorials and forums where users help each other, like an online study group.
Scalability: Preparing for Growth
Let’s say you start a small YouTube channel, and at first, only your friends and family watch your videos. But suddenly, one of your videos goes viral, and millions of people start following you. Wouldn’t you need better recording equipment, a stronger internet connection, and maybe even a bigger studio?
Websites grow the same way. A personal blog might start with low traffic, but as it gets popular, it will need more power and storage. That’s where scalable hosting comes in. It allows your website to upgrade resources smoothly without crashing.
Types of Scalability in Hosting
Vertical Scaling – Increasing your server’s power, like adding more RAM to a computer.
Horizontal Scaling – Adding multiple servers, like hiring extra teachers when a school gets more students.
Cloud Hosting – Automatically increases resources when traffic spikes, just like an airplane adding extra seats when more passengers book tickets.
The Final Word
Choosing the right hosting for a content-heavy website needs to be strong, fast, and reliable. From storage and speed to security and scalability, every factor plays a role in keeping your site running smoothly. Whether you go with InstaWP Live or another provider, always prioritize performance, uptime, and support to ensure your visitors get the best experience possible.
Frequently Asked Questions
1. What is web hosting, and why do I need it?
Web hosting is like renting a space on the internet to store your website. Without it, your site has nowhere to live. It’s like opening a shop—without a location, customers can’t visit you. Hosting keeps your website online, fast, and accessible to visitors worldwide.
2. How do I know if my hosting provider is reliable?
Look for a 99.9% uptime guarantee, strong security, and fast customer support. A reliable host is like a good Wi-Fi connection—you barely notice it when it works, but it’s a nightmare when it doesn’t. Check reviews and test support response times before choosing.
3. Can I switch my hosting provider if I’m not happy?
Absolutely. Most hosting providers offer free migration services. If your current host is slow, expensive, or unhelpful, don’t hesitate to switch. You can use this amazing WordPress migration tool to migrate your site in a few clicks.
4. What’s the difference between shared, VPS, and cloud hosting?
Shared Hosting – Like living in a dorm; you share resources with others.
VPS Hosting – Like renting a private apartment; more space, but still in a shared building.
Cloud Hosting – Like having on-demand mansions that expand when guests arrive. Perfect for growing websites.
5. Do I need an SSL certificate for my website?
Yes. An SSL certificate secures your site (turning http:// into https://) and boosts SEO. It’s like having a padlock on your door—it keeps hackers out and helps visitors trust your site. Most good hosts offer SSL for free.
What are the Reasons to Consider an Alternative for BDOW
Not Up to Date
If you imagine you’re someone responsible for suggesting new features for BDOW, you’d probably make a very long list. That list would have the expected options and features that any modern Popup builder should have. It would cover things like the installation process, the user interface, and settings. It would also include things like being up-to-date and flexible. All of these point to BDOW’s weakness in keeping up with current standards.
Old Editor that does not meet your Design needs
At first, it might seem like a drag-and-drop editor. And, while it does have basic features like dragging and dropping elements, freely arranging them, and resizing them, there aren’t other tools for things like aligning or structuring and laying out the existing elements. The user interface is very old, and it’s not intuitive at all. A new user will have trouble getting used to how it works and will need to spend time learning it. You can’t give your pop-up a different layout, like a box or full-width. And the other options that exist give you just a limited set of basic choices. Also, there aren’t tools that make it easy for the user to create a professional pop-up. For example, you can’t do anything to photos except move them and resize them. Things like cropping, flipping, or replacing photos, and giving them special visual styles, aren’t possible. In another example, you can’t use custom fonts from your website, and you can only choose from what it provides.
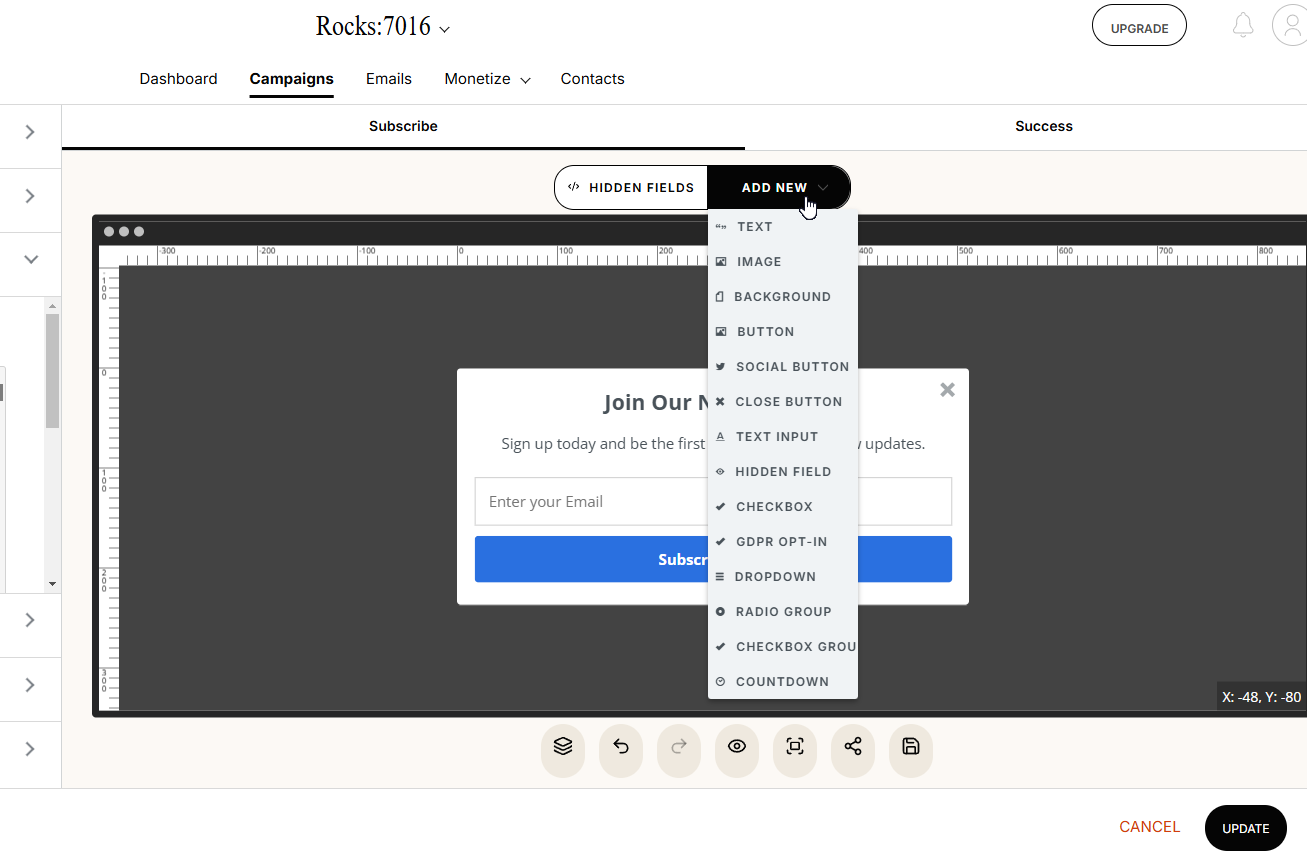
Limited Choices in Elements
If creativity matters to you, and you want different ways to use elements to get a unique result, BDOW isn’t the right choice. It only has basic elements for popups and forms, nothing special. For example, there’s no option for video elements, either regular or background. There’s no navigation control. You can’t use shapes, vectors, or even icons. And, of course, you won’t find advanced elements like shortcodes, iframes, coupon boxes, or anything else Depicter has.
Not Really Responsive
You might wonder where the responsive options are, beyond the one that shows the final output in different sizes. There aren’t other responsive settings in BDOW. You won’t find things like how elements behave when resized, different styles for different sizes, or how they move and are positioned. Basically, you just have to trust BDOW to handle it for you.
Lack of Visual Effects
You have to accept that the items in your popup won’t have any fancy animation effects or anything like that. There are only a few limited options for the whole popup, nothing more. You can assign one animation for when the popup first appears, and that’s it. And even for that, there aren’t any parameters to customize the animation. And it’s worth mentioning that if you’re looking for newer effects like Parallax or Ken Burns, or more options for Animation and Transition, you won’t find anything close to that here.
Limited and basic templates
You’ve got about 60 templates to choose from in BDOW. But, a quick look shows they’re pretty basic. So, the number of templates isn’t really a plus. And, it doesn’t seem like they add new ones often. Plus, there’s no way to organize them or sort them. You’re working with a limited set of simple templates. Even after you use one, the design is still pretty plain.
Pricing
BDOW has a free plan you can use, but it does have limits on the number of emails and monthly visits. Also, the final output will display BDOW branding. For its paid plans, there are options, with the lowest being $144 per year. If you pay more for higher-tier plans, the restrictions are reduced.
Depicter, The Best BDOW Alternative
Let’s look at the Depciter, the best alternative for BDOW.
The Modern Popup Builder
Depicter’s dashboard, interface, and popup creation process are all designed to be up-to-date. The features, customization options, and the way it handles creation and output give users a modern, professional experience. And we’ll look at some of those features below.
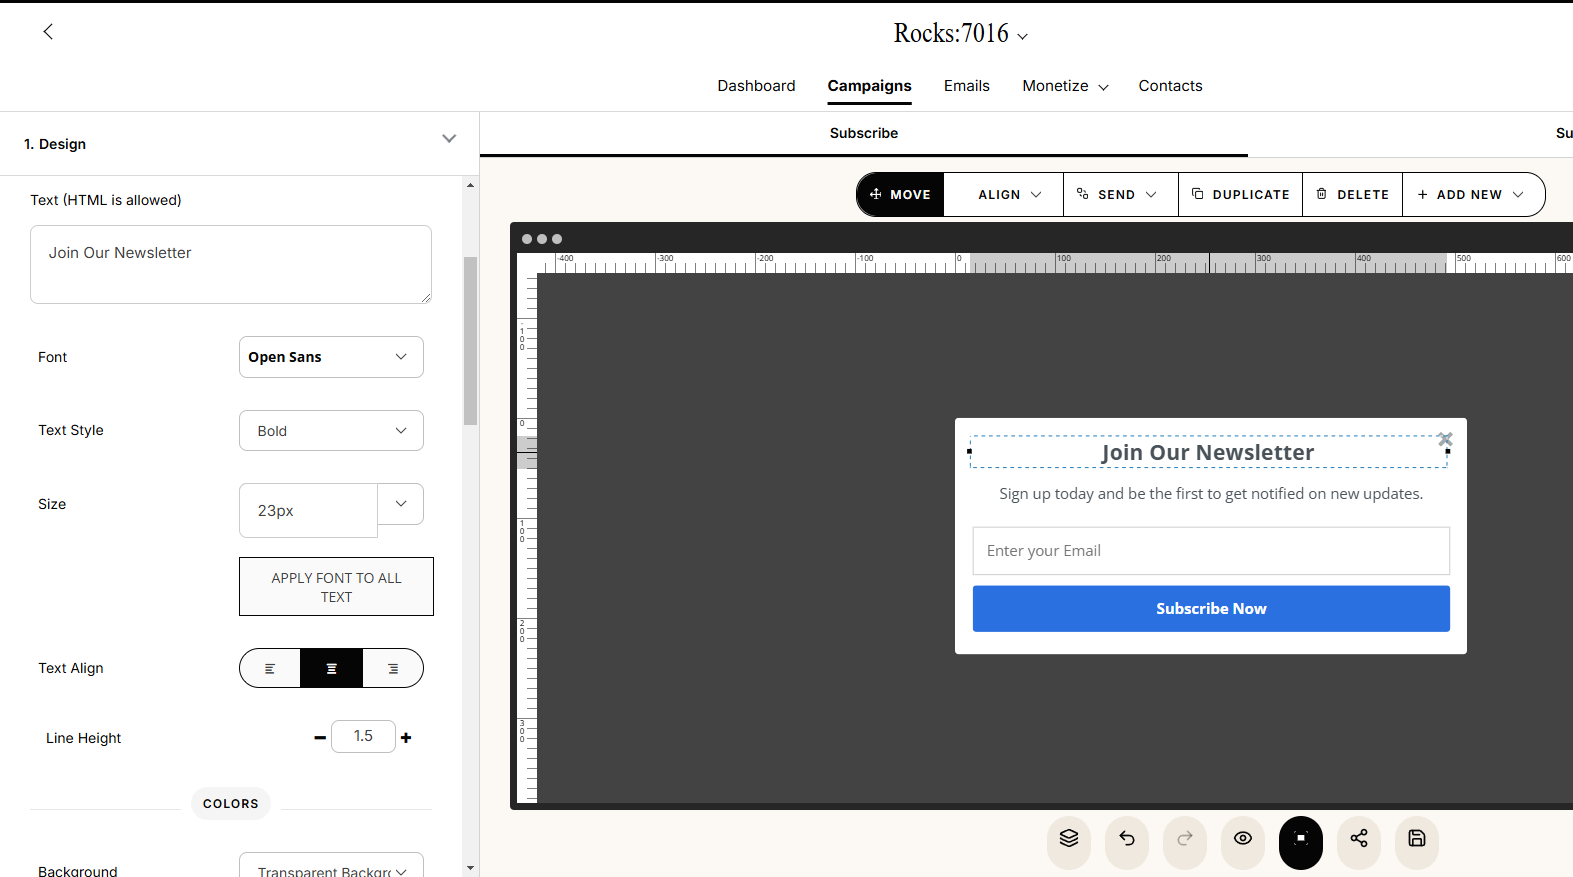
The Visual Editor
Depicter’s editor is completely drag-and-drop. You can resize and move elements freely, something that’s not common in other WordPress page builders. It includes layout tools like Grid and Flex, and you can also group elements and use snapping guides.
And, it has version history. You can go back to older saved versions of your pop-ups. So, if you make changes you don’t like, you can restore a previous version with one click.
There’s a lot more to cover with Depicter’s editor features, and it would need a separate article to do it properly.
True Responsiveness
Depicter’s responsiveness means you make separate designs for each screen size. You can choose which elements show up on each size, and how they behave – whether they resize or stay put. You can hide whole slides or change styles like colors, just for certain screen sizes. Plus, you can change things like popup backgrounds or how backgrounds fill the space, again, differently for each size. You also control the size of each responsive mode.
Animations and Transitions
With Depicter, you can add different animations for elements coming in, leaving, or looping, and you can change how those animations work. You can also animate the whole popup.
And then there’s Transition. It lets you make smooth effects when you move between popup pages.
You also get Parallax and Ken Burns effects. So, you can make pop-ups with animations and transitions that look professional.
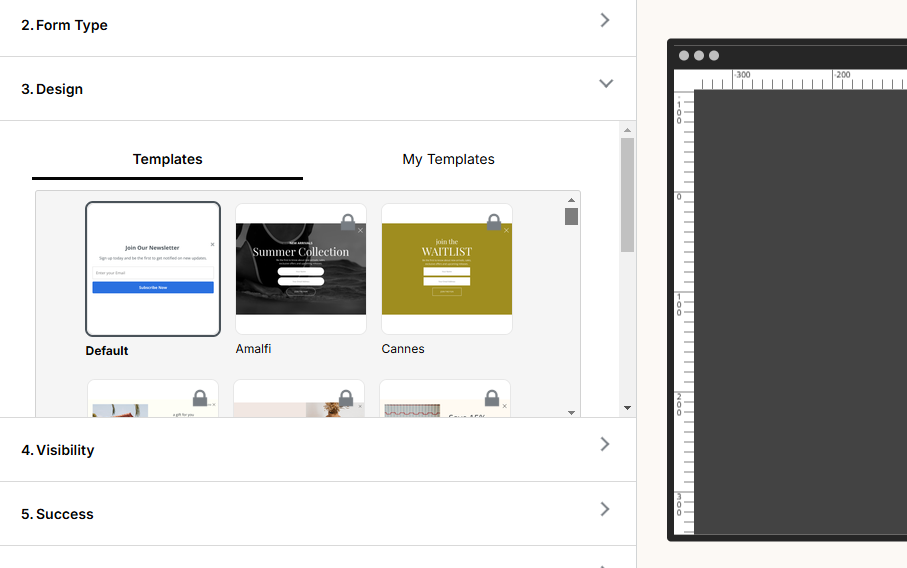
Templates
Depicter has over 550 templates, organized by category. You can find templates for different website uses. They’re built to work well on different screen sizes, and the collection gets updated every week. Plus, they add new designs for holidays and seasonal events.
And because there’s a lot of variety and the templates are designed with professional features, it can make building a popup faster.
Assets
Depicter gives you a panel with images, videos, and styled text you can use in your designs. They’re organized by category, and you can search them. That makes it faster to find what you need, so you don’t have to spend as much time looking for assets.
Dynamic Popups
Depicter also lets you make dynamic popups. That’s useful for WordPress users. You can set them up to show content from your blog posts or products. And, it works with custom post types and the ACF plugin. So, you can mix and match different content in your pop-ups.
Support and Community
Depicter has 24/7 support. You can reach out through several channels:
Live chat: For urgent questions, live chat is the fastest way to get help.
Help Center: The Help Center has articles, tutorials, and a ticketing system. You can find answers there or submit a ticket.
WordPress forum: The Depicter team is active on the WordPress forum and answers questions.
YouTube and Facebook: They also participate in YouTube and Facebook communities and respond to user questions.
Tutorials
Video content offered through a plugin or service is really helpful for users. It makes it easier to understand how things work, learn how to use tools effectively, and discover new features. Basically, videos make the whole experience better and help people get the most out of what they’re using.
Depicter understands this and maintains an active YouTube channel. Every week, it releases videos covering new and existing features, showcasing templates, and more. This gives users a valuable resource from which to learn and stay up-to-date.
Pricing
Okay, so price matters. People look at it right away when picking a service or plugin. Even if there’s a free option, they want to know about the paid one. And often, paid plans get more expensive as you want more features.
Depicter handles this differently. They have a free version for basic stuff. And the paid version, the Starter plan, is $39 a year. That’s for one website. You get everything in the premium version for that price. No extra costs for more features.
Conclusion
If you’re looking for a popup builder, it’s clear that BDOW has some significant limitations. It’s an older system, and it shows. And, while it might get the basic job done, it’s not going to give you the flexibility or modern features that you might need. On the other hand, Depicter offers a more up-to-date and comprehensive approach. It’s got a better editor, more responsive controls, and a wider range of features. And, the pricing structure is straightforward. If you want something that can keep up with current design standards, Depicter is the obvious choice.
If you’re staring at a blank screen, cursor blinking, and wondering how to find blog post ideas, you’re not alone. It can be a challenge for any WordPress blogger, whether you’re running an online shop, promoting a service, showcasing a portfolio, or selling digital products. But fear not! This guide will equip you with methods to generate endless content inspiration.
Why Consistent Blog Content Matters for Everyone:
Regardless of your blog’s purpose, consistent, high-quality content is crucial for:
Driving Traffic: Search engines love fresh content, which boosts your SEO and attracts organic traffic.
Building Authority: Sharing valuable insights establishes you as an expert in your field.
Engaging Your Audience: Blog posts develop interaction, build relationships, and create a loyal community.
Boosting Sales (For Shops & Digital Products): Content marketing can promote your products and services.
Showcasing Expertise (For Services & Portfolios): Blog posts can highlight your skills and past work.
Let’s Dive into Finding Blog Post Ideas:
Save Your Brainstorm Ideas
You know those little sparks of inspiration that pop up at the weirdest times? Don’t let them vanish. Keep a running list of every idea, no matter how small. Use a note app on your phone, a notebook, or whatever works. And then, when you’re stuck, you’ve got a whole pile of potential topics to search through. Think of it like a bank for your blog. You never know when a tiny thought might grow into a huge post.
Here are a few tools to help you with that:
Google Keep– A free note-taking service that allows you to easily capture and organize ideas across devices.
Notion– A versatile workspace that allows you to create notes, databases, and project boards, perfect for organizing complex ideas.
Evernote – A widely used note-taking app with robust organization features, including tagging and notebooks, to keep your ideas organized and easily accessible.
Analysis Your Competitor for Successful Content
It’s not about copying, it’s about seeing what works. Take a look at what other blogs in your niche are doing. What topics are they covering? What gets a lot of engagement? If you’re running a gardening blog, you might notice everyone’s talking about vertical gardens or organic pest control. And if you have an online coffee shop, looking at other coffee blogs could reveal that people want to know how to store beans properly, or the difference between roast levels. There are tools like SEMrush that can help you see what keywords your competitors are using, and that gives you a good starting point.
Ahrefs – A powerful SEO tool suite that provides an in-depth analysis of competitor backlinks, organic keywords, and content performance.
SEMrush– A comprehensive SEO and competitive research tool that allows you to analyze competitor content, keywords, and traffic.
Utilize Keyword Research
Knowing what words people use when they search for things is key. And you don’t have to guess. Tools like Google Keyword Planner, SEMrush, and Ahrefs can show you what people are typing into search engines. If you’re writing a baking blog, you might find that “easy chocolate chip cookie recipe” or “how to make French bread” are popular searches. And for a digital marketing agency, “local SEO services” or “social media marketing strategy” might be what you want to focus on. Don’t just go for the broad terms, though. Long-tail keywords, those more specific phrases, can bring in a more targeted audience. So instead of “running shoes,” try “best running shoes for flat feet on the pavement.”
Google Keyword Planner– A free tool within Google Ads that helps you discover keywords and get search volume data.
The best source of ideas is the people who read your blog. You need to really understand what they’re looking for, and what problems they’re trying to solve. You might find this out by watching their actions, or just by asking them directly. If you’re a fitness coach, you might find that your audience, busy professionals, wants to know how to fit workouts into their schedules. Or if you sell handmade jewelry, they might be interested in how to style different pieces. And don’t forget to look at online forums like Reddit. You can find subreddits related to your niche and see what people are talking about. You can also use tools like Google Forms to run polls or surveys, or just ask directly in the comments section.
Reddit– A platform with numerous community forums (subreddits) where you can find discussions and questions related to your niche.
Google Forms– A free tool to create surveys and polls to gather feedback from your audience.
AnswerThePublic– A tool that visualizes search queries and questions people ask around a specific keyword.
Find Trending Topics
Staying up-to-date on what’s happening in your field is important. You can use Google Alerts to get notifications when new articles are published on topics you’re interested in. If you’re a tech blogger, you might set up alerts for “artificial intelligence.” Or if you’re a fashion blogger, “sustainable clothing” might be a good one. Social media is also a great place to find trending topics. Pay attention to hashtags on Twitter, and join relevant Facebook groups. And tools like Hootsuite or Buffer can help you monitor social media mentions and trends.
Google Alerts– A free service that sends you email notifications when new results for your chosen keywords appear in Google Search.
Hootsuite – A social media management platform that allows you to monitor social media mentions, trends, and schedule posts.
Buffer– A social media management tool that allows you to schedule posts, analyze performance, and engage with your audience.
Expand Existing Blog Posts
You don’t always have to start from scratch. Look at your old blog posts. Are there any that could be updated or expanded? A post from 2020 about social media platforms, for example, could be updated with information about TikTok and Clubhouse. Or maybe you have a popular Instagram post that could be turned into a full blog post. And don’t forget about repurposing content. You can turn a blog post into an infographic, a podcast episode, or a video. And if you have a series of related topics, you can create a series of blog posts.
Conclusion:
Figuring out how to find blog post ideas isn’t as hard as you might think. By understanding your audience, doing keyword research, and exploring your area of expertise, you can generate a steady stream of engaging content. Remember to stay consistent, provide value, and engage with your readers. Your blog will thrive with a well-planned and executed content strategy.