In this post, we’ve rounded up the Best WordPress Black Friday Deals (2025). Whether you’re a seasoned WordPress pro or just launching your first site, these unbeatable offers will help you level up your website without breaking the bank. Get ready to discover the biggest savings of the year.
From premium plugins and themes to powerful hosting services, Black Friday is the perfect time to upgrade your toolkit and unlock new features for less.
Have a product that should be included in our list? Don’t wait. Fill out the form below and share your details with us so we can feature your deal and help more users find it.
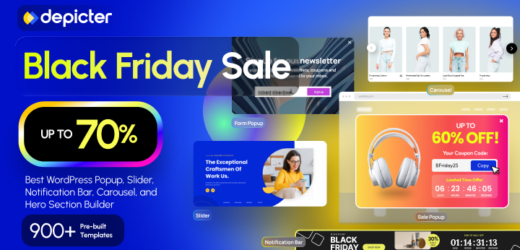
Depicter is the #1 AI-powered builder for creating engaging Popups, Interactive Sliders, Feedback Surveys, High-impact Notification Bars, Stunning Carousels, and Eye-catching Hero Sections, trusted by more than 100,000+ happy users on their daily usage! Boost engagement and sales with powerful Popups (email subscriptions, exit intent offers, promotions, cart abandonment reminders, campaigns) and Notification Bars. Build stunning WordPress sliders, carousels, hero sections, and slideshows, from video and image sliders to WooCommerce product showcases, testimonials, galleries, and more.
Phlox is the best Elementor multipurpose theme, trusted by over 100,000 active users and packed with more than 300 complete Elementor demos. Lightweight, modern, and fully customizable, Phlox powers every kind of website from blogs and portfolios to business sites, agencies, and online stores. With 49,000+ sales on ThemeForest and years of proven performance, it remains one of the most popular WordPress themes ever built. Don’t miss this year’s Black Friday offer to grab Phlox at an unbeatable price and elevate your website design with premium quality.
Master Slider is a free SEO friendly, responsive image and video slider, trusted by over 90,000 active users and 31,500 ThemeForest sales. With smooth, hardware-accelerated transitions and true touch swipe navigation, it offers a premium, lightweight, and intuitive experience that works perfectly with any theme. Don’t miss this year’s Black Friday offer to get Master Slider at a special discount and create stunning, interactive sliders for your website.
Depicter is the #1 AI-powered builder for creating engaging Popups, Interactive Sliders, Feedback Surveys, High-impact Notification Bars, Stunning Carousels, and Eye-catching Hero Sections, trusted by more than 100,000+ happy users on their daily usage! Boost engagement and sales with powerful Popups (email subscriptions, exit intent offers, promotions, cart abandonment reminders, campaigns) and Notification Bars. Build stunning WordPress sliders, carousels, hero sections, and slideshows, from video and image sliders to WooCommerce product showcases, testimonials, galleries, and more.
Built by Artbees, WPDone is a white-label custom development service for WordPress and WooCommerce offering a variety of solutions to meet specific client needs in areas such as Custom WP & Woo Development, Converting Design to WP, Theme Customization, Security & Performance Optimization, and Custom Design.
For BFCM 2025, we’ve rolled out our best offer yet, so you can upgrade to a faster, smarter hosting web stack with flexible pricing and no upfront commitments to contract lock-in.
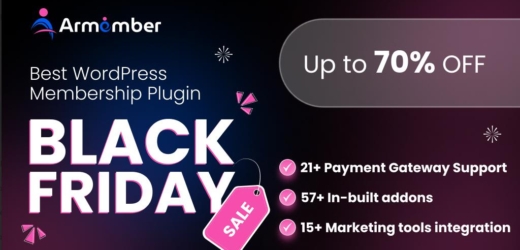
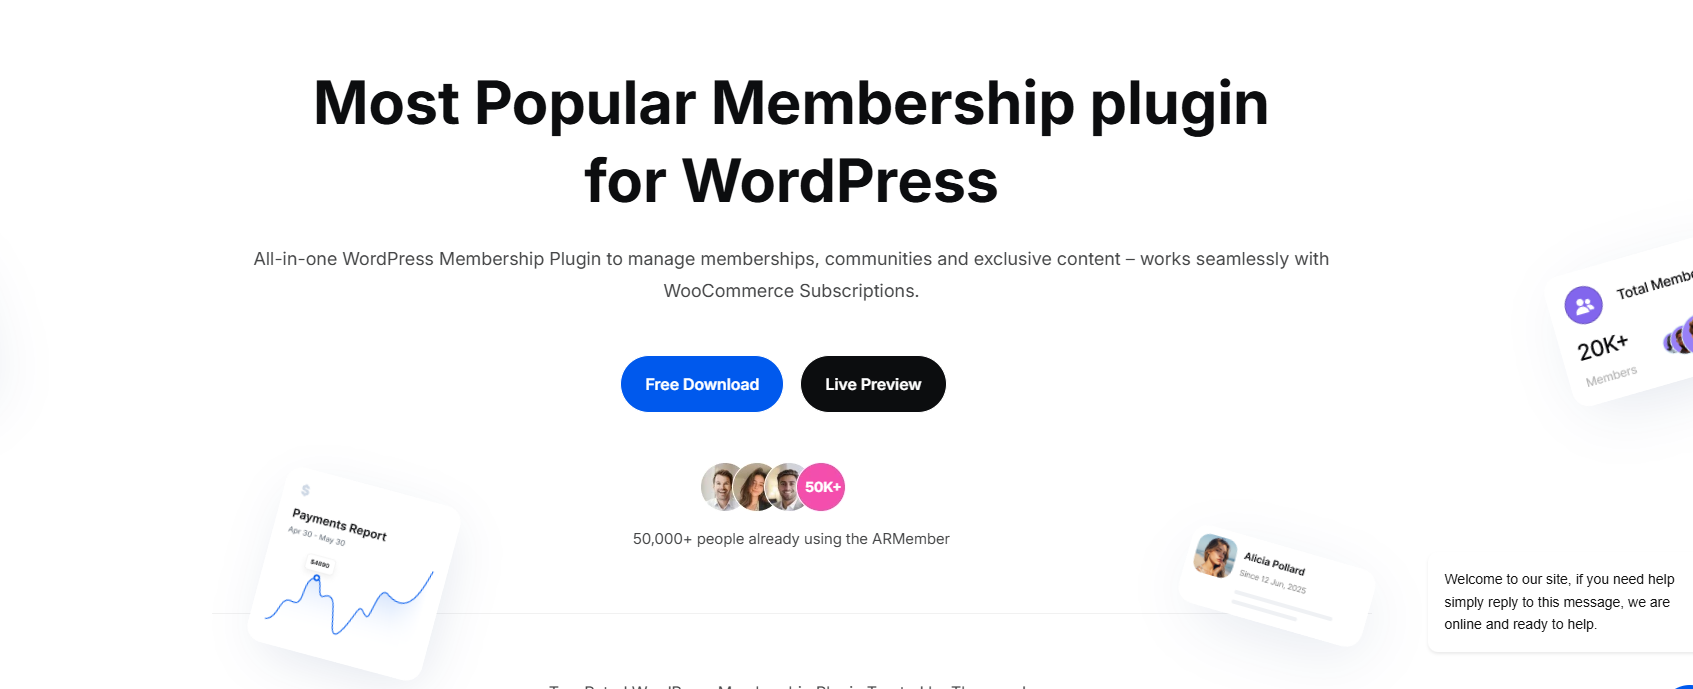
ARMember is the best WordPress membership plugin that makes building membership subscription based websites simple and flexible. From creating membership levels, restricting content, and offering drip content to integrating 21+ payment gateways and providing a smooth onboarding experience, ARMember has everything you need to grow your membership business.
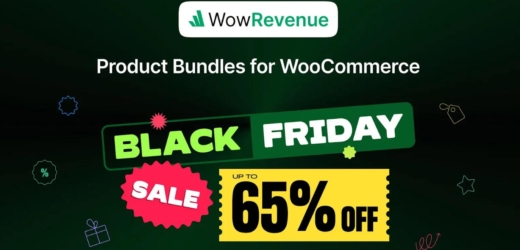
WowRevenue is a product bundles plugin for WordPress that helps store owners boost sales and increase average order value. Using its campaigns builder, you can set up, manage, and track multiple bundle offers such as product bundles, buy X get Y, mix and match, frequently bought together, and more.
In addition, the plugin also helps you manage discounts across your store and helps you increase conversion rate with cool features like countdown timers and animated add-to-cart.
CTX Feed Pro – Product Feed Manager for WooCommerce is your all-in-one solution to create and manage unlimited product feeds for any marketing or affiliate channel. Whether you want to showcase your products on ChatGPT, Google Shopping, Facebook, TikTok, or any of the 130+ supported platforms, CTX Feed Pro makes it effortless. It doesn’t matter if your store has 10 products or 100,000; CTX Feed handles them all smoothly.
JoomUnited offers a variety of WordPress plugins, including the popular “WP Media Folder” for organizing media libraries and “WP File Download” for file management.
Take advantage of our exclusive Black Friday and Cyber Monday deals! Get a massive 40% OFF on all JoomUnited memberships, including bundles and membership renewals.
This Black Friday, accelerate your dealership’s success with Motors, the complete WordPress plugin built to showcase and manage vehicle listings with ease. Whether you’re running a single dealership or a large automotive marketplace, Motors gives you all the tools you need to build a sleek, professional, and high-performing car sales website that stands out and sells faster. Motors is a powerful and versatile WordPress solution that makes it easy to create and manage vehicle listings with professional precision.
This Black Friday, power up your WooCommerce store with the ultimate Elementor addon for WooCommerce - Ultimate Store Kit. You can build high-converting product pages, carts, and checkout flows with 40+ widgets and ready-made templates. It’s designed for flexibility and performance, for all store owners to maximize conversions effortlessly.
Stop struggling with the default WordPress admin bar. Admin Bar Editor lets you transform it into a streamlined, personalized navigation tool. Show or hide items, rename options, add custom links, and control everything by user role with a simple drag-and-drop interface. You can even move it to the bottom of the screen! Highly recommended for agencies and eCommerce sites.
aBlocks is a versatile Gutenberg page builder that gives you full control over your WordPress site. With 95+ customizable blocks, you can quickly create blogs, portfolios, eLearning platforms, and online stores with ease and style. It features drag-and-drop functionality, one-click Figma to WordPress conversion, a library of ready-made templates, responsive design options, and seamless theme integration.
WPCafe is a feature-rich WordPress restaurant management plugin that helps cafés and restaurants handle online orders and food menu design with ease. It offers table reservations, pickup and delivery options, multi-location support, QR menus, and WooCommerce integration—all in one system. Unlike other food ordering tools, WPCafe is simple, flexible, and built to fit real restaurant workflows. With WPCafe, you serve faster and give customers a smooth ordering and dining experience every time.
WPCafe is a feature-rich WordPress restaurant management plugin that helps cafés and restaurants handle online orders and food menu design with ease. It offers table reservations, pickup and delivery options, multi-location support, QR menus, and WooCommerce integration—all in one system. Unlike other food ordering tools, WPCafe is simple, flexible, and built to fit real restaurant workflows. With WPCafe, you serve faster and give customers a smooth ordering and dining experience every time.
Masteriyo LMS is a complete WordPress LMS plugin for course creation and monetization. Designed with both educators and students in mind, Masteriyo makes it easy to create and deliver engaging courses online with its drag-and-drop builder.
Whether you are looking to create a single course or a full-fledged course marketplace, it offers everything you need to create, manage, and monetize an eLearning platform.
RestroFood is the Best Restaurant Management System for WordPress and WooCommerce. It helps you manage online food orders, delivery, and restaurant tasks easily with addons like POS, Multibranch, Delivery Fees, Invoice Printing, In-Restaurant Orders, and Tips.
Unlock the power of giving with the GIFTiT - Free Gifts For WooCommerce plugin! Delight customers by offering free products during their shopping experience. Set up deals like "Buy One, Get One" or "Buy X, Get Y" and customize offers with flexible rules based on product choices, cart value, or sales periods to boost loyalty!
YayCommerce provides an all-in-one eCommerce kit of powerful WordPress plugins designed to supercharge your WooCommerce store. From dynamic pricing and multi-currency support to custom product options, stylish swatches, reliable email delivery, and customer reviews - YayCommerce equips you with everything you need to build a seamless, high-performing online shopping experience. A powerful WooCommerce dynamic pricing and discount plugin that lets you create flexible rules like bulk discounts, BOGO deals, and personalized pricing with ease.
Master Slider is an SEO friendly, responsive image and video slider, trusted by over 90,000 active users and 31,500 ThemeForest sales. With smooth, hardware-accelerated transitions and true touch swipe navigation, it offers a premium, lightweight, and intuitive experience that works perfectly with any theme. Don’t miss this year’s Black Friday offer to get Master Slider at a special discount and create stunning, interactive sliders for your website.
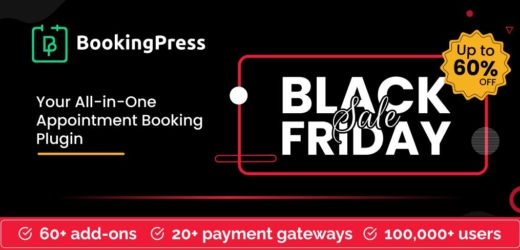
BookingPress is an all in one WordPress appointment booking plugin designed to simplify online scheduling for businesses of any size. Whether you run a salon, clinic, consultancy, or fitness studio, BookingPress lets you manage bookings, accept payments, send reminders, and more, all without coding. Other than its sleek interface and powerful features, it also comes with 35+ addons & integrations and supports 20+ payment gateways, including PayPal, Stripe, Razorpay, Paystack, and more.
Real Cookie Banner is a powerful cookie consent management plugin for WordPress. It enables you to collect GDPR- and ePrivacy-compliant consent effortlessly. With support for 17 languages and over 160 service templates, it covers all legal and technical requirements for most websites. Over 200 design settings allow for precise customization of the cookie banner to your individual branding.
Get ready for the Black Friday & Cyber Monday Sale at DJ-Extensions! Enjoy 50% OFF all Joomla and WordPress products, including templates, plugins, themes, extensions, and the Unlimited Plan.
WPXPO is offering a massive 88% discount for Black Friday on its 10 premium plugins, including PostX, WowStore, WowRevenue, WowAddons, WowOptin, WowShipping, WholesaleX, and 3 upcoming products, covering website building, product bundles, product addons, WooCommerce shipping, and more. It’s the perfect all-in-one deal for WordPress users who want to build and grow their businesses.
Challan Pro – PDF Invoice and Packing Slip for WooCommerce is the ultimate invoicing solution that makes managing orders effortless. It automatically generates PDF invoices, packing slips, and credit notes for every WooCommerce order, ensuring you stay compliant with all tax and shipping requirements. Whether your store handles 10 orders or 100,000, Challan Pro saves time and streamlines your workflow.
Cost Calculator Builder is the ultimate all-in-one WordPress plugin that helps you create interactive cost estimation and quote forms, no coding required. This discount season, get it for an unbeatable price and build professional, real-time calculators for any product or service with a simple drag-and-drop interface. Turn your website into a lead-generation machine and give your clients instant, transparent quotes that drive more conversions! The device is a powerful WordPress plugin designed to simplify pricing and lead generation for any business.
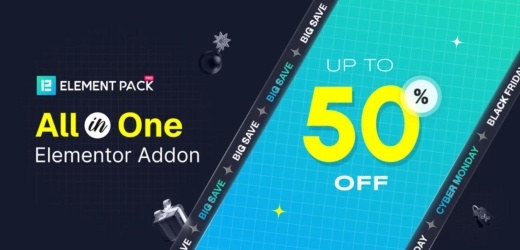
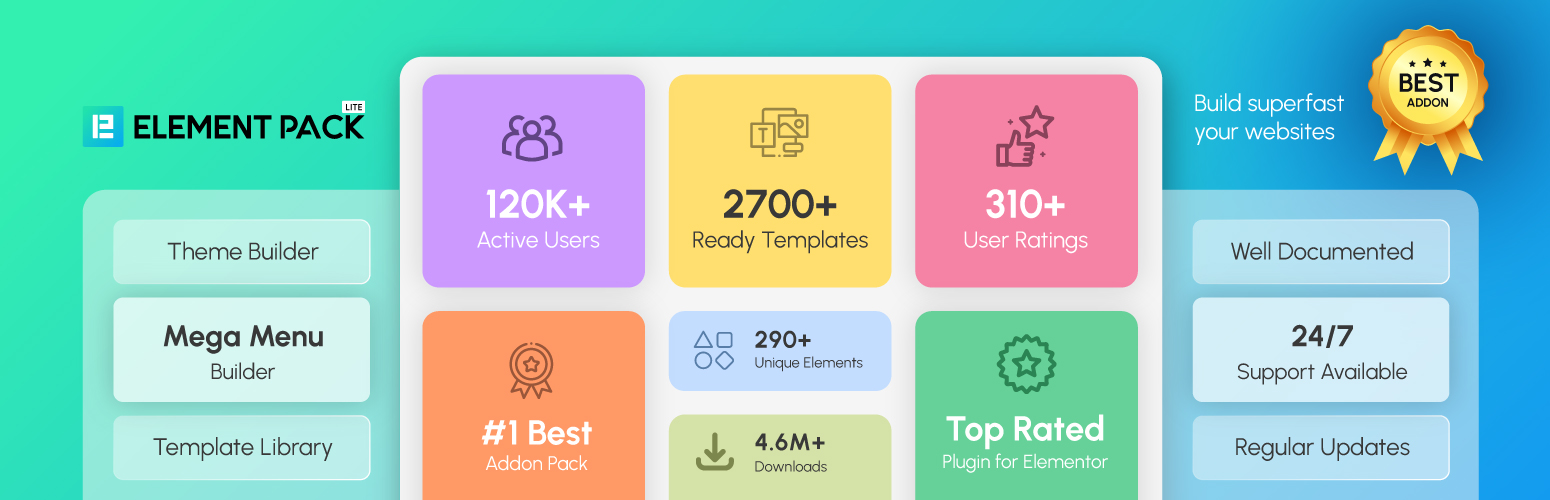
Get the most powerful Elementor addon to enhance Elementor functionality in this Black Friday deal with Element Pack Pro. It offers 250+ widgets, 200+ templates, and 500+ section blocks, for designers, marketers, and developers. Build stunning websites faster with advanced integrations, modern layouts, and unbeatable performance — now at up to 50% OFF.
Black Friday 2025 just got more exciting for WordPress creators. With Animation Addons, you can supercharge your website using the ultimate all-in-one GSAP-powered animation plugin for WordPress and Elementor. For the first time, you will enjoy exclusive features including horizontal scrolling, sticky elements, text animations, one click demo import and more.
If you use Elementor, you need this. Master Addons supercharges your page builder with 60+ powerful widgets and extensions. Create anything from animated headlines and flip boxes to filterable galleries and custom headers/footers. With advanced features like custom CSS and display conditions, your creativity is the only limit. This Black Friday deal makes it the perfect time to finally build that dream website.
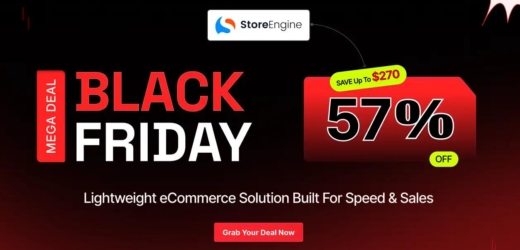
StoreEngine is a modern WordPress plugin that helps you sell physical goods, digital products, and memberships — all from one platform. You don’t need a stack of separate plugins. You can manage sales, subscriptions, payments, coupons, taxes and affiliates in one place. What sets StoreEngine apart are its built-in features: support for PayPal, Stripe, bank transfer and COD payments, affiliate system, tax management, dynamic pricing and order management — with a lightweight setup that won’t slow your site.
Booktics is a feature-rich WordPress booking plugin built for service-based businesses that need smart scheduling and client management. It supports multi-step bookings, staff and service management, calendar sync, extra services, and online payments—everything in one place. Unlike other booking tools, Booktics adapts to your workflow, making it easy for clients to book and pay without back-and-forth. With Booktics, you save time, reduce no-shows, and deliver a smooth booking experience that grows customer trust and revenue.
Instantio is your all-in-one solution for WooCommerce: checkout field editor, floating cart, pop-up cart, and one-click checkout. Manage the entire checkout in seconds and tailor the fields to your preferences. Our side cart utilizes AJAX for instant updates, allowing the checkout to load quickly without tedious loading screens and delivering a faster, smoother experience for your customers.
Supercharge Elementor with 80+ advanced widgets, 500+ ready blocks, and 170+ templates. EnterAddons helps you design stunning websites faster, without code. It’s ideal for freelancers, agencies, and businesses that want professional results with minimal effort.
Track your store's performance with the REPORTiT - Advanced Reporting for WooCommerce Plugin, offering over 50 detailed reports through clear graphs and stats. Covering orders, customers, stock, and taxes, it provides easy access to sales summaries, product reviews, coupons, and more. Customize and filter reports to focus on what matters most!
YayCommerce provides an all-in-one eCommerce kit of powerful WordPress plugins designed to supercharge your WooCommerce store. From dynamic pricing and multi-currency support to custom product options, stylish swatches, reliable email delivery, and customer reviews - YayCommerce equips you with everything you need to build a seamless, high-performing online shopping experience. Simplify multi-currency selling with automatic currency detection, real-time exchange rates, and sleek currency switchers that fit perfectly into any WooCommerce store.
SellKit addresses a range of checkout challenges, such as low order values, slow conversions, and limited engagement. Supercharge your sales with customized checkouts, order bumps, progressive discounts, and intelligent coupons through SellKit.
AffiliatePress is a reliable WordPress affiliate plugin that helps you boost sales by launching and managing your affiliate programs with ease. It offers powerful tracking, commission management, performance analytics, and seamless integration with WooCommerce and 23+ other popular plugins. Whether you’re starting fresh or scaling your affiliate network, AffiliatePress makes it effortless.
Real Media Library is the ideal tool for efficient media management in WordPress. Easily organize thousands of files into folders, collections, and galleries within your media library. This powerful file manager makes it easy to manage large volumes of images, graphics, videos, and more. It’s perfect for any WordPress website that needs order and structure in its media library.
Enhance your website's inclusivity with DJ-Accessibility, the essential tool that provides users with tools to customize their browsing experience according to their needs. It’s now reduced from €55 to only €27.50 (net)!
WowAddons is a product addons plugin for WooCommerce that lets store owners add extra product options with ease. From text fields and checkboxes to dropdowns, radio buttons, and file uploads, it offers fully personalized product offerings to boost order value and customer satisfaction. Whether you sell customizable goods, gift items, or services, this plugin helps you create custom add-on fields with flexible pricing and conditional logic, all with a user-friendly interface.
Disco Pro – WooCommerce Dynamic Pricing & Discount Rules Plugin is the ultimate solution for creating flexible discount strategies and boosting your WooCommerce store sales. From bulk discounts, BOGO offers, cart-based discounts, bundle deals, to shipping discounts—Disco plugin covers it all.
With advanced conditions, customizable rules, and real-time discount application, you can design promotions that match your sales goals.
This Black Friday, unlock the true potential of online education with MasterStudy LMS - the complete WordPress learning management system trusted by educators, tutors, and businesses around the world. Create stunning, interactive courses in minutes using AI-powered course creation and flexible builders for Elementor and Gutenberg, no coding needed. MasterStudy LMS is a multifunctional WordPress learning management system packed with powerful tools to create and manage engaging online courses.
In this 2025 black Friday discounts, upgrade your WordPress blog or magazine site post showcasing layout with Ultimate Post Kit. It features 80+ Elementor blog widgets, advanced query controls, and pre-designed layouts, build dynamic post grids, news sections, and engaging content pages. Perfect for bloggers, publishers, and news portals to design advanced post pages in the most appealing designs.
This is the ultimate plugin for your WordPress dashboard. It combines a ton of powerful features into one intuitive plugin. Take complete control with dashboard customization, admin menu editing, dark mode, white labeling, and productivity tools. It’s a must-have for admins, eCommerce sites, and agencies looking to skyrocket productivity and finally reclaim their time. This Black Friday deal is too good to miss!
Academy LMS is a fast and reliable top-rated WordPress LMS plugin for educators, entrepreneurs, and eLearning creators. With 43+ add-ons, 112+ features and 32+ integrations, it lets you build and manage courses easily. Its AI-powered Course Builder helps create lessons, quizzes, and outlines quickly. The plugin includes a native payment system, SCORM support, white-label options, student analytics, tutor booking, course bundles, and bulk CSV imports.
Eventin is an AI-powered WordPress event management plugin that makes hosting events simple and profitable. From event calendars, RSVP, ticket sales, and recurring schedules to speaker profiles and Zoom, Google Meet, Woo, Stripe, and PayPal integration—everything is built in. It’s easier to use than other event management tools, yet powerful enough for any organizer. With Eventin, you save time, sell more tickets, and deliver a smooth experience that keeps attendees coming back.
Tourfic is the ultimate WordPress plugin for developing and managing hotel, tour, car rental, and apartment booking websites. Seamlessly integrated with WooCommerce, it offers flexible booking options, pricing, and room management. Whether you're planning to develop a home rental or apartment booking system or a large travel agency website, Tourfic simplifies the entire booking process for you and your customers. You can build your own travel website like Agoda, Booking dot com, Airbnb with WooCommerce.
User Registration and Membership (URM) is a flexible WordPress plugin for building advanced user systems and membership sites. Create custom registration forms, sell membership subscriptions, manage user roles, restrict website content, and offer front-end profiles with ease.
The plugin includes role-based access control, membership groups, customizable profile pages, email notifications, and seamless integration with your existing WordPress and third-party marketing setup.
WcOne makes WooCommerce store management effortless. Enjoy same-page cart & checkout, delivery scheduling, zip code-based delivery options, and extra product fields. It even supports Dokan multi-vendor setups, perfect for both single and multi-store owners.
Simplify the ordering process with the TABLEiT - Product Table for WooCommerce Plugin! Display products in a clean, searchable, and responsive table for quick ordering and easy navigation. Ideal for restaurants, music shops, wholesale stores, or catalogs. Create multiple tables, customize them, and offer a streamlined shopping experience.
YayCommerce provides an all-in-one eCommerce kit of powerful WordPress plugins designed to supercharge your WooCommerce store. From dynamic pricing and multi-currency support to custom product options, stylish swatches, reliable email delivery, and customer reviews - YayCommerce equips you with everything you need to build a seamless, high-performing online shopping experience.
Enhance your product pages with customizable add-ons, extra options, and conditional logic to offer more personalization and increase your average order value.
Phlox is the best Elementor multipurpose theme, trusted by over 100,000 active users and packed with more than 300 complete Elementor demos. Lightweight, modern, and fully customizable, Phlox powers every kind of website from blogs and portfolios to business sites, agencies, and online stores. With 49,000+ sales on ThemeForest and years of proven performance, it remains one of the most popular WordPress themes ever built. Don’t miss this year’s Black Friday offer to grab Phlox at an unbeatable price and elevate your website design with premium quality.
Jupiter X is Artbees' powerful WordPress website builder, known for its flexibility, design excellence, and adaptability. It’s trusted by nearly 200,000 businesses globally, offering a complete solution for creating and managing websites across various industries with ease. Jupiter X dispenses you of Elementor Pro, with native alternative features and a one-time payment.
CyberChimps is all about making WordPress website building fun, fast, and frustration-free. Whether you’re a beginner setting up your first blog or a pro designing client sites, our tools help you do it all without touching a single line of code.
From the Responsive Theme, known for its speed and flexibility, to Responsive Addons for Elementor, Responsive Blocks, and Starter Templates, CyberChimps gives you everything you need to build stunning, responsive websites in minutes. Every product is built with performance in mind, so your sites not only look amazing but also load lightning-fast.
In this post, we’ve gathered the Best WordPress Halloween Deals (2025). Whether you’re an experienced WordPress user or just getting started, these spooky-good offers will help you boost your website without scaring your budget. Get ready to explore the top treats of the season!
Got a product that deserves to be featured in our list? Don’t miss the chance! Simply complete the form below and share your details with us.
Depicter is the #1 AI-powered builder for creating engaging Popups, Interactive Sliders, Feedback Surveys, High-impact Notification Bars, Stunning Carousels, and Eye-catching Hero Sections — trusted by more than 100,000+ happy users on their daily usage! Boost engagement and sales with powerful Popups (email subscriptions, exit intent offers, promotions, cart abandonment reminders, campaigns) and Notification Bars. Get up to 70% OFF on Depicter plans on the Halloween Special Deal.
Phlox is the best Elementor multipurpose theme with over 100,000 active installations. It has more than 300+ Complete Elementor demos that can be imported in 3 clicks and edited on Elementor. Simply find any templates you like, import it, replace the images and text with yours and it is done. If you are looking for a professional design Phlox would be a perfect option with 45000+ sales on ThemeForest!
Depicter is the #1 AI-powered builder for creating engaging Popups, Interactive Sliders, Feedback Surveys, High-impact Notification Bars, Stunning Carousels, and Eye-catching Hero Sections — trusted by more than 100,000+ happy users on their daily usage! Boost engagement and sales with powerful Popups (email subscriptions, exit intent offers, promotions, cart abandonment reminders, campaigns) and Notification Bars. Get up to 70% OFF on Depicter plans on the Halloween Special Deal.
FluentCart combines performance, flexibility, and control in one powerful WordPress eCommerce plugin. It empowers businesses, creators, and agencies to sell physical or digital products, hybrid product listings, subscriptions, memberships, and more.
All while keeping the shopping experience super fast, lightweight, and fully customizable.
This Halloween, enjoy Upto 57% discount on ElementsKit and avail of 92+ powerful widgets and extensions, 18+ exclusive modules, 98+ Premade Homepages, 900+ Premade Section Layouts & more! Serving over 1 million satisfied users, ElementsKit is the all-in-one Elementor addon for flexible & handy page-building features. Get all these PRO features before the offer runs out!
Wbcom Designs is a trusted name in building powerful WordPress-powered communities and eLearning solutions. With a strong portfolio of premium plugins and themes, Wbcom Designs helps businesses, educators, and online creators launch thriving communities featuring social networking, gamification, eLearning, and membership systems.
File Manager for Dropbox connects your WordPress site with Dropbox, letting you manage, upload, and embed files directly from your dashboard. Stream media, save hosting space, and use Dropbox files in Elementor, Tutor LMS, and WooCommerce. Perfect for bloggers, educators, and businesses who handle large files and want a faster, more efficient workflow.
Unlock Unlimited Possibilities this Halloween with DJ-Extensions Unlimited Plan! Get access to every extension and template DJ-Extensions offers with our Unlimited Plan! Perfect for developers and agencies, this spooky good deal lets you use all products on unlimited domains, ensuring that your projects never face limitations. From Joomla to WordPress, enjoy seamless updates and support with this all-in-one package.
Bit Assist is an easy-to-use WordPress chat plugin with 30+ messaging apps in a single widget. It helps businesses improve customer engagement by allowing customers to reach you via WhatsApp, Facebook Messenger, Telegram, and integrates with live chat tools like Tidio and Tawk.to. With Bit Assist, you can boost conversion rates and customer satisfaction through faster, more personalized interactions.
HappyAddons is a well-known addon of the Elementor plugin. If you feel like your Elementor plugin isn’t enough to meet your no-code design needs, you must try HappyAddons. It comes with 140+ widgets, 28+ features, and many readymade templates. Besides, HappyAddons includes a free theme builder so you can build header, footer, single post, and archive pages at zero cost. Developers are open to receiving feature requests from you so the plugin is regularly updated and stays user-friendly.
MasterStudy LMS — Turn Knowledge Into Magic This Halloween This Halloween, enchant your audience with engaging online courses built in minutes. MasterStudy LMS is a powerful WordPress learning management system designed for educators, schools, and businesses that want to share knowledge in a modern, interactive way. With AI-assisted course creation, flexible builders for Elementor and Gutenberg, and advanced analytics, MasterStudy LMS makes teaching easier and more impactful.
WPXPO is celebrating this Halloween season with an insane bundle discount of up to 87% on all of its plugins, including PostX, WowStore, WowRevenue, WowOptin, WowAddons, WowShipping, and WholesaleX, and 3 other upcoming products. So, you can get 10 amazing products at a very budget-friendly price.
WholesaleX is an all-in-one Wholesale plugin for WooCommerce with dynamic pricing & discount rules. With this single plugin, anyone can build B2B Wholesale or B2B+B2C hybrid stores in WooCommerce. Moreover, it offers an intuitive bulk order form. It allows buyers to create a purchase list quickly, order instantly or save as a purchase list for repeat orders. Furthermore, it offers more impactful features, including a custom registration form, user role management, a request a quote, and a store wallet.
Transform your WordPress site with powerful plugins trusted by thousands of businesses and developers worldwide. This Halloween, get 50% OFF all WPBens products.
Featured Products:
Filter Plus, Discountify, Quicker, MemberHub, MailerHub
Track your store's performance with the WooCommerce Report Plugin, offering over 50 detailed reports through clear graphs and stats. Covering orders, customers, stock, and taxes, it provides easy access to sales summaries, product reviews, coupons, and more. Customize and filter reports to focus on what matters most!
WP Social Ninja is a feature-rich WordPress social media plugin. It turns your website into a social hub with 30+ platforms. Easily, you can display content from 4+ social feeds, like Facebook, Instagram, and others. You can embed business reviews from Google, WooCommerce, and eight other platforms. Moreover, testimonials, notification popups, and chat widgets from 15+ platforms will also engage visitors.
Disco Pro – WooCommerce Dynamic Pricing & Discount Rules Plugin is the ultimate solution to create flexible discount strategies and boost your WooCommerce store sales.
From bulk discounts, BOGO offers, cart-based discounts, bundle deals, to shipping discounts—Disco plugin covers it all.
With advanced conditions, customizable rules, and real-time discount application, you can design promotions that match your sales goals. Plus, powerful reporting helps you track performance and optimize campaigns.
FluentCommunity is an all-in-one platform for building and managing vibrant online communities, and courses in WordPress.
FluentCommunity offers real-time chats, group creation, activity feeds, and interactive polls to boost engagement. With a user-friendly dashboard and tools like leaderboards and surveys, FluentCommunity ensures collaboration and helps businesses grow their communities effortlessly.
Supercharge your site this Halloween with ThemeHunk’s WordPress & WooCommerce plugins! Unlock terrifyingly good features, seamless performance, and effortless customization—now at bone-chilling discounts of up to 35% off. With regular updates, affordable pricing, and dedicated support, boosting your online success has never been easier. Don’t let this spooky deal vanish!
WPManageNinja is offering up to 60% discount on all of its premium WordPress plugins this Halloween. The deal includes their top-rated products: FluentAffiliate, Fluent Forms, FluentCRM, FluentCommunity, FluentBooking, Fluent Support, WP Social Ninja, FluentBoards, Paymattic, Ninja Tables, AzonPress
Bit Flows is a self-hosted, no-code workflow automation tool that’s a budget-friendly alternative to Zapier/n8n. With 210+ integrations, AI-powered actions, and a drag-and-drop builder, it simplifies complex workflows. Manage WordPress, SaaS, or custom workflows with unlimited tasks, connections, and no monthly fees. Features include real-time logs, webhooks, API support, and a custom app builder, helping you save time and cut costs.
Ready to give your website a frightfully good makeover? HasThemes is dropping its most ghoulish deal of the year! Grab premium WordPress plugins! Perfect timing to launch that project you've been dying to start and celebrate Halloween in style! Don't let this deal become a ghost - shop now before it disappears into the digital graveyard!
Wpmet is a trusted name in the WordPress ecosystem, offering innovative plugins such as ElementsKit, MetForm, ShopEngine, and WP Social. These solutions extend website functionality for millions of users worldwide. This Halloween season, grab your 78% OFF on all premium Wpmet plugins. It’s your chance to get more power, more features, for way less. Don’t wait! The best Halloween deal for WordPress 2025 won’t last long!
DiviFlash is an advanced all-in-one Divi plugin packed with 65+ custom modules, 20+ powerful extensions, 50+ ready-to-import website layouts, and 800+ pre-made sections. Supercharge your Divi website design with next-level features like the Popup Maker, Mega Menu Builder, 1-Click Layout Importer, Custom Post Types, and WooCommerce support — plus much more.
Bit Form is an advanced, super-fast, lightweight form builder for WordPress that loads only 15KB of JS and CSS for a standard form. Users can create dynamic forms, such as multi-step forms, conversational forms, and payment forms (Stripe, PayPal, RazorPay, Mollie). It offers 45+ advanced fields and 300+ integrations (powered by Bit Integrations). In short, Bit Form provides great value compared to market leaders (unlimited sites LTD for under $199).
Experience the unlimited possibilities with the most used WooCommerce multi-vendor marketplace solution - Dokan (Trusted by over 50K+ users worldwide). It is packed with a dazzling array of 42+ modules, along with tons of game-changing features that help you create a fully functional multi-vendor online marketplace within a few minutes.
Being the creator of several leading WordPress plugins, weDevs is offering up to 55% discount this Holiday season. This includes up to 50% off Dokan Multivendor Marketplace, up to 40% off WP ERP, up to 40% off HappyAddons for Elementor, and so on.
Fluent Forms is the fastest and most lightweight drag-and-drop WordPress form builder with tons of features and functionalities.
Fluent Forms allows you to create contact forms, product order forms, calculator forms, conversational forms, quizzes, surveys, and more. Advanced capabilities, great user experience, and 60+ integrations make it a great choice among beginners and expert users.
Make Your Website Spook-tacularly Accessible This Halloween with DJ-Accessibility! Ensure your website is inclusive for everyone, including users with disabilities, by using DJ-Accessibility! Our accessible solution works seamlessly with any WordPress theme or Joomla template. Customize your accessibility toolbar, improve the user experience for people with specific disabilities, and enhance your site's inclusivity with ease. Don’t let your site’s accessibility vanish into the night grab these spooky deals now!
WowAddons is a product addons plugin for WooCommerce that lets store owners add extra product options with ease. From text fields and checkboxes to dropdowns, radio buttons, and file uploads, it offers fully personalized product offerings to boost order value and customer satisfaction. Whether you sell customizable goods, gift items, or services, this plugin helps you create custom add-on fields with flexible pricing and conditional logic, all with a user-friendly interface.
Car Dealer Plugin — The Ultimate Automotive Solution for WordPress Car Dealer Plugin is a comprehensive WordPress tool designed to help dealerships, marketplaces, and automotive businesses showcase and manage vehicle listings with ease. It offers everything you need to build a professional car sales website — from advanced inventory management to customizable search filters and dealer profiles.
Managing a large inventory of WooCommerce products can be time-consuming, especially with multiple variations and attributes. The WooCommerce Products Bulk Edit Plugin simplifies this process by allowing you to update, edit, and manage products in bulk, saving time. Whether handling complex variations or large inventories, it gives you full control over your store’s data for effortless management.
Paymattic is an all-in-one plugin for WordPress payments and donations. With pre-built templates, it’s easy to create forms and process transactions in seconds. Paymattic offers you 14 payment methods covering 157+ currencies. With subscription payments, customer management, and eLearning integrations, Paymattic is a must-have plugin for your business. In addition, it comes with advanced donation features, allowing you to run a fully-fledged donation website using just a single plugin.
Upgrade Your Website from Ghostly to Gorgeous this Halloween. One click is all it takes to activate a smarter, sleeker, and more engaging dark mode experience for your visitors. Why should haunted houses have all the fun? This Halloween, use the most advanced dark mode plugin to give your website a tech-enhanced dark transformation. WP Dark Mode makes your site instantly more modern and user-friendly, reducing bounce rates and keeping visitors engaged.
Bit Integrations is a no-code WordPress automation plugin that connects your site to 300+ apps like WooCommerce, Google Sheets, LMS, CRMs, and email marketing tools.
Its 3-step setup - trigger, action, field mapping- makes automation quick and easy. Capture leads, sync WooCommerce data, and send submissions to Google Sheets in minutes. It offers unlimited Tasks, Unlimited workflows, and helps you save time and reduce repetitive tasks.
"Cost Calculator — Smart Forms and Instant Quotes Made Easy This Halloween, skip the tricks and give your clients a real treat — interactive forms and instant quotes in one sleek package. Cost Calculator lets you build dynamic quote forms and contact forms in minutes with its intuitive drag-and-drop builder. It combines price estimation, lead capture, and client communication in one tool — complete with branded emails, conditional logic, and payment integrations.
Advanced WP post Scheduling & Auto sharing to Social Media plugin for WordPress. With features like auto-posting, advanced scheduling, and integration with 12+ platforms (Facebook, Instagram, LinkedIn, Discord, etc.), it saves you time and effort. Manage your WordPress posts and WooCommerce products in one place.
A powerful AI SEO and Content Creation tool with over 40K installations and counting, GetGenie delivers top-quality, optimized content along with detailed SEO analytics. From your WordPress dashboard, you can get access to all the content writing & optimization features. Perform advanced keyword research & competitor analysis, create impactful content, and gain in-depth SEO insights with this WordPress plugin.
wePOS completes the Missing Piece of WooCommerce POS. It's the ultimate one-stop solution, featuring an efficient, customizable point-of-sale tool that effortlessly tracks and manages your WooCommerce store's inventory, processes orders automatically, and organizes real-time order information. wePOS comes with data-driven insights on sales performance, store-wise product information, target sales, merchandise costs, and many more.
DiviGear offers premium Divi plugins, child themes, and layouts designed to streamline your Divi website creation process. This Halloween 2025, enjoy unbeatable discounts across the entire DiviGear collection — up to 60% OFF on plugins, flat 80% OFF on child themes and layouts, and flat 75% OFF on bundles. Every product is fully compatible with Divi 5 and includes lifetime access, regular updates, and dedicated support, making DiviGear a trusted choice for over 250,000 Divi users.
ThemeLooks is bringing spine-chilling savings this Halloween with Up To 70% OFF on all premium WordPress products, including themes, plugins, and templates that make your website faster, smarter, and more professional. Whether you’re managing a restaurant, running an online store, or designing creative websites with Elementor, there’s something special for everyone!
Fluent Support gives you everything to deliver fast, reliable customer support right inside WordPress. Manage unlimited tickets with agents without extra costs. It comes with shared inboxes, internal notes, canned replies, and more productivity features. Plus workflow automation, 20+ plugins integration, and OpenAI to boost response speed. No third-party bloat, no monthly lock-ins. A helpdesk trusted by 10,000+ businesses worldwide.
Unlock the power of giving with the Free Gifts for WooCommerce plugin! Delight customers by offering free products during their shopping experience. Set up deals like ""Buy One, Get One"" or ""Buy X, Get Y"" and customize offers with flexible rules based on product choices, cart value, or sales periods to boost loyalty!
FluentAffiliate is a full-fledged affiliate management plugin for WordPress.
It helps businesses launch and manage their own affiliate programs with ease; onboarding affiliates, tracking visits, disbursing commissions, and handling everything else needed to run a successful program efficiently. With powerful integrations for eCommerce and essential tools, FluentAffiliate is your all-in-one solution for an affiliate program.
WowShipping is a table rate shipping plugin for WooCommerce that boasts 30+ shipping conditions, letting store owners create advanced, customizable shipping rules based on weight, cart total, item count, location, and more. It makes complex logistics simple by allowing multiple shipping methods and condition-based rates – all from an intuitive dashboard.
CTX Feed Pro is the best WooCommerce product feed plugin designed to help your eCommerce business list products across multiple channels effortlessly.
With support for over 100+ platforms like Google Shopping (Google Merchant), Facebook/Instagram (Meta), Pinterest, Bing, Walmart, and price comparison sites in CSV, XML, TXT, or TSV file format, it simplifies managing and distributing your product data feed.
Challan Pro – PDF Invoice & Packing Slip for WooCommerce is a powerful invoicing and document management plugin designed to help your WooCommerce store easily generate professional PDF invoices, packing slips, and shipping labels.
With features such as multi-language support, custom paper sizes, product attributes and more, Challan ensures that every document is accurate, customizable, and business-ready.
Supercharge your Elementor experience with Master Addons. This premium addon packs over 70+ powerful widgets and extensions to make your page building super easy. It offers 500+ pre build sections and 20+ full Elementor kit design. Think animated headlines, progress bars, flip boxes, filterable galleries, and a header & footer builder. It comes with advanced styling options and display conditions for creating truly unique sites.
Integration for Google Drive connects your WordPress site with Google Drive, letting you manage, upload, and embed files right from your dashboard. Stream media, save hosting space, and use Drive files in Elementor, Tutor LMS, and WooCommerce. Perfect for bloggers, educators, and businesses who work with large files and want a faster, smoother workflow.
FlexTable is a WordPress plugin that turns Google Sheets into live, responsive tables. Update your sheet and the table auto-syncs; embed via shortcode or Gutenberg/Elementor, with sorting, search, and pagination built in. It supports images, links, merged cells, and performance boosts like smart caching. The free tier allows up to 10 tables and 100 synced rows.
Phlox is the best Elementor multipurpose theme with over 100,000 active installations. It has more than 300+ Complete Elementor demos that can be imported in 3 clicks and edited on Elementor. Simply find any templates you like, import it, replace the images and text with yours and it is done. If you are looking for a professional design Phlox would be a perfect option with 45000+ sales on ThemeForest!
SKT Themes Halloween Deals 2025 - Get 420+ Premium WordPress Themes for Just $69! This year, for Halloween, SKT Themes is introducing something unique for website designers, digital agencies, and small business owners. Over 420 premium WordPress themes, covering every niche, from portfolios and business to blogging and e-commerce.
CyberChimps is all about making WordPress website building fun, fast, and frustration-free. Whether you’re a beginner setting up your first blog or a pro designing client sites, our tools help you do it all without touching a single line of code.
From the Responsive Theme, known for its speed and flexibility, to Responsive Addons for Elementor, Responsive Blocks, and Starter Templates, CyberChimps gives you everything you need to build stunning, responsive websites in minutes.
BuddyX Pro is the fastest WordPress theme designed for BuddyPress and BuddyBoss Platform, making it the perfect choice for building community, membership, social learning, or social marketplace websites. With its sleek design, blazing performance, and endless customization options, BuddyX Pro unlocks infinite possibilities for creating engaging online communities.
Every season is a chance to refresh your website and connect better with your audience. Halloween is one of the best times to do this because people are in the mood for themed products, fun promotions, and limited-time offers. For WordPress and WooCommerce site owners, adding a seasonal touch, in this case a Halloween vibe can make the store stand out, increase engagement, and even boost sales.
Why Seasonal Marketing Matters
Seasonal marketing is powerful because it taps into the sense of urgency that holidays naturally create. When shoppers see Halloween-only offers or themed designs, they are more likely to act quickly.
It also improves your visibility since festive content is more shareable and aligns with the search behavior of customers. For WooCommerce store owners, this means more clicks, higher conversions, and a stronger brand presence during one of the busiest shopping months of the year.
Add a Halloween Vibe to Your Website
One of the easiest ways to prepare your site is by updating its look and feel.
For WordPress sites, this could mean switching to a dark and spooky color palette, adding banners with pumpkins and bats, or even using Halloween-themed hero images.
A WooCommerce store might redesign its homepage banner to feature products as part of a Halloween collection — for example, a “Spooky Sale” with themed visuals that make customers feel the holiday excitement as soon as they land on the site.
Thankfully, Depicter makes it easy to bring these seasonal touches to life. Instead of relying on multiple design tools or complex customization, you can create banners, sliders, and themed visuals directly inside WordPress.
We’ll cover this in detail later in the post, but the main advantage is speed and flexibility: with just a few clicks, you can apply Halloween-ready designs that grab attention and keep visitors engaged. This not only refreshes the look of your store but also shows customers that your brand is active and in tune with the season.
Create Special Halloween Offers
Halloween is the perfect time to launch creative deals that match the holiday mood.
You could add coupon codes with fun names like BOO20 for discounts, or create themed bundles such as a “Halloween Essentials Pack” in WooCommerce.
Limited-time flash sales are another effective option, giving customers a reason to buy right away. For example, a beauty shop might offer a “Halloween Glam Kit” bundle, while a digital product store might promote a “Trick or Treat Deal” available only during October.
With WooCommerce, you can easily set up coupons and schedule discounts for a limited period. Plugins like Depicter help you create urgency with countdown timers and other features.
Combining these tools with clear promotion banners ensures visitors don’t miss the deal. The real benefit is that seasonal offers not only increase conversions but also encourage repeat customers who return each year for similar holiday promotions.
Share Halloween-Themed Content
Content marketing can also play a big role in your Halloween strategy.
A WordPress blog is the perfect place to publish posts like “Top 10 Halloween Recipes,” “DIY Decorations for Your Party,” or product tutorials tied to the season. Even service providers can join in by writing about “Spooky Marketing Tips” or “Halloween Safety Ideas.”
The goal is to make your site feel connected to the holiday while showcasing your niche expertise.
Using WordPress makes content publishing straightforward, and you can pair it with SEO plugins like Yoast SEO or Rank Math to optimize seasonal keywords. Adding infographics or running interactive polls via Depciter makes your content more engaging. These efforts not only drive more organic traffic but also help position your site as fun, timely, and resourceful — making visitors more likely to trust and buy from you.
Prepare Your Store for Extra Visitors
Holiday promotions can mean traffic spikes, and the last thing you want is for your WooCommerce store to slow down or crash.
Before Halloween, make sure your site is optimized: compress large images, clean up unused plugins, and test your checkout process. Many stores also simplify their checkout flow to keep visitors from abandoning their cart — for example, by offering a one-page checkout or guest checkout option.
WordPress performance plugins like WP Rocket, W3 Total Cache, or image optimization tools such as Smush and ShortPixel help improve speed.
Using a CDN service like Cloudflare adds another layer of reliability. Not only do these optimizations keep your store running smoothly during busy Halloween traffic, but they also build trust: customers are more likely to complete a purchase if the site loads quickly and feels secure.
Spread the Word on Social Media
Your WordPress site should work hand-in-hand with your social media campaigns.
Leading up to Halloween, you can share themed posts, run contests like “Best Costume Challenge,” or promote your WooCommerce products with countdown teasers.
For example, a store could encourage customers to share their Halloween setups featuring products they purchased, rewarding them with discounts or gift cards.
This cross-channel approach builds community, encourages user-generated content, and drives more visitors back to your WooCommerce store — boosting both visibility and sales during the holiday season.
How to Do It with Depicter
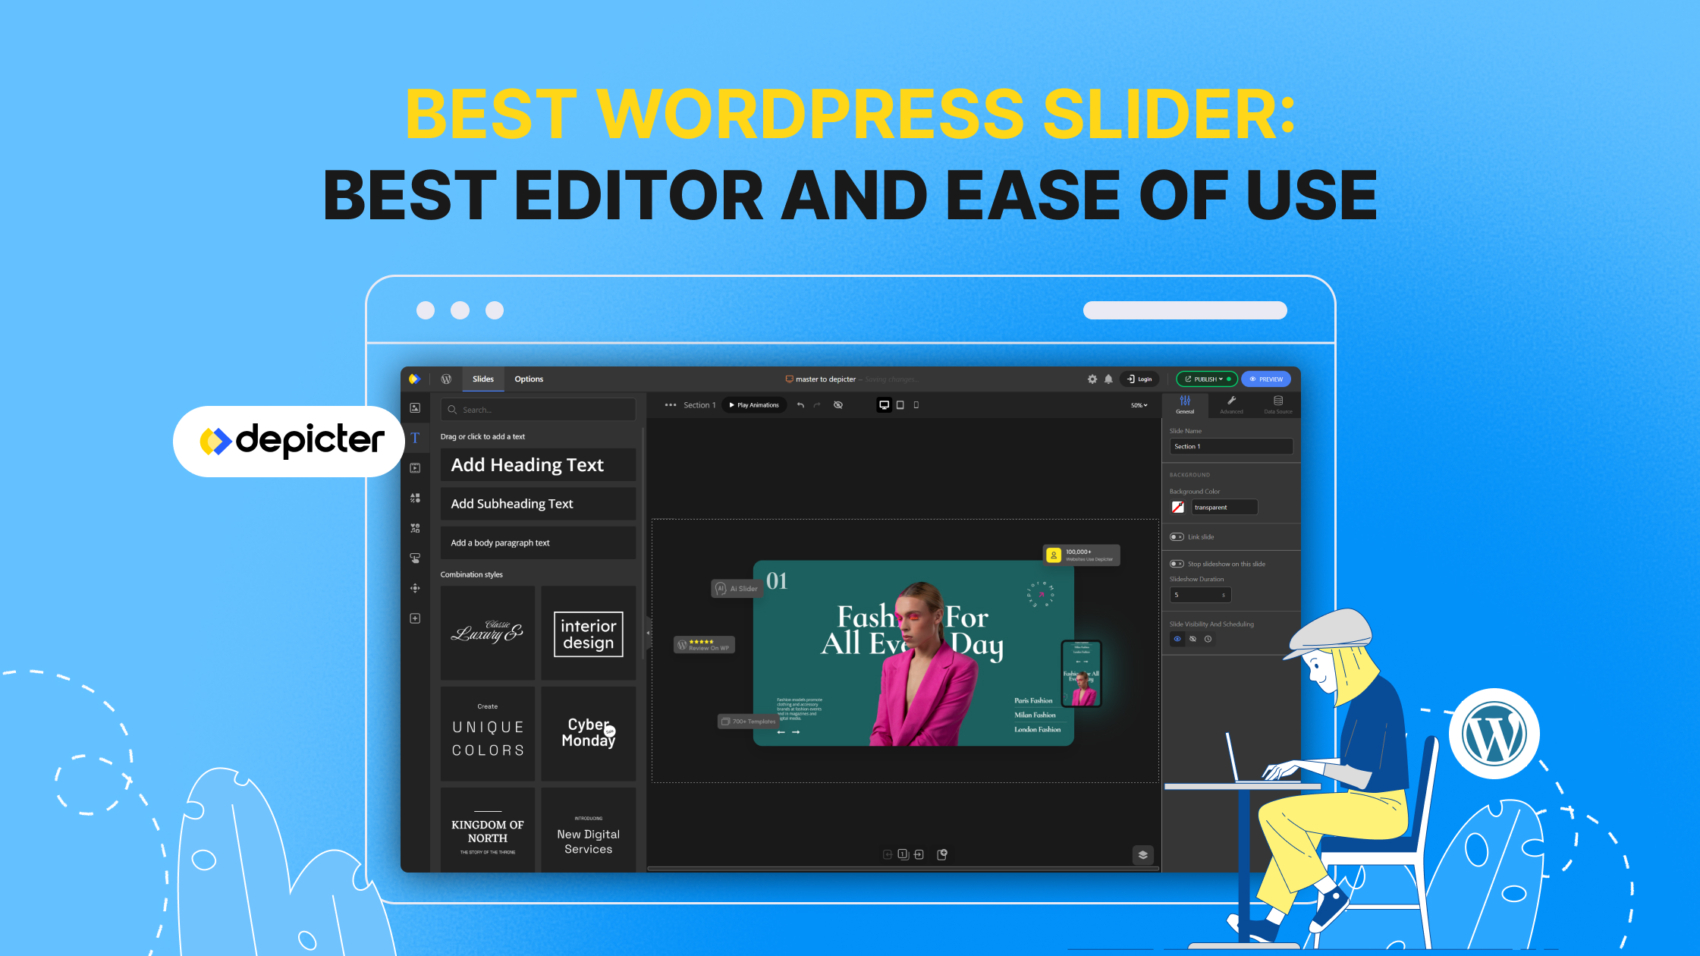
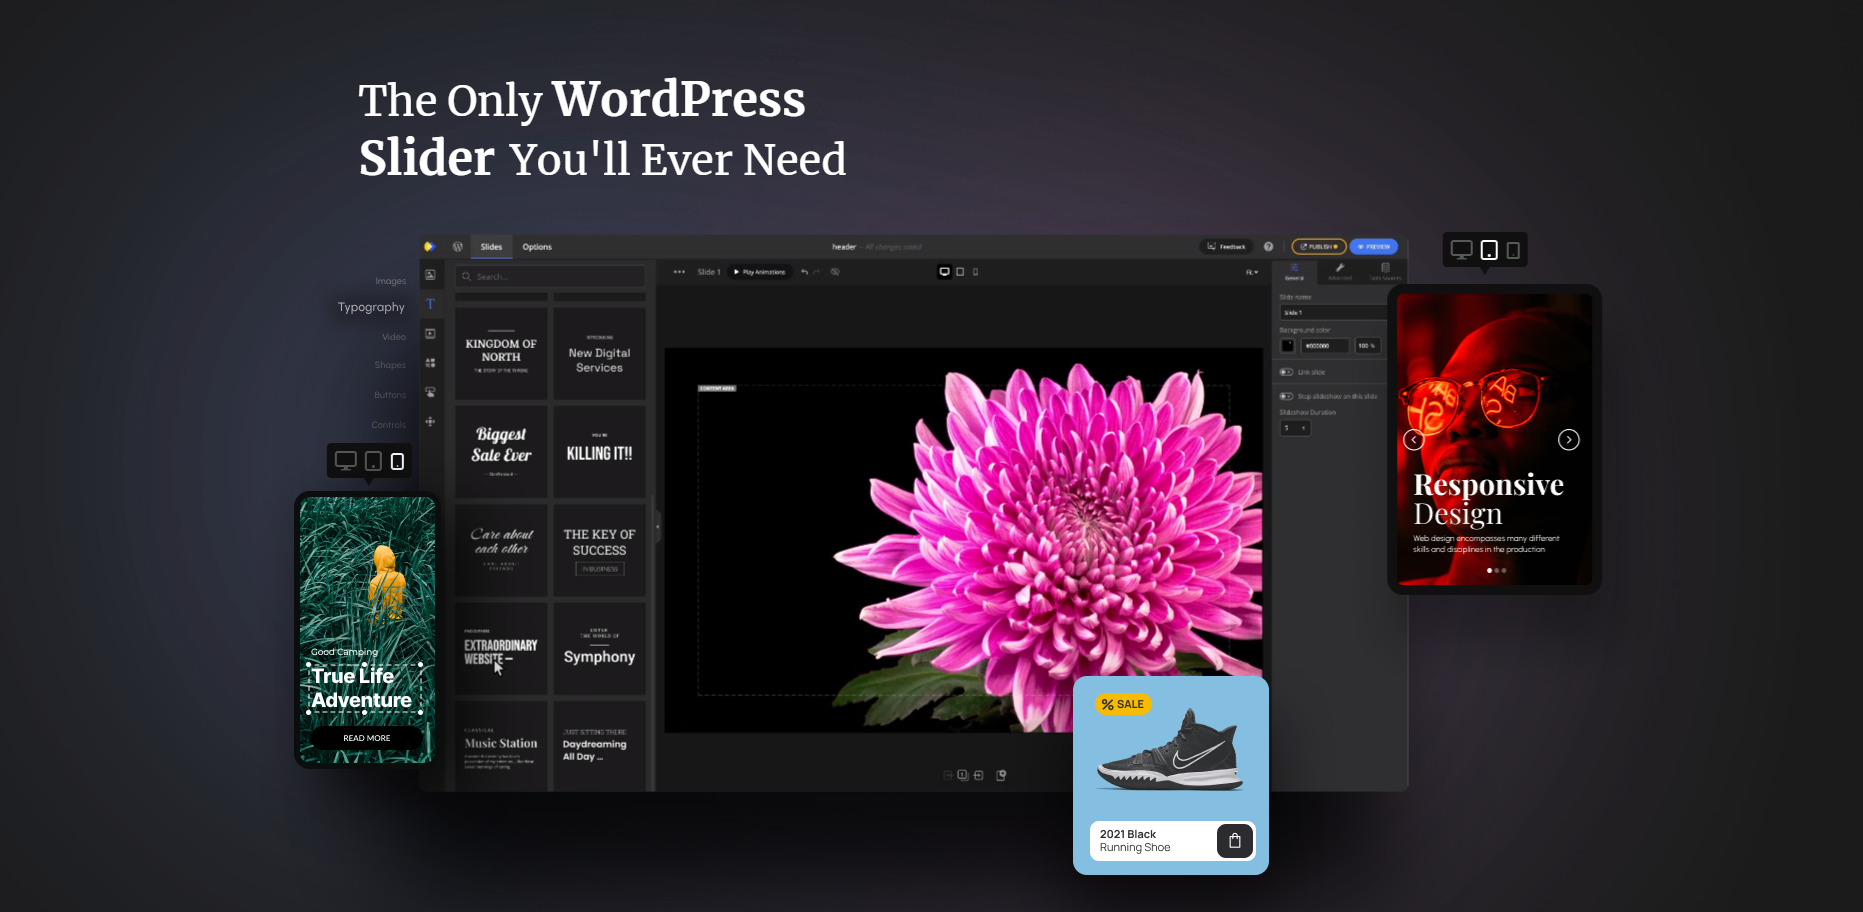
Depicter is a WordPress plugin that builds sliders, popups, notification bars, hero sections, and carousels — all with a visual, code-free editor. It includes a large template library, responsive controls, and display rules (page/visitor targeting and triggers).
Depicter also supports WooCommerce product sliders and dynamic content, so you can display products or posts automatically.
If you haven’t installed Depicter yet, it’s very simple: go to your WordPress dashboard → Plugins → Add New, type Depicter in the search box, then click Install Now and Activate. If you prefer, here is a step-by-step documentation and video tutorials on how to install Depicter.
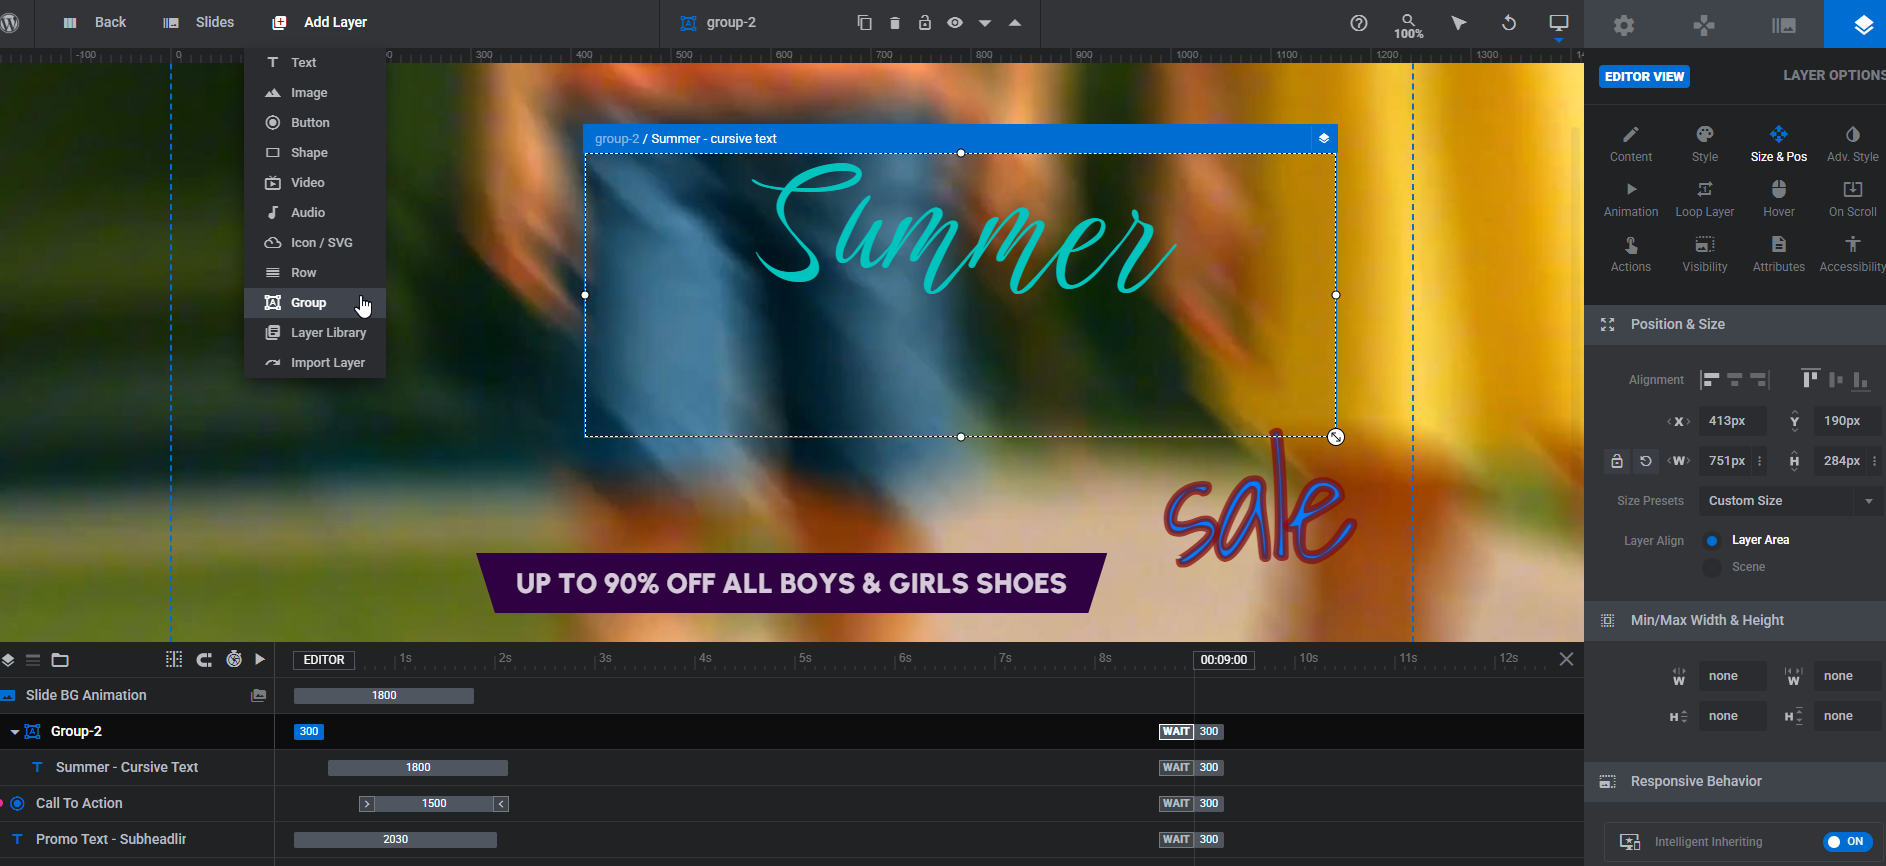
Use Sliders to Highlight Deals and Products
With Depicter sliders, you can create eye-catching product carousels, post sliders, or image slideshows that showcase Halloween collections, featured products, or limited-time deals.
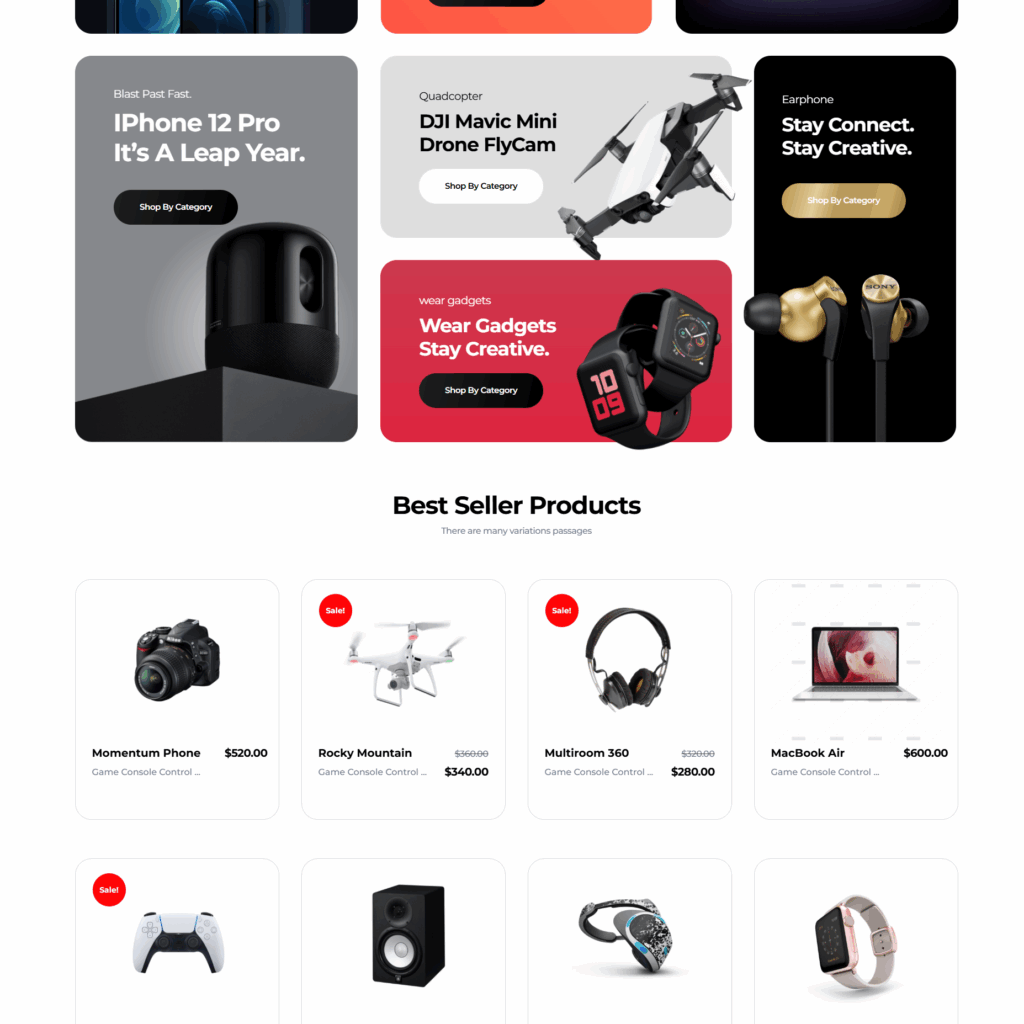
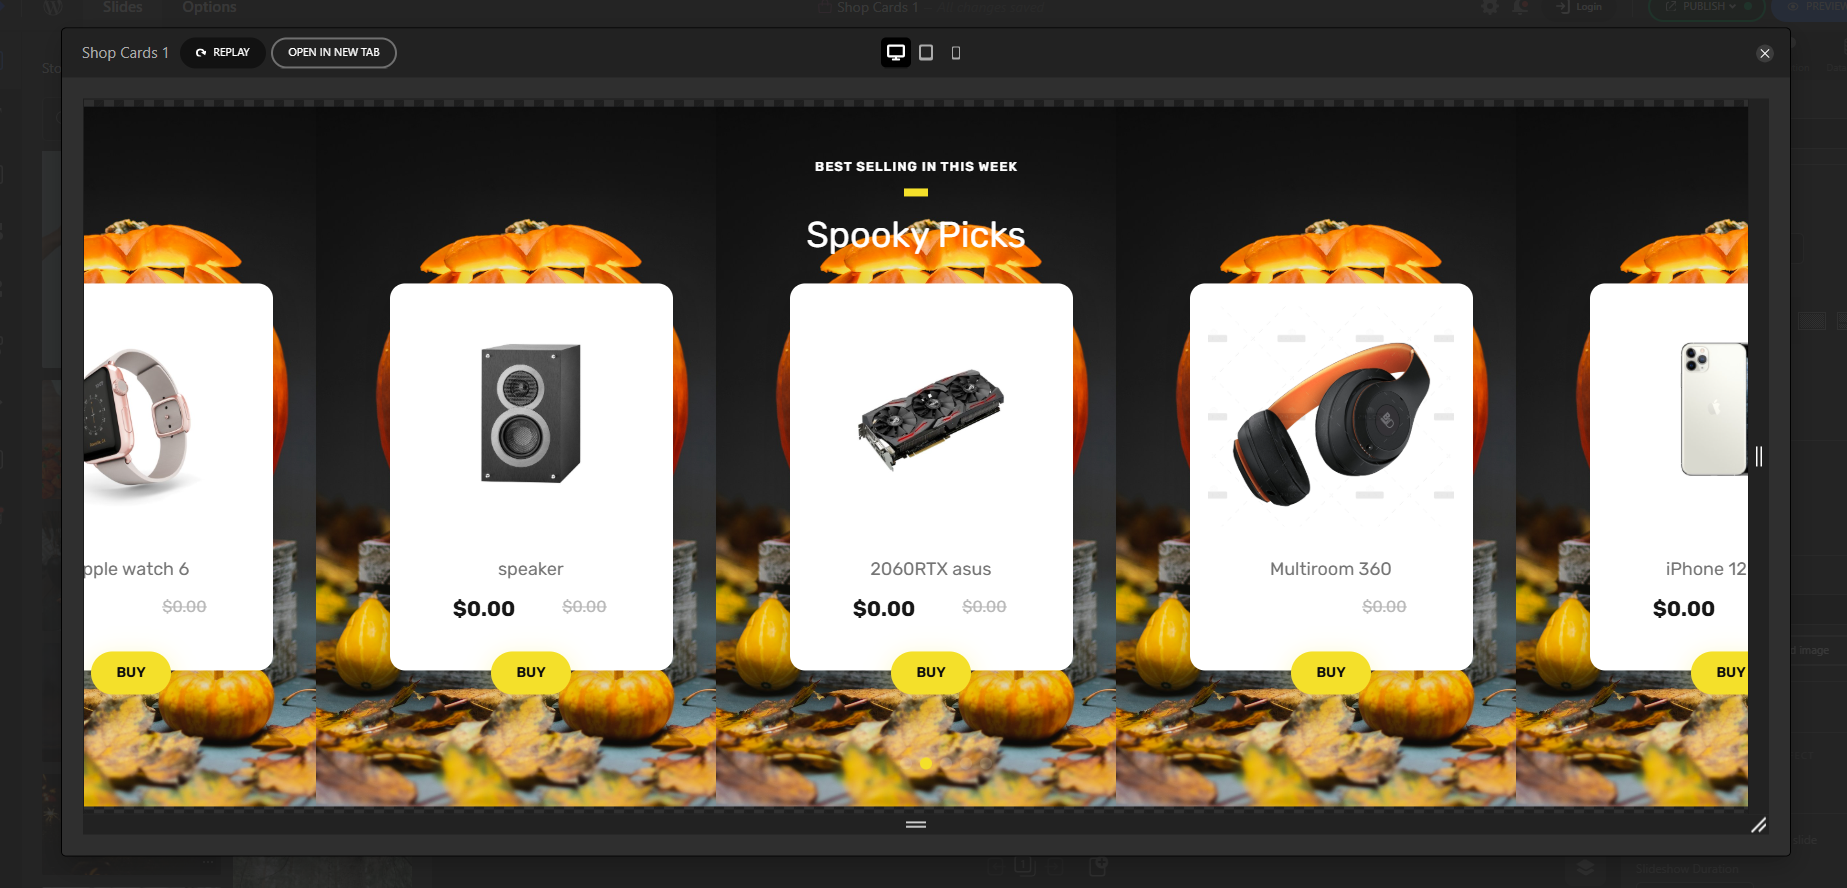
For WooCommerce stores, choose a product slider template and display a “Spooky Picks” carousel on the homepage or category pages to push sale items.
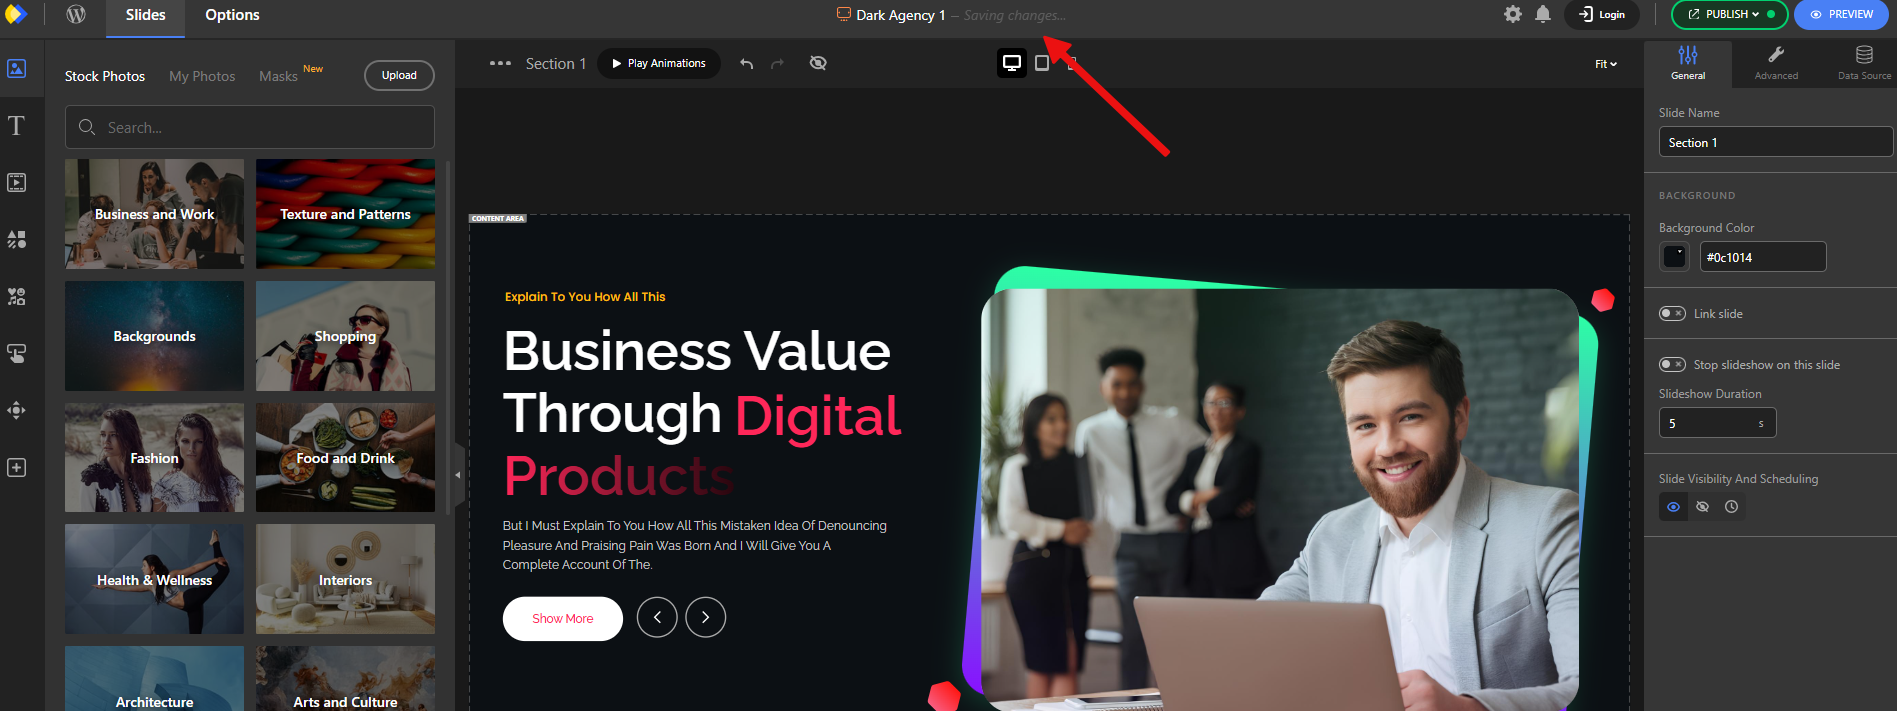
This is our online store where we plan to add a Halloween-themed slider.
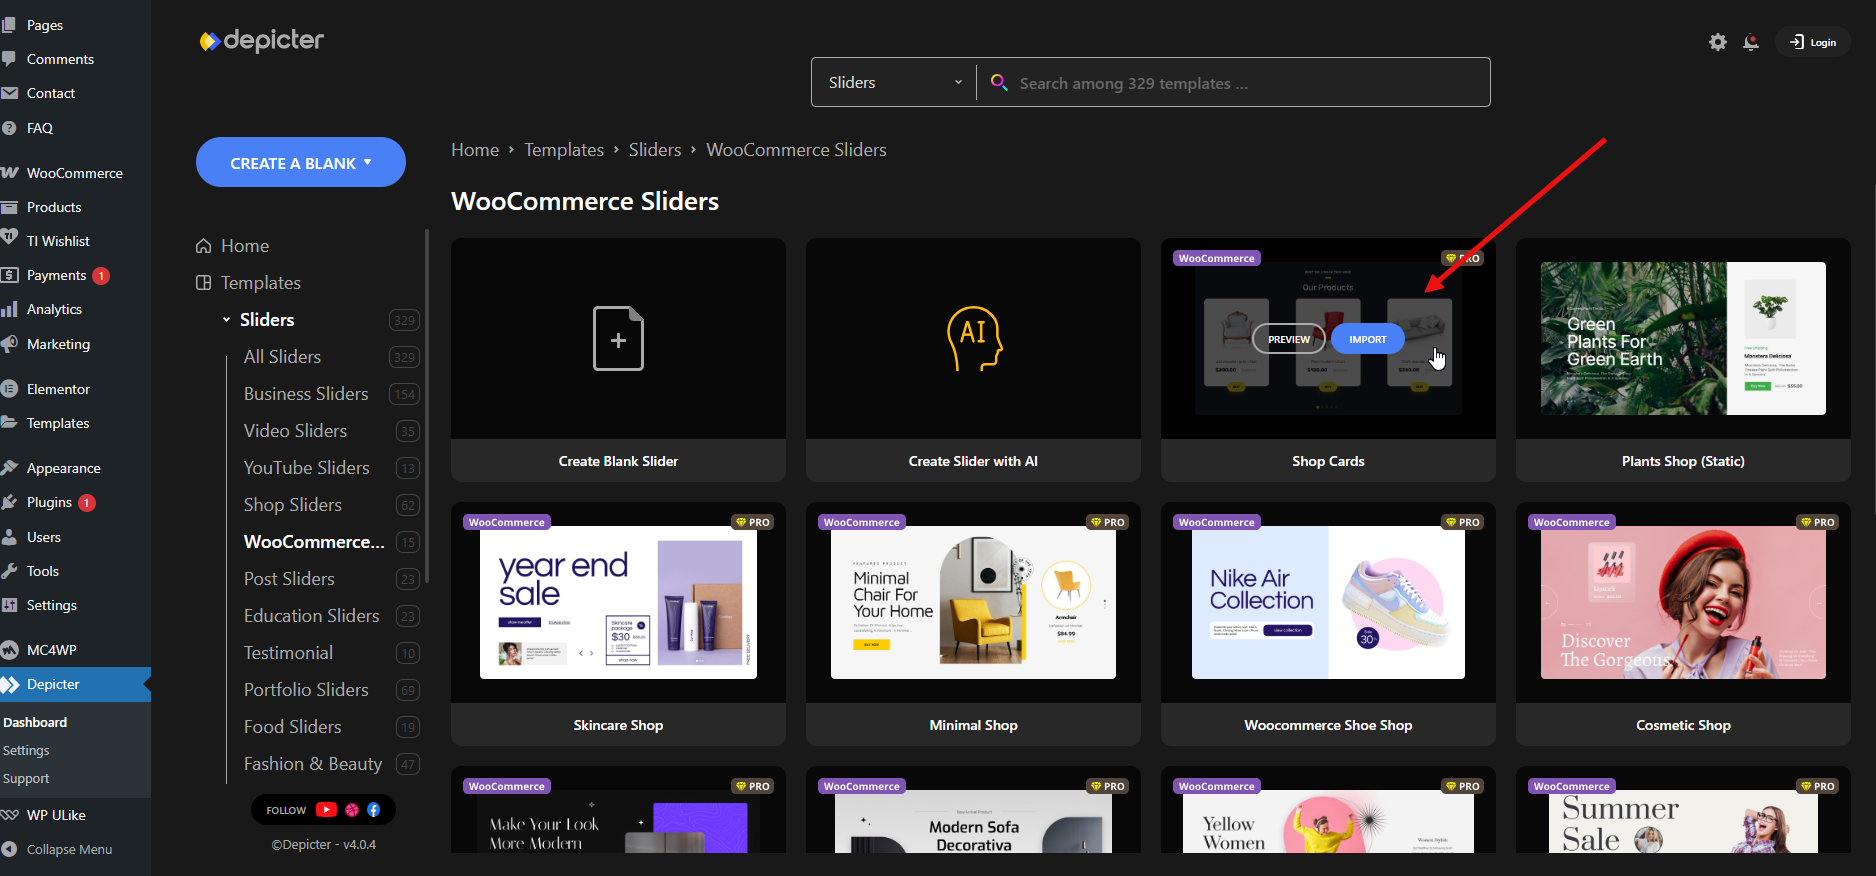
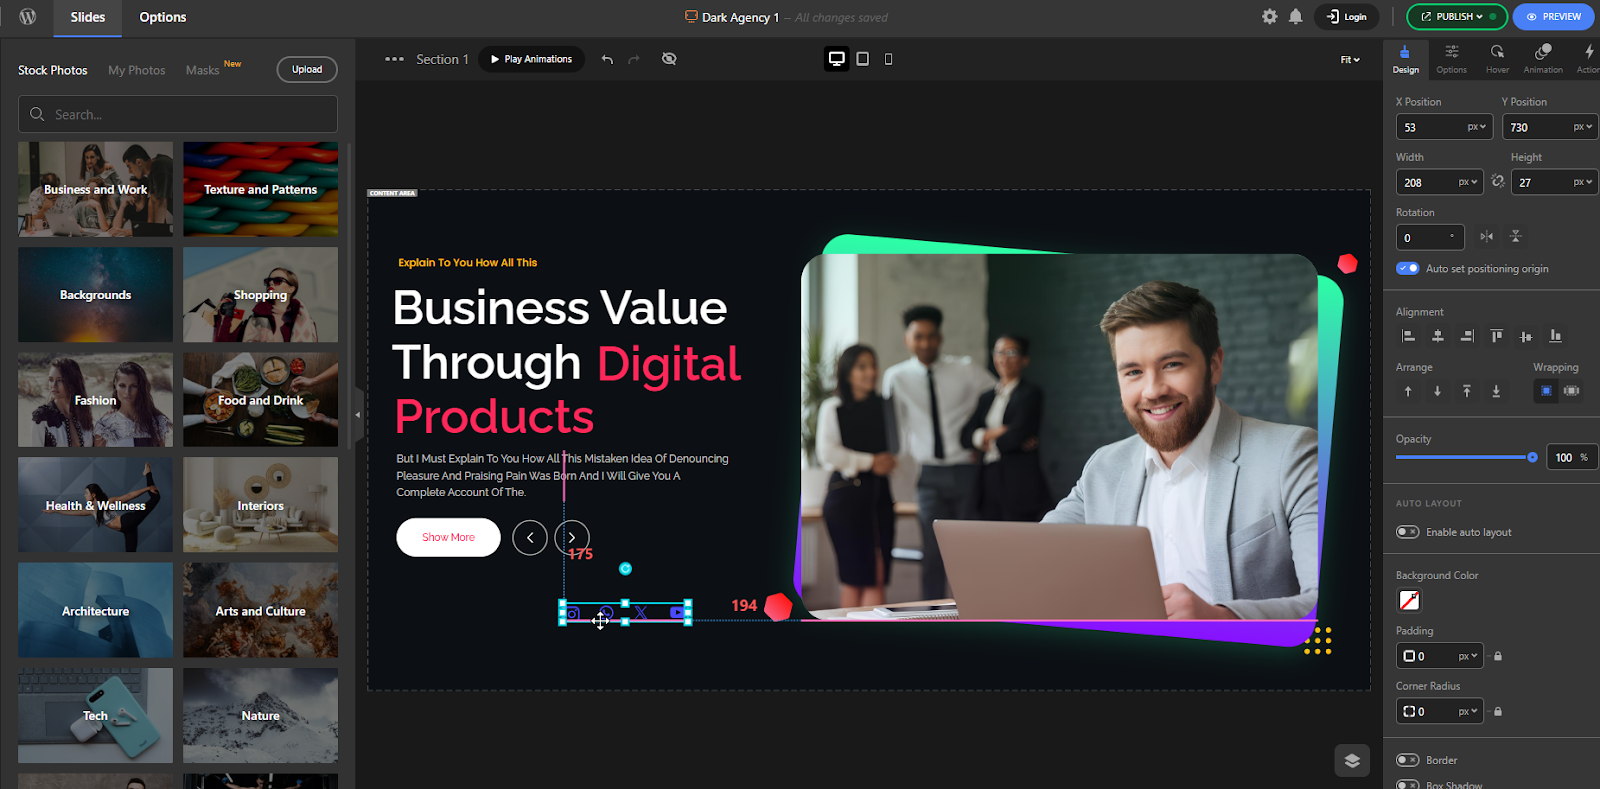
After logging into the Depicter dashboard, go to Slider → Templates, and import one of the templates designed for WooCommerce products.
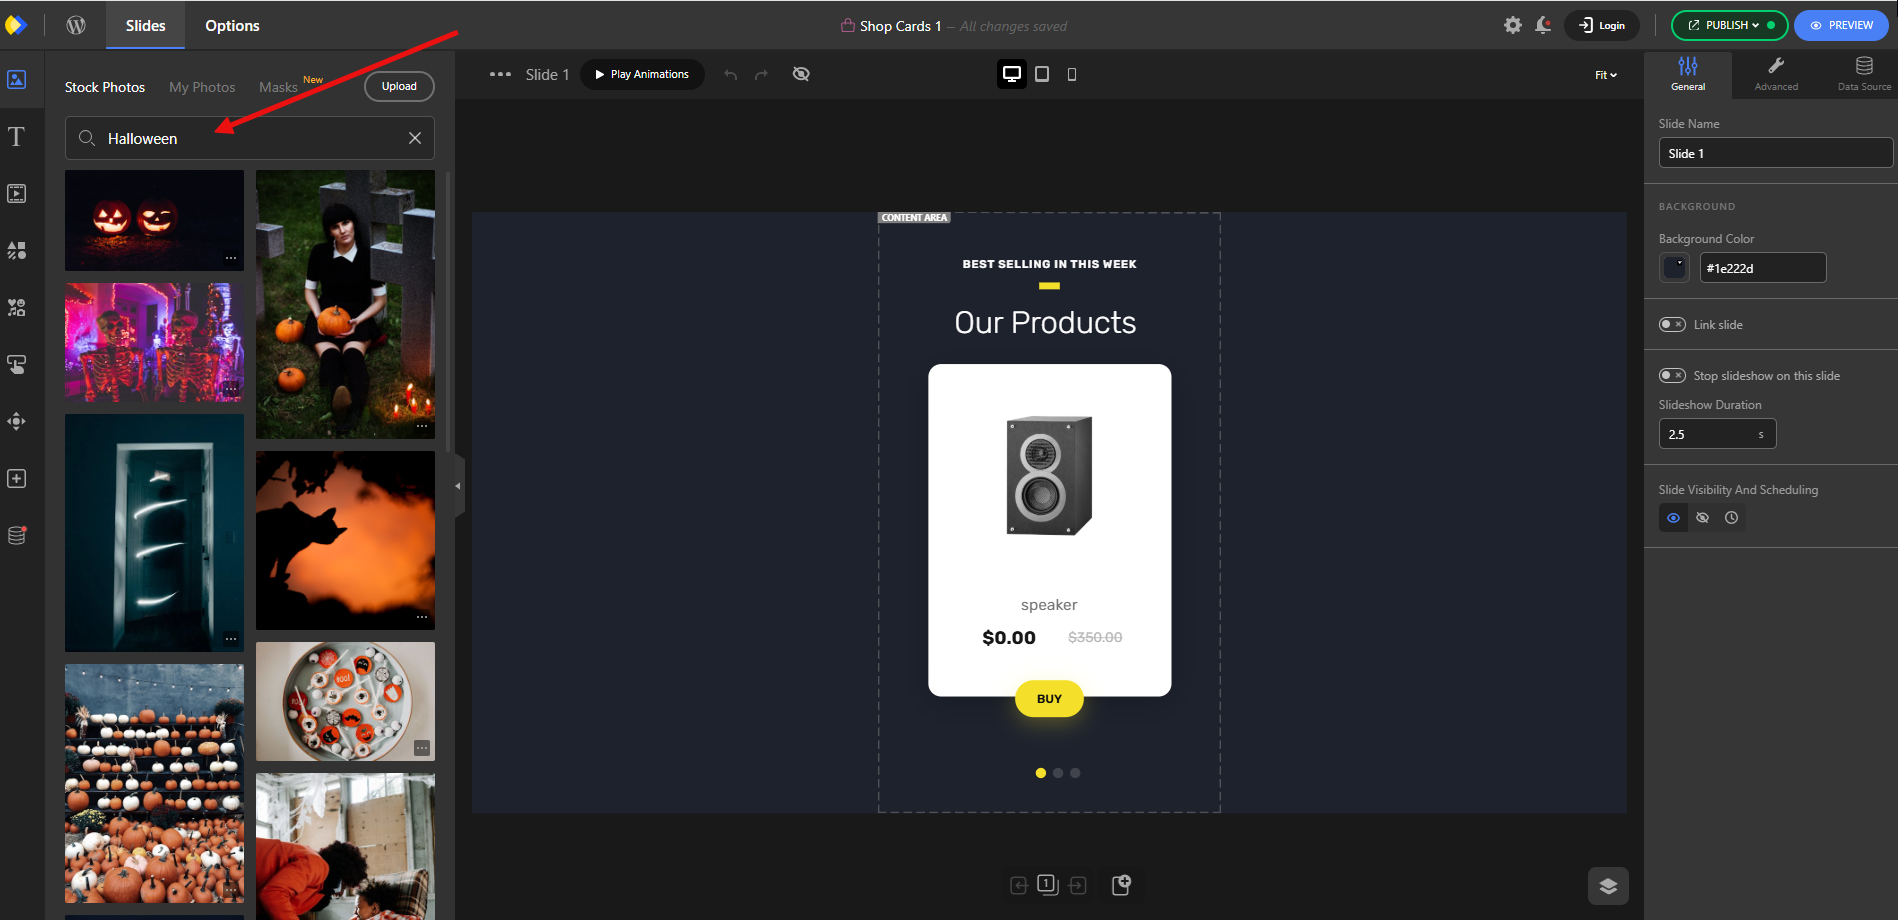
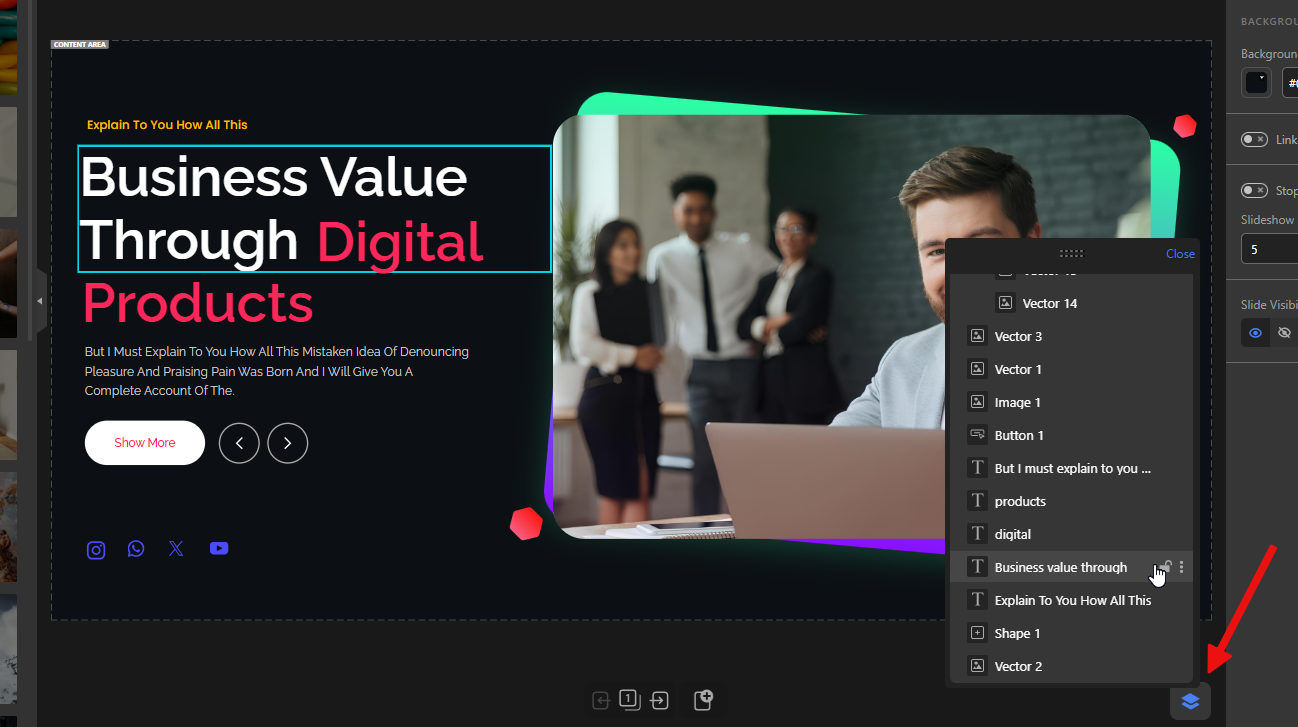
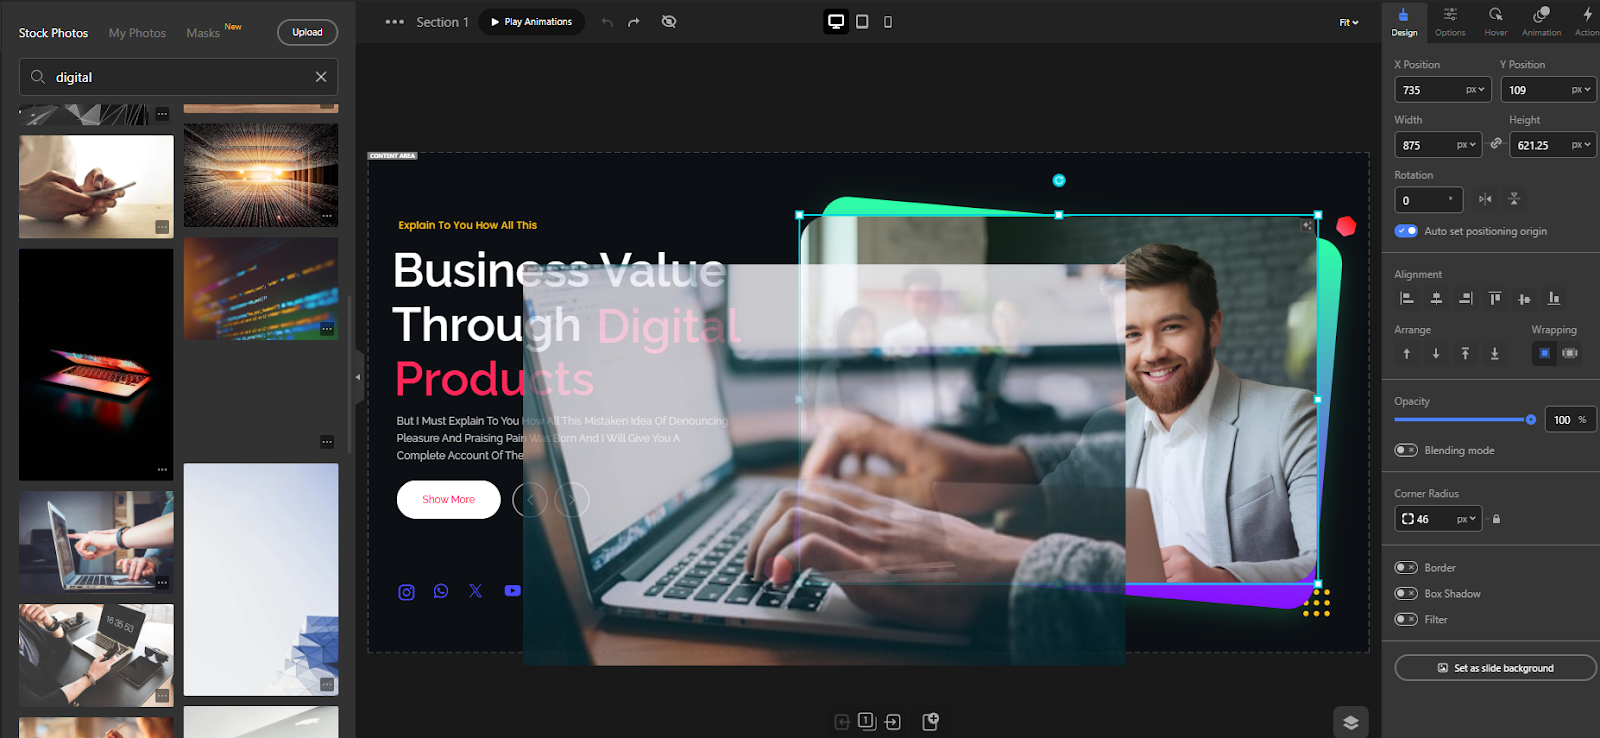
In the editor, you can find Halloween images in the Assets panel and add them to your slider.
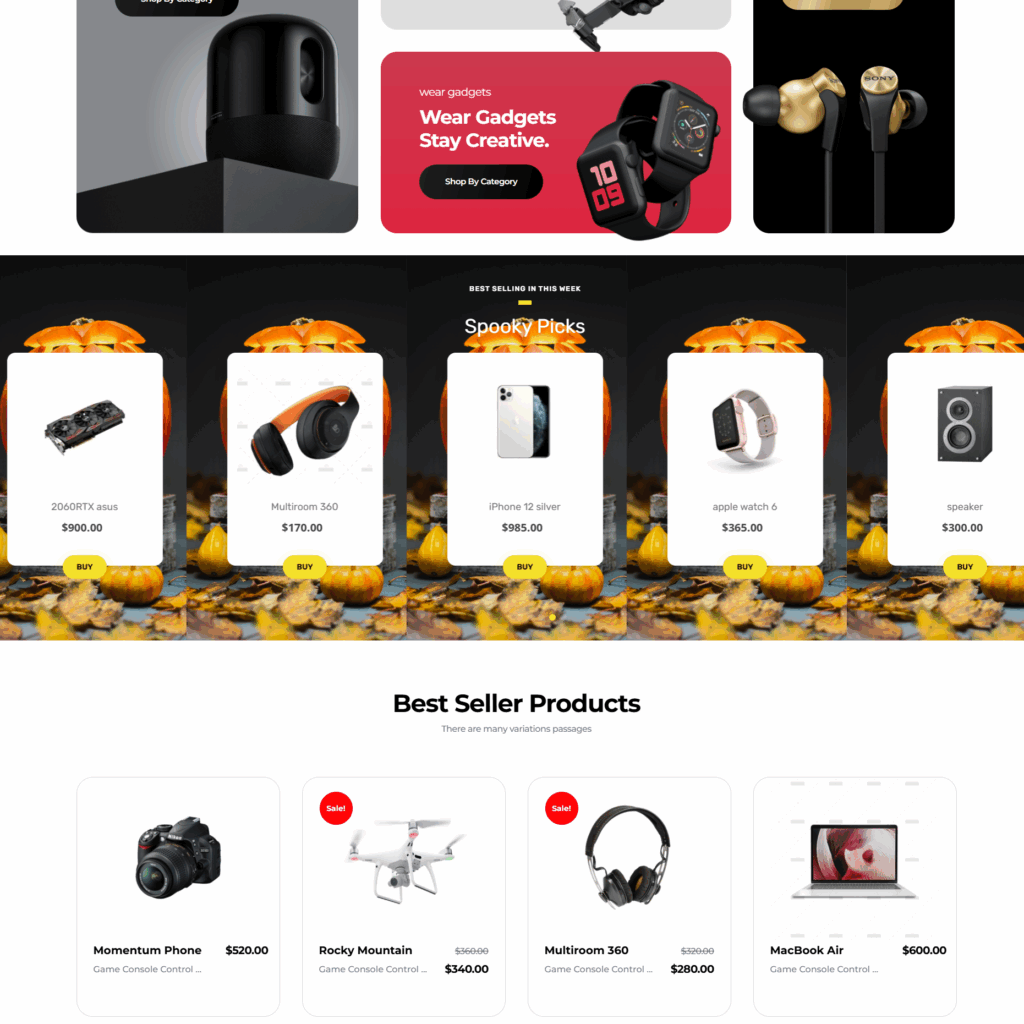
Once you’ve made the changes, add the slider to your homepage.
،he final result will look like this:
A WooCommerce product slider titled “Halloween Bestsellers” with sale badges and a CTA button can boost click-throughs from the homepage directly to product pages, shortening the path to checkout and increasing average order value.
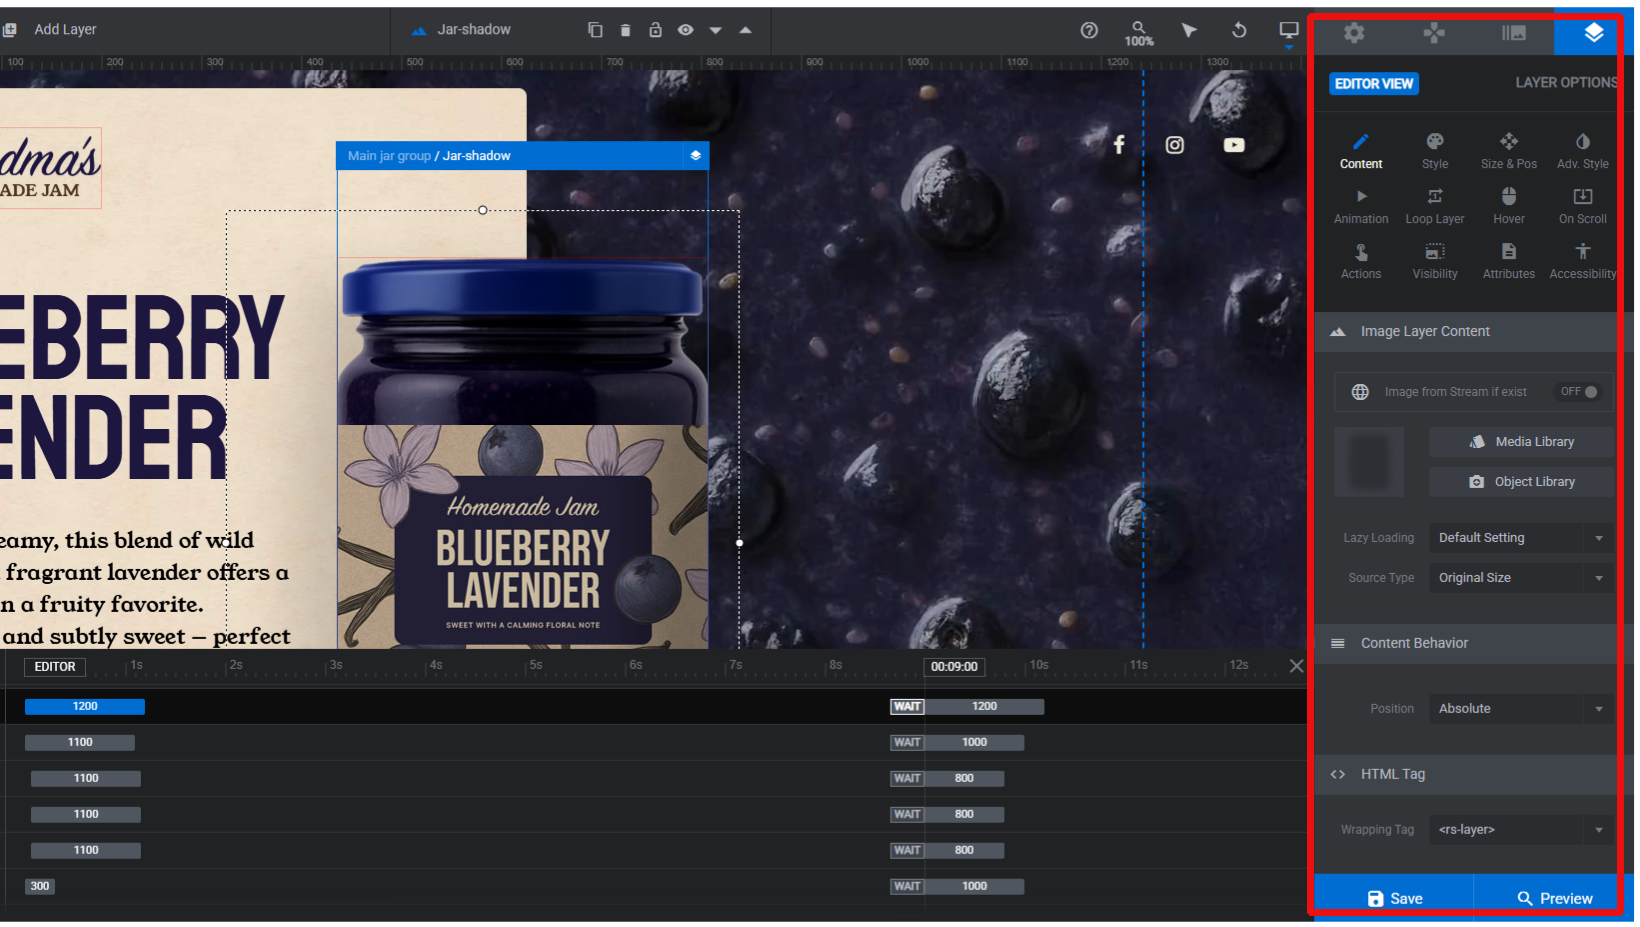
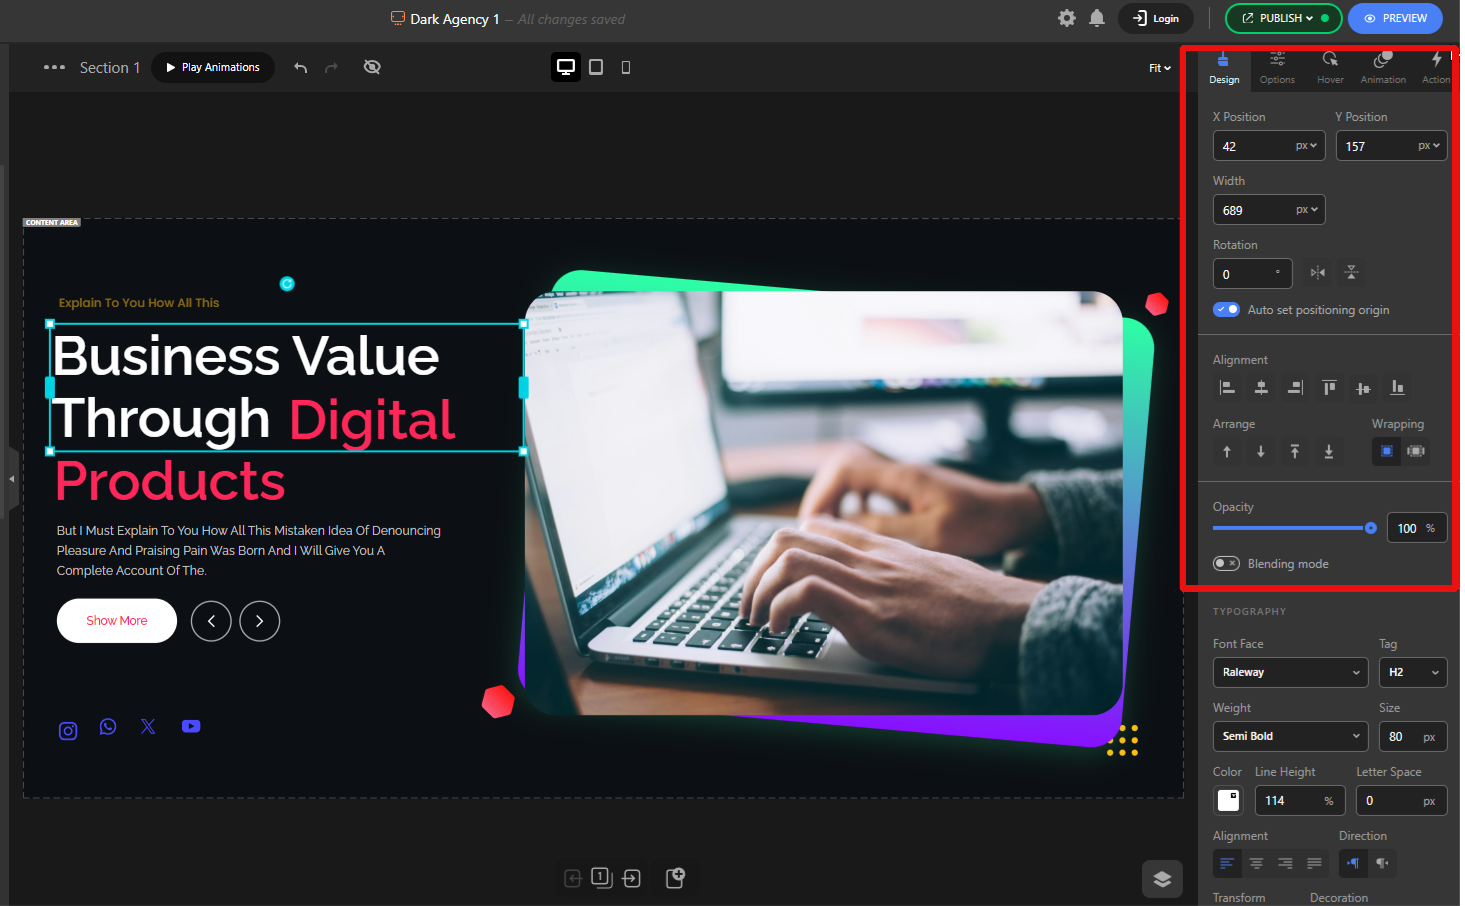
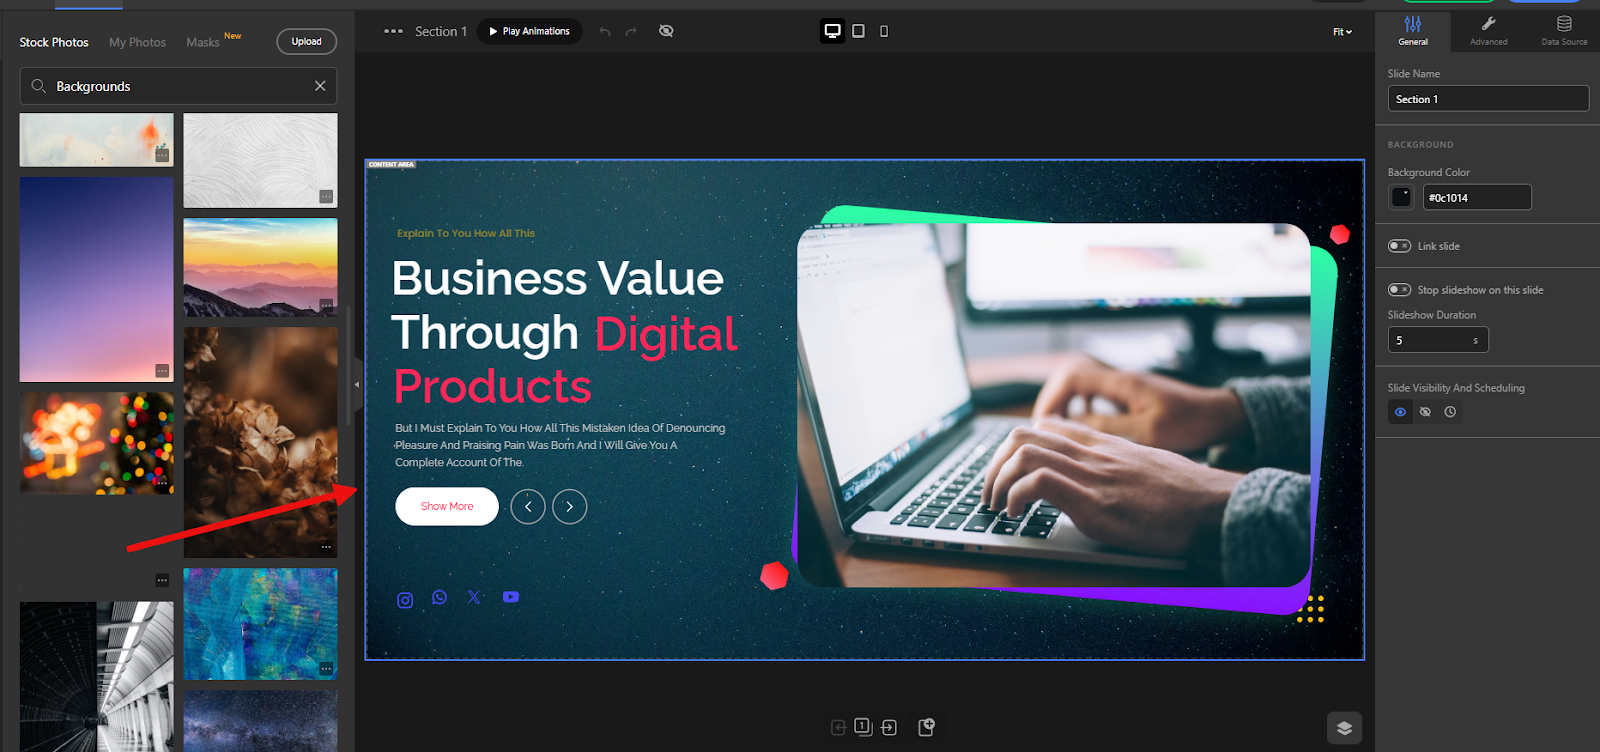
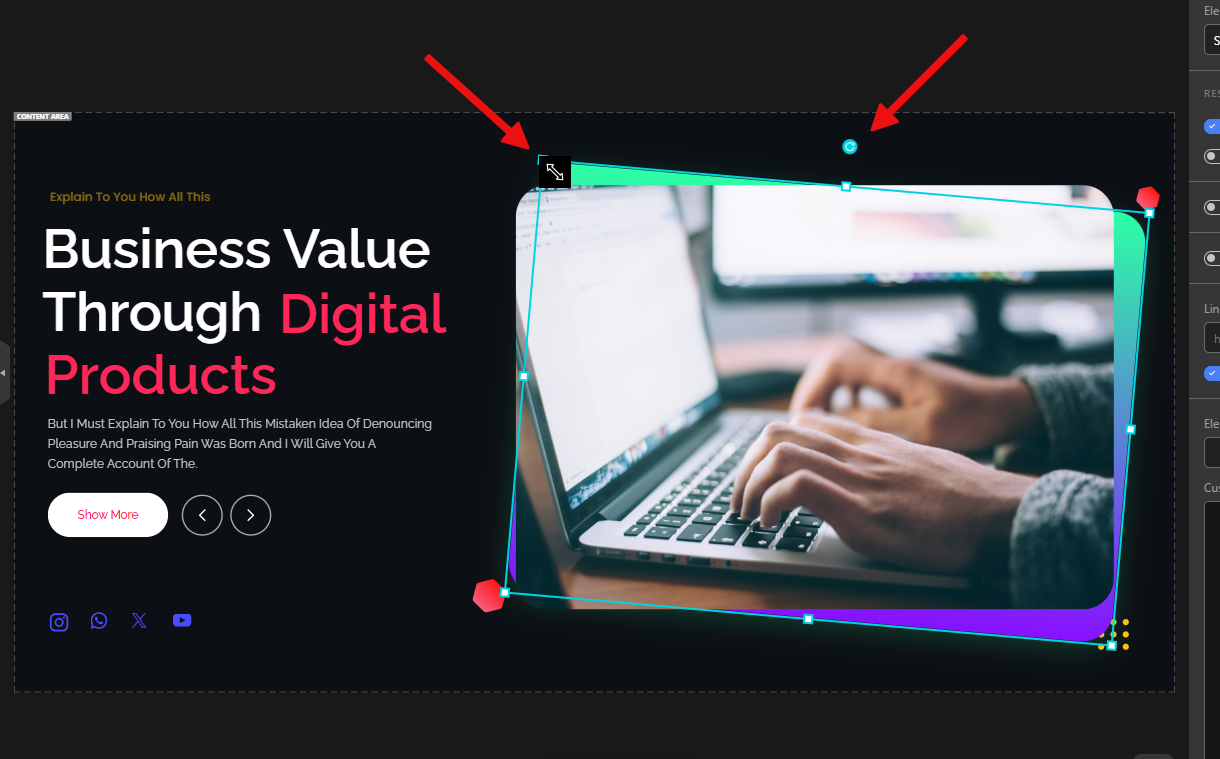
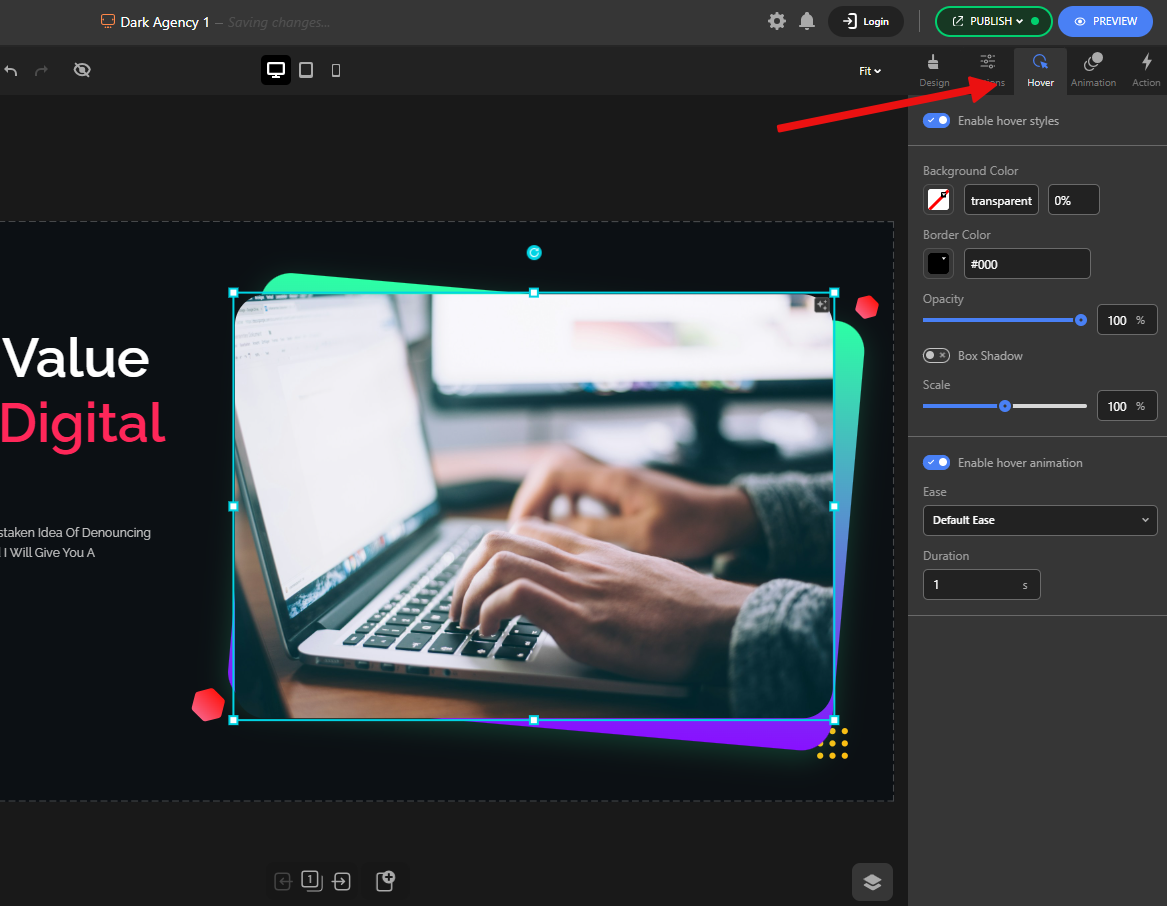
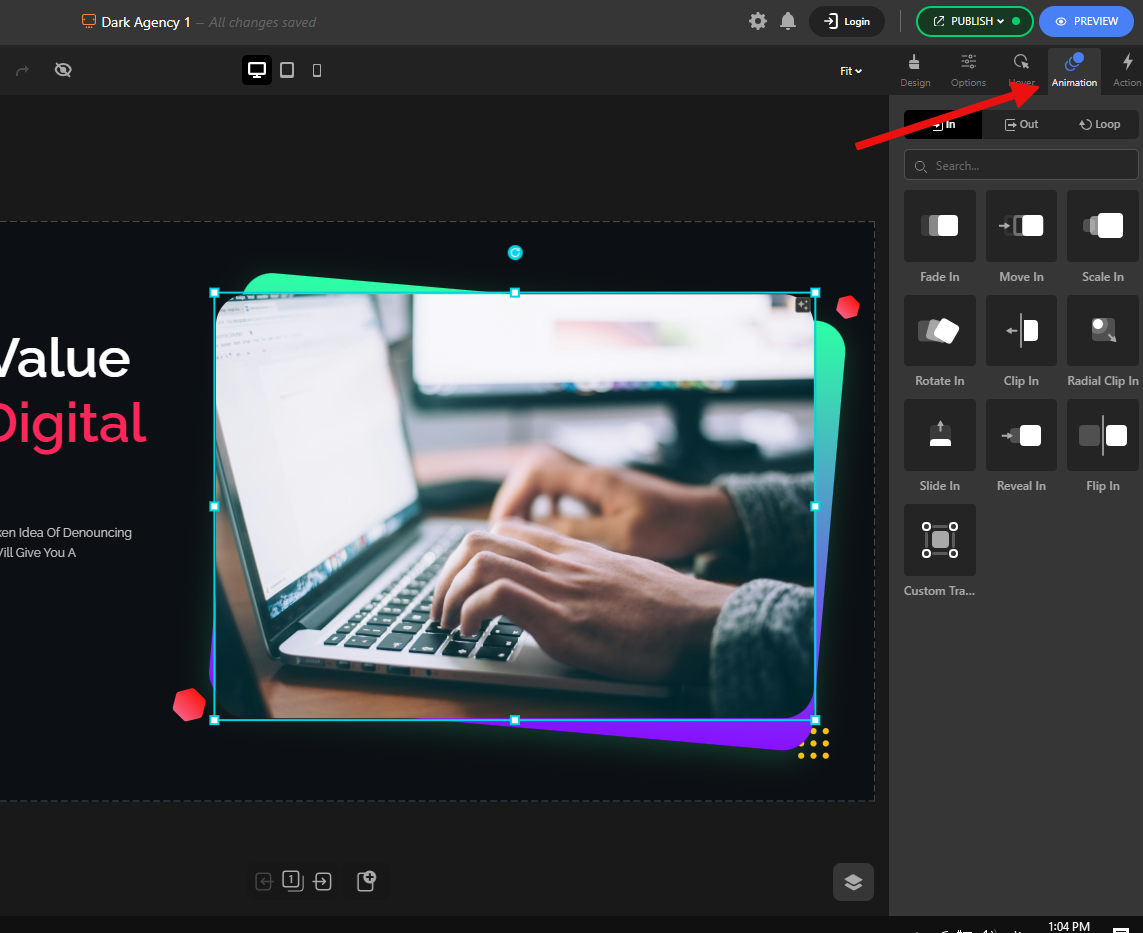
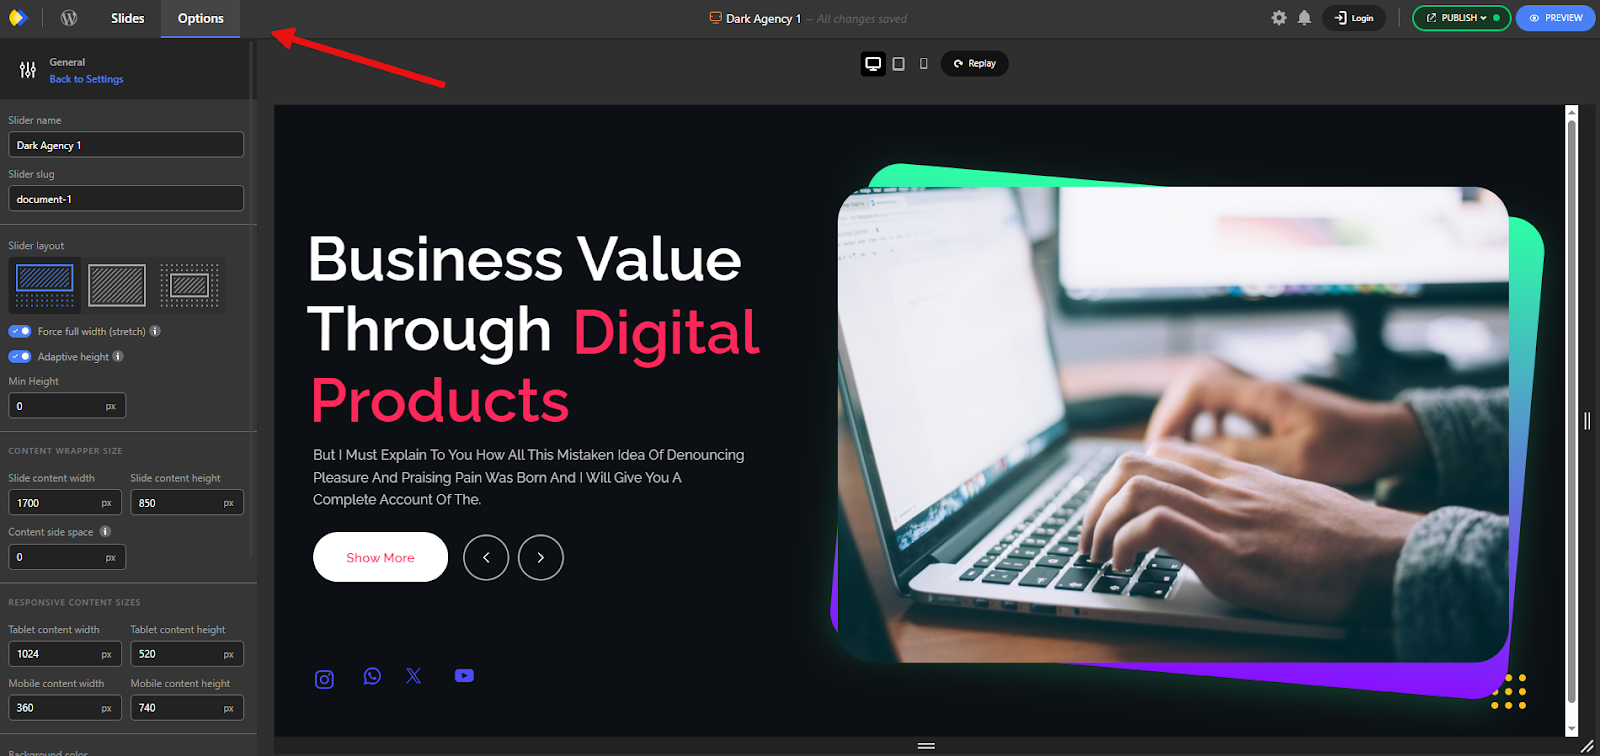
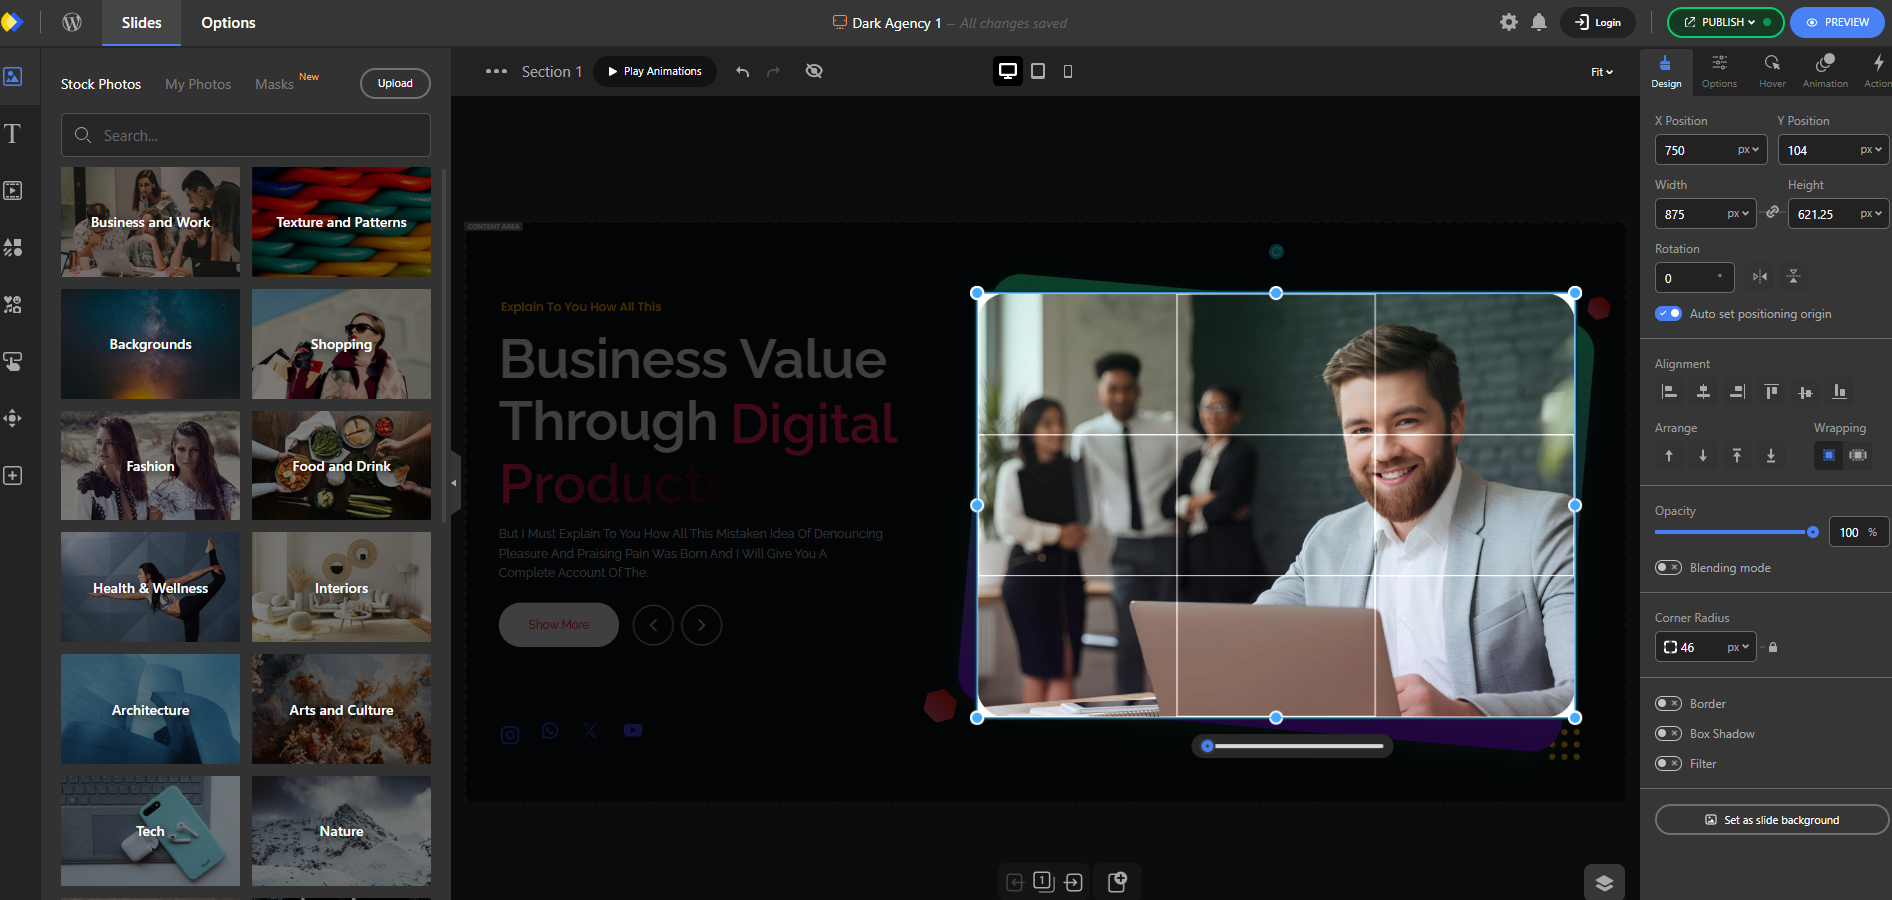
Design a Hero Section with Halloween Graphics
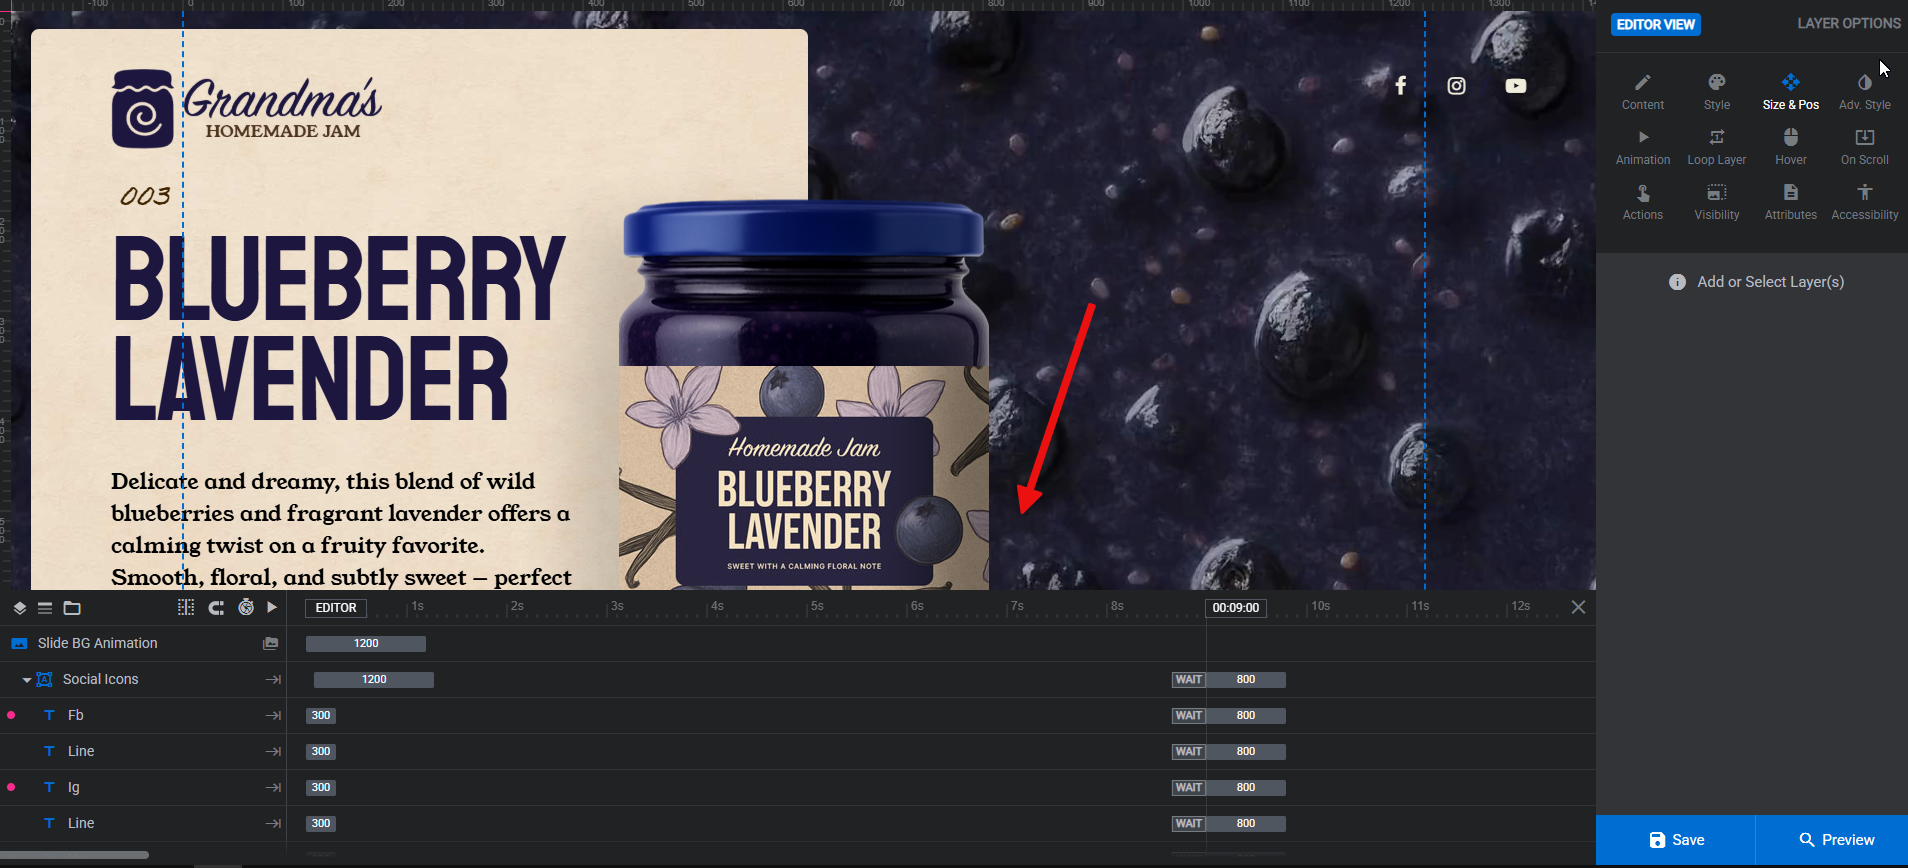
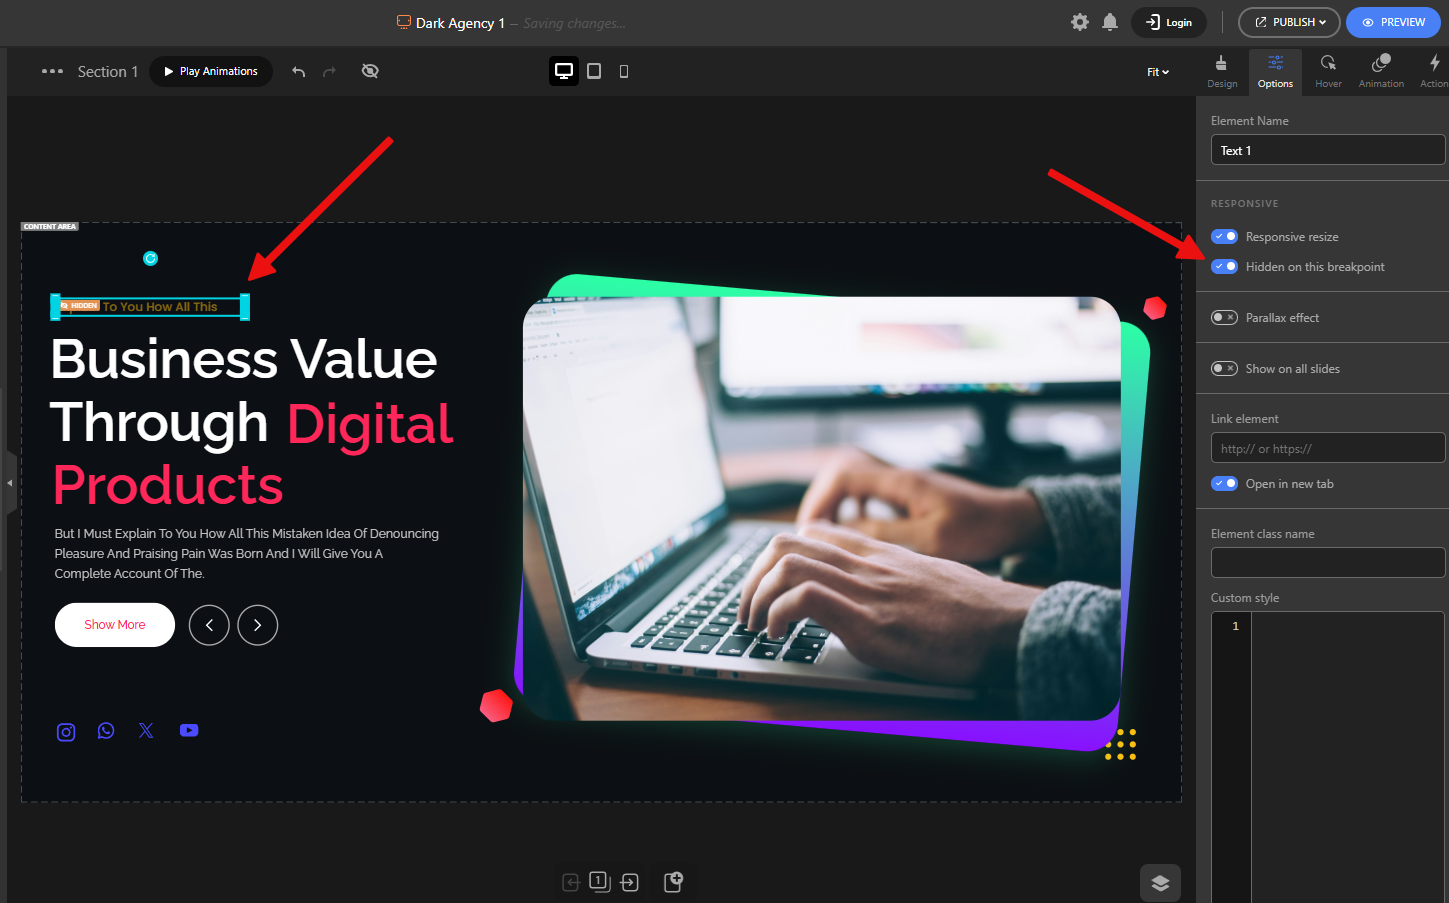
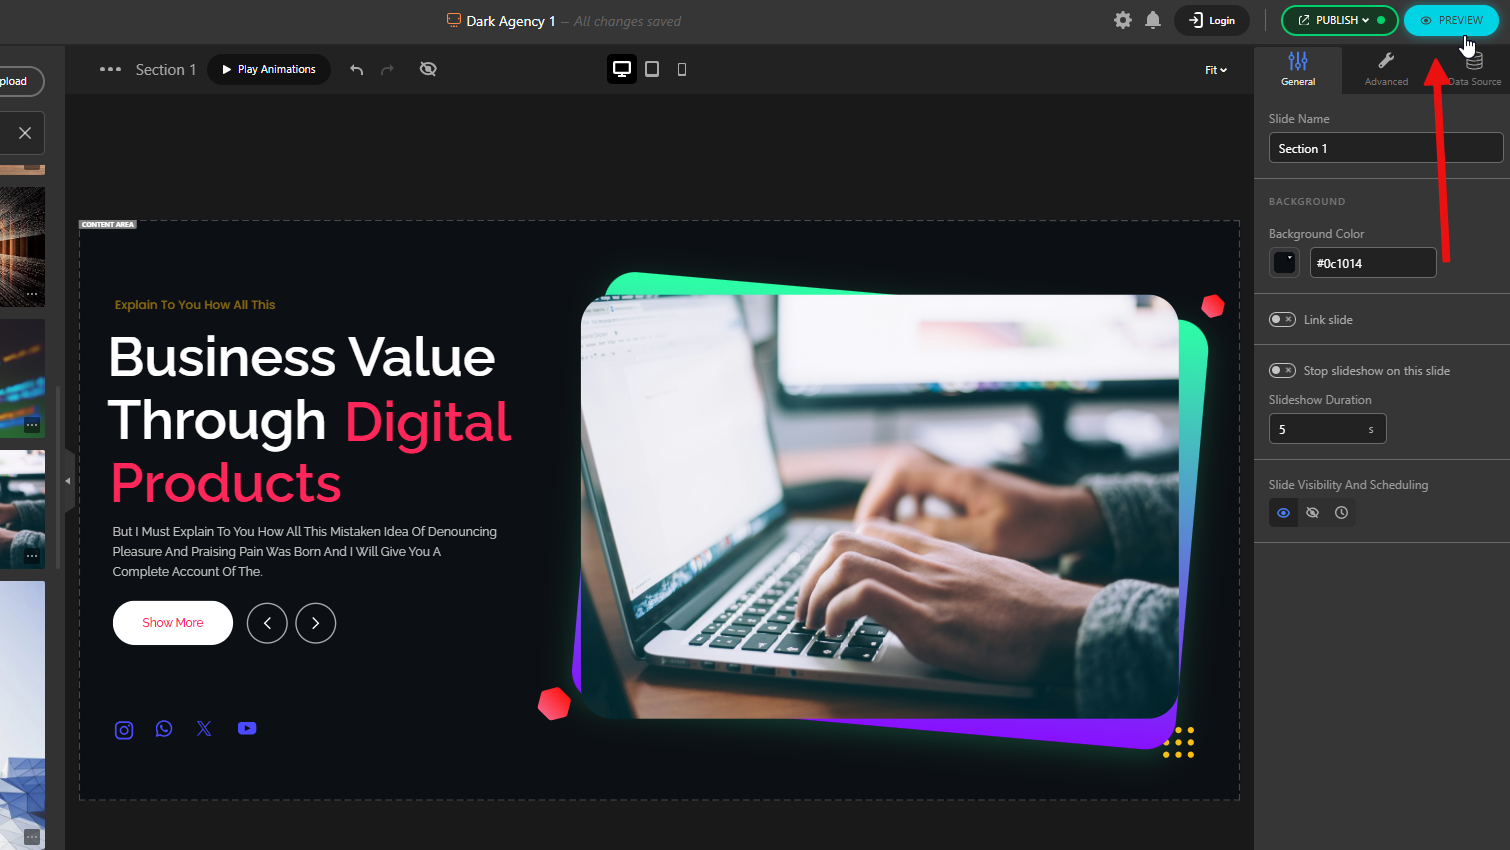
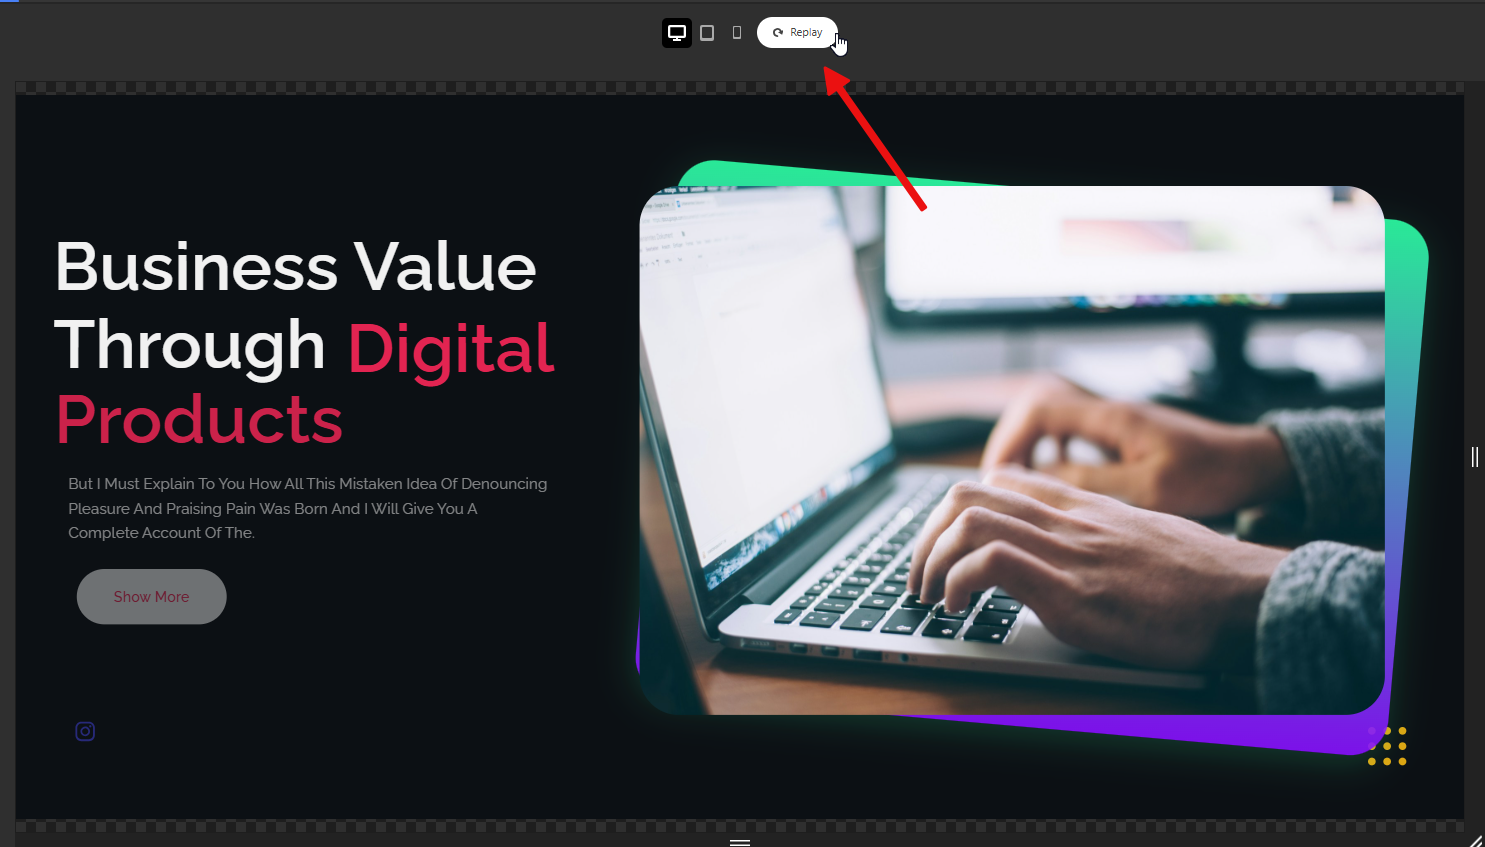
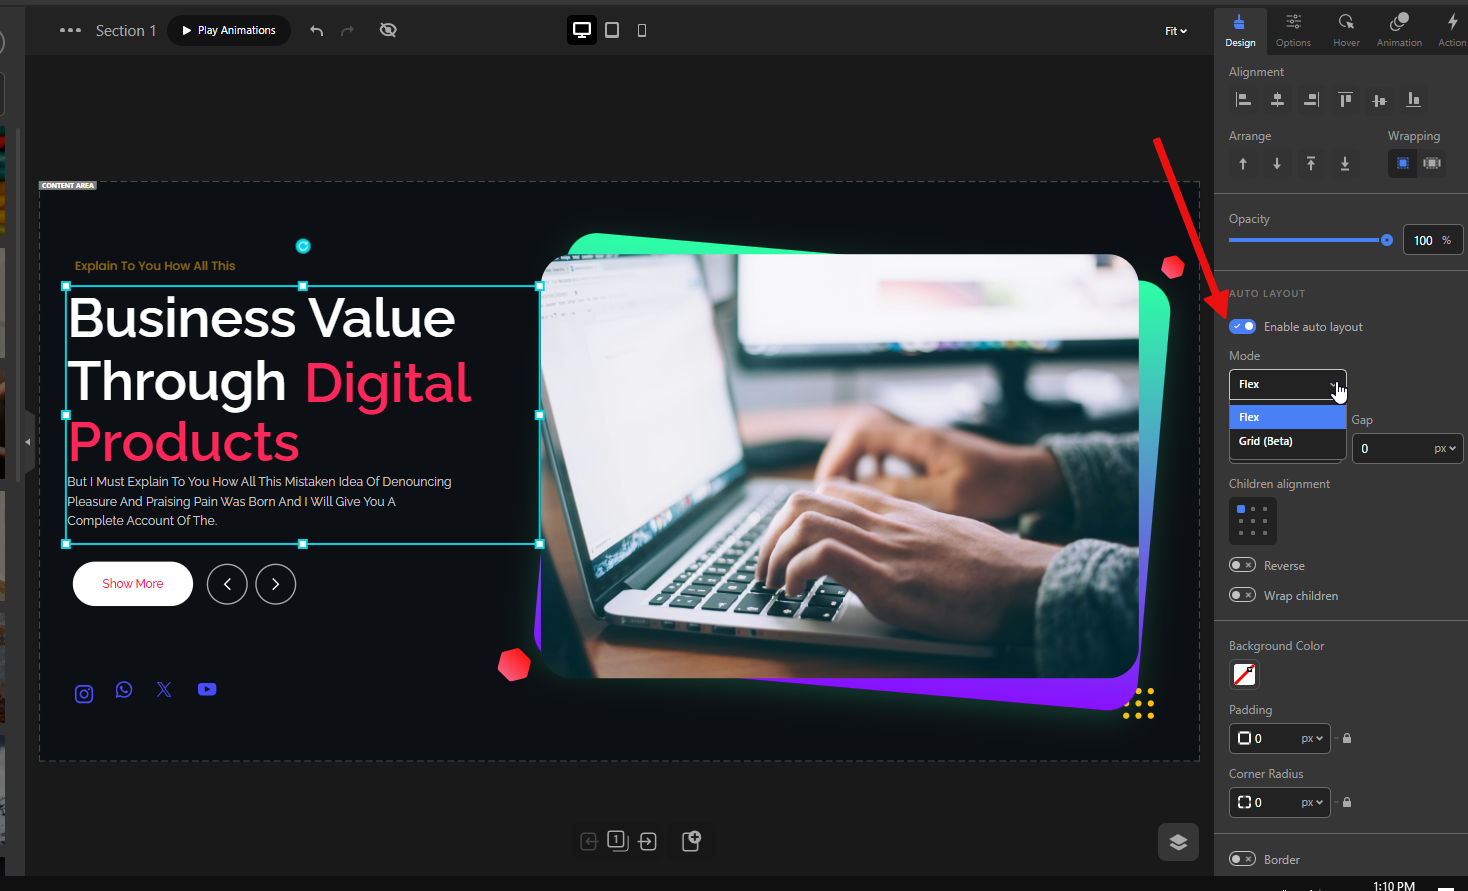
A hero section is the large top area of your homepage that makes the first impression. With Depicter, you can build a full-screen hero: a big Halloween image, a headline, a CTA button, and an optional countdown timer for your Halloween sale.
Because Depicter has templates and layout controls, you can create a strong visual without custom coding.
A hero that screams “Limited Halloween Sale — Ends Midnight Oct 31” with a visible countdown creates urgency and drives visitors straight to the sale collection — ideal for increasing conversion rate on the main landing page.
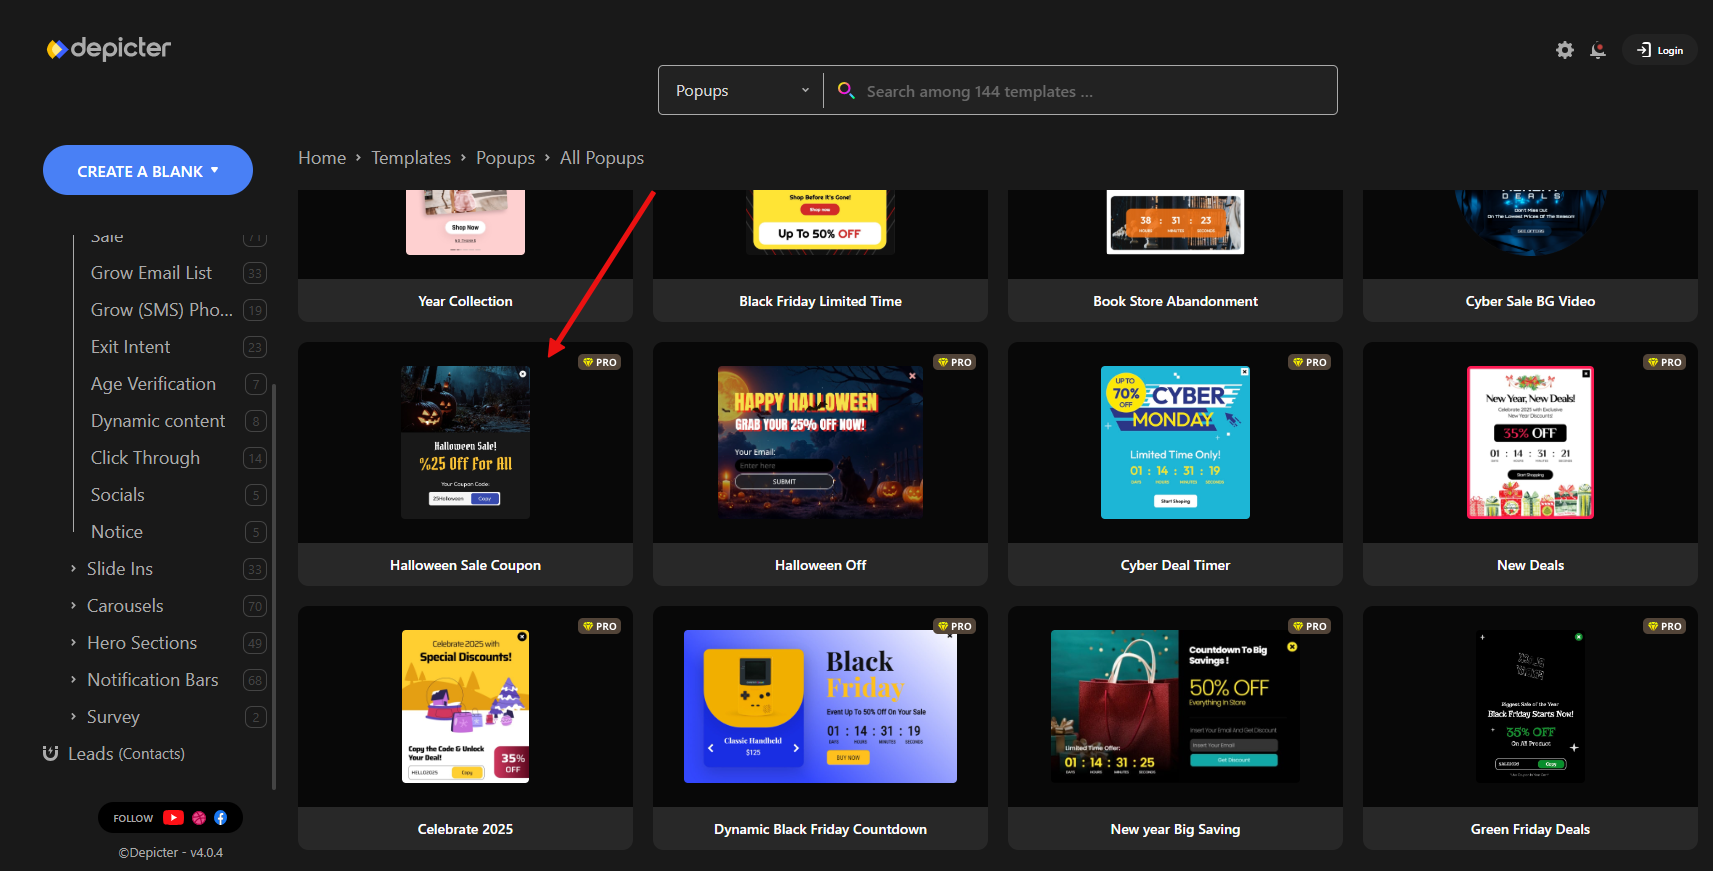
You can target popups by page type, device, referral, or behavior (time on page, scroll percent, exit intent) — great for capturing leads or recovering carts during Halloween campaigns.
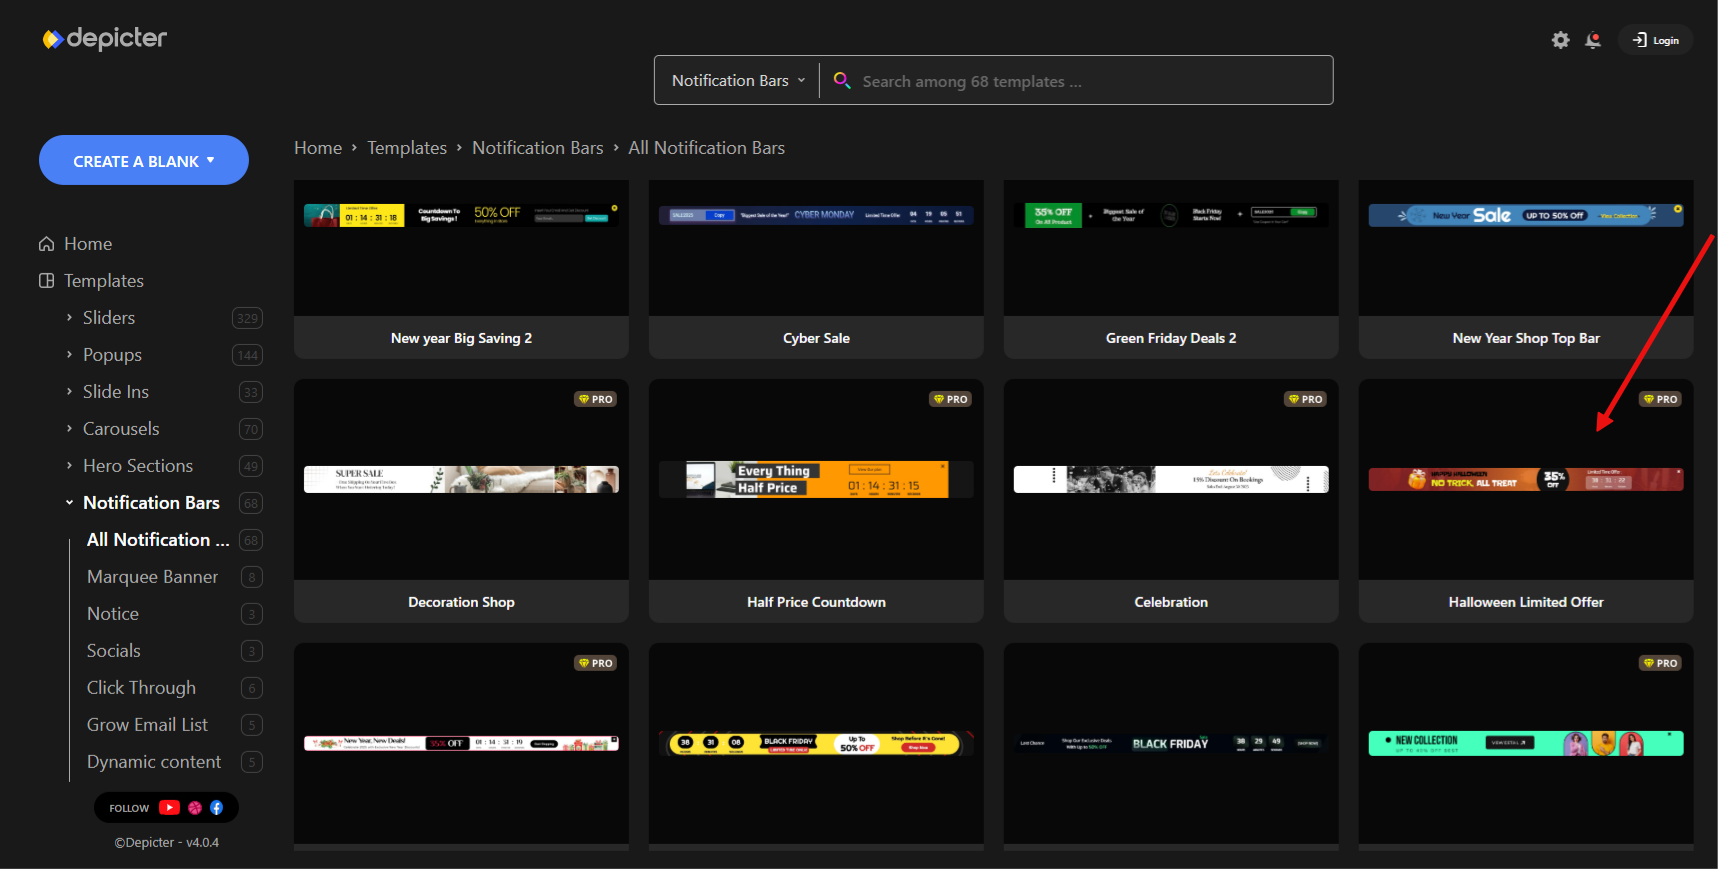
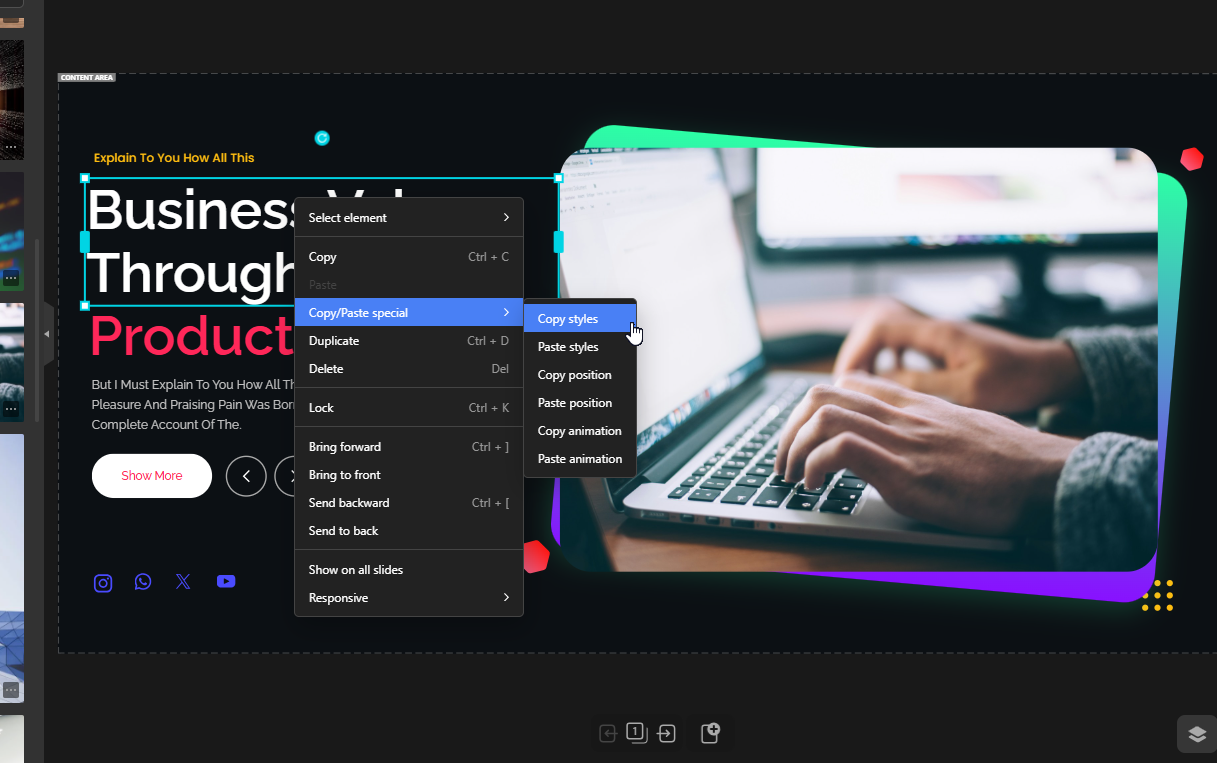
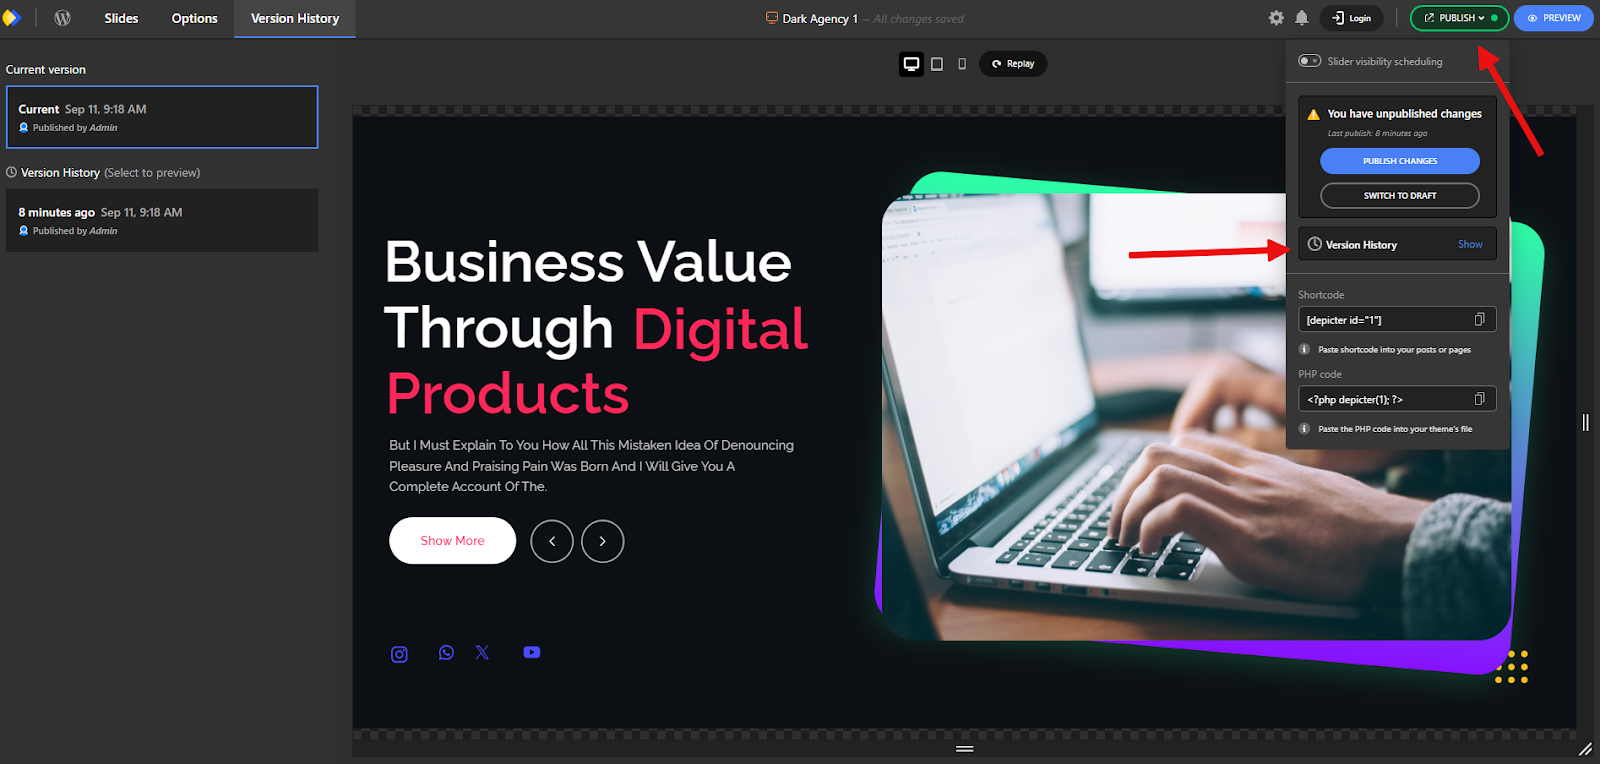
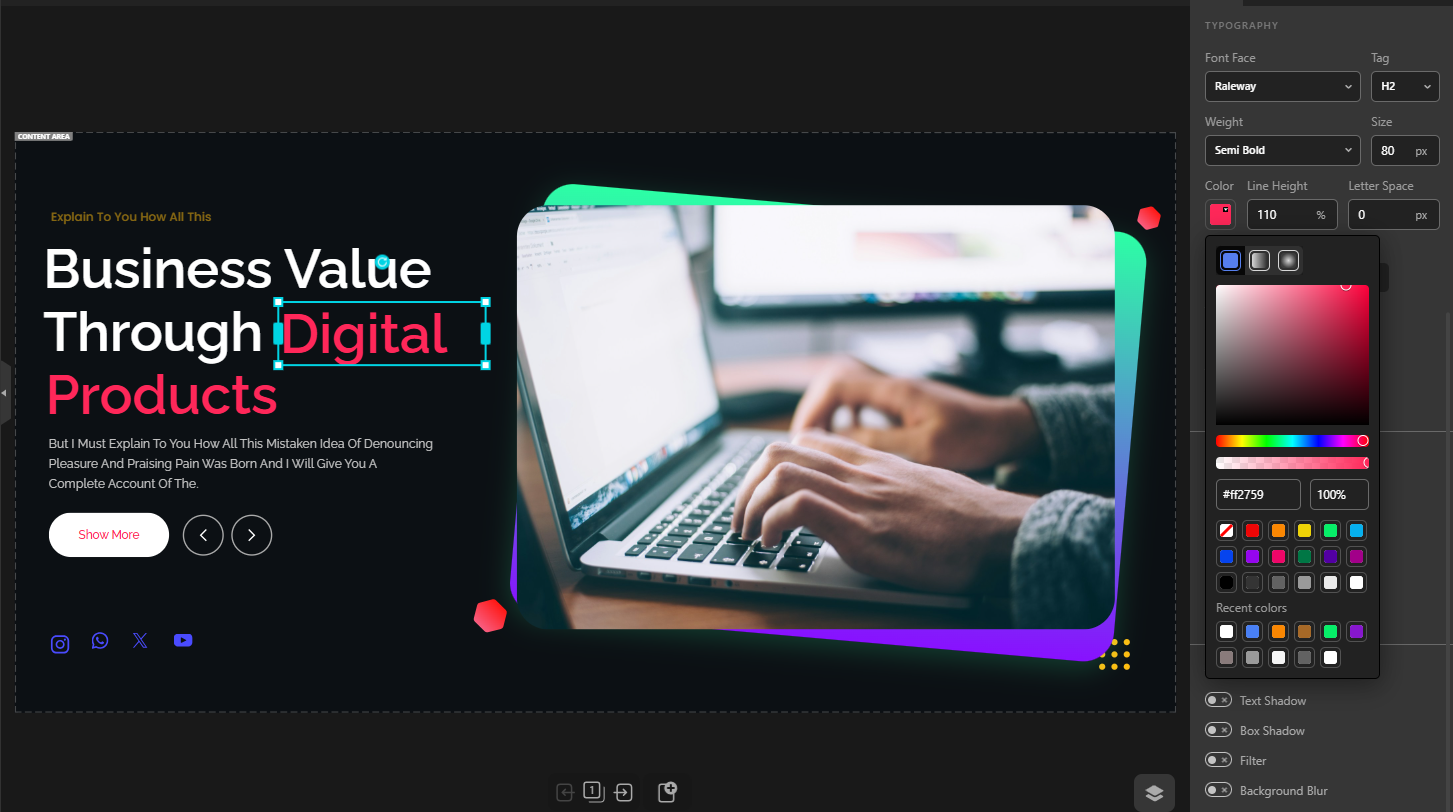
After logging into the Depicter dashboard, go to the Popup section, where you can find ready-made Halloween templates.
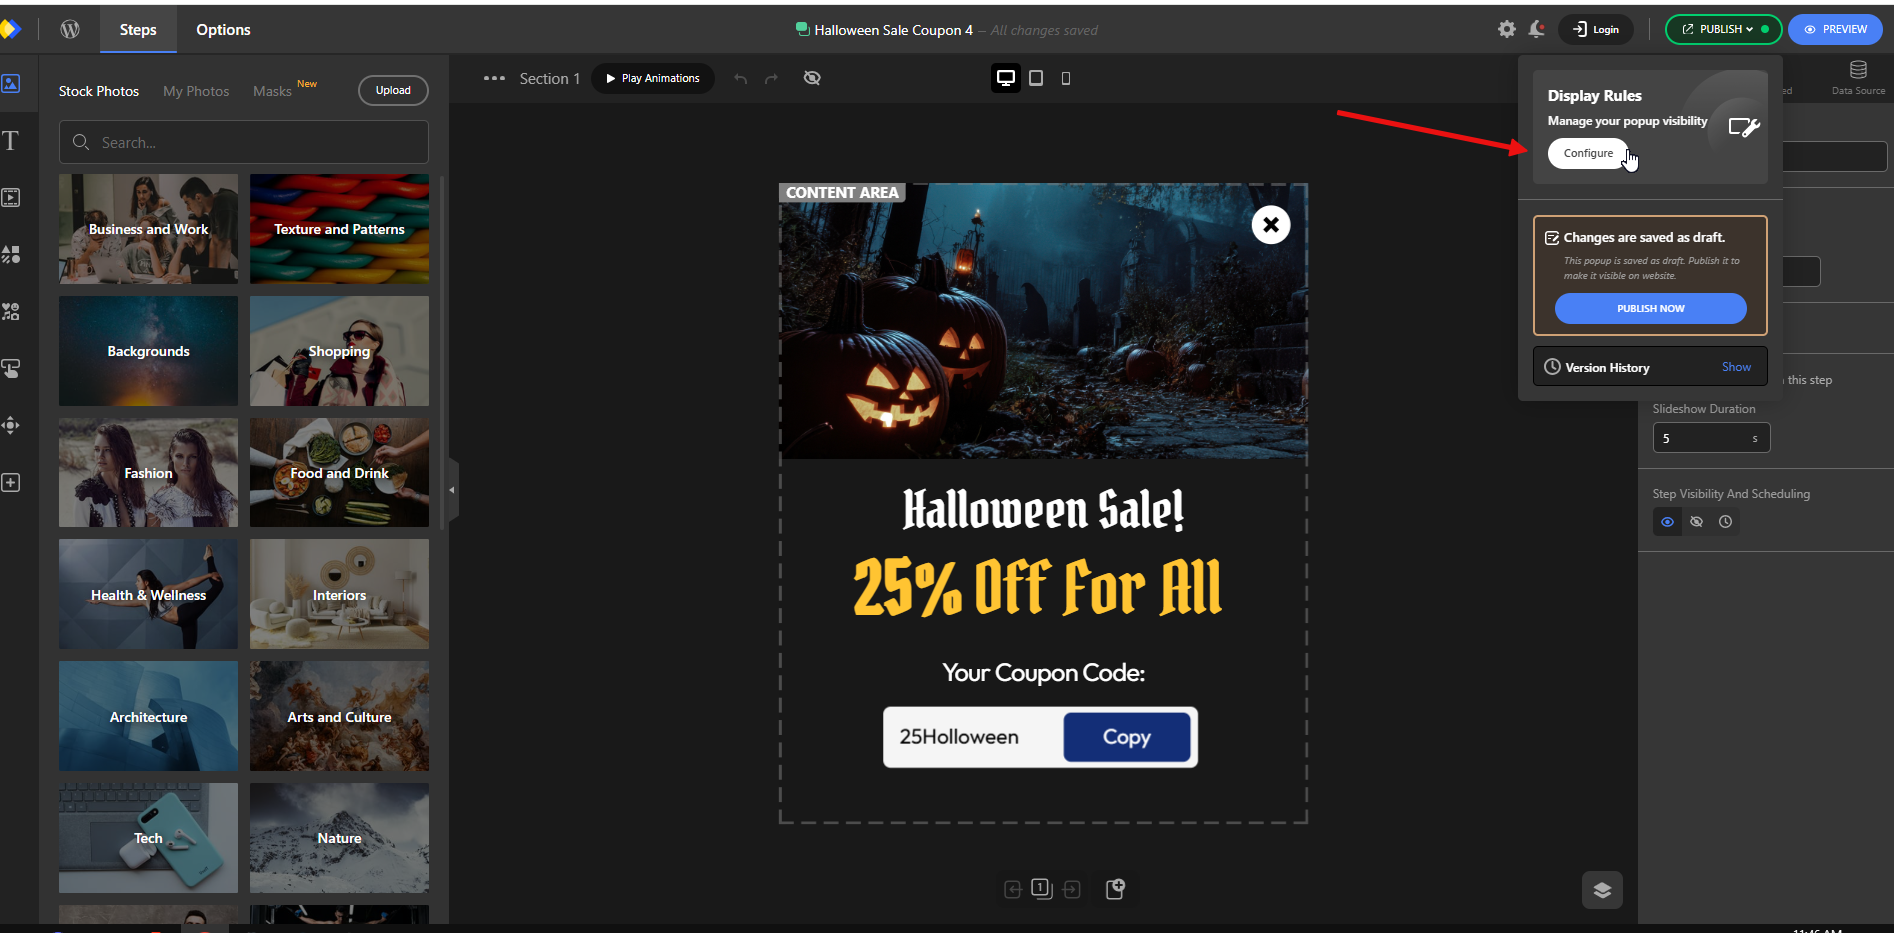
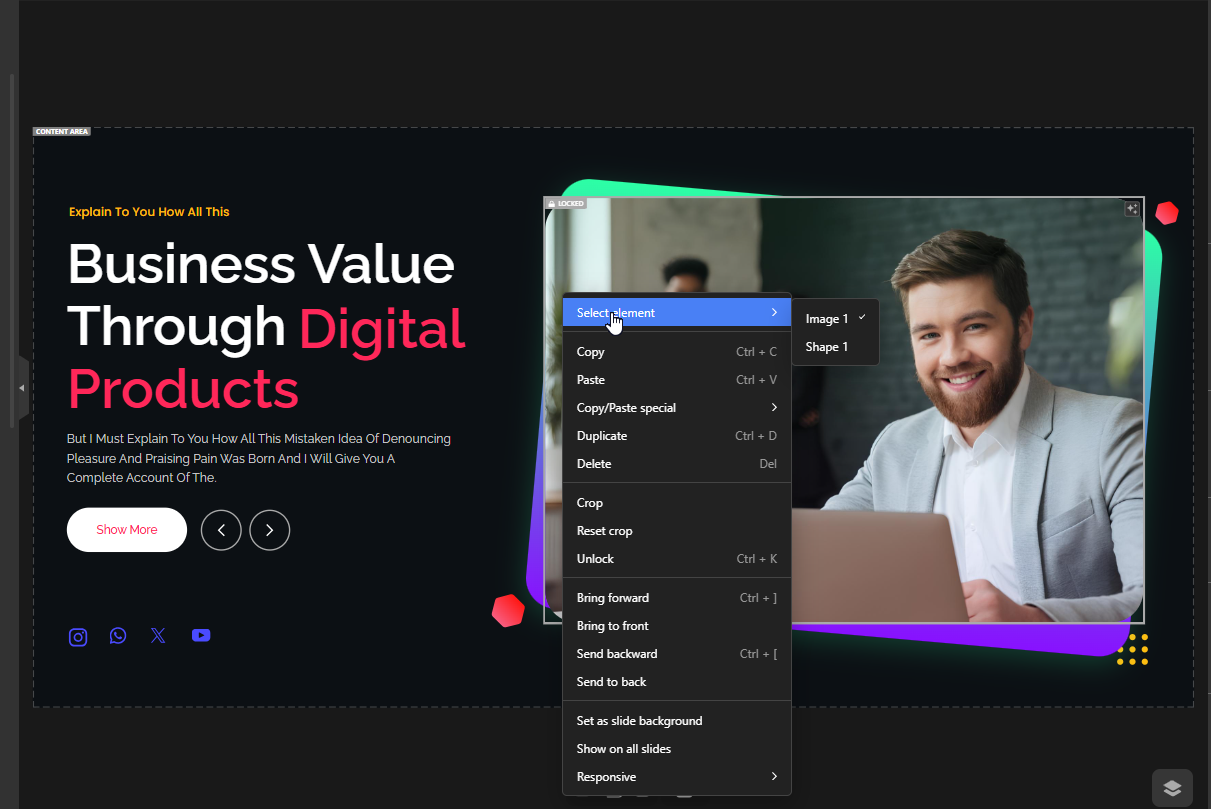
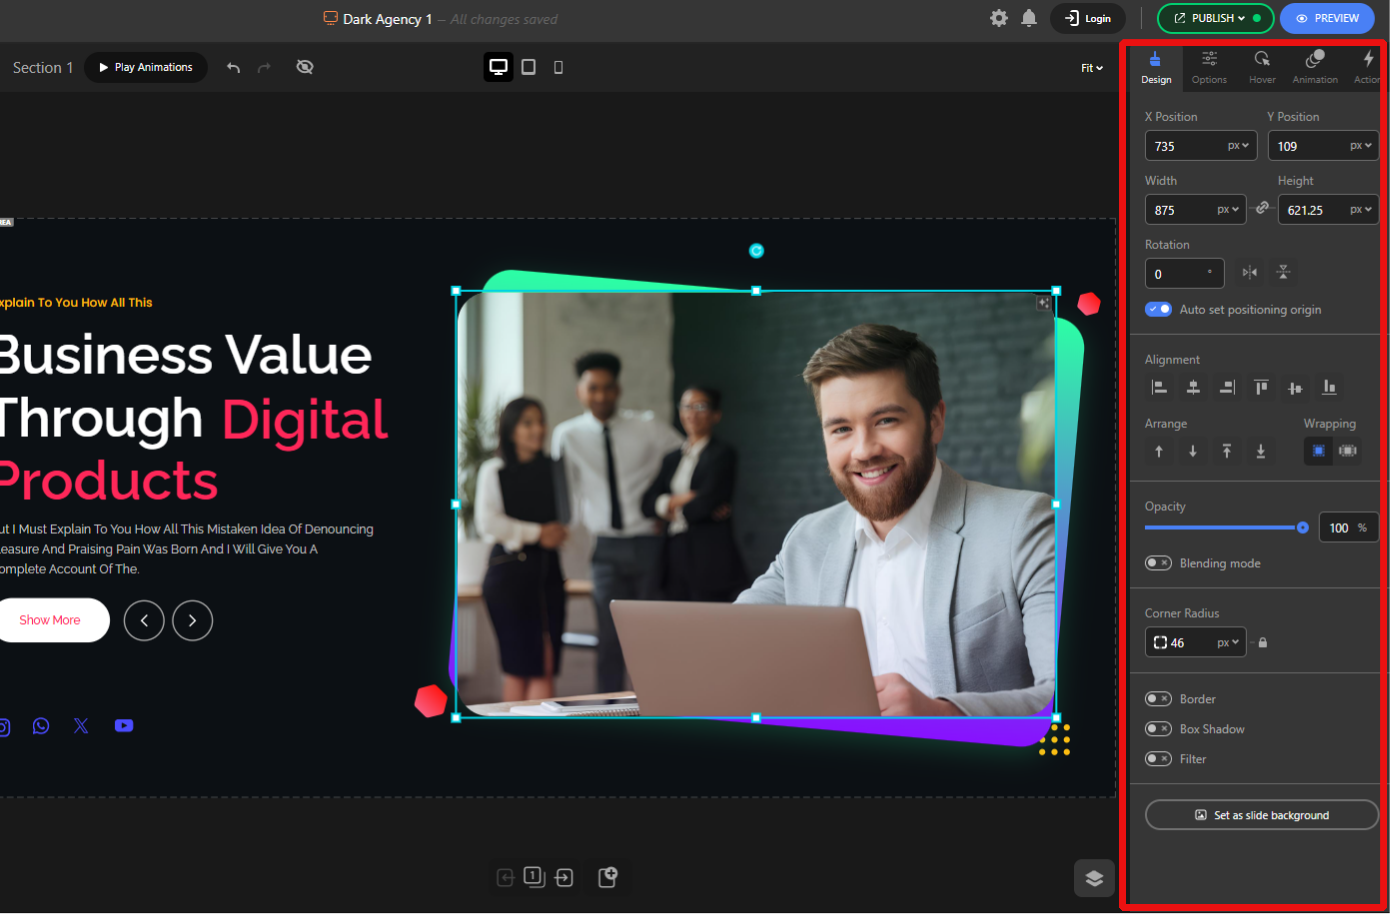
With a single click, import one and it will open in the editor. Here, you can edit and customize every detail.
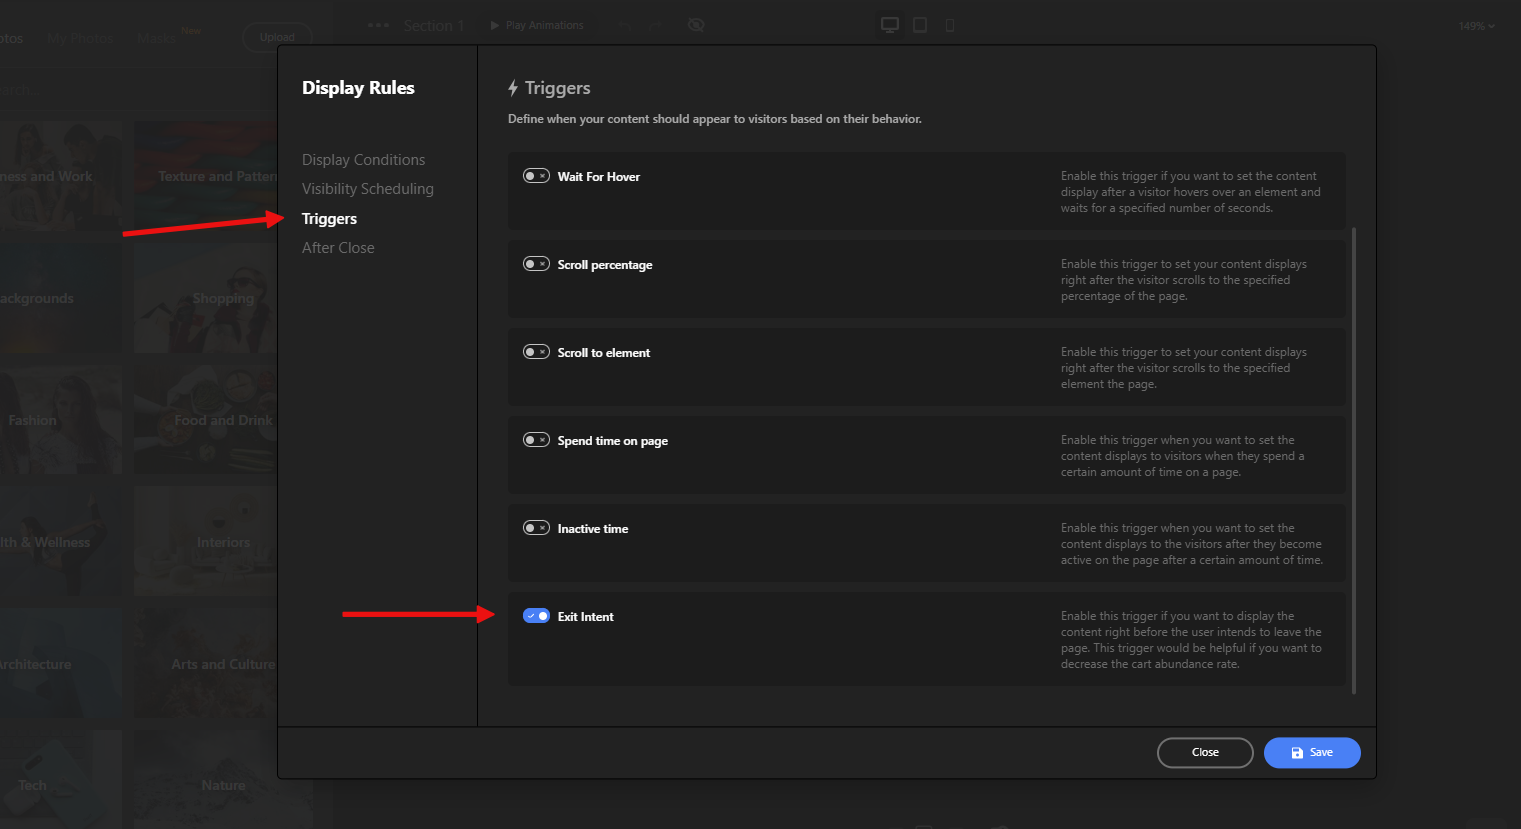
To set the display conditions — in this case, we want exit intent — click Publish, then go to Display Rules and hit Configure.
From the Triggers options, enable Exit Intent.
Now, whenever a visitor tries to leave the page, the popup will appear and grab their attention.
An exit-intent popup offering “Take 15% off now — use BOO15” when a customer tries to leave the cart can reduce abandonment and recover otherwise lost sales — especially useful for Halloween weekend promotions.
Add a Notification Bar for Quick Announcements
A notification bar (top or bottom) is a lightweight way to show short messages: sitewide Halloween sale, free shipping, or a limited-time promo.
Depicter’s notification bar builder offers templates, scheduling, and simple CTAs so you can communicate an urgent message without blocking content.
For the notification bar, the process is similar to creating a popup. Simply choose a suitable template from the available options and import it.
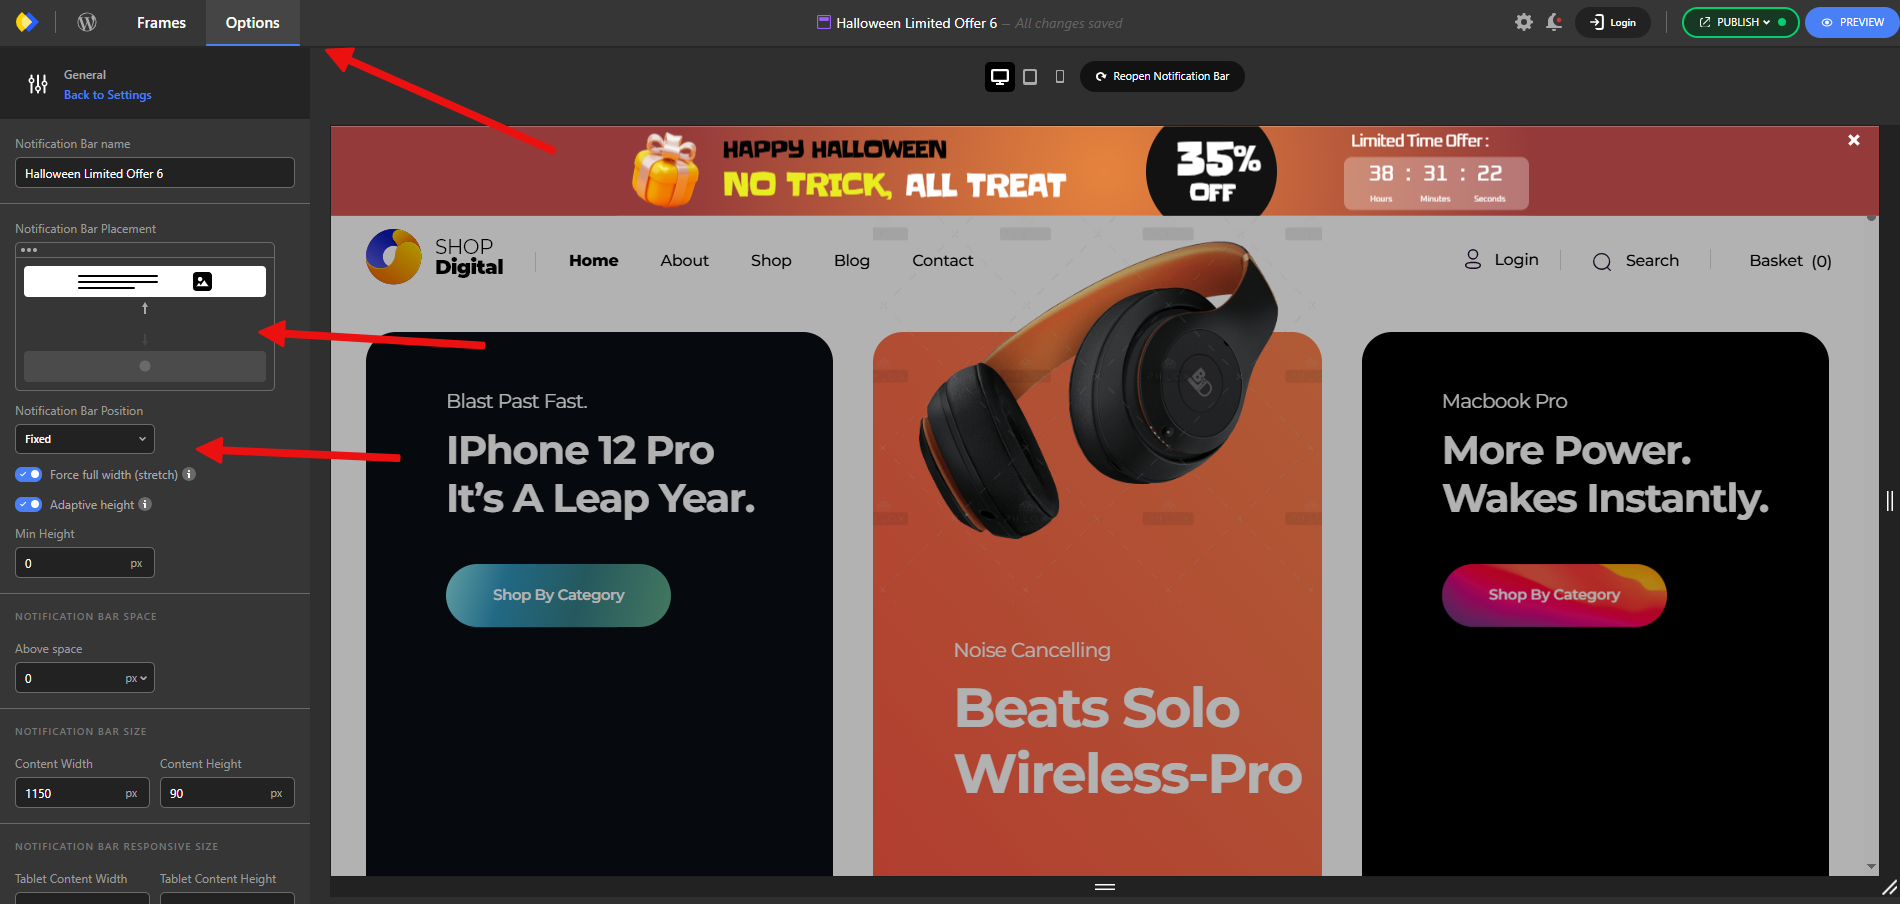
The main difference is that the key customization settings for a notification bar are usually about where it appears on the page and how it is displayed. You can adjust these from the Options menu.
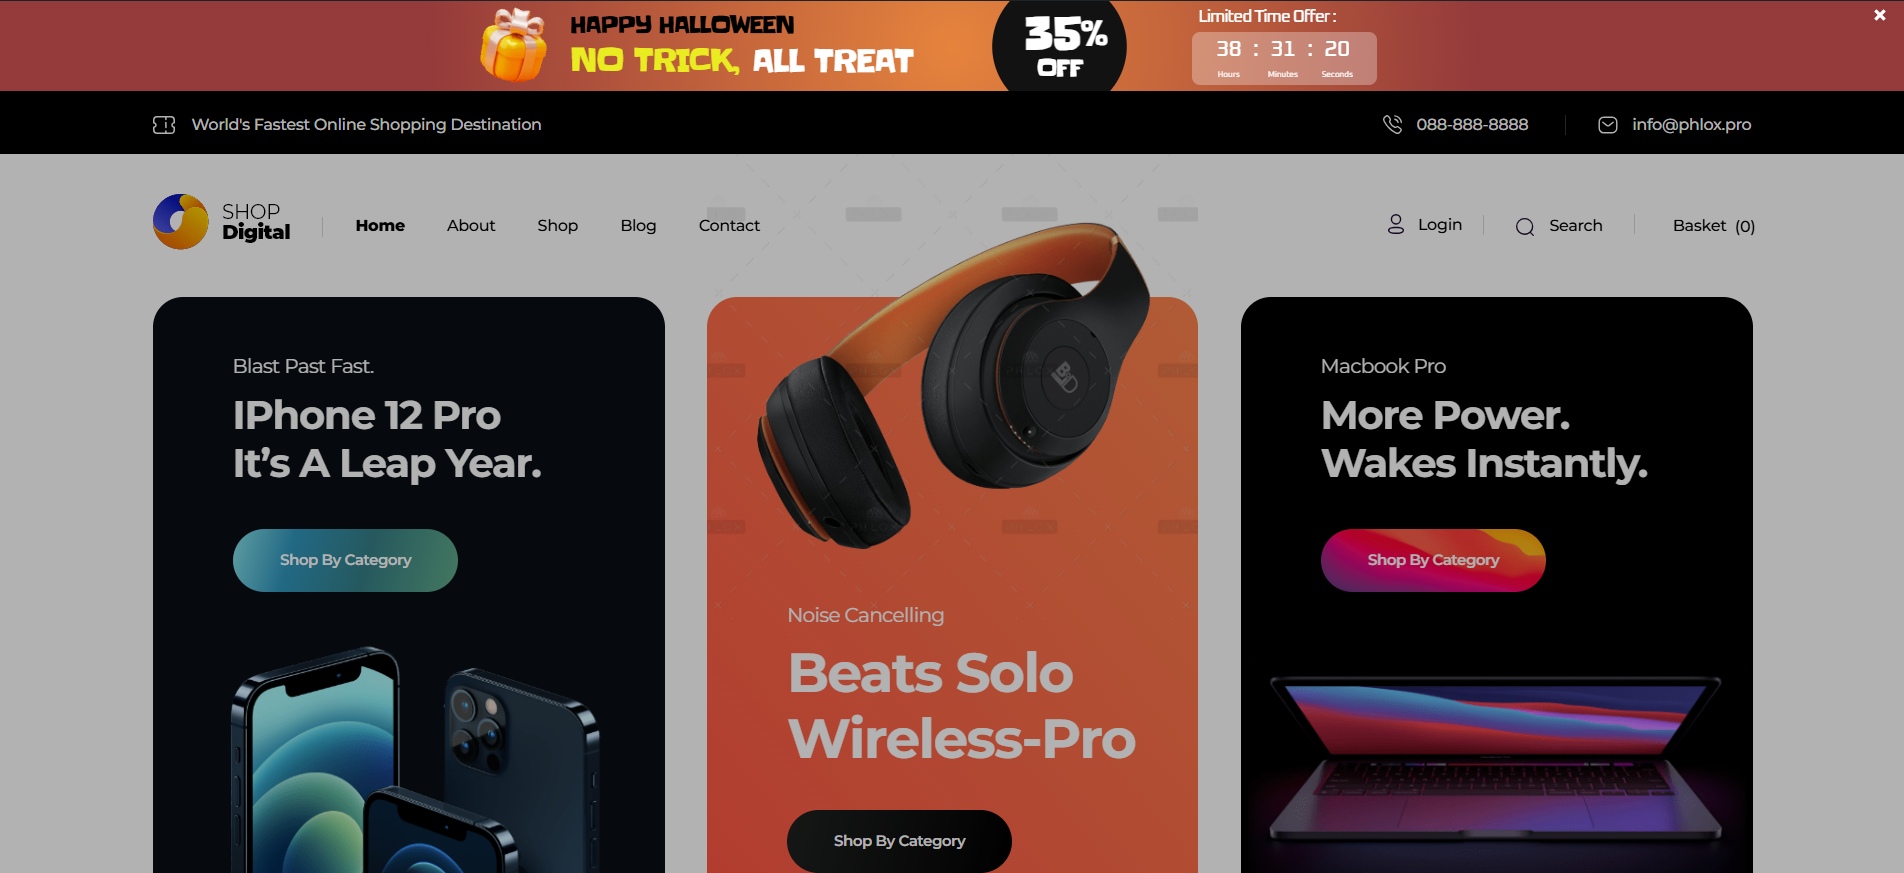
Once everything is set, your Halloween-themed notification bar will be displayed on your website like this.
A small top bar announcing “Free shipping for Halloween orders over $50” with a link to the sale collection keeps the message visible without being intrusive, nudging more users to click and convert.
Running a WooCommerce store is exciting. But turning visitors into paying customers is where the real challenge begins. Many store owners launch their site full of hope, only to realize sales don’t come in as easily as expected.
The good news? Boosting WooCommerce sales isn’t about luck. It’s about strategy. With the right tools, smart tweaks, and proven methods, you can turn your store into a sales machine.
In this guide, we’ll break down practical steps to increase your WooCommerce sales. So, without any further ado, let’s get started!
Key Takeaways
Audit First: Before making changes, audit your store’s performance. Understand key metrics like conversion rate and AOV, and benchmark them against industry standards to find your biggest opportunities.
Master SEO: Optimize your store for search engines by conducting thorough keyword research, perfecting on-page and technical SEO, and using content marketing to drive organic traffic.
Focus on CRO: Implement Conversion Rate Optimization (CRO) by analyzing your sales funnel, enhancing product pages with high-quality visuals and social proof, and streamlining your checkout process to reduce friction.
Increase AOV: Boost your Average Order Value (AOV) with strategic upsells and cross-sells on product pages, in the cart, and at checkout. Implement smart pricing like bundles and tiered discounts.
Leverage Email Marketing: Build and segment your email list to run automated workflows for abandoned carts, welcome series, and post-purchase follow-ups. Email provides one of the highest ROIs in marketing.
Prioritize Speed: A fast-loading store is crucial for sales. Optimize your site speed through quality hosting, caching, image optimization, and ensuring a seamless mobile experience.
6 Proven Steps to Skyrocket Your WooCommerce Sales
Want to sell more on your WooCommerce store? Follow these 6 proven steps to skyrocket your WooCommerce sales.
Audit Your WooCommerce Store’s Performance
Optimize Your WooCommerce Store for Search Engines
Work on Conversion Rate Optimization (CRO)
Increase Average Order Value (AOV)
Utilize Email Marketing
Speed Up Your WooCommerce Store
Each of these steps can give your sales a serious push. Now let’s break them down one by one and see how you can put them into action.
Step 1: Audit Your WooCommerce Store’s Performance
Before you can improve your WooCommerce sales, you must first understand where you stand. A thorough performance audit is the critical first step to identifying the leaks in your sales funnel and uncovering opportunities for growth.
1.1 Understanding Key E-commerce Metrics
Data provides the map for your optimization journey. Familiarize yourself with these essential Key Performance Indicators (KPIs) to track your store’s health:
Conversion Rate: The percentage of visitors who complete a purchase. This is a primary indicator of your store’s overall effectiveness
Average Order Value (AOV): The average amount spent each time a customer places an order. Increasing AOV is a direct path to higher revenue
Cart Abandonment Rate: The percentage of shoppers who add items to their cart but leave without completing the purchase. Plugins like StoreGrowth help with reducing cart abandonment, while ensuring higher AOV.
Customer Lifetime Value (CLV): The total revenue you can expect from a single customer over their entire relationship with your business. This metric shifts focus from single transactions to long-term profitability
Customer Acquisition Cost (CAC): The total cost of sales and marketing efforts needed to acquire a new customer
Depicter can also help reduce cart abandonment with exit-intent popups. By showing personalized offers or reminders right before a shopper leaves, you get a second chance to capture the sale and keep customers engaged.
1.2 Actionable Step: Compare Your Data to Industry Benchmarks
Once you have your numbers, see how they stack up. While performance varies, industry benchmarks provide a useful baseline.
In 2025, the average global e-commerce conversion rate hovers between 2% and 4%.
Industry
Average Conversion Rate (2025)
Personal Care
6.8%
Food & Beverages
4.9%
Electronics & Home Appliances
3.6%
Pet Care
2.32%
Cars & Automobile Parts
2.1%
Retail (Fashion, Jewelry)
1.9%
Home Decor
1.4%
Source: SpeedCommerce
Device-specific benchmarks are also crucial. While mobile drives the most traffic, desktop still boasts a higher conversion rate (4.8% vs. 2.9%), highlighting the need for a smooth experience on all platforms.
1.3 A Quick-Win Audit Checklist for Your WooCommerce Store
Perform these quick checks to identify immediate areas for improvement:
Speed Test: Use tools like Google PageSpeed Insights to analyze your load times. Your Largest Contentful Paint (LCP) should be under 2.5 seconds.
Checkout Flow: Go through the entire purchase process yourself. Is it simple? Are there any unnecessary fields or steps? Is guest checkout an option?
Mobile Experience: Test your store on multiple mobile devices. Are buttons large and easy to tap? Is navigation intuitive? Is the text legible without zooming?
Step 2: Optimize Your WooCommerce Store for Search Engines
Search Engine Optimization (SEO) is the art and science of making your store visible to customers actively searching for your products on Google and other search engines.
2.1 How to Do Keyword Research for Your WooCommerce Products
Effective SEO starts with understanding the exact words and phrases your customers use.
By uncovering the language they naturally type into Google, you’re not just optimizing for algorithms, you’re serving what shoppings are actually searching for; questions, and buying triggers.
Identify Your Target Market: Understand who your ideal customer is, their pain points, and the language they use.
Use “Google Suggest”: Start typing a product name into Google and see what autocomplete suggestions appear. These are long-tail keywords that real people are searching for.
Analyze Competitors: Use SEO tools to see which keywords are driving traffic to your competitors’ sites.
Focus on Search Intent: Determine the goal a user has when searching. For e-commerce, keywords with commercial intent (e.g., “buy red running shoes”) are highly valuable.
2.2 On-Page SEO for Product & Category Pages: A Complete Checklist
On-page SEO involves optimizing the individual pages of your store.
When each page is optimized, search engines can better understand what you’re selling, and customers are more likely to find you right when they’re ready to buy.
Title Tags: Include your primary keyword near the beginning of the title. Keep it under 65 characters to avoid it being cut off in search results.
Meta Descriptions: Write a compelling summary (under 150 characters) that includes your keyword and entices users to click.
Headings (H1, H2, etc.): Use a single, keyword-rich H1 tag for your page title. Use H2 and H3 tags to structure the rest of your content.
Product Descriptions: Write unique, benefit-driven descriptions. Don’t just copy from the manufacturer, as this can create duplicate content issues.
Image Alt Text: Add descriptive alt text to all product images. This helps search engines “see” your images and improves accessibility.
URLs (Slugs): Use short, descriptive URLs that include your main keyword (e.g., yourstore.com/womens-shoes/red-running-shoes).
2.3 Technical SEO Best Practices for WooCommerce
Technical SEO ensures your site’s foundation is solid, allowing search engines to crawl and index it efficiently.
Submit an XML Sitemap: A sitemap is a roadmap of your store. Use an SEO plugin to generate one and submit it to Google Search Console.
Use Schema Markup (Rich Snippets): Schema is a special code that helps search engines understand your product data (price, availability, reviews). This can result in “rich snippets”, enhanced search listings with star ratings and pricing, that dramatically increase click-through rates.
Ensure Mobile-Friendliness: A responsive design that adapts to all screen sizes is non-negotiable.
Fix Broken Links: Routinely scan your site for dead links and update or remove them to ensure a smooth user experience.
Secure Your Site with HTTPS: An SSL certificate is essential for protecting customer data and is a confirmed ranking factor.
2.4 Using Content Marketing and Link Building to Drive Traffic
Content marketing establishes your brand as an authority and attracts customers through valuable information.
Start a Blog: Write blog posts that answer your customers’ questions, offer solutions to their problems, and provide value beyond just selling a product. This can include “how-to” guides, buying guides, or industry news.
Create Video Content: Product demonstrations, tutorials, and behind-the-scenes videos can engage customers and be shared across social media.
Build Links: Earn backlinks from reputable sites in your industry by creating high-quality content, contributing expert quotes to media outlets, or appearing as a guest on podcasts.
2.5 Essential WooCommerce SEO Plugins and Tools
Make the most out of powerful plugins to simplify your SEO efforts:
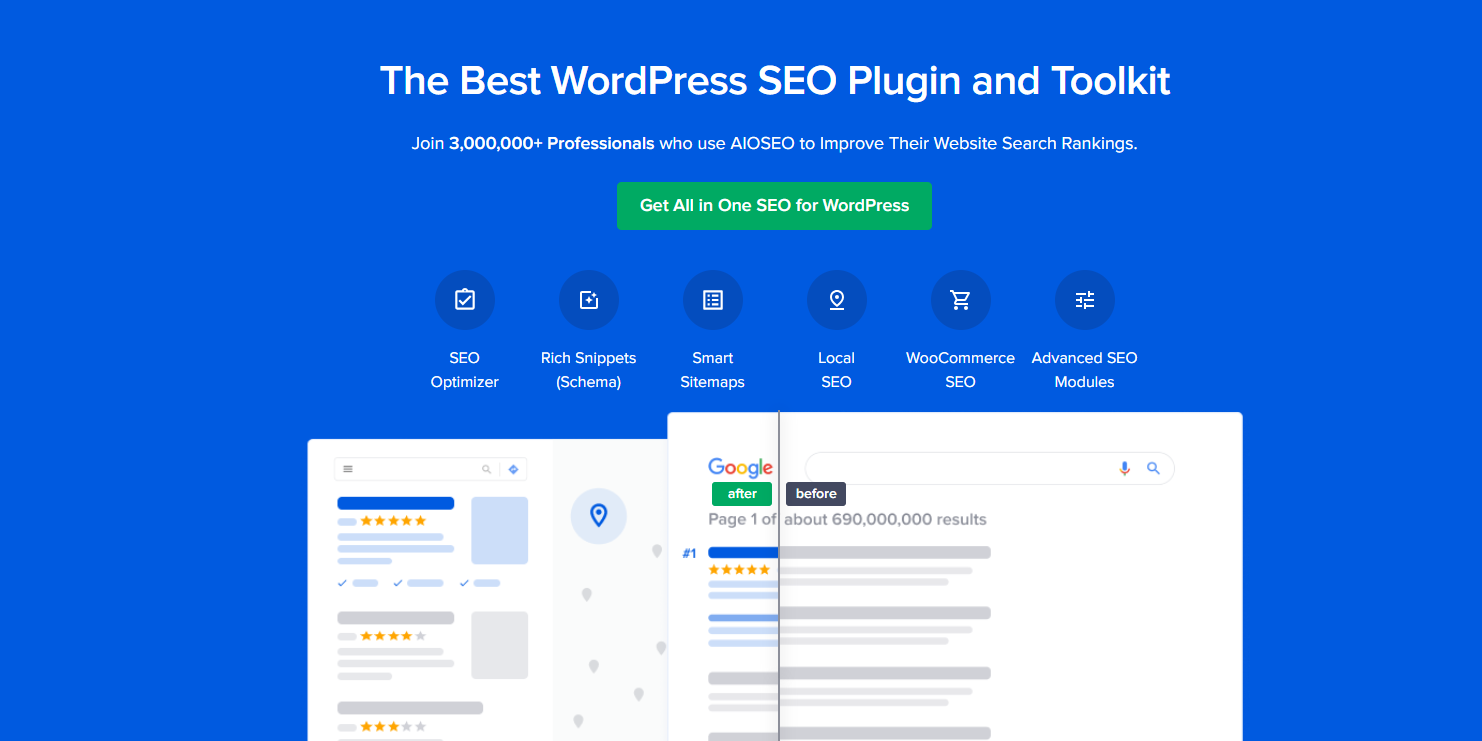
All in One SEO (AIOSEO)
AIOSEO is designed for store owners who want powerful SEO without the steep learning curve. It guides you through optimizing titles, meta descriptions, and product content with built-in checklists.
Beyond on-page SEO, it automatically generates XML sitemaps, integrates with social media, and supports schema markup, helping search engines better understand your products and improving your chances of showing up in rich results
Rank Math
Known for its extensive free feature set, including basic WooCommerce SEO and internal link suggestions. It covers all the SEO basics (like meta optimization and breadcrumbs) while also providing WooCommerce-specific features such as product schema, advanced SEO analysis, and internal link suggestions.
For growing stores, it even includes features like 404 monitoring and redirection management, so you can keep your site healthy without extra plugins.
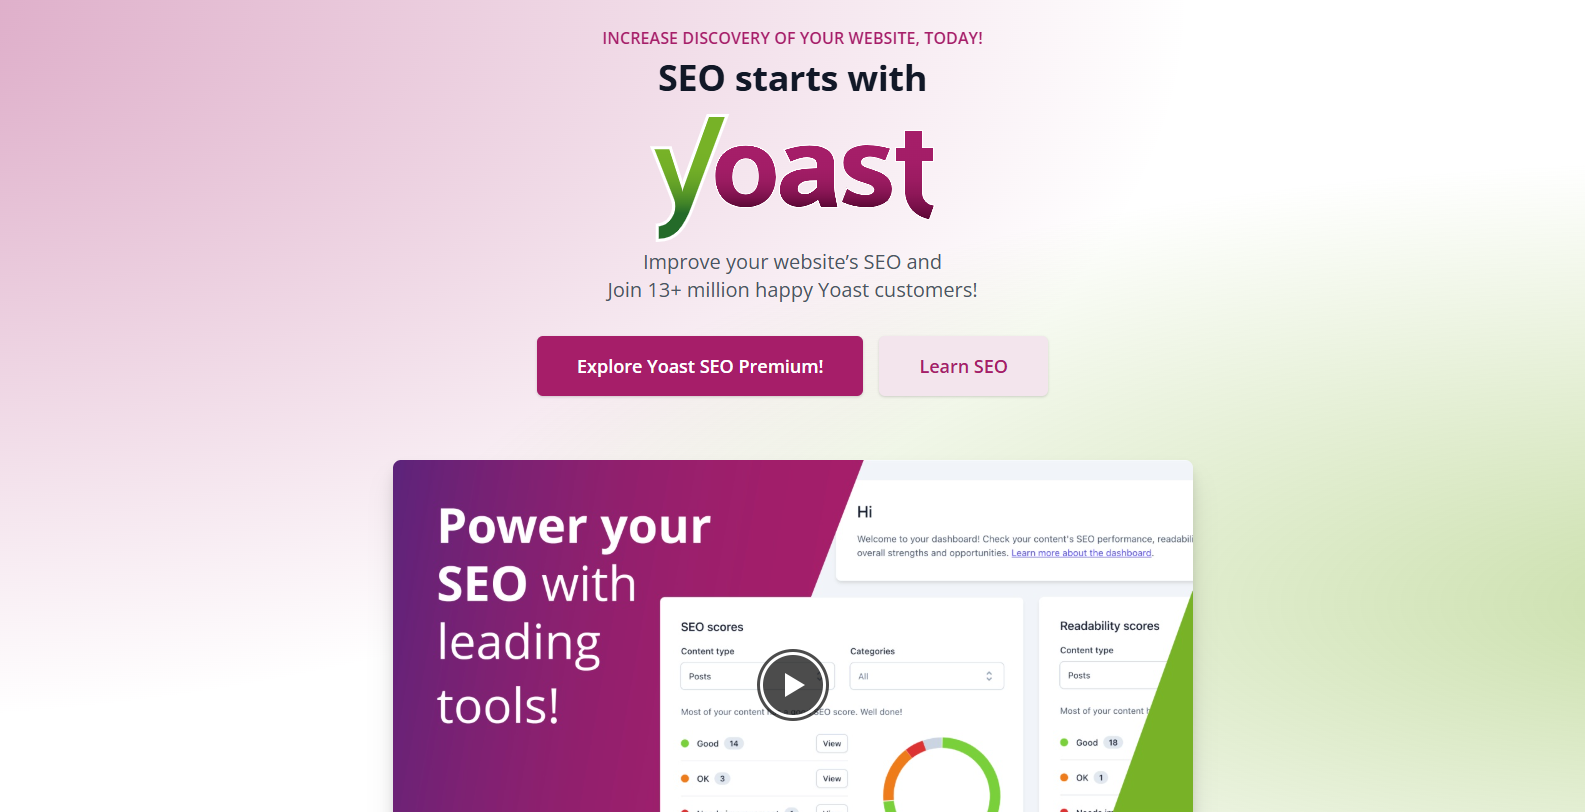
Yoast SEO
Yoast is trusted by millions of WordPress users. Its strength lies in content optimization, it analyzes your product pages and blog posts in real time, offering suggestions to improve readability and keyword use.
The dedicated WooCommerce SEO add-on takes it a step further by optimizing category pages, breadcrumbs, and structured data, making sure your products are not just listed, but showcased effectively in search results.
2.6 Local SEO for WooCommerce
For businesses with physical stores, Local SEO is a game-changer. It connects your digital presence with your physical locations, targeting high-intent customers searching for products “near me.”
Its WooCommerce add-on further optimizes category pages, breadcrumbs, and structured data so your products stand out in search results.
Optimize Your Google Business Profile (GBP)
This is your digital storefront on Google. Complete every field: business name, address, phone number (NAP), hours, and a detailed description.
Use precise categories (e.g., “Specialty Food Shop”) and add high-quality photos of your products and store. Enable messaging and post regular updates about new items or sales.
Create Location-Specific Landing Pages:
Each physical store should have its own dedicated page on your website. This page should include the store’s unique NAP, hours, local testimonials, and localized content (e.g., “Best Winter Coats for the Denver Climate”).
This helps each location rank independently in its geographic area.
Use Local Keywords
Optimize your location pages and content with local keywords. Instead of just “handmade furniture,” target “handmade furniture in Austin.”
This reduces competition and attracts highly qualified local buyers.
Integrate WooCommerce with Local Offerings
Use your WooCommerce setup to offer local pickup, same-day delivery within specific zones, or display in-store stock levels.
These features bridge the gap between your online and offline experiences, providing convenience that drives local sales.
Step 3: Work on Conversion Rate Optimization (CRO)
Conversion Rate Optimization (CRO) is the process of systematically improving your website to increase the percentage of visitors who make a purchase.
3.1 Using Funnel Analysis to Find and Fix Revenue Leaks
Use analytics tools to track the customer journey from the homepage to the thank you page.
Identify where users are dropping off – is it on a specific product page? Or during the checkout process? This data will reveal the friction points that need fixing.
3.2 How to Optimize Product Pages for Higher Conversions
The product page is your digital salesperson. Every element must work to persuade the visitor.
Use High-Quality Visuals: Display multiple high-resolution images and product videos to help customers visualize the item.
Write Persuasive Copies: Rather than selling your features, focus on the benefits derived from your product. Use clear, compelling language and a prominent call-to-action (CTA) button.
Leverage Social Proof: Displaying customer reviews and ratings is incredibly powerful. A product with just five reviews can see a 270% increase in its conversion rate compared to one with none. You can also use tools to display live sales notifications to build trust.
Offer a Quick View Option: Allow users to see product details and add items to their cart from the category page without a full page load, reducing friction. A Fly Cart can further streamline this experience.
3.3 Optimizing the WooCommerce Checkout Process to Reduce Abandonment
The checkout is where most sales are lost. Make it as frictionless as possible.
Eliminate Surprises: Be transparent about all costs, including shipping and taxes, upfront. Unexpected costs account for the majority of carts being abandoned.
Offer Guest Checkout: Any forceful action creates friction. By pushing users to create an account, a lot of customers will fall off the lead pipeline. 24% of shoppers will abandon a purchase if required to create an account.
Simplify Forms: Only ask for the absolute minimum information required to complete the order. Use a single-page checkout where possible.
Provide Multiple Payment Options: Accept major credit cards, digital wallets like PayPal and Apple Pay, and other popular payment gateways.
3.4 Using Trust Signals and Urgency to Increase Sales
Build confidence and motivate immediate action with psychological triggers.
Display Trust Seals: Show security badges (SSL certificates) and logos of accepted payment methods to reassure customers their data is safe
Create Urgency: Use limited-time offers and countdown timers to encourage customers to buy now rather than later.
Signal Scarcity: Display low-stock warnings (e.g., “Only 3 left!”) to create a fear of missing out (FOMO).
With Depicter, you can easily design time-limited offers like countdown timers, seasonal banners, or flash sale popups. These visuals push customers to act faster and directly improve your WooCommerce conversion rate.
3.5 How to A/B Test Your WooCommerce Store for Better Results
Don’t guess what works – test it. A/B testing (or split testing) involves comparing two versions of a page to see which one performs better.
What to Test: Experiment with different headlines, product descriptions, CTA button colors and text (“Add to Cart” vs. “Buy Now”), and checkout page layouts.
How to Test: Use tools like Google Optimize, VWO, or Optimizely to split your traffic between the two versions and measure the results.
Best Practices: Formulate a clear hypothesis for each test (e.g., “Changing the CTA button to red will increase clicks”) and run the test long enough to gather statistically significant data.
Step 4: Increase Average Order Value (AOV)
Increasing the amount each customer spends is one of the fastest ways to grow revenue without needing more traffic.
We like to optimize our WooCommerce stores with the StoreGrowth plugin, as its advanced features help to lift the AOV, decrease cart abandonment, and encourage customer loyalty.
4.1 Upsell and Cross-sell Strategies for WooCommerce
Upsells
Encouraging customers to purchase a more expensive, premium version of the product they are considering (e.g., a larger size, a more powerful model).
Cross-sells
Recommending complementary products that enhance the original purchase (e.g., suggesting batteries for an electronic toy or a case for a new phone).
Cart/Checkout Page: Use an “order bump” – a simple, one-click offer presented directly on the checkout form – to add a low-cost, high-margin item.
Post-Purchase: Use the “thank you” page or follow-up emails to offer a special discount on a related product.
Implementing effective upsells and order bumps is the fastest way to increase AOV. StoreGrowth’s one-click order bump module allows you to add irresistible offers directly on your checkout page.
A complete suite of tools can help you implement these powerful tactics. Plugins like StoreGrowth are designed to seamlessly integrate upselling and cross-selling into your store.
4.2 Implementing Smart Pricing Tiers and Packages
Product Bundling
Group several related products together and offer them at a discounted price compared to buying each item individually. This increases the perceived value and encourages larger purchases.
Volume Discounts
Offer tiered pricing that rewards customers for buying in bulk (e.g., “Buy 2 get 10% off, Buy 3 get 15% off”).
Step 5: Utilize Email Marketing
Email marketing is a powerful channel for building customer relationships and driving repeat purchases. In Digital Marketing, email marketing has always consistently delivered one of the highest ROI.
5.1 How to Build and Segment Your Email List
Capture Emails: Use pop-ups to offer a discount in exchange for an email address. Add a simple, GDPR-friendly checkbox at checkout to let customers opt-in to your newsletter.
Segment Your Audience: Group your subscribers based on their purchase history, browsing behavior, or demographics. This allows you to send highly relevant and personalized messages.
Depicter also makes it simple to grow your email list by creating eye-catching opt-in forms and popups. Instead of plain signup boxes, you can design engaging visuals that capture more leads and boost your WooCommerce email marketing results.
5.2 Setting Up Automated Email Workflows
Automation gives you the ability to talk directly with your prospects without all the manual work. By having a solid email automation system, you nudge the customers at the perfect time for them to take measurable actions.
Welcome Series: Send a series of emails to new subscribers, introducing your brand and offering a first-time purchase incentive.
Abandoned Cart Recovery: Automatically email customers who leave items in their cart, reminding them to complete their purchase. Including a small discount in the third email can be highly effective.
Post-Purchase Follow-up: Send order confirmations, shipping updates, and a request for a product review a week or two after delivery.
5.3 Running Effective Promotional Campaigns
Use your email list to announce sales, new product launches, and personalized offers based on a customer’s past purchases.
Create a sense of exclusivity by giving your email subscribers early access to sales or special list-only discounts.
5.4 How to Measure the ROI of Your Email Marketing
Track key metrics for each campaign, including open rate, click-through rate (CTR), and, most importantly, the conversion rate and revenue generated per email.
Tools like MailPoet or weMail can track this directly in your WordPress dashboard.
Step 6: Speed Up Your WooCommerce Store
In e-commerce, every second counts. If your pages take too long to load, you risk losing both users and visibility in search results.
6.1 Why Site Speed and Core Web Vitals Matter for Sales
Website speed plays a key role in delivering a smooth user experience and boosting SEO performance. Even a 0.1 second improvement in page load speed can boost conversions by 8.4%.
Google’s Core Web Vitals (LCP, INP, CLS) are metrics that measure the real-world user experience of your site, and they directly impact your rankings.
6.2 Key Optimization Tactics: Hosting, Caching, CDNs, and Code Cleanup
A fast, smooth shopping experience isn’t just nice to have, it directly impacts conversions and search rankings. By focusing on key technical optimizations like hosting, caching, CDNs, and code cleanup, you can keep your WooCommerce store running at peak performance.
High-Performance Hosting: Choose a managed WooCommerce host that offers server-level caching and HTTP support.
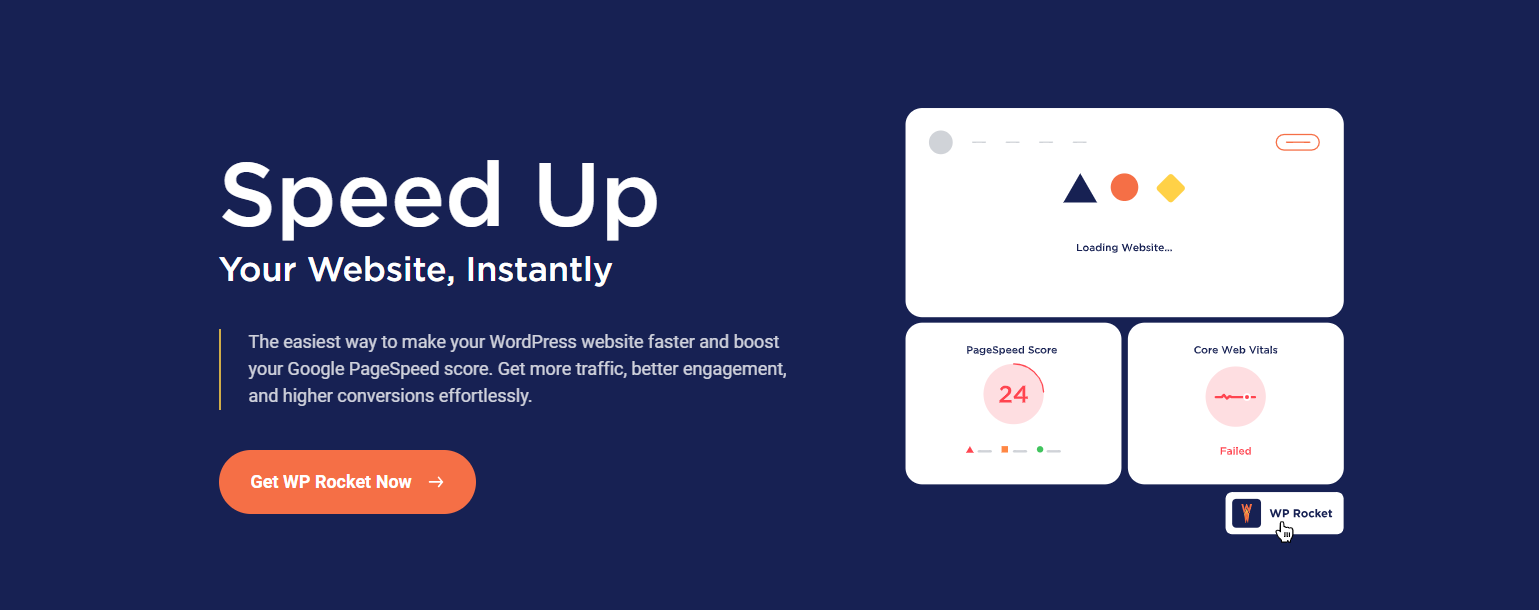
Caching: Use a caching plugin like WP Rocket to create static versions of your pages, reducing server load and speeding up delivery.
Content Delivery Network (CDN): A CDN stores copies of your assets (images, CSS, JS) on servers around the world, delivering them to users from the closest location.
Code Minification: Remove unnecessary characters from your CSS and JavaScript files to reduce their size.
Image Optimization: Compress images and use modern formats like WebP. Use lazy loading so images outside the initial view load only when visitors scroll down.
6.3 Mobile Optimization: Creating a Seamless Shopping Experience
With mobile commerce projected to account for 59% of all e-commerce sales in 2025, a flawless mobile experience is essential.
Use a Responsive Theme: Ensure your theme automatically adjusts to fit any screen size.
Simplify Navigation: Use a “hamburger” menu and ensure buttons are large enough (at least 44px) to be easily tapped.
Avoid Intrusive Pop-ups: Pop-ups that are difficult to close on a small screen can be a major source of frustration.
6.4 Specific Strategies for Checkout Speed Optimization
The checkout page needs to be as fast and light as possible.
Minimize Scripts: Limit the number of scripts and third-party integrations loading on the checkout page.
Use Lightweight Payment Gateways: Some payment gateways are lighter and faster than others. Test their impact on performance.
6.5 Continuous Performance Monitoring and Maintenance
Performance optimization is an ongoing process. Regularly monitor your Core Web Vitals and run speed tests to catch issues before they impact your sales.
Bonus: Advanced Strategies to Drive Even More Growth
7.1 Setting Up Google Analytics 4 for Enhanced E-commerce Tracking
Google Analytics 4 (GA4) provides deep insights into how users interact with your store. Use a plugin like ExactMetrics to easily set up enhanced e-commerce tracking, which allows you to monitor user lifetime value, funnel performance, and more without writing any code.
7.2 Using Heatmaps to Understand User Behavior on Your Store
Heatmaps are visual representations of where users click, move their mouse, and scroll on your site.
Tools like Hotjar or Microsoft Clarity can reveal which elements are getting attention and which are being ignored, providing invaluable insights for A/B testing and design improvements.
7.3 Integrating a CRM with WooCommerce for a 360-Degree Customer View
Integrating an email and SMS marketing platform that functions as a Customer Relationship Management (CRM) solution, like weMail or Omnisend, allows you to consolidate all customer data in one place. This enables highly personalized marketing based on a complete view of every interaction a customer has had with your brand.
7.4 Building Your Essential WooCommerce Plugin Stack
Beyond a great theme and an SEO plugin, your stack should include:
A Performance Plugin: A tool like WP Rocket for caching and file optimization.
An Analytics Plugin: A tool like MonsterInsights or ExactMetrics for easy GA4 integration.
A Sales Booster Plugin: A multi-functional sales booster plugin like StoreGrowth that handles CRO tactics like urgency timers, social proof notifications, and upsells.
Frequently Asked Questions (FAQ)
Q: How long does it take to see results from these WooCommerce optimization strategies?
The timeline for results varies. Technical changes like improving site speed can show an impact on user engagement and bounce rates within days.
SEO strategies typically take 3-6 months to yield significant results in organic traffic. CRO tactics like A/B testing can produce measurable lifts in conversion rates within a few weeks, depending on your traffic volume.
Q: What is the single most important metric to track for boosting WooCommerce sales?
While all metrics are important, the Conversion Rate is arguably the most critical. It directly measures how effectively your store turns visitors into paying customers.
Improving your conversion rate means you’re getting more value from the traffic you already have, making it a powerful lever for growth.
Q: Can I implement these strategies if I’m not a technical expert?
Absolutely. Many of these strategies can be implemented using user-friendly plugins. For SEO, plugins like AIOSEO or Rank Math guide you through the process.
For CRO and AOV, WooCommerce plugins like StoreGrowth are designed to add advanced features like countdown timers and upsells without any coding required. For site speed, caching plugins like WP Rocket automate much of the optimization process.
Q: Should I focus on acquiring new customers or retaining existing ones?
Both are important, but retaining existing customers is often more cost-effective. It can cost 5 to 25 times more to acquire a new customer than to keep a current one.
Strategies like email marketing, loyalty programs, and excellent customer service (covered in Step 5) are key to increasing Customer Lifetime Value (CLV) and building a sustainable business.
Conclusion: Your Roadmap to Sustainable E-commerce Growth
Boosting your WooCommerce sales is a marathon, not a sprint. It requires a strategic and continuous cycle of auditing, optimizing, testing, and refining. By building a strong technical foundation, understanding the psychology of your customers, and leveraging the right tools, you can create a powerful engine for sustainable growth.
Each step in this guide – from speeding up your site and mastering SEO to optimizing your checkout and nurturing customer loyalty – is a crucial piece of the puzzle. Implementing these strategies will not only increase your conversions but also build a resilient business that thrives in the competitive e-commerce landscape.
Ready to implement these powerful conversion tactics without touching a line of code? StoreGrowth ties it all together with urgency timers, social proof, and a frictionless checkout, so you can focus on growing your store.
Want more expert WooCommerce tips delivered straight to your inbox? Join our newsletter and get exclusive guides, strategies, and updates.
When building sliders in WordPress, ease of use is just as important as having powerful design features. Many plugins offer advanced tools, but overwhelm users with complicated interfaces. Depicter solves this by combining a clean, modern UI with a true drag-and-drop experience. It allows beginners to design sliders without code while giving professionals the flexibility to create complex layouts and animations quickly. The result: faster workflows, less frustration, and professional results every time.
There’s a simple test you can try yourself. Import a template from a different slider plugin, then try moving some elements around, resizing them, and changing their content. You’ll quickly notice the difference. Below, we’ve explained some of these features in detail.
In this guide, I will show why Depicter stands out as the best WordPress slider plugin. Instead of just providing a list of features, I offer detailed explanations and direct comparisons with other popular slider plugins. By breaking down both the strengths and weaknesses, you’ll clearly see how Depicter makes designing sliders faster, easier, and more professional.
Feature
Depicter
Slider Revolution
Smart Slider 3
Description
True Drag-and-Drop
Yes
Partial
Partial
Depicter allows free placement of any element, not restricted to grids. Others limit positioning.
Alignment & Auto Snapping
Yes
Partial
Partial
Depicter provides smart alignment guides and snapping for pixel-perfect layouts.
Not Restricted to Grid System
Yes
Partial
Partial
Depicter frees you from strict row/column layouts; great for creative designs.
Layers Panel
Yes
Yes
Yes
Depicter’s floating panel makes navigating, selecting, and moving layers easier.
Lock Elements
Yes
Partial
No
Full locking in Depicter prevents accidental moves; others have weaker lock functions.
Selecting Overlapping Elements
Yes
No
No
Depicter allows direct selection of overlapping items on the canvas.
Contextual Options Panel
Yes
Partial
Partial
Depicter shows clear, element-specific options.
Duplicate Slides
Yes
Yes
Yes
All support duplication, but Depicter makes it one-click and keeps consistent structure.
Depicter offers these controls clearly and intuitively; others bury them in menus.
Replace Images via Drag & Drop
Yes
No
No
Depicter lets you drag new images directly over old ones for instant replacement.
Set Image as Background via Drag & Drop
Yes
No
No
Unique to Depicter: drop an image onto canvas edges to set as background.
Copy & Paste Styles
Yes
Yes
No
Depicter saves time by allowing style-only copy/paste across elements.
Hide Elements in Responsive Modes
Yes
Yes
Yes
Depicter lets you hide elements per device mode without deleting them.
Live Editing & Preview
Yes
Partial
Yes
Depicter provides instant preview with animation replay inside editor.
Auto Save Before Publish
Yes
No
No
Depicter auto-saves drafts but changes only go live when published.
Undo/Redo + Hotkeys
Yes
Yes
Yes
Depicter fully supports standard hotkeys (e.g., CTRL+Z) for smooth workflow.
Resize & Rotate Elements Easily
Yes
Partial
Partial
Depicter allows intuitive resizing and rotation directly on canvas.
Version History
Yes
No
No
Depicter offers version rollback with live previews.
Advanced Typography (gradients, Google fonts, custom fonts, shadows, etc.)
Yes
Partial
Partial
Depicter gives complete typography control without coding.
Hover Effects + Element Animations
Yes
Yes
Yes
Depicter lets you add hover effects and customized animations per element.
Categorized Animation Options
Yes
Partial
Partial
Depicter organizes animations by category for easier use.
Fully Categorized Options Panel
Yes
Partial
Partial
Depicter’s panel is clean and structured.
Grouping Elements
Yes
Partial
No
Depicter allows grouping for easier move/resize.
Auto Layout (Grid/Flex inside Groups)
Yes
No
No
Exclusive to Depicter: auto layout for grouped elements using Grid or Flex.
True Drag-and-Drop
Place any element anywhere – You’re not restricted to a rigid row-and-column grid. You can drag elements freely across the canvas.
Auto snapping & alignment guides – Helps align items perfectly without guessing, making layouts look professional with less effort.
💡 Why it matters: Instead of struggling with fixed grids, you get total design freedom while still maintaining neat, balanced layouts.
Other slider plugins:
Slider Revolution:
It has drag-and-drop, but it feels limited. For example, you can’t always freely move grouped elements or elements inside rows. Editing imported sliders quickly becomes frustrating because changing positions breaks layouts. Like Depicter, it also has snapping guides, but with more limited functionality. For example, if you want to align a layer based on other layers, it doesn’t accurately show the edges, and unlike Depicter, it doesn’t display the spacing either.
Smart Slider 3:
This plugin is fully based on a row-and-column system. To move elements freely, you have to manually change their position settings. This creates a confusing and complicated workflow. Also, apart from two guide lines that show the center of the slide, there are no other snapping guides.
Layers Panel
Manage all your elements in one organized list.
Quickly select, reorder, or hide layers without hunting around the canvas.
💡 Why it matters: Keeps projects organized, especially when working with complex sliders containing many elements.
Other slider plugins:
Slider Revolution:
It has a layers panel, but it’s not as intuitive. It always sits at the bottom of the editor, unlike Depicter’s floating panel, which you can move around freely.
Smart Slider 3:
Like Slider Revolution, it has a timeline that also works as the layers panel, and it’s always fixed at the bottom of the screen.
Lock Elements
Lock items in place so they don’t accidentally move while you’re designing.
💡 Why it matters: Saves time and avoids frustration during detailed adjustments.
Other slider plugins:
Slider Revolution:
It has this feature, but once a layer is locked, clicking it becomes difficult. If the locked layer is in a group, moving the group still moves the locked layer, which defeats the purpose. Depicter avoids these headaches.
Smart Slider 3:
This plugin does not have this feature.
Selecting Overlapping Elements
Easily select elements even when multiple layers overlap.
💡 Why it matters: Makes editing smoother on complex or crowded designs, where you’d otherwise waste time searching for the right element.
Other slider plugins: Slider Revolution: Doesn’t have this in the right-click menu. You must go to the layers panel and manually find the item you want.
Smart Slider 3:
This plugin does not have this feature.
Contextual Options Panel
Each element has its own specific options in the right-hand panel (e.g., set an image as the slide background).
General controls + element-specific settings in one place.
💡 Why it matters: Streamlines your workflow—no need to dig through menus or write code.
Other slider plugins:
Slider Revolution:
Like Depicter, it shows options for each selected layer, but visually it’s cluttered — options feel crammed together, which makes the editor tiring and confusing for beginners.
Smart Slider 3:
It has a floating menu that sits on the right side of the screen by default, with a very simple UI and not so many features.
Duplicate Slides
Duplicate any slide with a single click.
Great for keeping a consistent structure across multiple slides.
💡 Why it matters: Perfect for building uniform sliders quickly, like product carousels or testimonials.
Other slider plugins:
Slider Revolution:
Works similarly and performs fine, though the UI is not as user-friendly.
Smart Slider 3:
Works similarly and performs the duplicate process.
Intuitive Basic Controls
Built-in tools for positioning, flipping, rotating, aligning, arranging, adjusting opacity, and blend modes.
💡 Why it matters: These common actions are available right where you need them, so you don’t lose time searching.
Other slider plugins:
Slider Revolution:
Provides the necessary options, but the UI is more complex, and all options feel crowded, which makes it less beginner-friendly and more confusing.
Smart Slider 3:
It includes the basic options, but the arrangement is a bit messy and doesn’t prioritize the important ones. For example, to change the position, you have to go through less important options before finding the right setting.
Easy Image Replacement
Drag a new image from the assets panel and drop it on an existing image to replace it instantly.
Set an image as the slider background by simply dragging it to the slider corner.
💡 Why it matters: Replacing visuals becomes a one-step action, making content updates incredibly fast.
Other slider plugins:
Slider Revolution:
Because it lacks an integrated assets panel, you must open the content tab and the media library to replace images. It also doesn’t support the same drag-to-set-background convenience.
Smart Slider 3:
Because it lacks an integrated assets panel, you must open the content tab and the media library to replace images. It also doesn’t support the same drag-to-set-background convenience, and the overall appearance feels even more basic.
Easy Text Replacement
Double-click any text layer — including buttons or any layer with text — to edit inline directly on the canvas.
💡 Why it matters: Inline editing removes context-switching and speeds up content updates dramatically.
Other slider plugins:
Slider Revolution:
Doesn’t support inline editing. You need to select the layer and replace text through the content tab.
Smart Slider 3:
Inline editing isn’t available. To change text, you have to select the layer and update it from the content tab.
Copy & Paste Styles
Copy the style of one element and apply it to another with a single click.
💡 Why it matters: Saves huge amounts of time when creating consistent designs.
Other slider plugins:
Slider Revolution:
Has copy-paste style functionality similar to Depicter.
Smart Slider 3:
This plugin does not have this feature.
Responsive Controls
Hide specific elements only on certain device views (desktop, tablet, mobile).
💡 Why it matters: It lets you design device-optimized sliders without deleting elements.
Other slider plugins:
Slider Revolution:
Also supports hiding layers per responsive mode, like Depicter.
Smart Slider 3:
It also lets you hide layers for specific responsive views.
Live Editing & Preview
See every change instantly in the editor.
Preview animations inside the editor with a Replay button—no need to go to the front-end.
💡 Why it matters: Immediate feedback means faster design iterations and fewer mistakes.
Other slider plugins:
Slider Revolution:
It has live preview features, but they’re weaker. For example, you may not see unsaved changes in preview until you press Save. It also lacks an inline Replay feature to preview slide animations directly.
Smart Slider 3:
It offers live preview features, but they’re limited. There’s no inline replay option to preview slide animations directly.
Auto Save & Publishing
All changes are saved automatically, but they only go live after you publish.
💡 Why it matters: Prevents losing progress while giving you control over what’s published.
Other slider plugins:
Slider Revolution:
Does not auto-save; you must manually press Save to preserve changes.
Smart Slider 3:
Does not auto-save; you must manually press Save to preserve changes.
Undo & Redo
Go back or forward with undo/redo buttons or keyboard shortcuts like CTRL+Z.
💡 Why it matters: Gives you creative freedom to experiment without worrying about mistakes.
Other slider plugins:
Slider Revolution:
Supports undo/redo via buttons and hotkeys as well.
Smart Slider 3:
It supports undo and redo, both through buttons and keyboard shortcuts.
Resize & Rotate
Adjust element size and angle directly on the canvas.
💡 Why it matters: Quick, intuitive adjustments keep the design process smooth.
Other slider plugins:
Slider Revolution:
It also offers resizing, but with fewer details than Depicter — for example, it lacks a dedicated rotate handle. And when you resize a text layer, the font size doesn’t adjust automatically, so you have to change it manually.
Smart Slider 3:
Just like Slider Revolution, resizing is available but less refined — no rotate handle, and text layers don’t auto-adjust font size.
Version History
Access past versions of your published slider.
Restore any version with a live preview.
💡 Why it matters: Safe experimentation—you can always roll back if needed.
Other slider plugins:
Slider Revolution:
Doesn’t offer switching between published versions or restoring a previously published snapshot. It only provides undo for changes during the current editing session.
Smart Slider 3:
This plugin does not have this feature.
Advanced Typography & Styling
Full typography control with color picker, gradient types, Google Fonts, or custom theme fonts.
Add borders, shadows, filters, and more.
💡 Why it matters: Professional-grade design options without needing extra tools like Photoshop.
Other slider plugins:
Slider Revolution:
Has strong typography features, but options are scattered across different tabs, which makes them harder to find. Some details are less refined than Depicter — e.g., Depicter can inherit theme fonts or apply multiple gradient modes in ways Slider Revolution doesn’t.
Smart Slider 3:
It has far fewer options, with a very basic color picker and no Gradient. Layout settings are messy and hard to work with. The experience feels nothing like “Advanced”.
Hover Effects & Animations
Apply hover effects or entry animations to individual elements.
Choose from categorized animation presets with customizable settings.
💡 Why it matters: Adds interactivity and motion that captures user attention.
Other slider plugins: Slider Revolution:
Offers a large set of advanced animations and fine-grained controls, but lacks helpful guidance. Depicter groups and labels animations to help you choose; Slider Revolution often only shows names and requires previewing to understand the result. Depicter also lets you preview the animation inline without opening the preview panel.
Smart Slider 3:
The categorization and presentation of animations are acceptable, but the options are limited and it doesn’t provide a large number of animations.
Organized Options Panel
Everything is grouped into categories with toggle switches and sliders.
No need for manual code or CSS tweaks.
💡 Why it matters: Makes advanced features approachable for all skill levels.
Other slider plugins: Slider Revolution:
Its right-hand panel tends to be cluttered and less organized. Many options live in the same place, making it harder to find the right controls or expect logical submenus — overall, it reduces ease of use.
Smart Slider 3: The general slider settings are located outside the editor, in the dashboard.
Grouping & Auto Layout
Select multiple elements and group them.
Move or resize them together.
Enable Auto Layout to arrange them with Grid or Flex properties.
💡 Why it matters: Keeps grouped elements aligned and consistent, especially useful for designing complex sections like product grids or galleries.
Other slider plugins: Slider Revolution:
Adding, editing, and managing groups is not easy with Slider Revolution. You must add a group layer and then drag layers into the group in the timeline, whereas in Depicter, you can select multiple elements and right-click to group them.
In Slider Revolution, a small moving element may cause it to leave the group, and groups don’t offer the same enhanced behaviors that Depicter provides, like the Auto Layout feature.
These workflow frictions become very annoying on larger projects.
Smart Slider 3:
This plugin does not have the grouping feature at all.
Easy Crop Mode
Double-click an image to enter crop mode and crop it directly inside the editor.
💡 Why it matters: Saves time and avoids switching to external tools — you can get the exact framing you need without leaving the slider editor.
Other slider plugins: Slider Revolution:
Does not include an integrated crop feature. You must prepare and crop images beforehand.
Smart Slider 3:
This plugin does not have a cropping feature.
Auto Background Remover
Remove image backgrounds with one click using AI for clean, professional visuals.
💡 Why it matters: Simplifies creating polished designs and hero sections without separate image-editing tools.
Other slider plugins:
Slider Revolution:
No equivalent built-in background removal feature.
Smart Slider 3:
This plugin does not have this feature.
Conclusion
When it comes to building sliders in WordPress, ease of use and a smooth editing experience make all the difference. While Slider Revolution offers deep functionality and Smart Slider 3 provides a balanced middle ground, both come with limitations in usability, flexibility, or modern UI design.
Depicter, on the other hand, strikes the perfect balance: it’s truly no-code, visually intuitive, lightweight, and packed with smart tools that speed up the design process. From true drag-and-drop freedom and responsive editing to version history, advanced typography, and grouped auto layouts, every detail is designed to save time and make creativity effortless.
The result? Depicter makes slider building not just faster—but also more enjoyable. For beginners, it removes the learning curve; for professionals, it delivers creative freedom without the clutter. That’s why Depicter is the best choice for ease of use in WordPress sliders.
FAQs – Best WordPress Slider for Ease of Use
Q1: What makes Depicter’s drag-and-drop builder better than other WordPress slider plugins? Depicter offers a true drag-and-drop experience, letting you place elements anywhere on the canvas with smart alignment guides and auto-snapping. Unlike other plugins that restrict layouts to rigid grids, Depicter gives you total creative freedom without complexity.
Q2: Is Depicter the best WordPress slider for beginners? Yes. Depicter is designed as a no-code slider builder with an intuitive interface. Beginners can create professional-looking sliders in minutes without coding or technical knowledge.
Q3: Can I undo or revert changes in Depicter if I make a mistake? Yes. Depicter includes undo/redo hotkeys, auto-saving, and version history. You can easily roll back to a previous design version whenever you need.
Q4: How does Depicter compare to Slider Revolution and Smart Slider 3 in ease of use? Slider Revolution is powerful but comes with a steep learning curve. Smart Slider 3 is easier, but its interface feels outdated. Depicter strikes the balance—it’s modern, lightweight, and the most user-friendly WordPress slider plugin.
Q5: Can I use Depicter with page builders like Elementor or Gutenberg? Definitely. Depicter works seamlessly with Elementor, Gutenberg, Divi, WPBakery, and other popular WordPress page builders. This makes integration into your existing workflow effortless.
Q6: Is Depicter free, and what’s included in the free version? Yes. Depicter has a free version that includes all essential features and templates to build stunning sliders at no cost. The Pro plan unlocks advanced design tools, more templates, and deeper customization starting at an affordable price.
When you create a website, all the files, like images, code, and content, need to live somewhere accessible 24/7. That “somewhere” is a web hosting service. Think of it like renting a storage unit on the internet: instead of physical boxes, you’re storing website files that visitors can reach anytime.
For WordPress users, choosing the Best WordPress Plugins is important, but hosting is even more critical. WordPress is a dynamic content management system (CMS) that needs a server to process code, run databases, and deliver pages instantly when someone clicks a link. Without a reliable host, even the most beautifully designed WordPress site won’t perform well.
Good hosting ensures:
Your site is always online.
Pages load quickly.
Security is in place to prevent hacks or data loss.
You get support when things go wrong.
Why Choosing Quality Hosting Matters
Not all hosting providers are the same. Some focus on keeping costs low but sacrifice performance, while Top WordPress Hosting Companies invest heavily in infrastructure to deliver a smooth experience. Choosing the right host has a direct impact on your site’s success.
Here’s why:
Reliability & uptime: A site that keeps going offline damages trust and costs money. Aim for 99.9% uptime guarantees.
Speed & performance: Hosting affects load times, which impact SEO rankings and user engagement. Faster sites convert better. Security & backups: Good hosts include SSL certificates, firewalls, malware scanning, and regular backups so you’re protected if something goes wrong.
Scalability: As your traffic grows, you’ll want hosting that can scale resources without breaking the bank.
Support: Quick, expert help can save you hours when troubleshooting.
These factors are often what separate average hosting companies from the best.
Types of Hosting Services
Hosting providers usually offer several service tiers depending on your needs and budget. Here are the most common ones:
Shared Hosting: Multiple websites share the same server resources. It’s affordable and beginner-friendly but less powerful. Best for small sites or blogs.
VPS (Virtual Private Server) Hosting: A middle ground between shared and dedicated hosting. You get a “virtual” slice of a server with more resources and flexibility. Ideal for growing websites.
Dedicated Hosting: You rent an entire server just for your website. Offers maximum control, performance, and customization, but it’s expensive. Suitable for large businesses.
Cloud Hosting: Your site runs on multiple connected servers (the “cloud”). It’s scalable, reliable, and often pay-as-you-go, making it great for sites with variable traffic.
Managed WordPress Hosting: A premium service where the host takes care of updates, security, speed optimization, and support specifically tailored for WordPress. Perfect for agencies or non-technical users who want peace of mind.
In other words, reliable hosting isn’t just about keeping your site online—it’s about creating a foundation where your marketing efforts, lead generation campaigns, and conversion strategies can actually succeed. Even the best-designed landing page or sales funnel won’t perform well if the host is slow, unreliable, or insecure.
What Is a Sandbox (Staging Environment) and Why Does It Matter
A sandbox, often called a staging environment in web development, is a safe copy of your website where you can test changes without affecting the live version. It’s like having a rehearsal stage before the big performance.
With a sandbox, you can:
Try out new themes or plugins safely.
Test code changes without risking downtime.
Share progress with teammates or clients for feedback.
Push changes live only when everything works as expected.
Why not just test locally on your laptop? Local testing has limitations:
Your setup may not match the server environment.
Sharing changes with a client is harder (you’d need to export/import or use tools to make it visible online). You risk the “works on my machine” problem. Something might function locally but break in production.
A sandbox on your hosting provider solves all of this. It mirrors the live environment, making testing more reliable and collaboration effortless. It reduces deployment risks and improves overall development workflows.
Top WordPress Hosts That Include Sandbox/Staging Features
Below is a list of WordPress hosts offering built-in staging or sandbox tools—ideal for testing, collaborating, and deploying safely:
InstaWP One-click staging; instant site launches and easy live-site syncing—great for rapid testing and client demos.
Liquid Web provides managed WordPress hosting with free staging sites, allowing you to safely test changes before publishing. It’s a reliable, high-performance option ideal for developers and agencies.
Kinsta Managed hosting with free staging environments per install. High-speed Google Cloud servers, automatic backups, premium security, and a local DevKinsta environment.
WP Engine Premium WordPress hosting with one-click staging, easy push-to-live workflow, daily backups, and strong security.
SiteGround One-click staging, daily backups, fast infrastructure, free CDN & SSL, and WooCommerce optimization.
Hostinger Has one-click staging, smart auto updates, fast performance with free CDN, backups, and priority support.
Cloudways Flexible cloud hosting with one-click staging environments, effortless push to live, daily backups, and solid security.
Bluehost Easy staging tools, free migrations, staging & live both secured with SSL, performance boost via Cloudflare CDN.
CloudPress Instant staging setup, seamless deployment, daily backups, fast performance, and strong security.
Flywheel Aimed at agencies, with intuitive workflow, easy collaboration, automatic backups, and straightforward staging to live updates.
Conclusion
Using a WordPress hosting provider that includes sandbox or staging environments gives you a risk-free zone to build, test, and share updates before going live. It’s safer, more professional, and ideal for client workflows, far smoother than struggling with local setups alone. Many hosting companies offer powerful sandbox tools that save time and headaches. Choose one that fits your needs and future-proof your development routine!
A strong Call To Action (CTA) can make a world of difference on your WordPress site, prompting visitors to subscribe, buy, download, or explore more of your content.
To help your site stand out, I’ve compiled a list of top-notch CTA plugins based on high-ranking recommendations.
Let’s start with a standout plugin, the Depicter, followed by more powerful options.
1. Depicter
Depicter is designed to help you create highly effective calls-to-action through advanced popups, notification bars, and other interactive elements. It combines powerful functionality with visually polished designs, so your CTAs not only work flawlessly but also look professional on any device. Whether you want to capture leads, highlight promotions, or guide users toward a specific action, Depicter gives you the tools to achieve your goals with ease.
Key Features:
Smart Popups & Notification Bars – Trigger CTAs based on user behavior (exit-intent, scroll depth, time on page).
Visual Drag & Drop Editor – Build and customize CTAs without coding, with pixel-perfect control. 700+ Ready-Made Templates – Choose from sliders, hero sections, popups, notification bars, carousels, and more.
Dynamic & Interactive Elements – Add countdowns, forms, and animations to make CTAs more engaging.
Responsive Design – Every CTA adapts seamlessly to desktop, tablet, and mobile.
2. Elementor Pro
Though primarily a page builder, Elementor Pro’s Popup Builder lets you craft popups, slide-ins, notification bars, and fullscreen overlays with pixel-perfect control. It integrates forms and countdowns directly in the UI and offers rich targeting—but doesn’t include built-in analytics or split testing (you’ll need third-party tools to fill that gap).
Key Features:
Visual drag-and-drop design with full styling control
Includes form and countdown widgets
Targeting by content, device, referrer, login status; triggers include scroll, time, exit intent
No built-in analytics or A/B testing (requires integration)
3. Ultimate Blocks
Ultimate Blocks is a Gutenberg blocks plugin made for bloggers and marketers who want to create engaging content with ease. It comes with 25+ custom blocks that make your posts more interactive and visually appealing.
When it comes to call-to-action elements, Ultimate Blocks gives you flexible options to design attractive buttons and CTA blocks right inside the editor. This makes it simple to guide readers, capture attention, and drive more clicks without using extra plugins.
Key Features:
Call-to-Action block with customizable layouts and styles
Easy-to-use Button block with flexible design options
Schema-enabled blocks to improve SEO visibility
Lightweight and modular, so you only enable the blocks you need
4. Boxzilla
Boxzilla focuses on popups and slide-in panels—with a drag-and-drop interface that’s beginner-friendly yet versatile. You control when and where boxes appear (e.g. after scrolling or timing), who sees them, their positioning, and how often before they reappear.
Key Features:
Custom pop-up/slide-in content support
Multiple event triggers (time, scroll, etc.)
Page-specific targeting
Dismiss control to avoid annoying repeats
5. Simple Side Tab
Simple Side Tab adds a sleek vertical tab (left or right side) that stays visible as visitors browse—perfect for directing attention to a landing page, sign-up form, or promotion. It’s light on resources, flexible in style, and doesn’t rely on graphics.
WP CTA helps you create compelling call-to-action elements such as banners, sticky sidebars, or fully custom HTML blocks. The interface is user-friendly—with no code needed—and it’s responsive across devices. You can also set display rules and preview your CTAs before going live. The Pro upgrade adds advanced targeting, A/B testing, click tracking, and more.
Key Features:
Pre-made templates: banner, sticky sidebar, HTML
Customize fonts, colors, positioning, and content
Responsive design and page-level targeting
Pro version adds analytics, A/B testing, unlimited CTAs, and custom CSS
When it comes to building a successful WordPress website, plugins play a huge role in shaping performance, design, and user experience.
With thousands of options available in the WordPress repository and beyond, finding the right ones can be overwhelming. The best plugins are not only popular they are reliable, lightweight, regularly updated, and proven to deliver results.
In putting together this list, we considered several key factors:
Ease of use – Plugins should be beginner-friendly, offering intuitive interfaces and clear documentation.
Performance impact – A good plugin should enhance your site without slowing it down.
Feature set – Each plugin was chosen for the value it adds, whether for design, security, SEO, analytics, or e-commerce.
Community trust – Strong user reviews, active installations, and consistent updates from developers were all critical points.
Integration – Plugins that work well with popular themes, page builders, and other tools were prioritized.
With these criteria in mind, we’ve selected the most useful WordPress plugins you can install today.
This list covers everything from SEO optimization and site security to form builders, page design, performance, and beyond. No matter what kind of site you’re running, these plugins can help you improve functionality, boost engagement, and grow with confidence.
Point to Ponder:
To avoid plugin compatibility problems, always test new plugins in a sandbox first. Create a WordPress sandbox and try the plugin there with your theme and key extensions before installing it on a live site.
InstaWP’s Sandbox plan starts at $2, and you can keep the sandbox for as long as you need for testing. This simple step will save time and protect your live sites.
1. Depicter
Depicter is a no-code tool for WordPress that combines marketing utilities with visual design features in one platform. On the marketing side, it allows you to create popups, notification bars, and slide-ins to collect leads, promote offers, and share important updates. These tools can be configured with triggers like exit-intent, scroll depth, or time on page, so they appear at the right moment without interrupting the browsing experience. For website owners, this means a straightforward way to grow email lists, announce campaigns, or keep visitors engaged.
In addition to marketing functions, Depicter provides advanced design capabilities. Users can build sliders, carousels, hero sections, and other visual elements to showcase products, posts, or featured content. With its drag-and-drop editor and a large library of ready-to-use templates, you can quickly create professional layouts. Every design is responsive by default, ensuring that content looks consistent across desktop, tablet, and mobile devices. Depicter also supports both static and dynamic content, making it suitable for everything from simple galleries to fully automated product showcases.
Key features:
AI-powered form creating the whole campaign or removing the background or improving the text
Canva-like drag & drop builder with full customization
Supports dynamic data sources like WooCommerce, Custom Post types, and Google Reviews
High-converting popups and opt-in campaigns
A complete library of 700+ ready-to-use templates for different needs
Smart targeting & trigger rules for maximum impact
Responsive, mobile-friendly design for all campaigns
2. Everest Forms
Everest Forms is a lightweight form builder designed for users who want to create clean, functional contact forms without dealing with code. Its drag-and-drop interface makes it easy to add fields like dropdowns, checkboxes, date selectors, radio buttons, and other advanced inputs, so you can build anything from simple contact forms to detailed submission forms. Multiple layout options give you flexibility in how forms display across different page sections, keeping them responsive on all devices.
Even though the plugin has a generous free version suitable for most basic use cases, there are premium upgrades available for users who need more advanced functionality. Paid plans unlock additional features, integrations, and extended controls, making it scalable for growing sites that require more than just a standard contact form.
Key features:
Drag-and-drop form building
Unlimited forms with multiple layout types
Advanced fields including date/time pickers
Works well with basic and complex forms
Premium upgrades for extended functionality
3. Fluent Support
Fluent Support is the fastest AI-powered helpdesk plugin for WordPress to enhance customer support operations. It has unlimited tickets, agents, attachments, and users to scale with your business with no boundaries.
With OpenAI integration, agents can generate replies, summarize tickets, refine responses, and analyze customer sentiments.
And that’s not all. Fluent Support brings your CRMs, email marketing platforms, and project management tools into one central dashboard. So your team doesn’t waste time switching tabs or juggling systems.
Its powerful workflow automation handles repetitive tasks, and advanced reporting makes decision-making even better. All these you can get for just $129/year with an easy 5-minute setup. So whether you’re a small business or a scaling agency, Fluent Support gives you enterprise-level support power without the enterprise price tag.
Key features:
Unlimited tickets, agents & attachments.
AI-powered summary, fine-tune, generate reply, etc.
MasterStudy LMS is a robust and versatile WordPress plugin designed for building and scaling fully branded online learning platforms. Businesses, educators, and creators can easily launch professional training programs thanks to built-in reports, analytics, and seamless payment integrations such as WooCommerce, PayPal, and Stripe. Features like memberships, course bundles, upcoming course promotions, live lessons via Zoom or Google Meet, and ready-to-use templates make it simple to deliver structured, engaging, and profitable learning experiences.
Users can build anything from a single course to a full multi-instructor academy, supported by performance-optimized admin tools, progress tracking, and high-quality customization options. The standout AI Lab add-on dramatically accelerates course development by generating lessons, quizzes, assignments, and images from a single prompt, empowering instructors to focus on teaching rather than content production. Combined with customizable landing pages, 50+ design widgets, sticky CTAs, and branding-ready templates, MasterStudy LMS enables creators to deliver premium, interactive learning environments that attract and retain students.
User Registration is a popular free WordPress plugin designed for creating user registration and membership systems.
It comes with an intuitive drag-and-drop form builder and a wide range of features that make it easy to create fully customized registration forms. With the User Registration plugin, you can add various custom fields to your forms, including multiple-choice fields, dropdown menus, checkboxes, and more.
The plugin also provides a front-end user account page where registered users can manage their profiles. From there, users can update their information, change their passwords, log out, and perform other account-related actions.
Additionally, several form configuration options allow you to control and customize how your registration forms behave. While the free version offers plenty of functionality, the plugin can also be expanded through premium plans.
If you need additional capabilities, you can choose from more than 30 premium add-ons that help enhance your registration forms and enable you to create and sell membership plans.
Key Features
Collection of ready-to-use form templates
Built-in login form and front-end user profile page
Full compatibility with WooCommerce
Customizable front-end admin approval messages
Strong protection against form spam
6. Bit Assist
Bit Assist is an affordable but advanced WordPress chat plugin that brings 30+ messaging apps into a single floating chat widget. This chat plugin transforms how businesses connect with customers and handle their queries. Bit Assist not only allows visitors to reach you through their favorite messaging channels, including WhatsApp, Facebook Messenger, Telegram, and more, but also integrates with live chat tools like Tidio, Tawk.to, ensuring real-time communication with customers.
So if you want multi-platform customer support and don’t want to miss opportunities to communicate with your audience, then go for Bit Assist. It will improve your overall customer experience and increase conversion rate like never before.
Key features:
Integrates with 30+ messaging apps, so your customers can communicate with you using their favorite app.
An extensive customizable widget, which gives you the freedom to customize the size, color, icon, and position of the widget so that it aligns well with your brand.
Fast and optimized, that’s why it will load faster than you think.
Offers engagement analytics(visitor statistics, total clicks, click rate) so you can analyze the performance of your widget.
7. WPForms
WPForms makes building forms in WordPress a breeze. Even beginners can craft contact, order, or survey forms using a drag-and-drop builder. Templates help you start fast, while extra features include conditional logic, payment integration, and conversational form layouts. The plugin simplifies gathering user info and connecting with marketing platforms in just a few clicks. A must-have for creating user-friendly forms!
Key features:
Drag-and-drop form builder
Prebuilt templates for different form types
Conditional logic for smarter forms
Payment gateway integration (e.g., Stripe)
Conversational form layouts
8. MonsterInsights
MonsterInsights connects your website to Google Analytics effortlessly. It presents powerful tracking data directly in your WordPress dashboard without needing code. You can monitor form submissions, e-commerce actions, downloads, and more all structured in easy-to-read reports. It’s ideal for site owners who want insight without complexity.
Key features:
One-click Google Analytics setup
Behavior tracking (downloads, forms, e-commerce)
Analytics dashboard inside WordPress
9. ARMember
ARMember is the best WordPress membership plugin that makes building membership subscription based websites simple and flexible. From creating membership levels, restricting content, and offering drip content to integrating 21+ payment gateways and providing a smooth onboarding experience, ARMember has everything you need to grow your membership business.
Key features:
Easy Membership Setup Wizard
WordPress Subscription feature
21+ Payment gateway support
Packed with 57+ In-built Addons
10. SeedProd
SeedProd is a user-friendly landing page builder plugin. Import ready-made templates and personalize them with a visual drag-and-drop editor no coding needed. It’s perfect for crafting attractive landing pages or site layouts quickly. Highly recommended for anyone looking to launch pages fast with style.
Key features:
Drag-and-drop landing page editor
Prebuilt templates for easy design
High customization without coding
11. Element Pack Addons for Elementor
Elementor Pack is a powerful plugin that will help you create a beautiful and functional WordPress website using Elementor. With this plugin, you don’t have to write any code or hire a developer.
You can drag and drop ready-made widgets, templates, and sections to design your pages the way you want. Elementor Pack includes hundreds of widgets for different purposes, such as forms, sliders, galleries, tabs, and price lists.
Key Features
300+ advanced widgets for Elementor
2,700+ ready-made templates
Mega Menu and advanced navigation
Live copy-paste between sites
Dynamic grids, carousels, and galleries
Customizable design and flexible options
Regular updates and smooth compatibility
12. All in One SEO (AIOSEO)
AIOSEO scans your site and gives clear, hands-on advice for SEO improvements. It adds sections to your editors for optimizing titles, descriptions, and keywords. The plugin works behind the scenes to fine-tune on-page SEO and metadata. A solid choice for boosting visibility in search results.
Key features:
On-page optimization suggestions
SEO fields in post/page editor
Metadata and sitemaps tools
13. Yoast SEO
Yoast SEO remains one of the most trusted SEO plugins. It guides you in real-time on how to improve content readability, keyword use, and technical SEO. The plugin automatically manages sitemaps, structured data, and even supports AI-enhanced guidance. A go-to plugin for anyone serious about search visibility.
Key features:
Readability and SEO analysis
Automatic XML sitemaps
Schema and AI SEO suggestions
14. WP Rocket
WP Rocket is a premium caching plugin built to speed up site loading without complex setup. It uses smart caching methods and integrates well with various servers. It’s one of the most widely used performance tools, praised for its simplicity and effectiveness.
Key features:
Page caching to boost speed
Works with Apache and Nginx
Easy setup with performance boost
15. WooCommerce
WooCommerce is the leading e-commerce plugin for WordPress. It turns your site into an online storefront with product, payment, and shipping management all customizable. Backed by a big community and robust support, it’s ideal for launching a shop on WordPress.
Key features:
Product and order management
Payment and shipping options
Large plugin ecosystem
16. Ultimate Blocks
Ultimate Blocks is a handy plugin built for the Gutenberg editor that gives content creators access to a wide range of custom blocks. Whether you’re publishing blog posts, product reviews, or tutorials, these blocks like tables of contents, review boxes, and tabbed content help make your articles more engaging and user-friendly.
What’s great is that the plugin only loads the blocks you choose to activate, so your site stays lightweight and fast. Plus, many of its blocks are schema-ready, giving your content an SEO boost right out of the box.
Key Features:
25+ custom blocks to enrich your content
Schema-ready blocks to improve SEO
Modular setup so you only enable what you need
17. Sucuri
Sucuri provides all-in-one security for WordPress sites. It guards against malware, scans for vulnerabilities, monitors downtime, and defends against brute-force attacks. Essential for any site that prioritizes safety and stability.
Key features:
Malware scanning and cleanup
Firewall protection
Website uptime monitoring
18. Elementor
Elementor is a powerful visual page builder that’s beginner-friendly yet rich in options. With drag-and-drop editing, a vast template and widget library, it enables design control over headers, footers, e-commerce pages, and more. AI tools further simplify creating custom layouts. A top choice for flexible, creative WordPress design.
Key features:
Visual drag-and-drop editor
Theme & WooCommerce builders
AI Copilot for content and design
19. WP Super Cache
WP Super Cache enhances your site’s performance by creating fast-loading static HTML pages. It’s simple to set up and reduces server demand, making pages load quicker for visitors. A handy tool to speed up any WordPress site.
Key features:
Static HTML page generation
Easy configuration
Lightweight and efficient caching
20. MemberMouse
MemberMouse helps you create a membership site with ease. It handles subscription tiers, protected content, billing, and refunds all without coding. User-friendly and flexible, though full features require higher-tier plans.
Key features:
Membership, access control, and subscriptions
Automated billing and user management
Customizable plans and access rules
21. Divi
Divi is a real-time visual builder that simplifies crafting beautiful landing pages. With hundreds of templates and intuitive editing, it’s a great option for users transitioning to professional site design. Offers both subscription and lifetime pricing.
Key features:
Visual front-end editing
Template-rich library
Flexible pricing models
22. bbPress
bbPress transforms your WordPress into a forum platform. It’s open-source and highly extensible with hundreds of add-ons for moderation, avatars, attachments, and more. Great for building community forums with flexibility.
When it comes to building a WordPress site, it really comes down to personal preference. Many people love using Elementor because it’s powerful, feature-rich, and makes designing websites easier for a lot of users. Choosing Gutenberg doesn’t mean Elementor is bad or that you should avoid it—Elementor is still one of the best tools out there.
At the same time, some users simply prefer to work with Gutenberg, the default WordPress editor. With Gutenberg, you can keep things lighter, faster, and closer to the WordPress core. For those who like a simpler workflow, Gutenberg is often enough to create a flexible and professional-looking site.
In short, it’s not about which one is “better,” but about which one fits your style. If you prefer Gutenberg, there are plenty of plugins that can extend its features and give you many of the tools you need without installing a full page builder.
Plugins to Extend Gutenberg (without Elementor)
If you decide to build your site mainly with Gutenberg, you might notice that the default editor gives you a solid foundation, but sometimes you’ll want a bit more flexibility.
That’s where plugins come in. By adding the right plugins, you can unlock new blocks, design options, and layout tools—without needing a full page builder like Elementor.
Below are five plugins that can extend Gutenberg’s features and help you create a more dynamic and engaging WordPress site.
Depicter is a no-code, drag-and-drop tool that adds popups, sliders, carousels, hero sections, and notification bars to your site—all inside Gutenberg.
It offers AI-powered layouts, rich animation, responsive design, templates, and smart form elements for lead capture, growing your email list, and engagement—all without slowing your site down.
Otter adds 20-plus useful blocks, full-page templates, patterns, animations, visibility controls, dynamic content, and even a Custom CSS block—so you control when and how blocks appear.
Perfect for building more advanced layouts cleanly within Gutenberg.
Ultimate Blocks is a free WordPress plugin built with bloggers and content marketers in mind. Instead of being just another add-on, it works as a complete toolkit to enhance engagement and simplify the way you create content.
What makes it stand out is how it helps you craft interactive experiences rather than just adding extra features.
Whether it’s content filters that keep readers engaged, attention-grabbing call-to-action blocks, or effortless social sharing, every element is designed to make your site more dynamic and visually appealing.
At the end of the day, Ultimate Blocks is all about making content creation easier, boosting interaction, and ensuring every visit to your site leaves a lasting impact.
Tableberg is a relatively new table builder plugin, but it’s already showing a lot of potential for WordPress users. Built to enhance the default Table block in the Gutenberg editor, it takes table creation to a whole new level.
With Tableberg, you’re not limited to plain text cells—you can add all kinds of custom blocks inside your tables, like styled lists, ratings, buttons, ribbons, images, and more. The best part? Adding these elements feels just as simple as working with regular Gutenberg blocks.
Despite its powerful features, the plugin remains lightweight, so it won’t slow down your site. On top of that, it includes advanced options like cell merging, responsive controls, table styling, and even a handy template library.