Are you looking for information on How to Schedule a Popup in WordPress? In today’s digital landscape, effective marketing requires strategic engagement with your audience. One powerful tool for capturing attention and driving conversions is scheduled popups. By strategically timing the appearance of popups, you can deliver targeted messages to your visitors at the optimal moment, increasing the likelihood of action.
In this guide, we’ll walk you through the steps of scheduling a popup using Depicter, empowering you to leverage this effective marketing tool for your WordPress website.
Why Schedule a Popup in WordPress?
Scheduling popups on your website can be a powerful option for targeted marketing and improved user experience. By strategically timing the appearance of popups, you can create limited-time offers that generate urgency and excitement among your audience, promote products or services relevant to specific holidays or seasons, and ultimately drive conversions and improve your overall user experience.
How to Schedule a Popup in WordPress with Depicter
Depicter is a versatile WordPress popup builder plugin that empowers you to create and schedule stunning, high-converting popups for your website. With its intuitive drag-and-drop interface and extensive customization options, Depicter makes it easy to design popups that capture attention and drive results.
Installing Depicter
Installing Depicter is a breeze. Simply navigate to the “Plugins” menu in your WordPress dashboard, click “Add New,” and search for “Depicter.” Once you find the plugin, click “Install Now” and then “Activate.” That’s it! Depicter is now ready for you to create and customize your popups.
Creating a Scheduled Popup
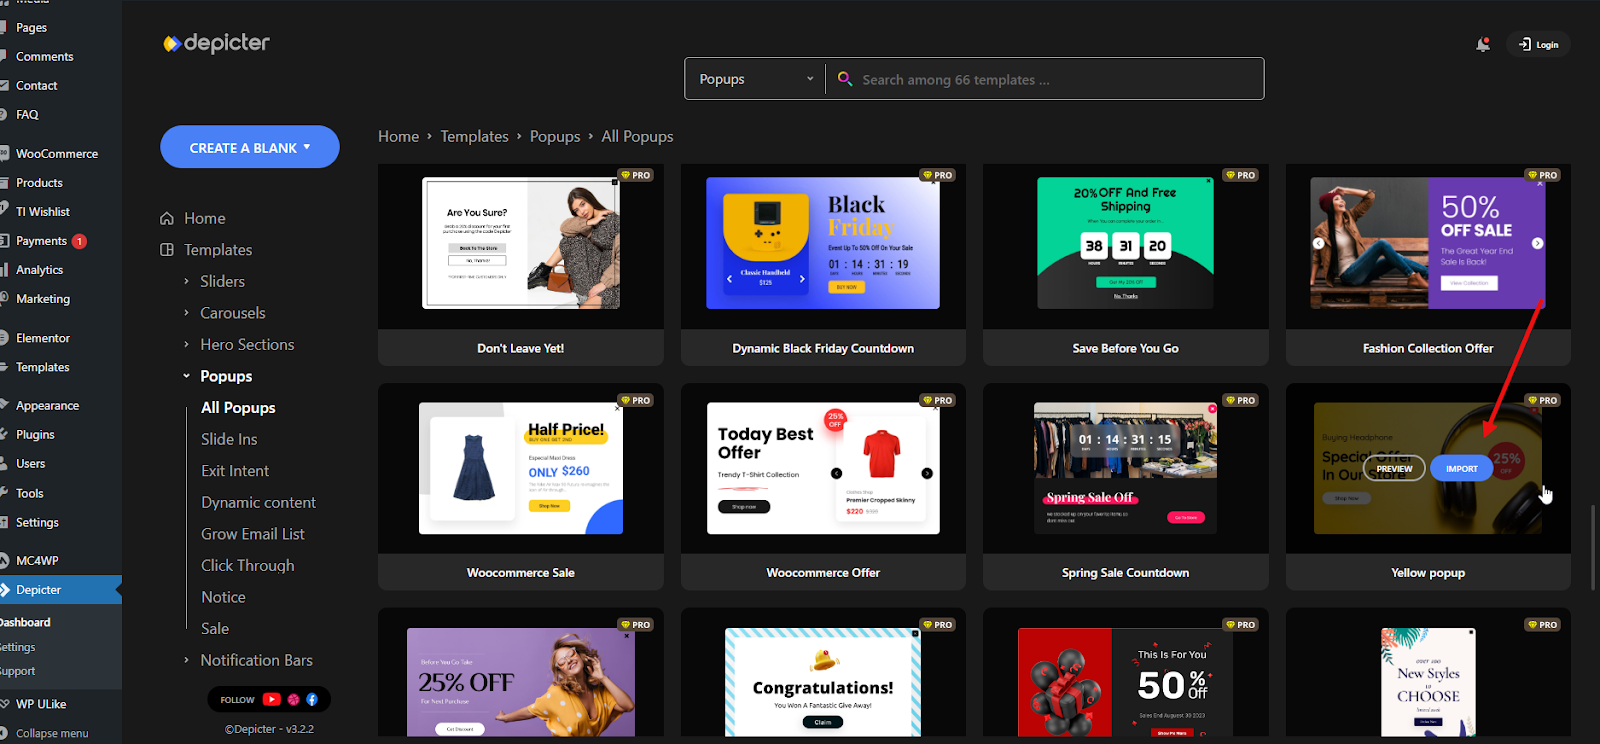
After installing Depicter, go to the “Popup” menu in your dashboard to access the collection of ready-made templates.

Choose one of the available options and simply click the ‘Import’ button. After a few seconds, the popup will be imported for you and you will be redirected to the Depicter editor.
Here, you can fully customize all the details of your popup using Depicter’s completely drag-and-drop editor. To learn more about creating a popup from scratch, you can watch the following video.
After confirming your popup, click on the ‘Configure’ option in the ‘Publish’ menu to set up the display rules.

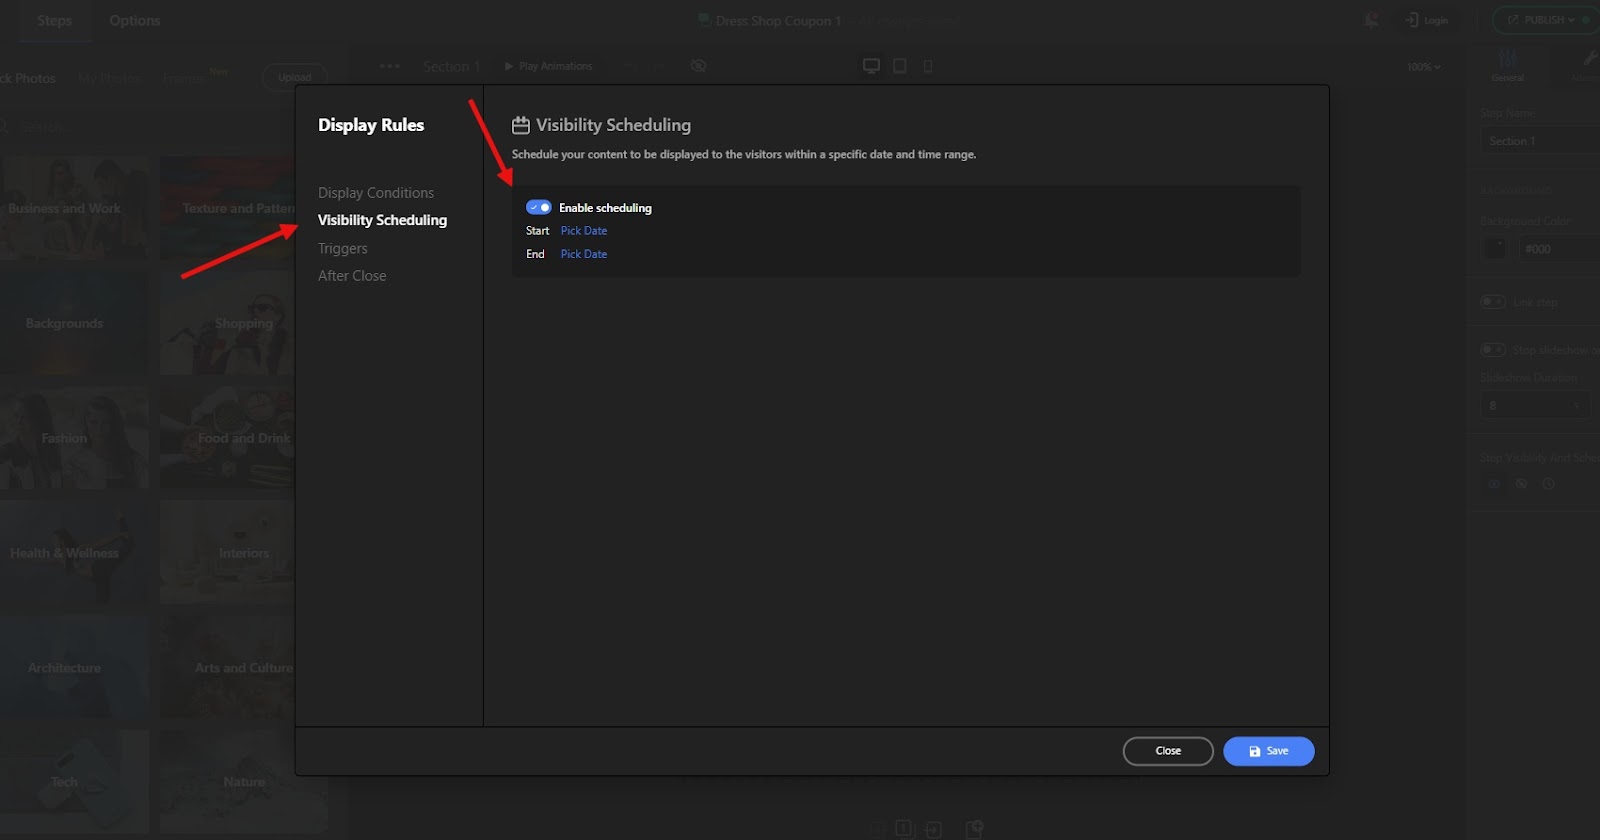
To schedule your popup to appear at specific times, go to the ‘Visibility Scheduling’ menu and check the ‘Enable Scheduling’ box. This will allow you to set a start date and end date for when the popup will be visible to your visitors.
For full control over the popup’s display, you can specify an exact start and end date and time. This allows you to schedule the popup to appear at any moment you choose.
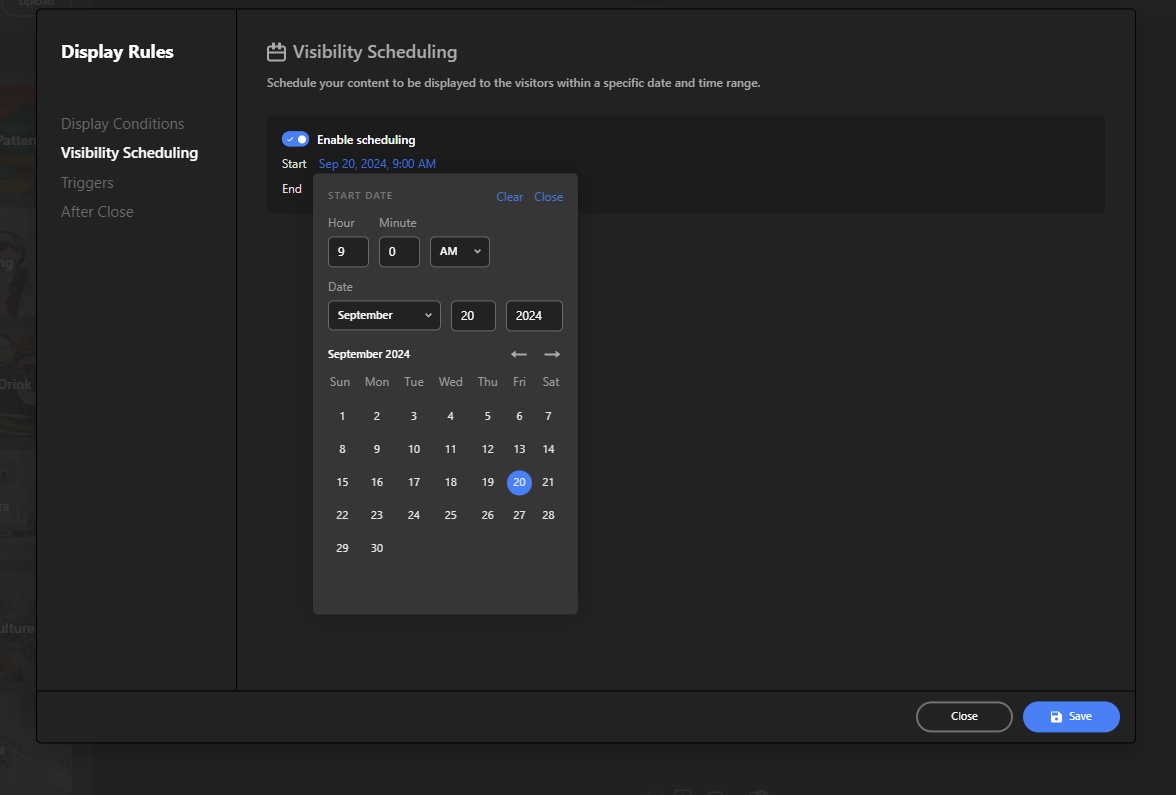
Your popup is now ready to go! Click ‘Save’ to store your changes, and then ‘Publish’ to make it live. The popup will be displayed on your website at the precise start and end times you’ve set.

Conclusion
You’ve gained the knowledge to create and schedule effective popups using Depicter. With the ability to target your audience, and deliver timely messages, scheduled popups can significantly enhance your website’s engagement and conversions.
Remember, the key to successful popup marketing lies in creating relevant and non-intrusive experiences for your visitors. Plan your popup’s content, design, and timing carefully and you will build stronger relationships with your audience and drive meaningful results.
Leave Comment