
Email marketing is a powerful tool for businesses to connect with their customers in today’s digital world. If you use WordPress, there are lots of plugins and tools that can make your email marketing easier. One such plugin is Depicter. With Depicter, you can easily create and customize popups to capture email addresses, increase your email list, and grow your subscribers. By using these tools effectively, you can improve customer engagement, build relationships, and ultimately drive more sales.
Video: How to Grow Your Email List for FREE Using Popup Forms
📧 Watch this video to learn how to grow your email list for FREE using Depicter popup forms in WordPress! This tutorial walks you through creating, customizing, and publishing popups designed to capture leads. Start building your email list effortlessly and export your leads as CSV files to integrate with email marketing tool
Utilizing Popups for Email Collection:
One effective way to capture email addresses is through the use of well-placed and strategically designed popups. In the next section, we’ll explore how you can use Depicter to create and customize these popups. Popups can appear at various points on your website, such as when a user is about to leave or after they’ve spent a certain amount of time on a page. To ensure maximum effectiveness, create visually appealing popups with compelling offers or incentives.
Before you begin, please ensure that the Depicter plugin is installed on your website.
You can quickly install it by heading to the Plugins section in your WordPress dashboard and searching for “Depicter.”
Need a detailed walkthrough? Check out our step-by-step guide with a video tutorial here.
Creating Your First Popup:
- Access the Dashboard: After activation, visit the Depicter dashboard.
- Choose a Template: The dashboard offers a range of templates for various visual elements like popups, sliders, and more. Select a pre-designed popup template to kickstart your creation.
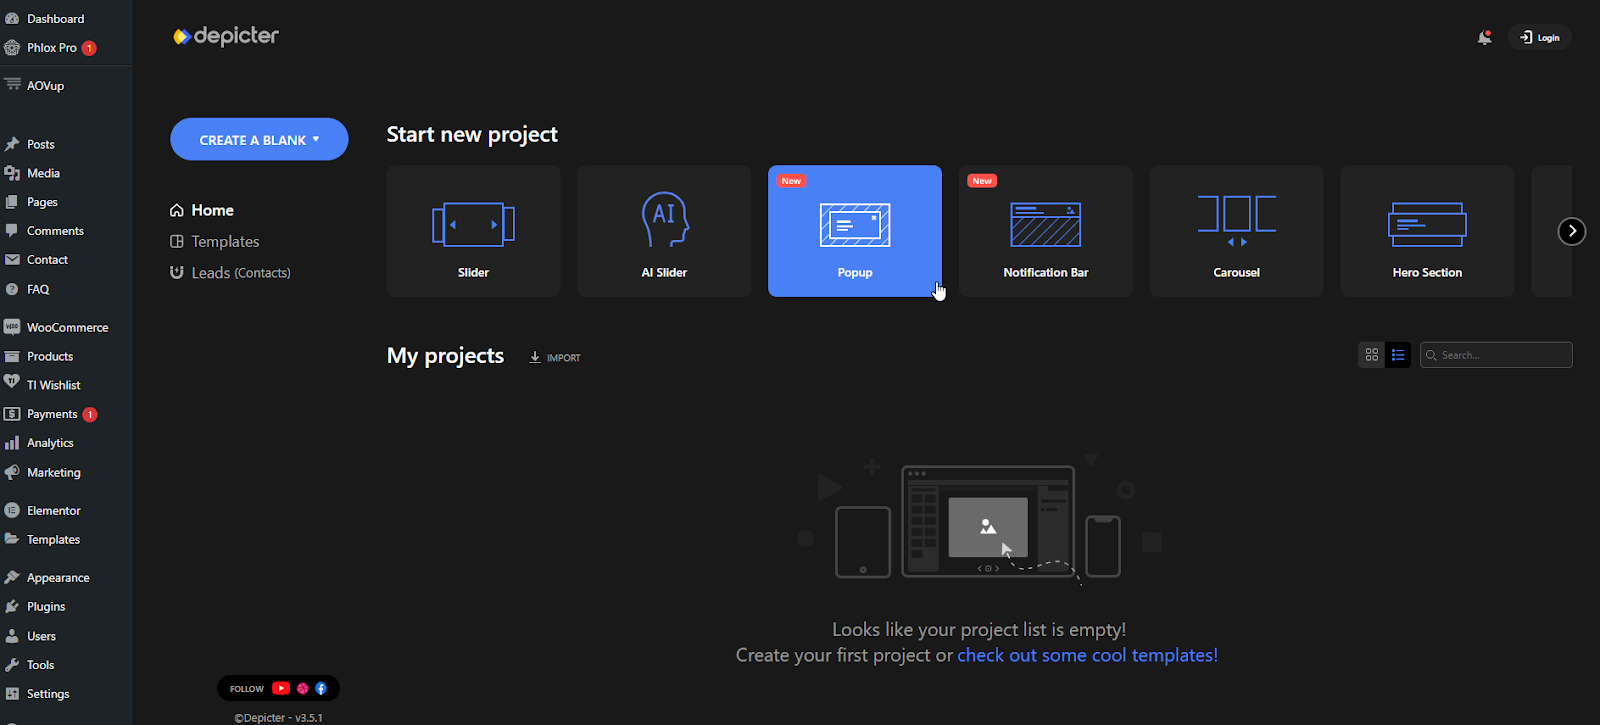
To preview a template before importing, simply click the “Preview” button. Once you’ve selected the desired template, click “Import” to add it to your Depicter editor and begin customizing.

Our template is now imported and ready for customization. Here, we can make any changes we want to the popup using the tools provided by Depicter. For a more in-depth look, I recommend watching this video.

To collect user emails, we need to use a specific element provided by Depicter called a ‘Form.’ Click on the ‘Elements’ menu in the left-hand panel and add a ‘Form’ element to your popup.

Once we add this element, we’ll have various options for different types of fields that we can add to our form. Here, we’ll add fields for ‘Name,’ ‘Email,’ ‘Submit button,’ and a ‘Form message.
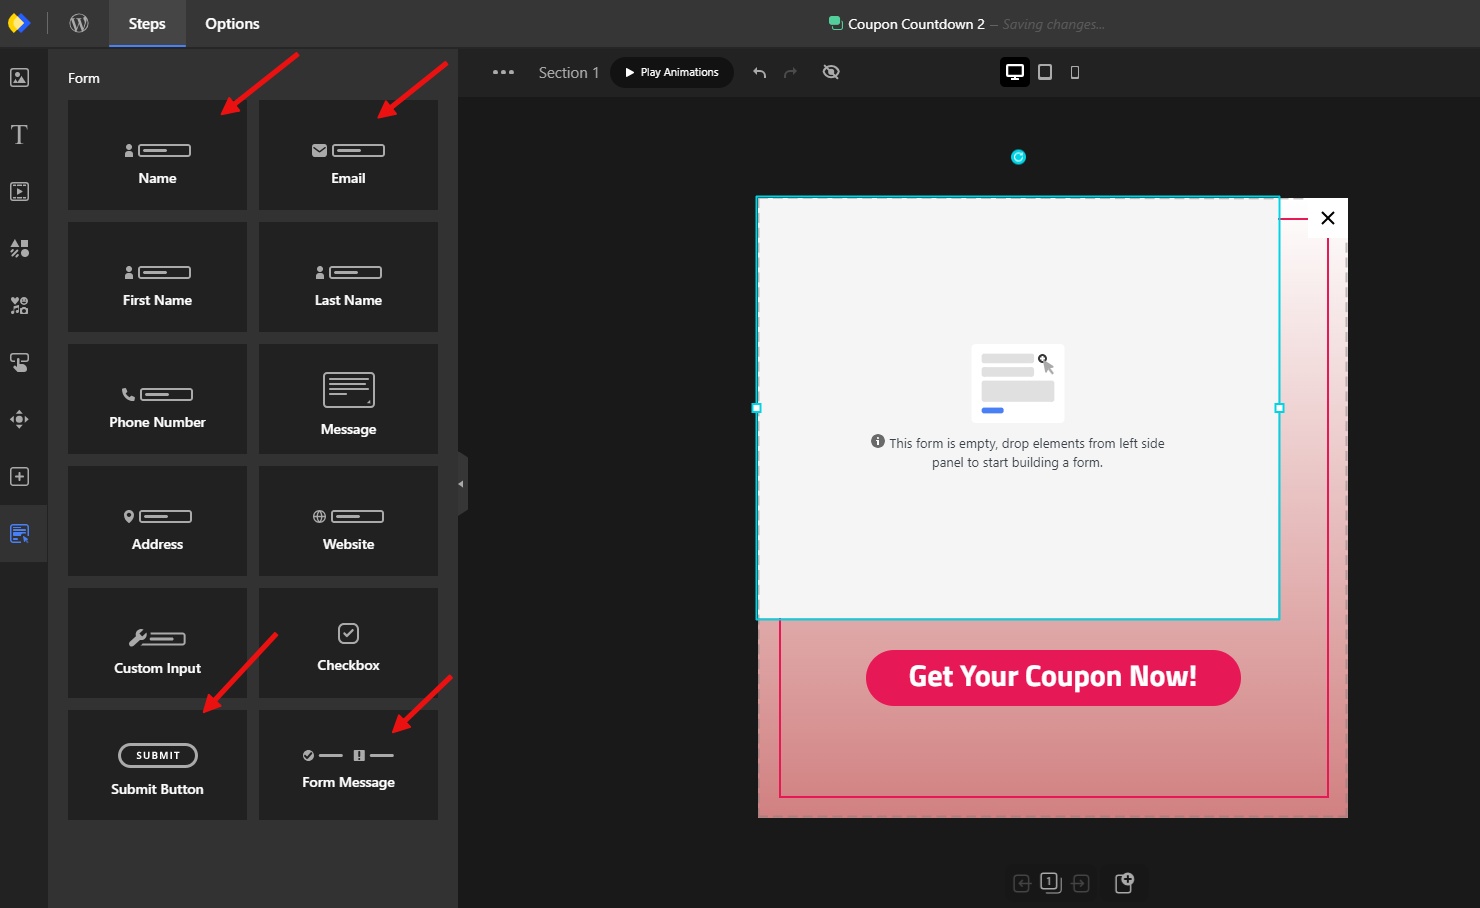
The selected fields will be added to the form one by one. We can customize the appearance of this form using the options available in the ‘Options’ panel.
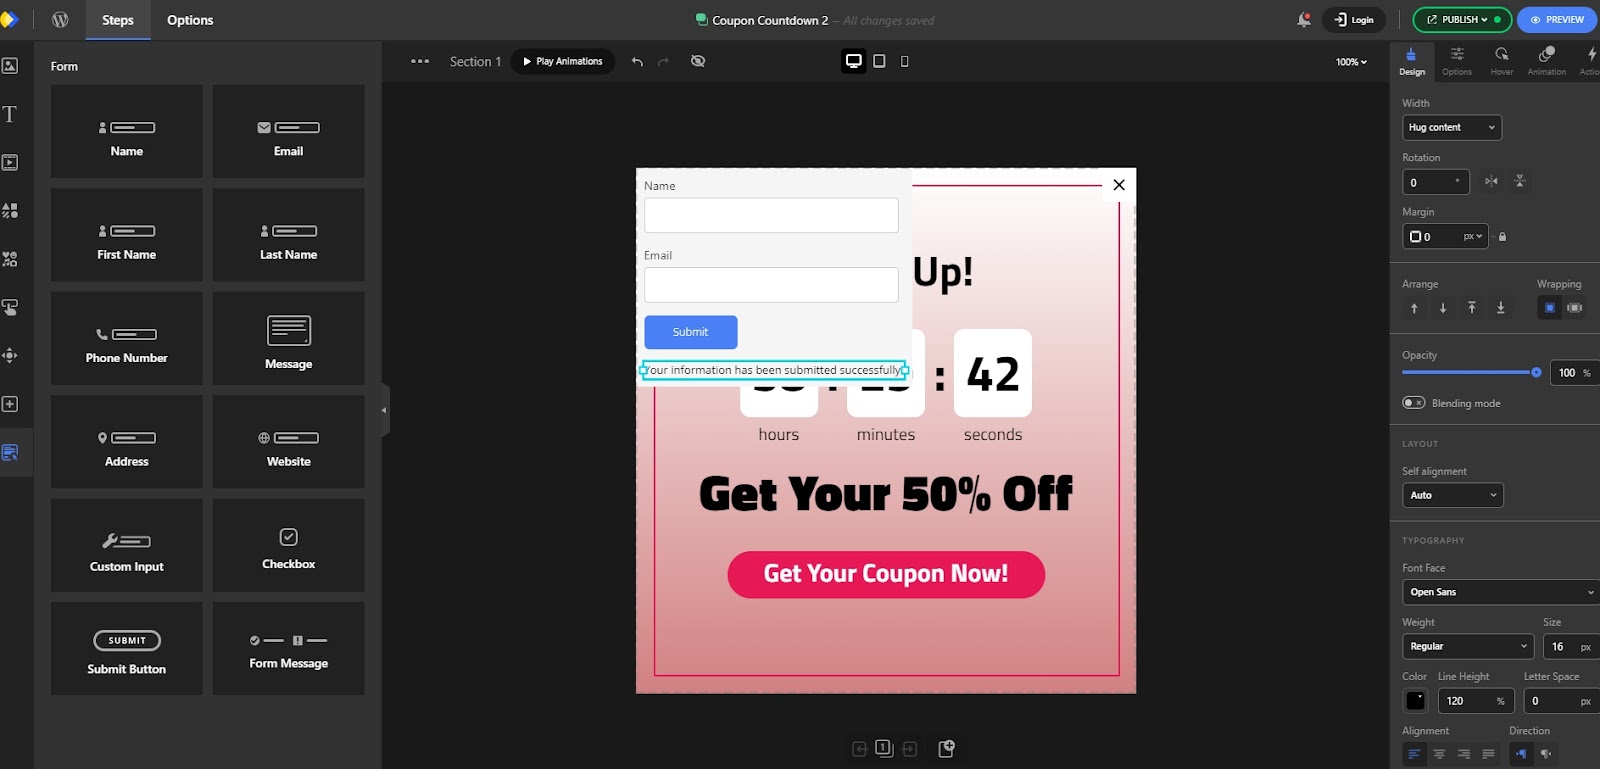
When we are done with the adjustments, our final form will look like this.

After making these changes and saving the form, our popup will appear on our website according to the display settings we’ve chosen.

After entering their name and email, the user clicks the ‘Submit’ button. A message will then appear confirming that their information has been successfully sent.


Next, we’ll use the data that the form saved. To do this, go to the ‘Leads’ menu in the Depicter dashboard. Here, you’ll see the information that users submitted through the popup form. This data serves various purposes, such as email marketing. Keep in mind that you can filter, search, and even export this data as a CSV file for further analysis.

Conclusion
By using email marketing effectively and taking advantage of tools like Depicter, you can grow your email list and make more sales. This guide has covered everything you need to know, from understanding your customers to creating eye-catching popups and tracking your results.
Leave Comment