
Have you ever landed on a website or blog and been greeted by a friendly message offering a discount or exclusive content? That’s the power of a welcome popup! These targeted messages can be a game-changer for your website, grabbing new visitors’ attention and sparking valuable engagement.
In this guide, we’ll show you how to create a welcome popup using Depicter, a user-friendly WordPress plugin. We’ll walk you through the entire process, from installation to customization, ensuring your popups deliver the right message at the right time.
What is a welcome popup?
A welcome popup is a personalized greeting that appears when a visitor first lands on your website. It captures attention, provides value, and encourages engagement.
Welcome popups are a powerful tool to boost your business. Offering incentives like discounts or exclusive content can quickly convert new visitors into loyal customers.
How to create a welcome popup with Depicter?
Installing Depicter
Depicter is easy to install. Just go to the ‘Plugins’ menu in your WordPress dashboard, click ‘Add New,’ search for ‘Depicter,’ and click ‘Install Now.’ Activate it, and you’re ready to start creating and customizing your popups.
Importing a Template
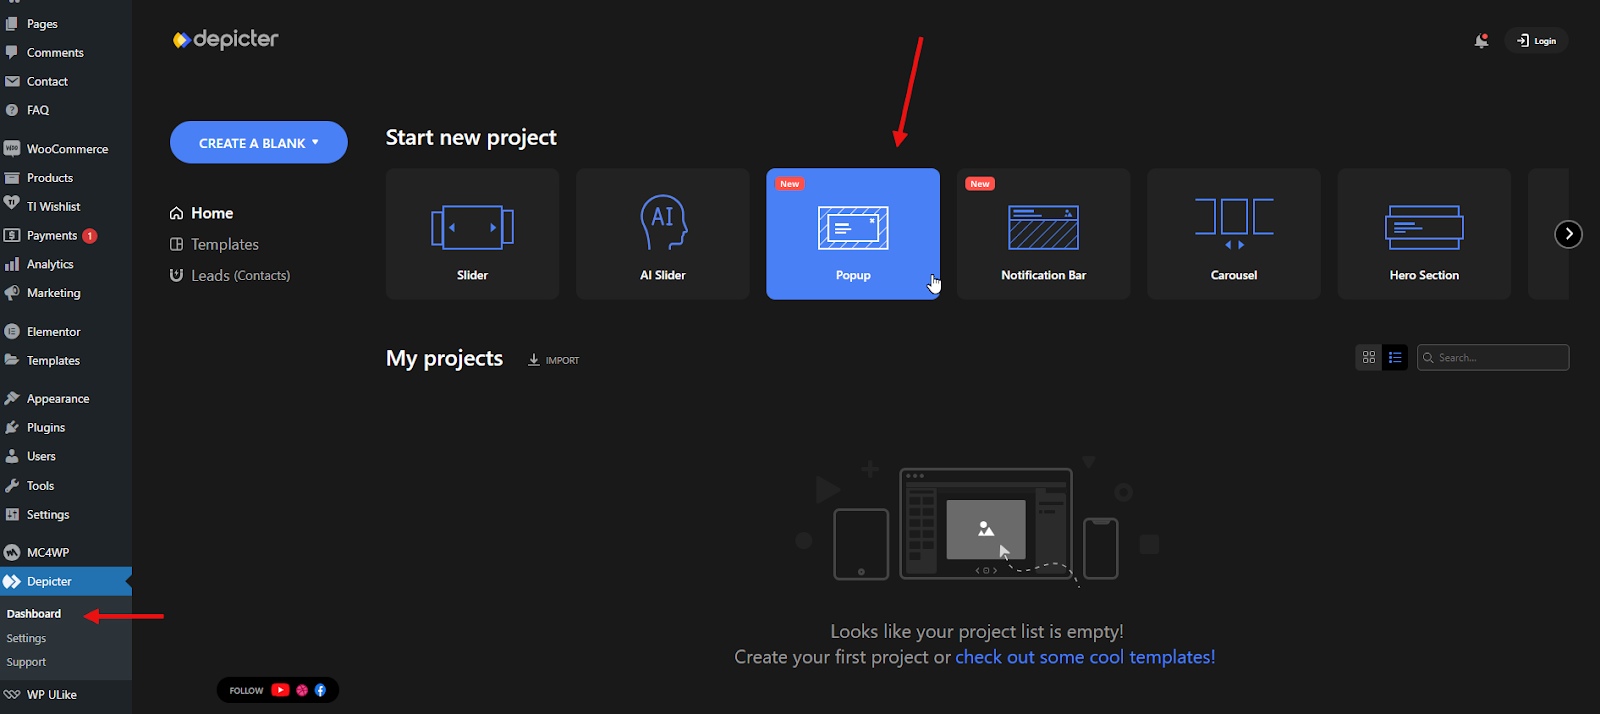
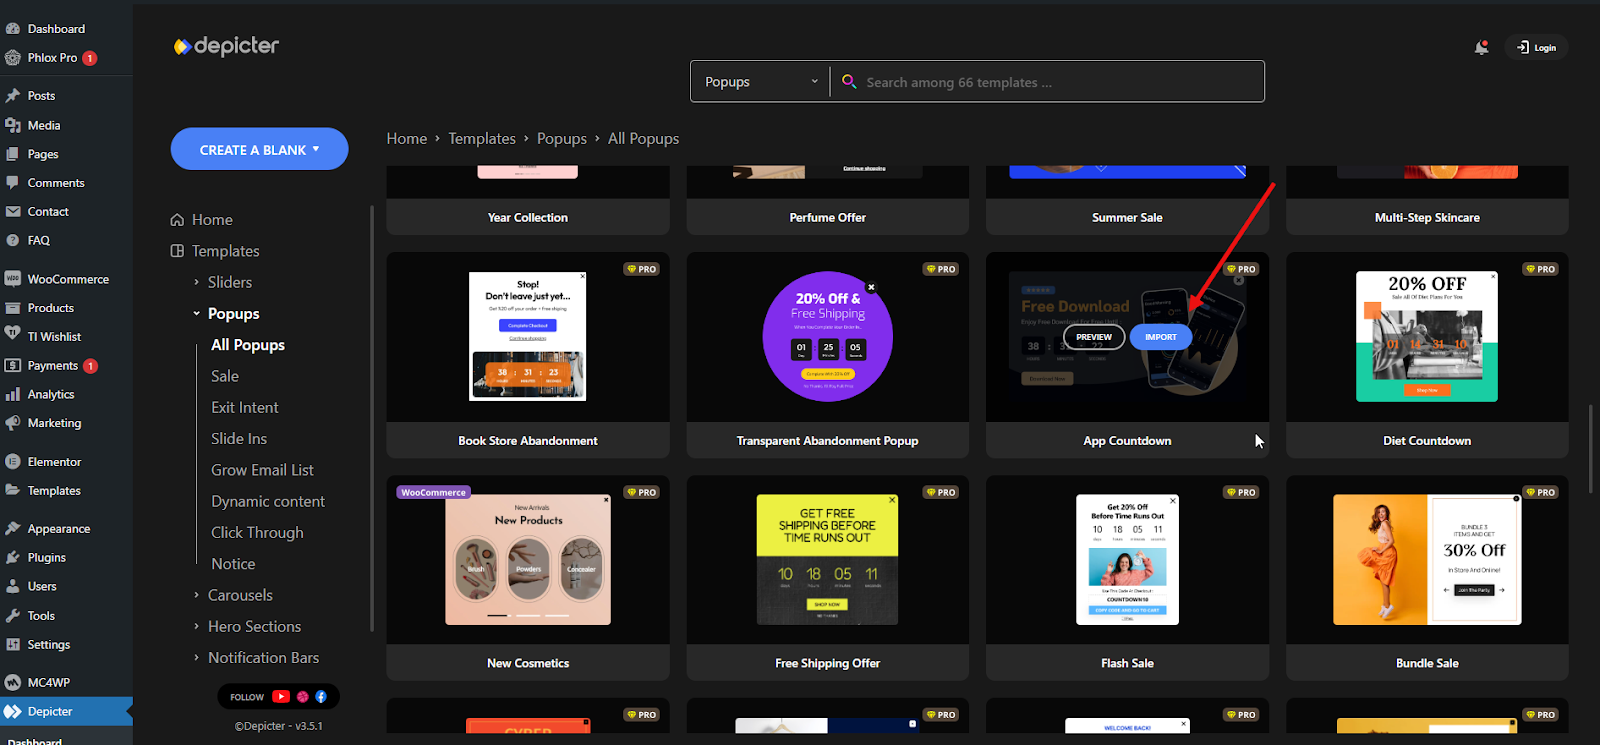
After installing the plugin, we’ll access the Depicter dashboard. This dashboard provides tools to create a variety of visual elements like sliders, popups, carousels, and notification bars. To streamline the process, we’ll start with a pre-designed template for our popup. You can find these templates by clicking on the ‘Popup’ option at the top of the dashboard.
We can preview each one by using the ‘preview’ button. To import any of them, simply click the ‘import’ button. In a few seconds, the import process will finish and take you to the Depictor editor.
Here, we can customize our pop-up exactly the way we want using the various tools and options that Depictor provides.
Customizing the Template

To learn more about creating a pop-up from scratch and using Depictor’s tools to personalize it, I recommend watching this video.
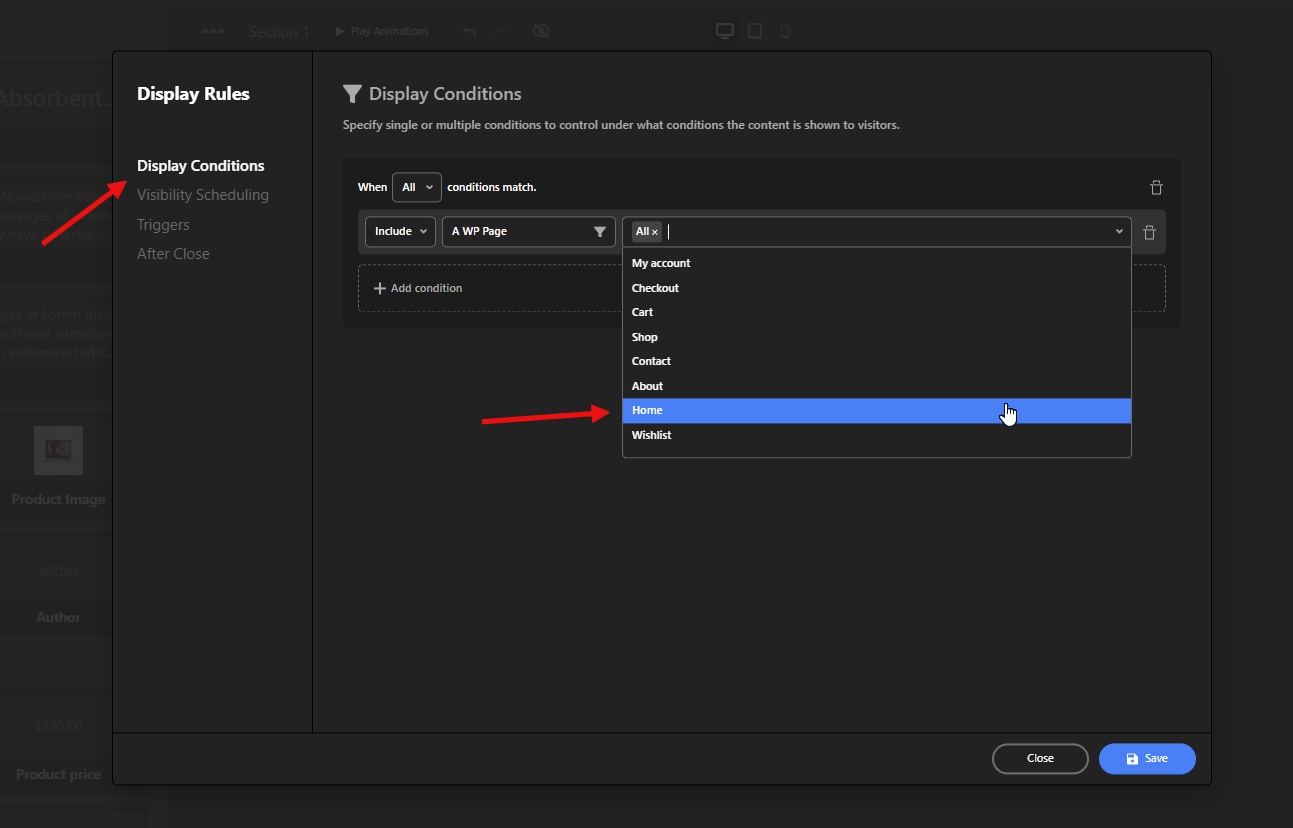
To control how the pop-up is displayed, we need to configure the Display Rules. To do this, click the ‘publish’ button, and then in the ‘Display Rules’ section, click the ‘Configure’ button.

These four sections allow you to customize how the pop-up is displayed. In the first section, we’ll specify where on the website the pop-up should appear. For this example, we’ll choose the Home page.
You use the second section to schedule when the popup will appear. I suggest reading this article for more details.
In the ‘after close’ section, you can determine what happens to the popup once it’s closed.
Next, in the ‘Triggers’ section, we’ll set the conditions for when the pop-up should appear. For this example, we’ll use the ‘Spend Time on page’ option and set it to 3 seconds.

Finally, we’ll save the changes and click the ‘Publish Now’ button under the publish menu.

After a visitor opens the homepage of the website, our pop-up will display after 3 seconds.

Conclusion
Welcome popups are a powerful tool for any website owner. They provide a valuable opportunity to greet new visitors, showcase your offerings, and convert them into engaged users. With Depicter, creating and customizing your own welcome popups is a breeze.
This guide has walked you through the process of installing Depicter, selecting a pre-designed template, and customizing it to your liking. Furthermore, you’ve also learned how to configure display rules and triggers to ensure your popups appear at the most impactful moments.
Now it’s your turn! Take advantage of Depicter’s user-friendly interface and create a compelling welcome popup that drives results for your website. Finally, and most importantly, don’t forget to check out the resources provided for further inspiration and best practices.
Leave Comment