The Display Rules section gives you full control over when and where your popup appears — so it reaches the right audience at the right moment, without being annoying or intrusive.
Here are the main settings you can adjust:
- Display Condition
Set one or more conditions to control who sees your popup. For example, you can target visitors based on the page they’re on or the device they’re using. - Visibility Scheduling
Show your popup only during specific dates or times — perfect for limited-time offers, flash sales, or holiday campaigns. - Triggers
Decide when the popup should appear based on visitor behavior, like scrolling, time spent on page, or exit intent. This makes your message more relevant and effective. - After Close
Control how soon the popup can appear again after someone closes it — to avoid spamming users and give a better browsing experience.
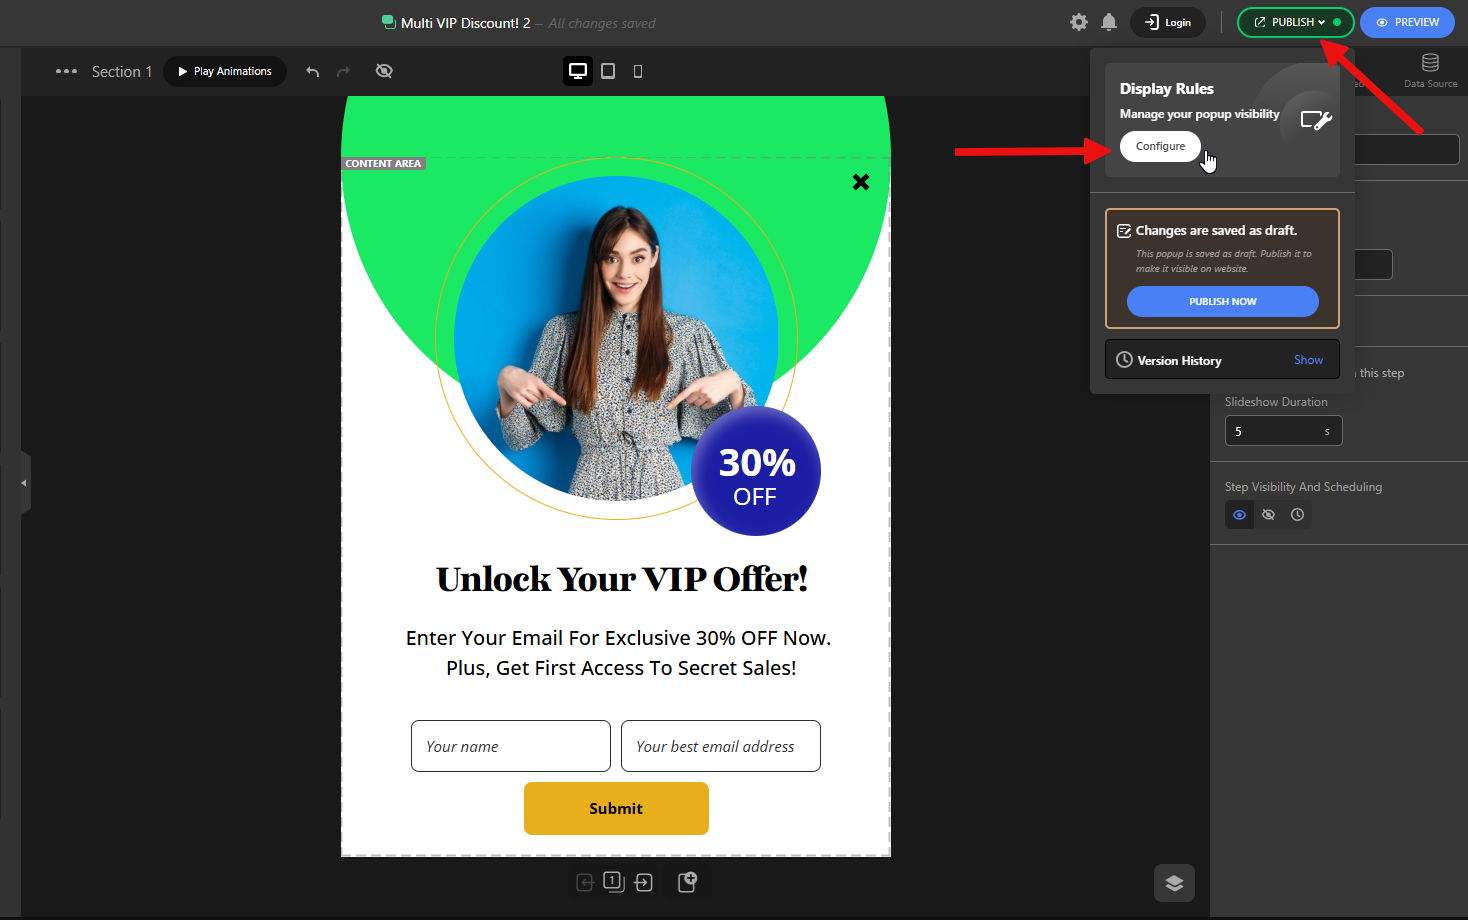
To access Display Rules, first click the Publish button, then click Configure under the Display Rules section.
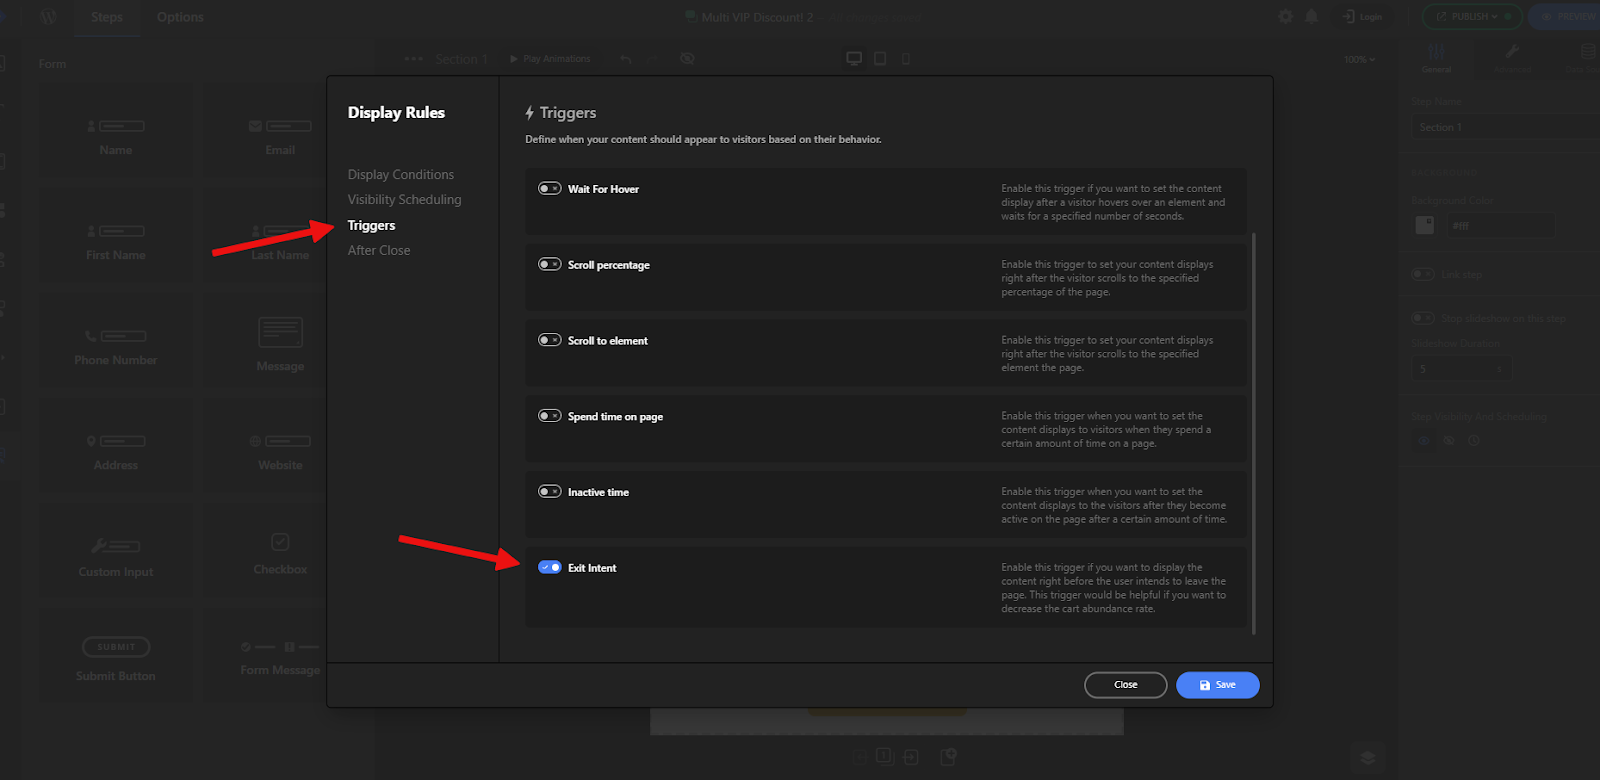
Exit-intent to catch abandoning visitors
Exit-intent is technology that detects when a user is about to leave a webpage.
When this happens, the website can show a message—like a special offer, access to extra content, or a short feedback form.
An Exit-intent Popup helps keep users engaged right before they leave. Using this method can lower bounce rates, improve conversions, and give useful information about user behavior, all without interrupting the overall user experience.
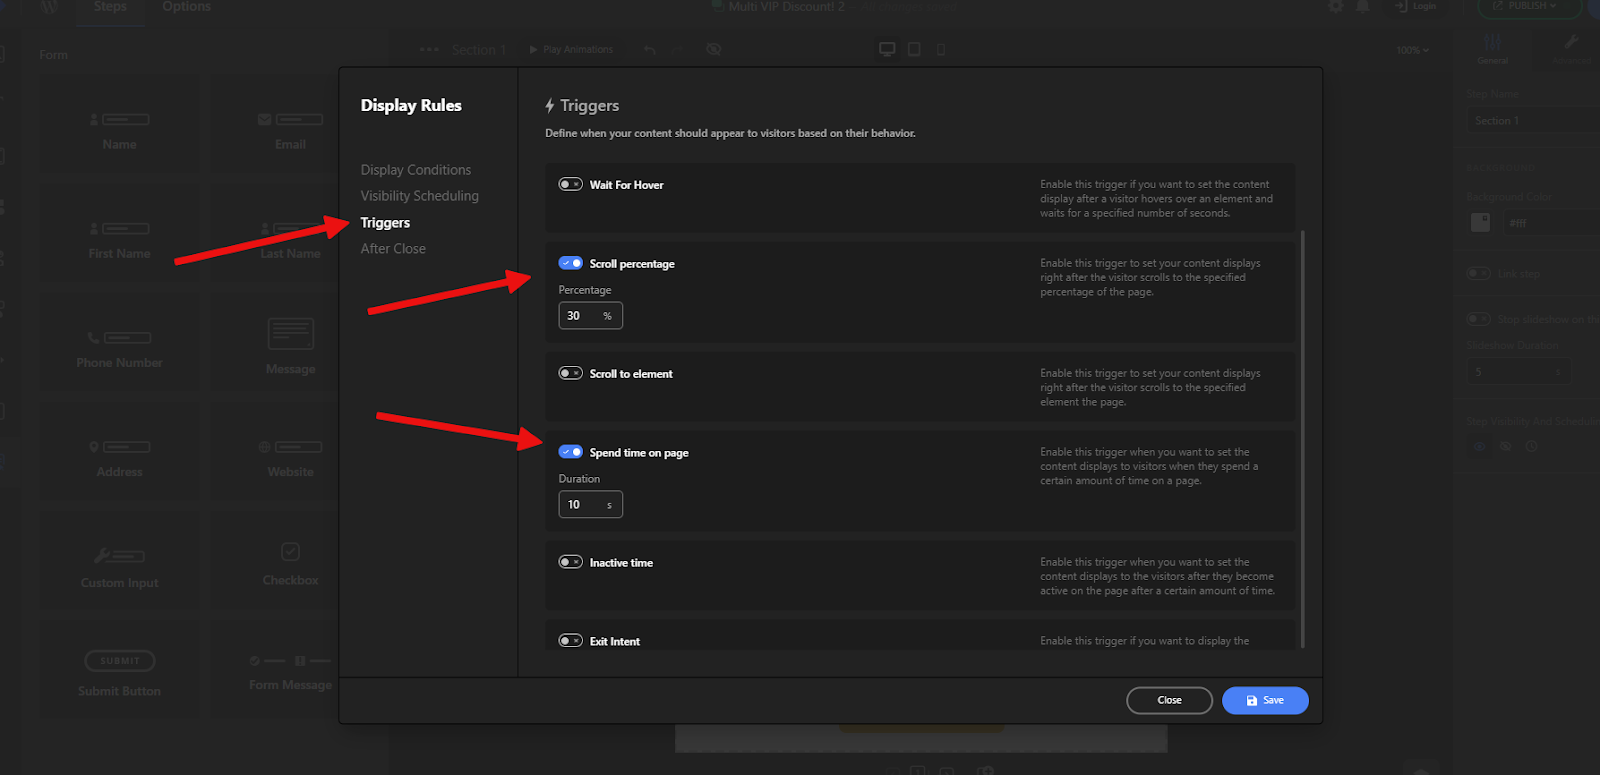
To enable this feature, go to the Triggers section and turn on the Exit Intent option.
Time delay or scroll-based triggers
Time-based and scroll-based triggers are two effective methods for showing popups based on user engagement, rather than displaying them immediately upon page load.
These triggers help you create a Scroll popup or a so-called Time-triggered Popup to ensure that your message appears at the right time, increasing the chances of user interaction without disrupting the browsing experience.
Spend Time on Page: This trigger shows the popup after a visitor has spent a defined amount of time on the page. It’s useful for identifying users who are actively reading or exploring content, and gives you a chance to engage them once they’ve had time to absorb what your page offers.
Scroll Trigger: This trigger displays the popup only after a user has scrolled down to a certain point. It’s especially effective for longer pages—like blog posts or product descriptions—where scrolling indicates real interest.
Each method has its ideal use case, and when applied correctly, they can significantly boost the effectiveness of your popups.
Target by page, device, country, or traffic source
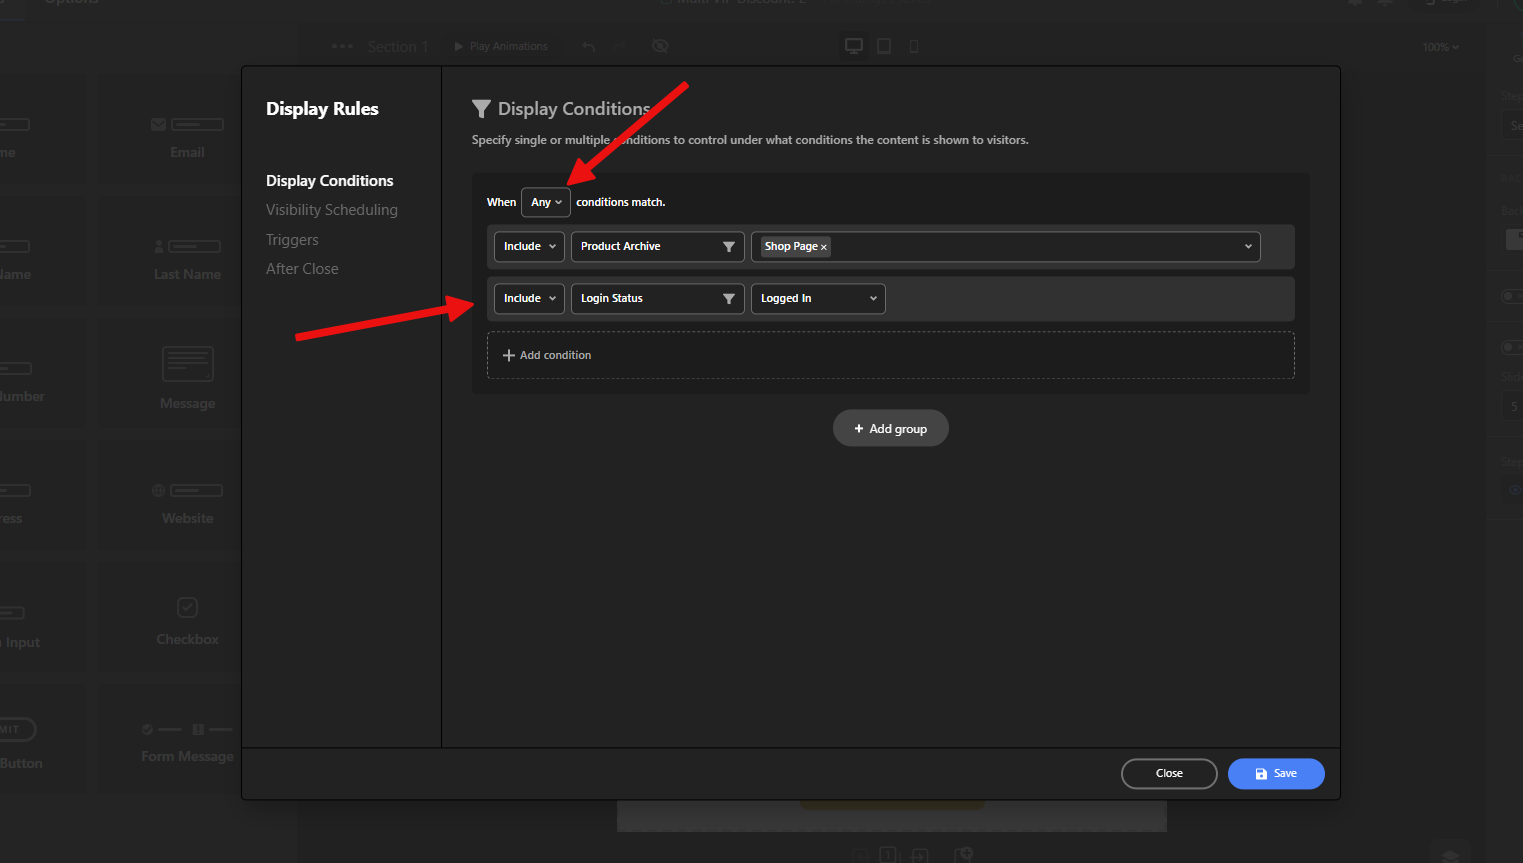
In the Display Conditions section, you define where and to whom your popup should appear. This system allows you to combine multiple rules to ensure that your popup is shown in the most relevant context for user interaction.
You have access to a wide range of conditions—ranging from basic options, like targeting a specific page or post, to more advanced rules such as checking whether the user is logged in, detecting the user’s device type, browser, or location (e.g., country), and even more technical criteria like the referrer path or specific cookies.
For example, if you want your popup to appear only for logged-in users or on the main Shop page, you can create a condition group combining both rules, as shown in the screenshots below.

Using these flexible condition settings, you can fine-tune exactly when and for whom your popups appear—maximizing relevance and impact without overwhelming your users.
Control frequency
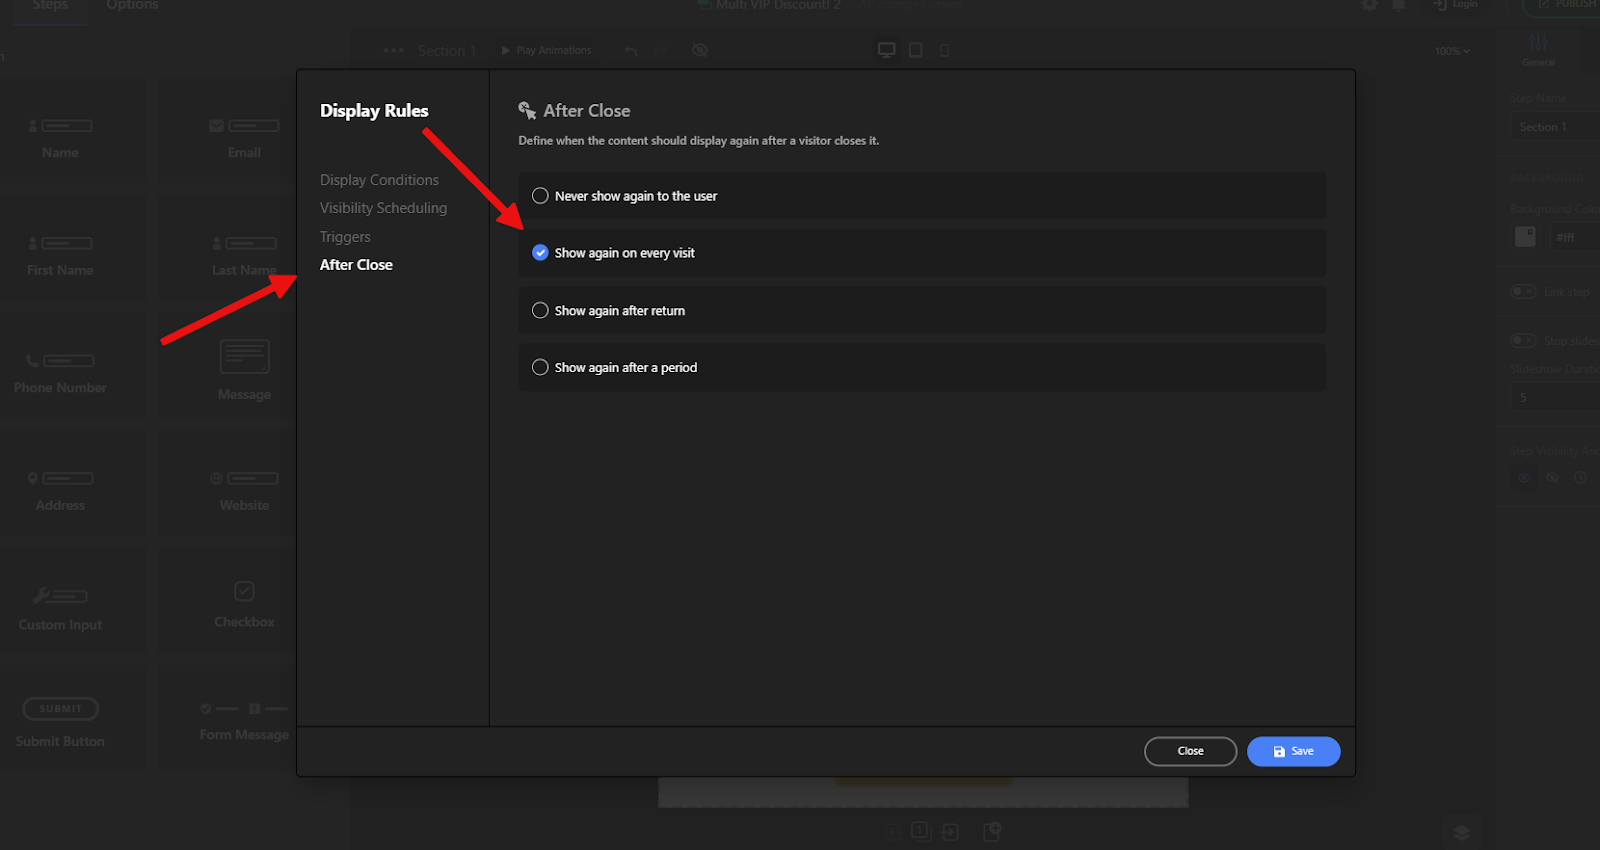
The After Close settings define what happens after a user closes the popup. These options control if and when the popup should appear again for the same user:
- Never show again to the user: The popup will not be shown to that user again, even on future visits.
- Show again on every visit: The popup will reappear every time the user visits a page on the site.
- Show again after return: The popup will be shown again when the user leaves the site and comes back in a new session.
- Show again after a period: The popup will reappear after a specific time delay (e.g., after 3 days), even if the user has closed it before.
These options help you control popup frequency and avoid overwhelming users while still keeping your message visible when appropriate.
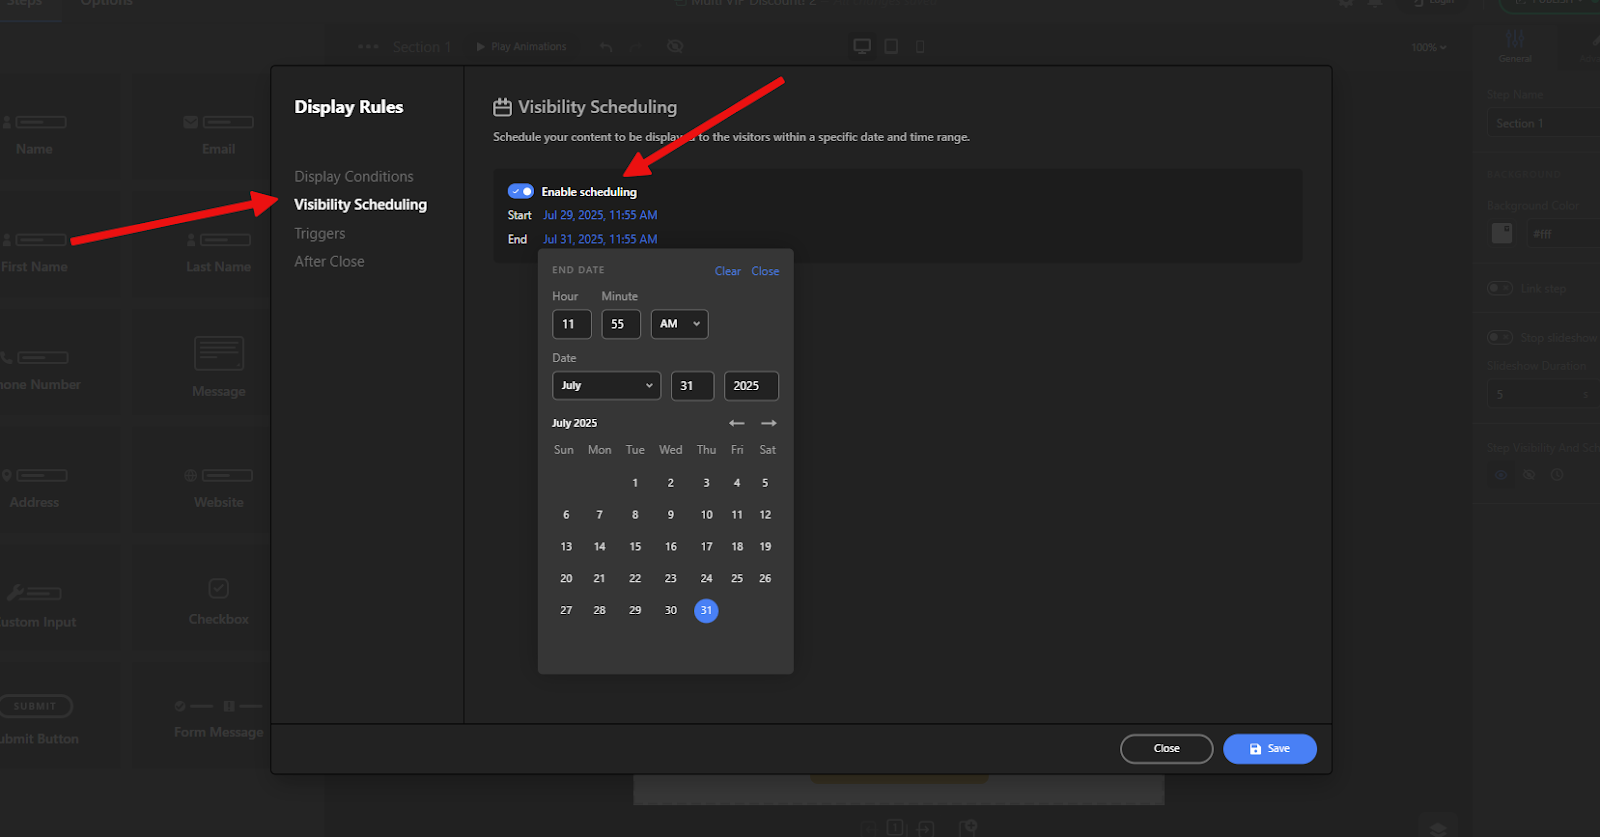
Schedule start and end times
The Visibility Scheduling option allows you to control when a popup should be visible to users based on specific dates and times.
Using the Schedule start and end times option, you can define a time window during which the popup will be active. Outside of this defined period, the popup will not be displayed to any visitors. It’s also called a schedule popup.
This is especially useful for time-sensitive promotions, seasonal announcements, limited-time offers, or event-based messages—ensuring the popup is shown only when it’s relevant.
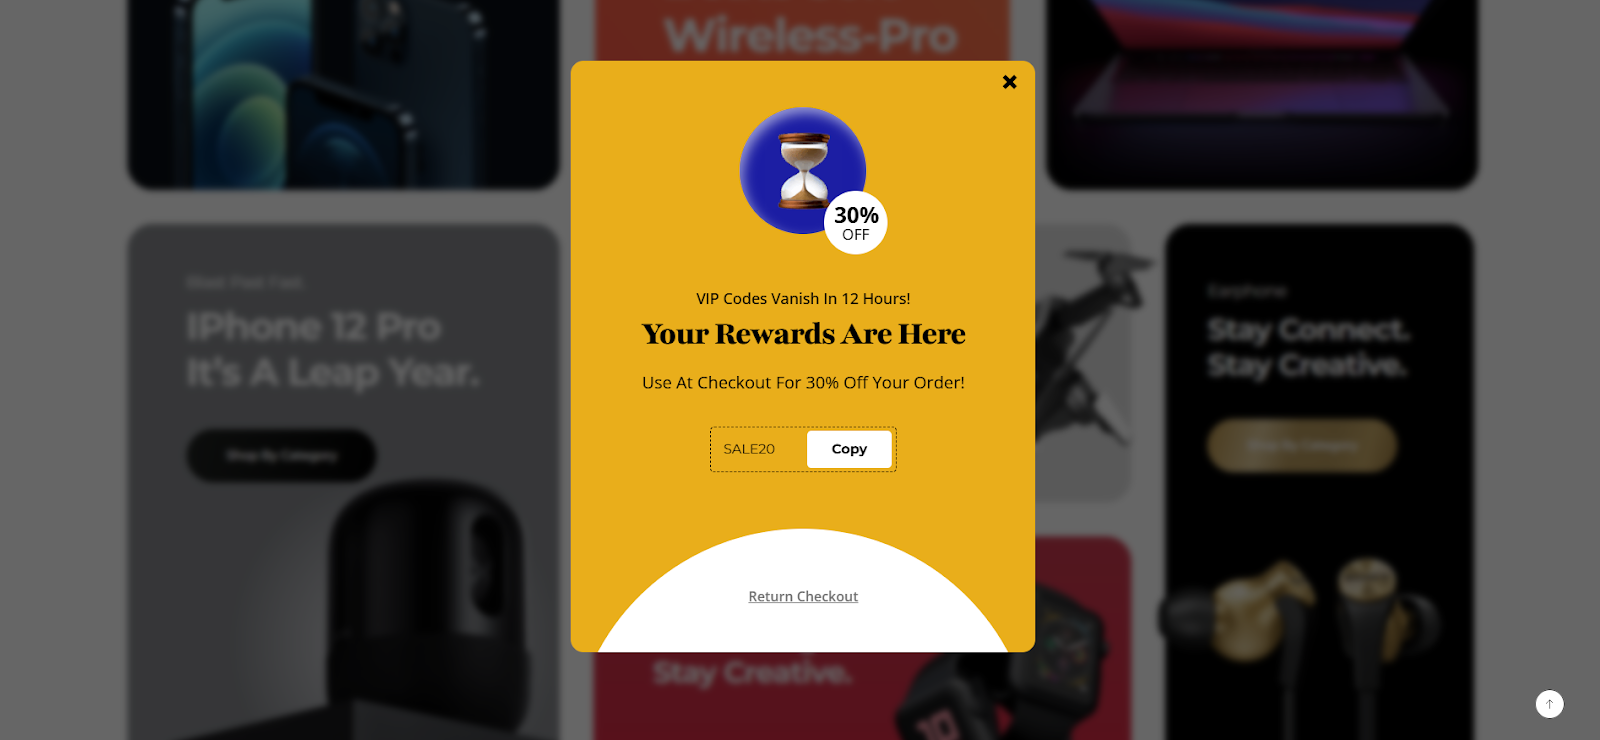
Based on all the configurations explained above, the popup we created in the previous steps will finally appear on your website according to the defined triggers, display conditions, and scheduling settings.
Before the user submits the information:
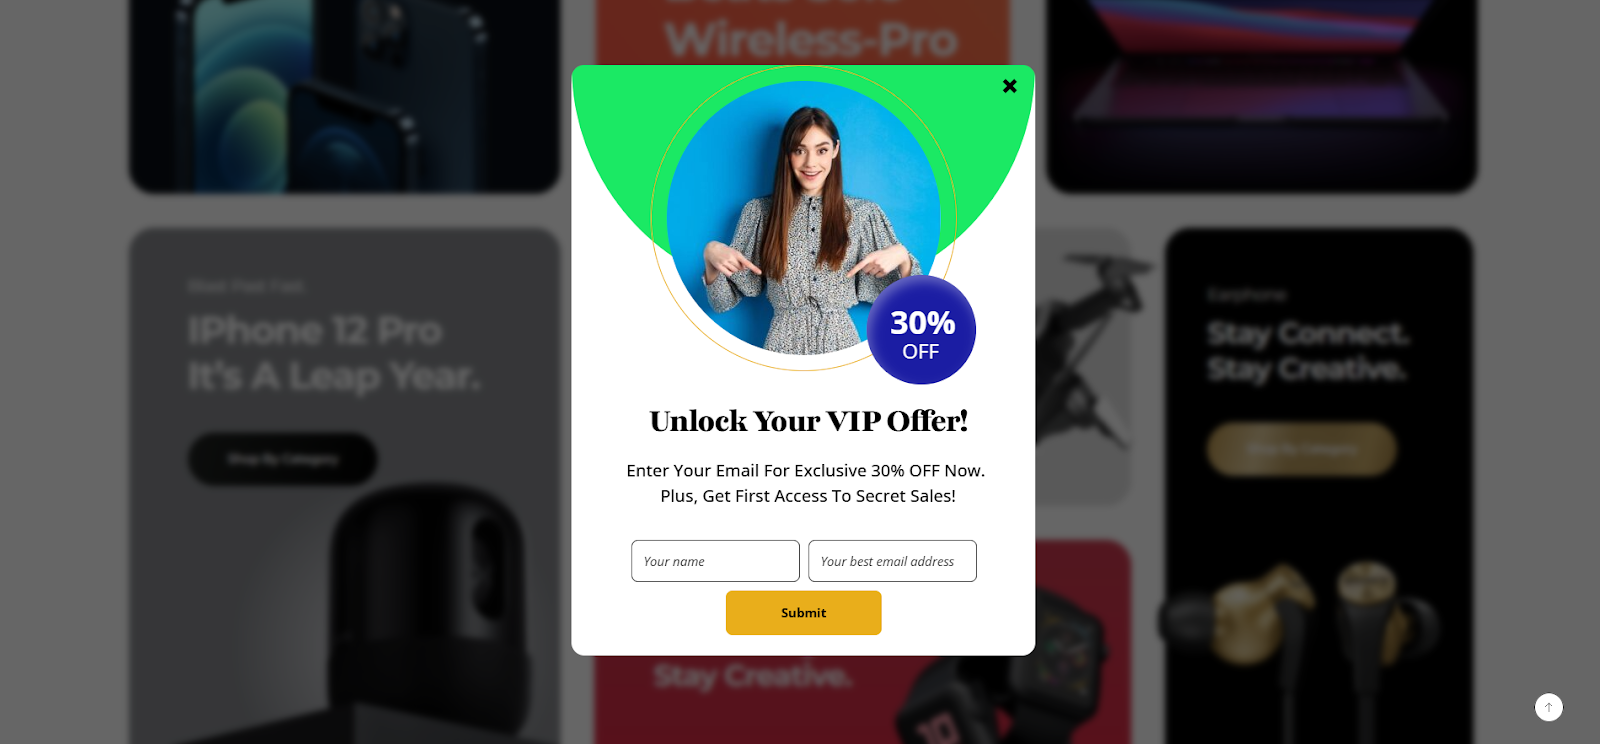
After the user submits the information: