
What is a custom post type in WordPress?
On a WordPress website, post types are utilized to differentiate between various content types in WordPress. Although both posts and pages are categorized as post types, they are designed for different purposes.
WordPress includes several default post types:
- Post
- Page
- Attachment
- Revision
- Nav Menu
Moreover, you have the option to establish custom post types. These are particularly helpful when creating content with a format different from that of a standard post or page.
For example, if you manage a movie review website, you may consider creating a custom post type for movie reviews. Additionally, custom post types can be tailored for portfolios, testimonials, and products.
The most popular custom post type for WordPress, which is added to WordPress by a plugin, is the product post type.
When you install the WooCommerce plugin on your WordPress website, it creates a custom post type called “product” for managing the products in your store.
What is ACF?
By default, there is no way to create custom post types in WordPress without touching the code. If you want to do this manually, you need to add the code for defining the custom post type to the code of your WordPress site.
The code snippet provided below creates a basic custom post type called “Recipe” that will be accessible through your admin menu.
// Our custom post type function named Recipe
function create_posttype() {

    register_post_type( 'recipes',
    // Options
        array(
            'labels' => array(
                'name' => __( ‘Recipes’),
                'singular_name' => __( 'Recipe' )
            ),
            'public' => true,
            'has_archive' => true,
            'rewrite' => array('slug' => 'recipes'),
            'show_in_rest' => true,

        )
    );
}
// Adding our function to theme setup
add_action( 'init', 'create_posttype' );
There are many more details to consider when adding custom post types and their taxonomies.
Combining all of this together and adding the code to your website can be time-consuming and requires a lot of attention to detail. Therefore, using plugins specifically for this task can be a much better option for achieving this goal.
ACF stands for “Advanced Custom Fields” which is a popular WordPress plugin. It allows users to add custom fields to their WordPress content, making it easy to tailor the editing experience to the specific needs of a website. With ACF, users can visually create fields such as text inputs, checkboxes, and more, and then assign these fields to multiple edit screens. This greatly enhances the flexibility and functionality of WordPress.
How to create a custom post type with ACF?
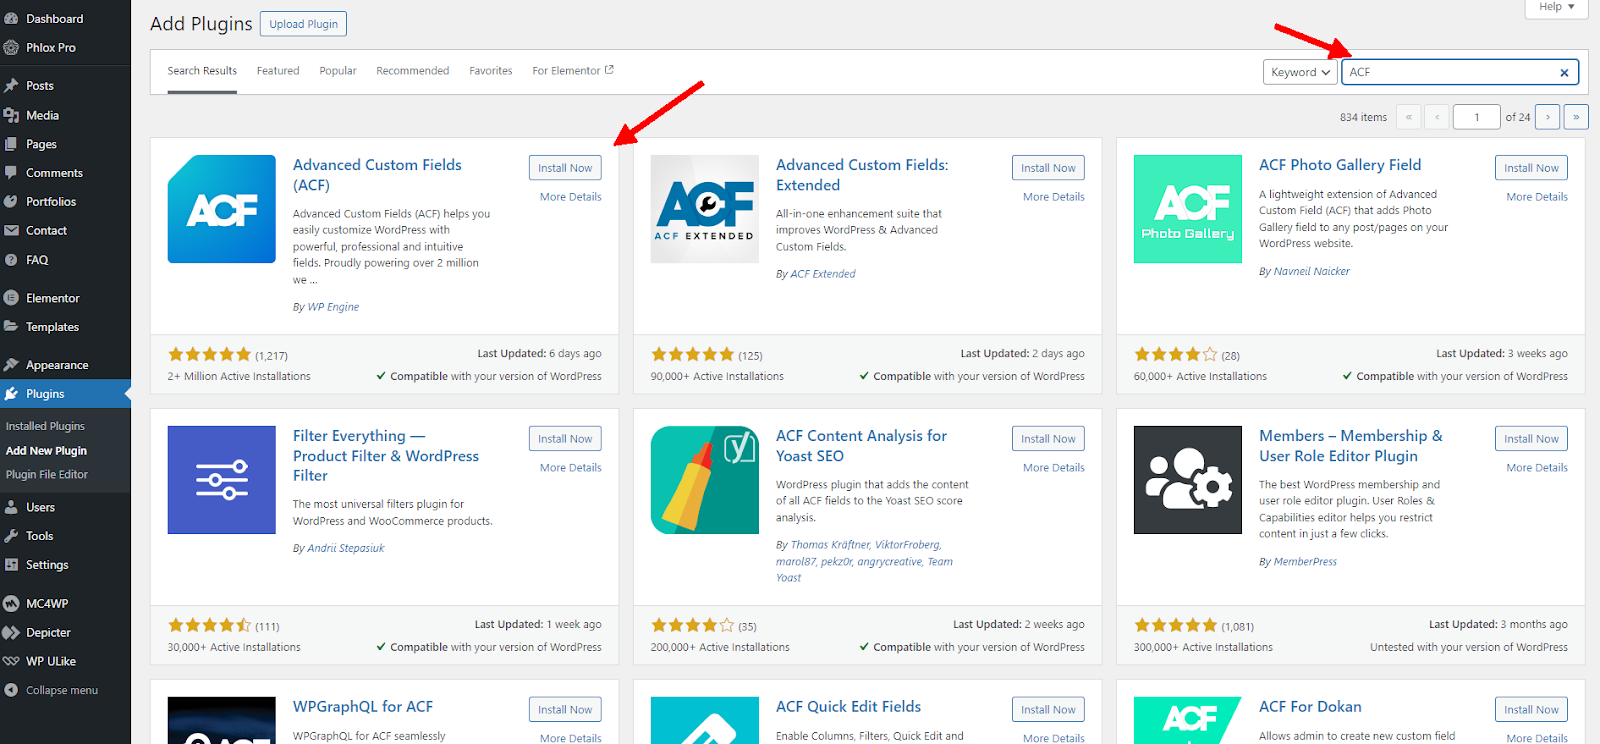
Installing ACF
From the Plugins menu, click on Add New Plugin and then search for “ACF”. In the search results, click the Install and then Activate button for the “Advanced Custom Fields” plugin.
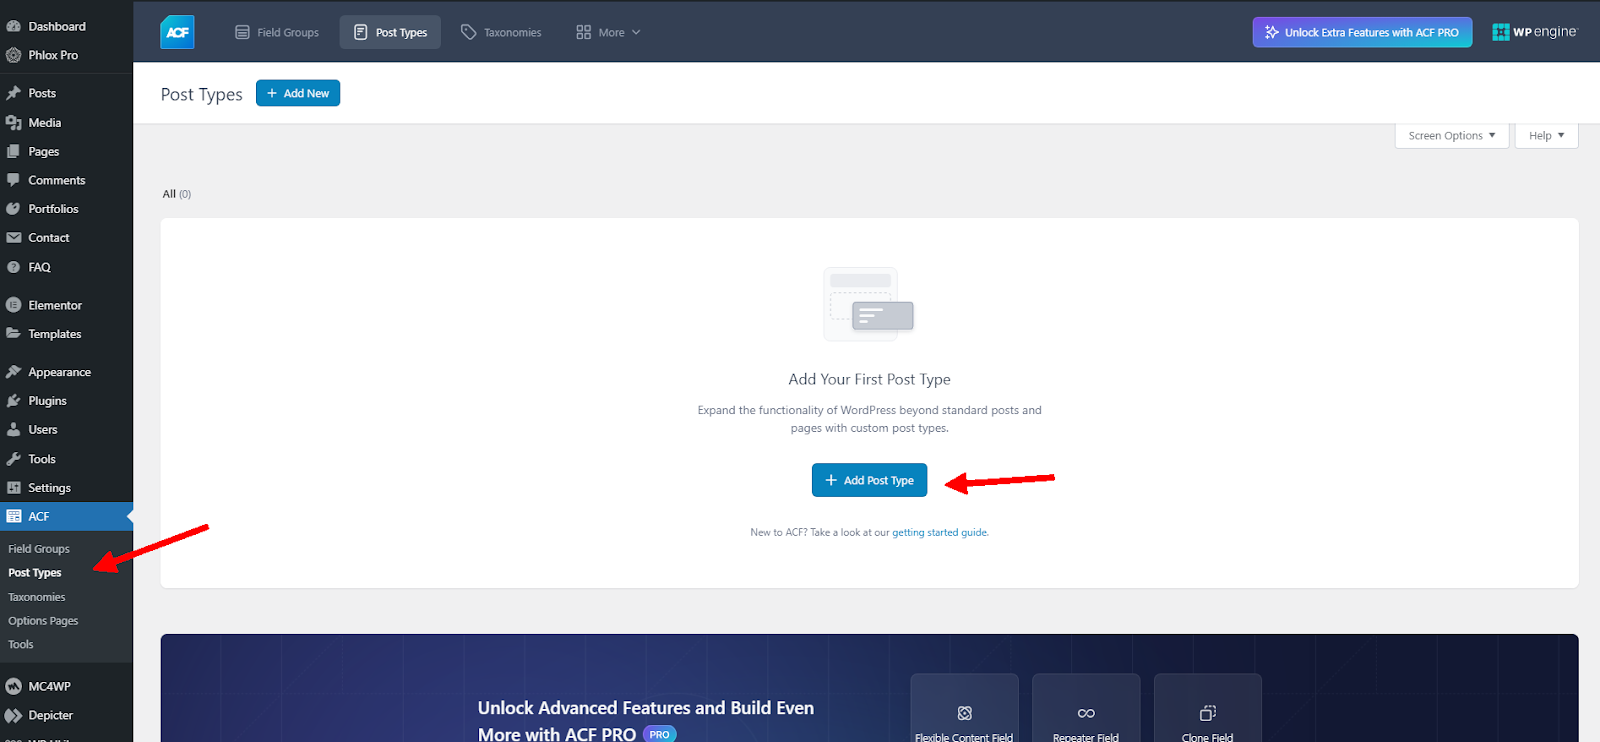
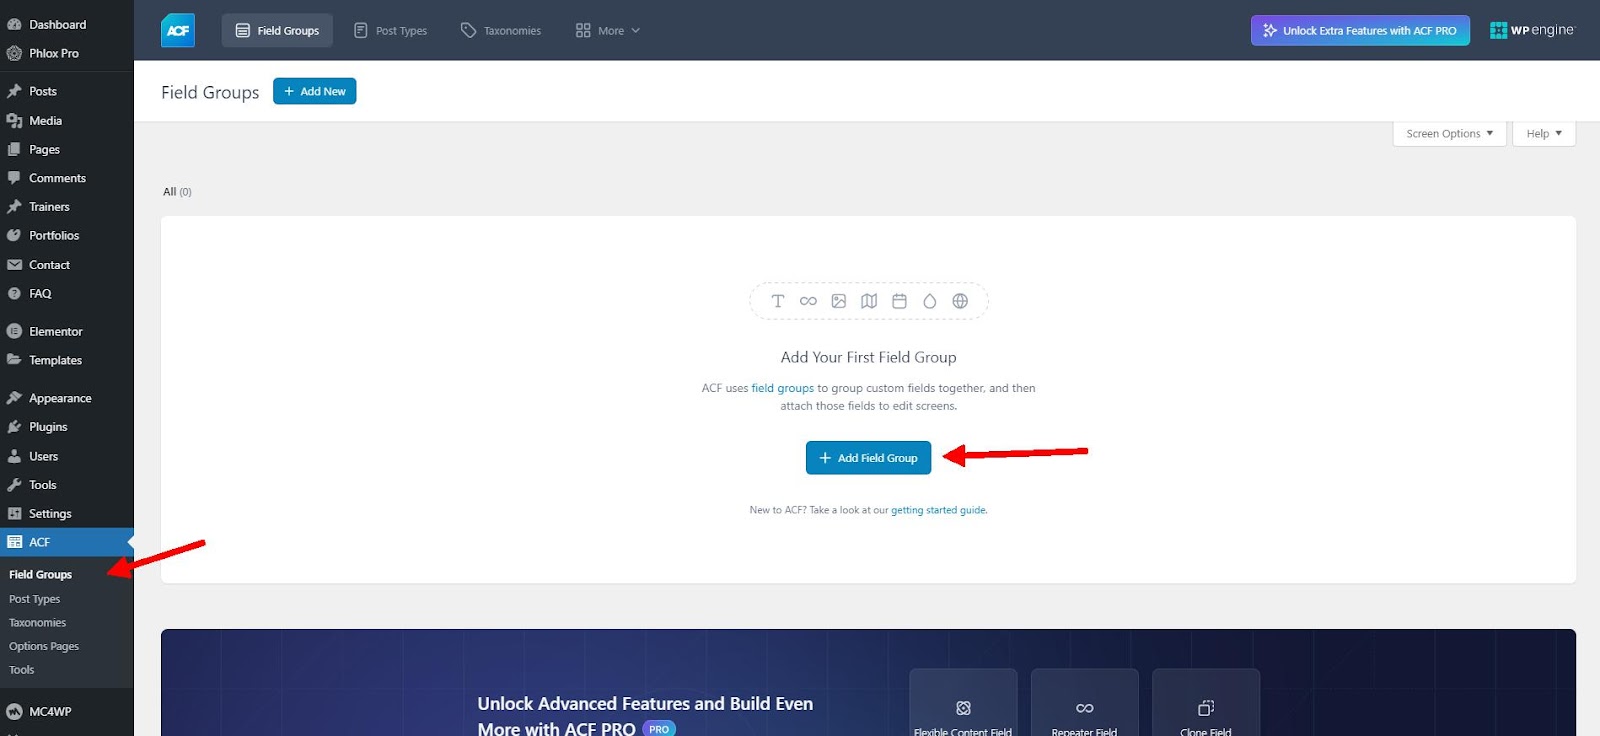
Add a new post type
From the Post Type menu, click on the Add Post Type option and enter the information related to the post type. The initial information includes Name, Label, and Key, which are sufficient to create a basic post type.

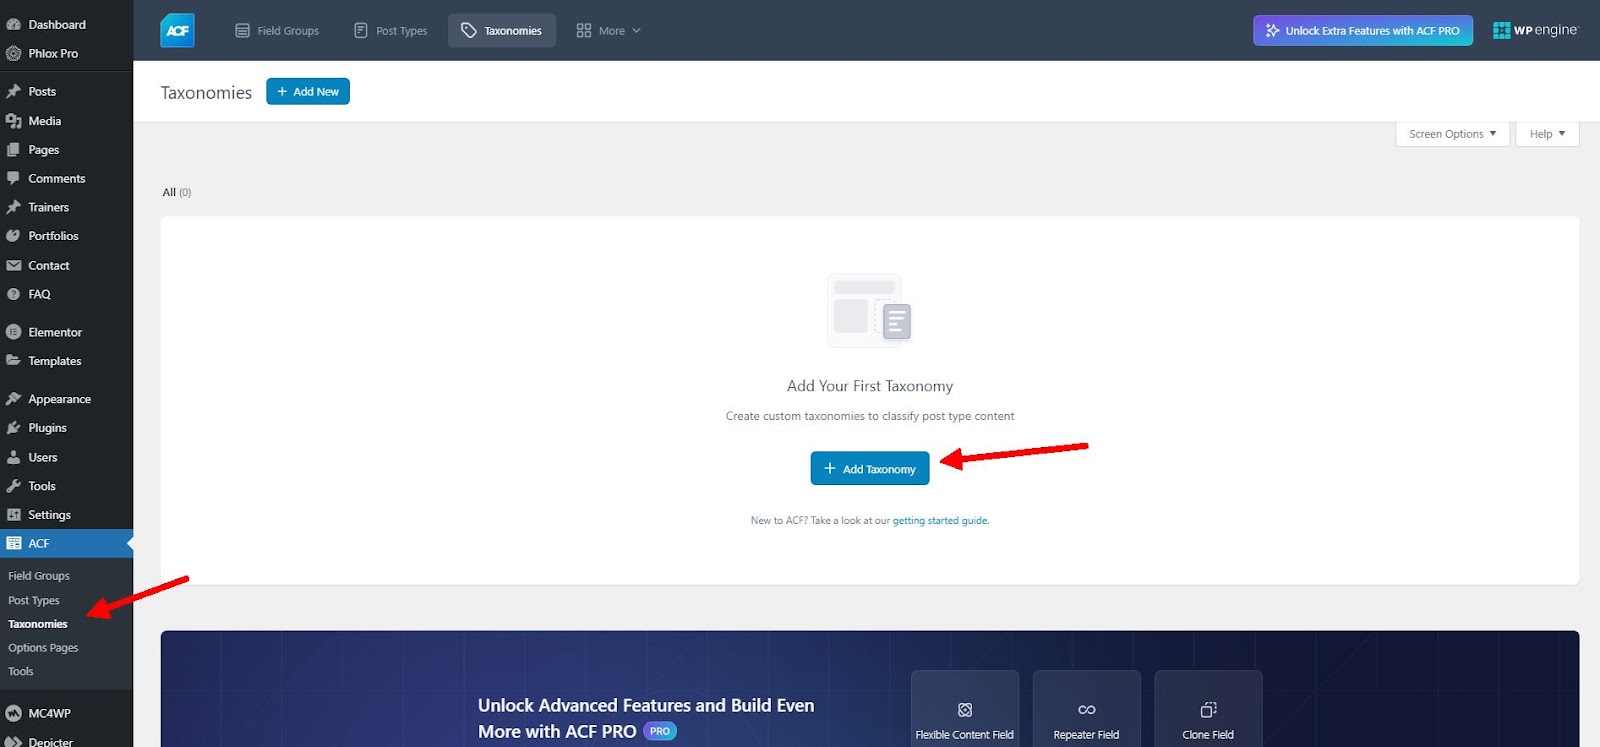
The next step is to create taxonomies. In this example, we will define a taxonomy called Field for our Trainer post type. To create it, simply enter the basic information as in the previous steps.
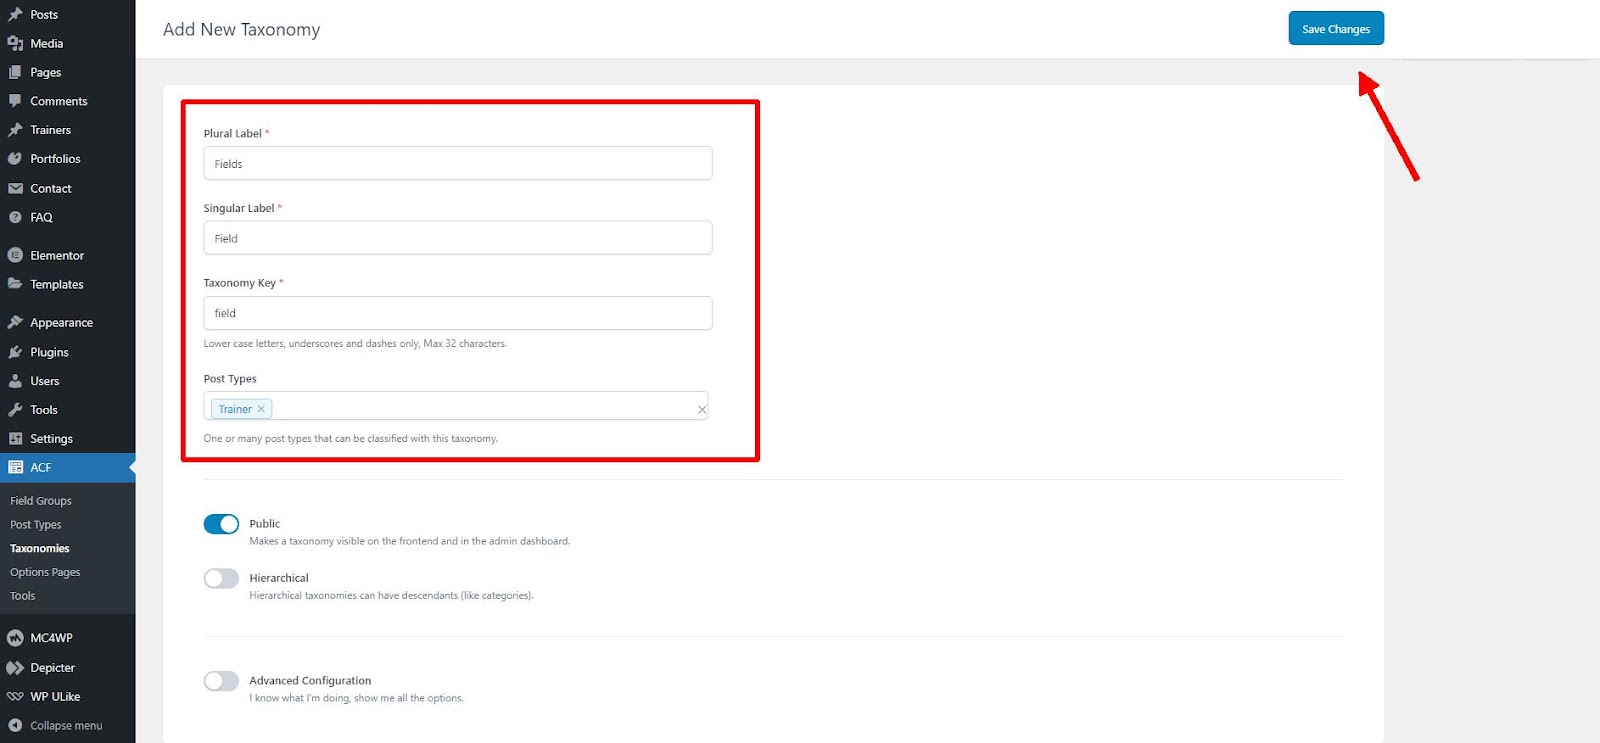
After creating a taxonomy, we proceed to create fields, which are actually metadata for our post type. These are completely optional and you can create as many of them as you want in different types such as text, option box, image, and more, according to your needs and preferences.
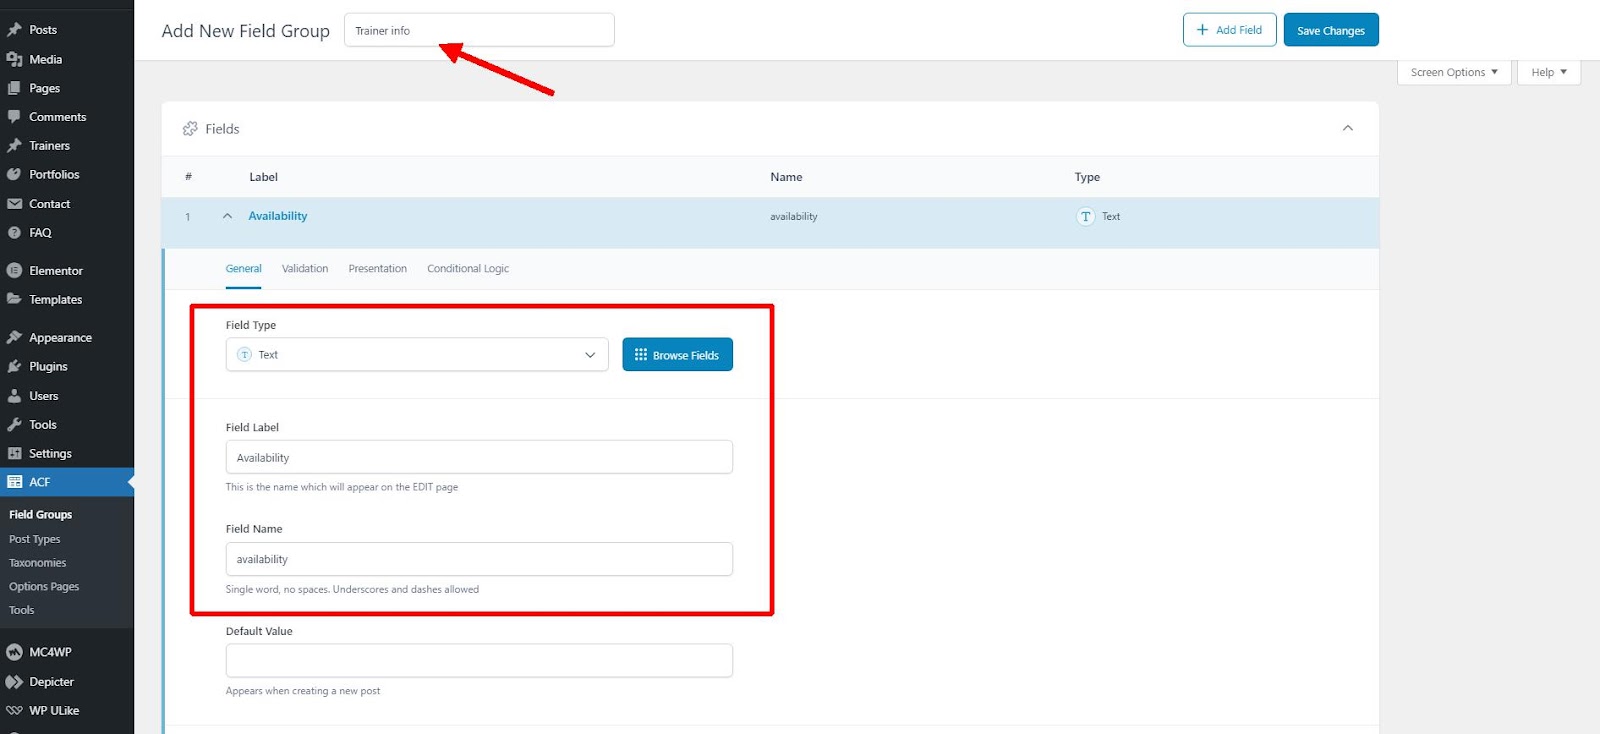
After entering the basic information, you must make sure that you link the newly created field to the corresponding post type.
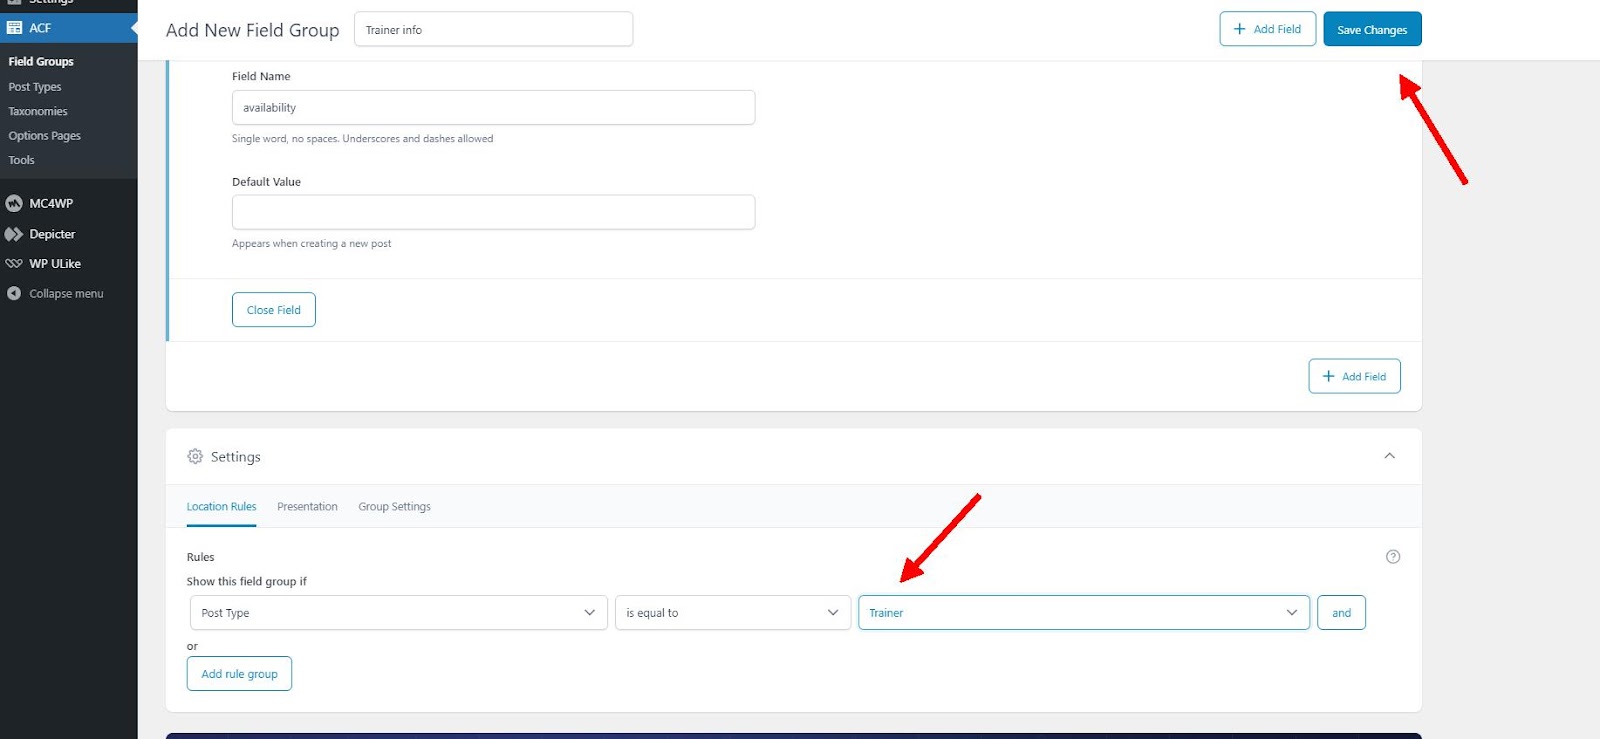
Finally, you will see that a menu with the same name that we assigned to your post type has been added to the WordPress admin menus. We can use this menu to manage your post type.
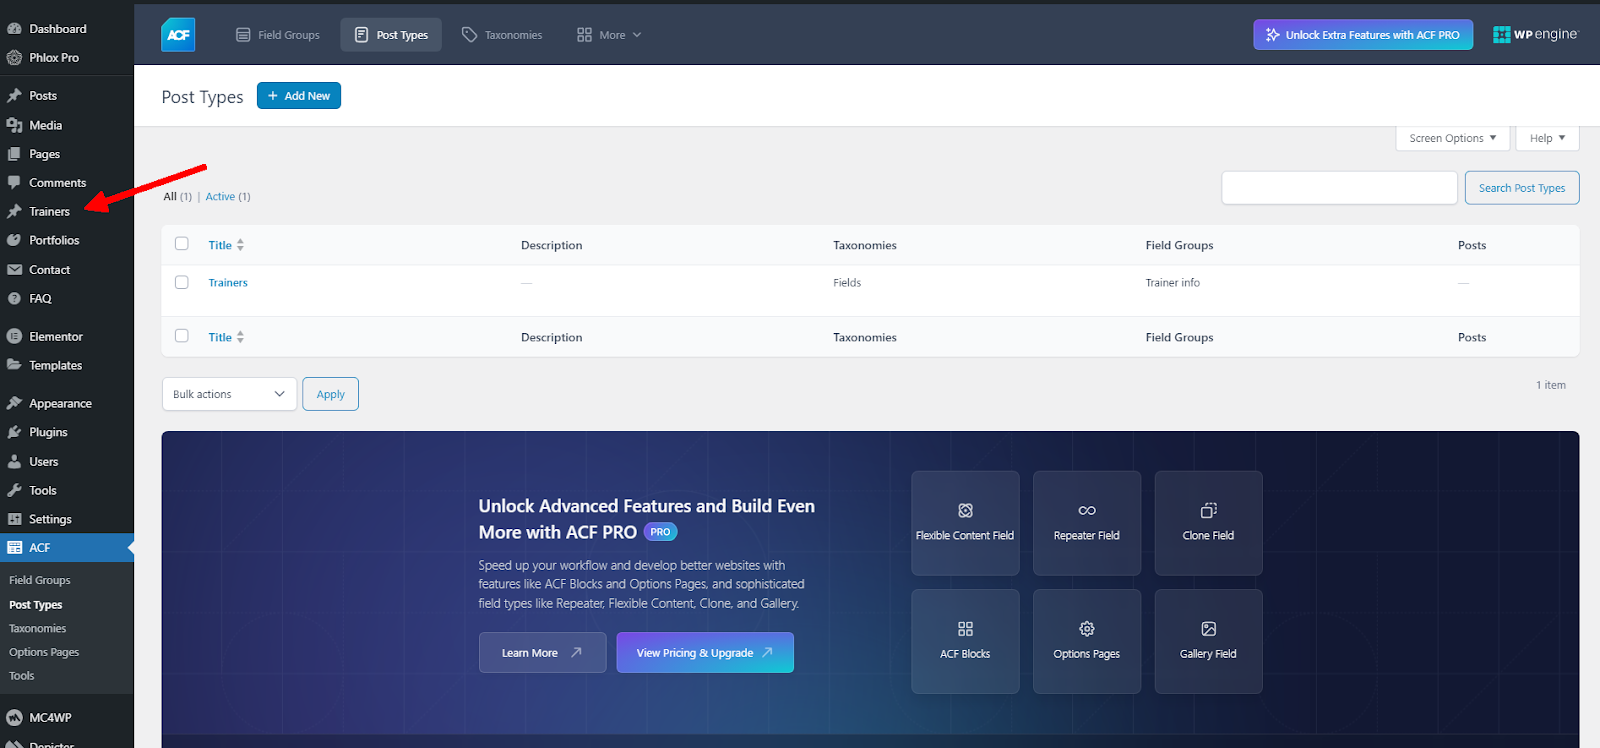
Adding new posts to our custom post type

We go to the Trainer menu in the admin dashboard to create a new trainer, just like we would write a blog post or page. We then enter the information for the trainer and finally publish it. That’s it.
How to create a dynamic slider with ACF and Depicter?
If you are wondering what is the best slider for ACF to create dynamic sliders, the answer is Depicter. It fully supports WordPress custom posts types and you can easily create professional sliders in the shortest time. For a complete demonstration, watch the following video tutorial or continue reading for more details.
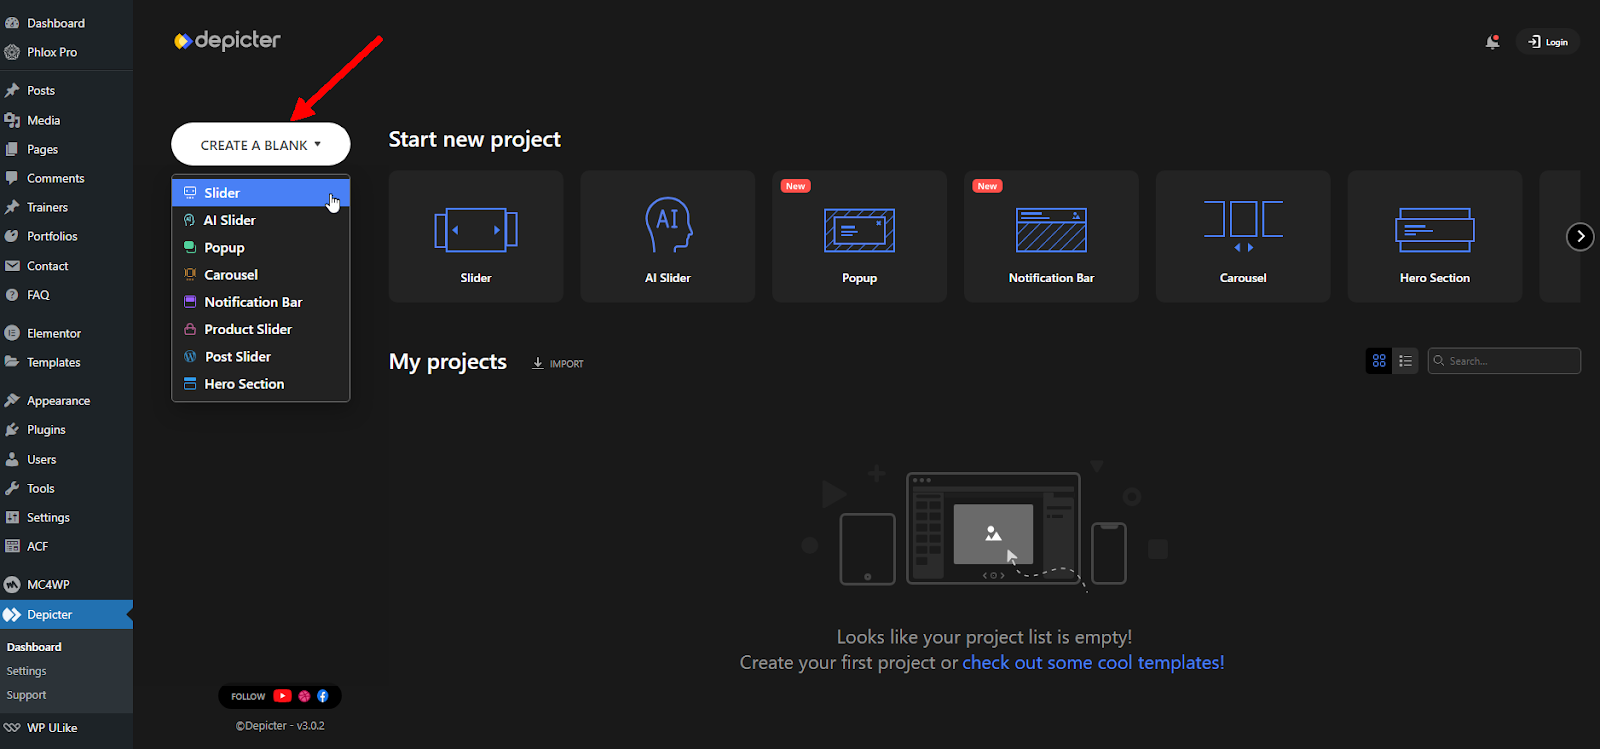
Open the Depicter dashboard and select the “Slider” option from the “Create a Blank” section to create a blank slider.
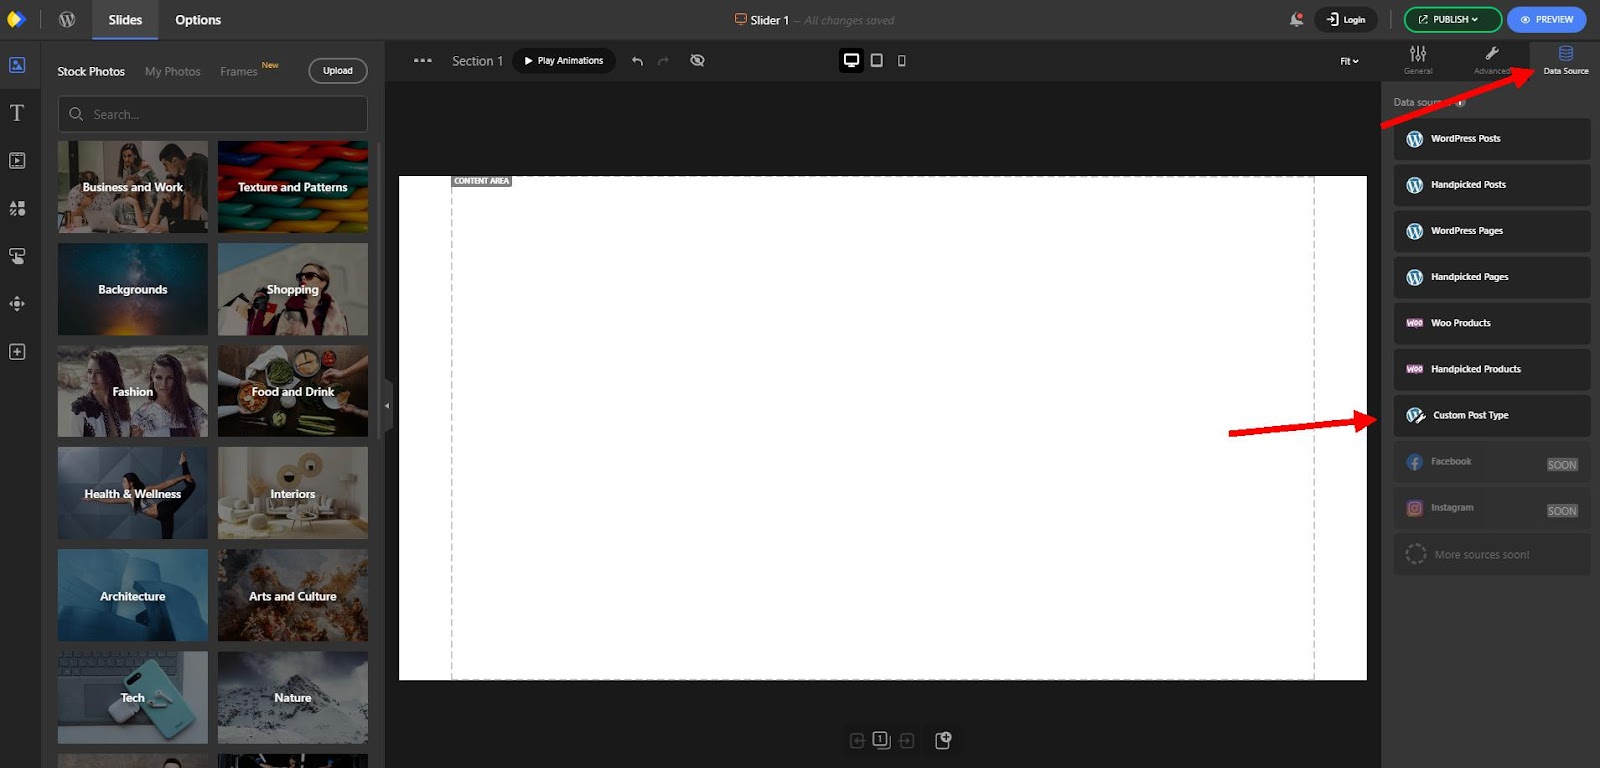
Next, we select the Data Source option from the top right corner and then select Custom Post type. This essentially converts a basic slider into a dynamic slider.
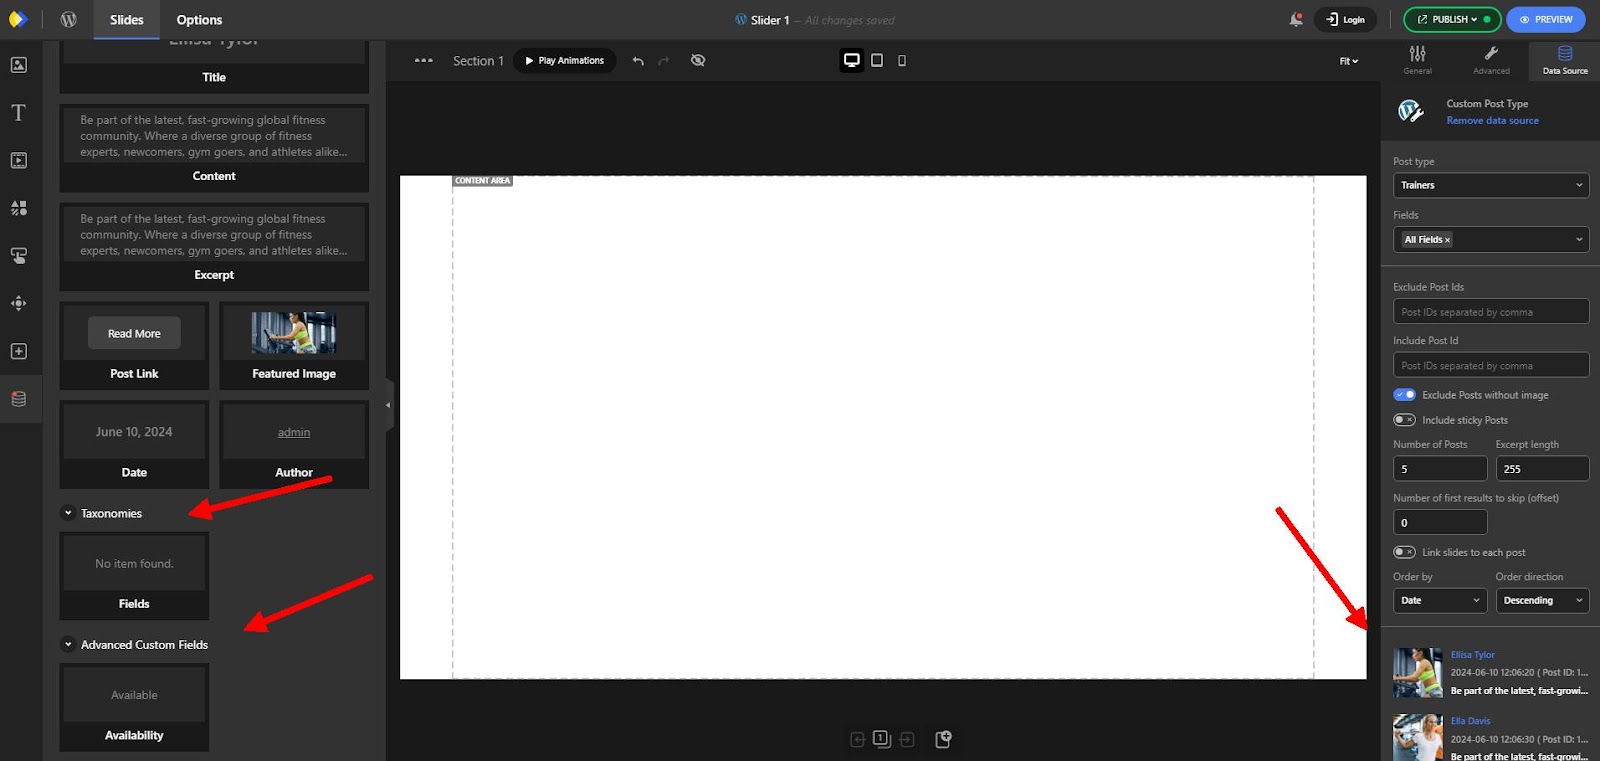
In the next step, we select the type of post type we want to choose for the slider, which in this case is Trainer.

After that, we see a preview of the available fields for Trainer in the bottom right corner, and all the default and ACF-customized data are also available for use in the slider from the left panel.

Using ready-to-use templates for your custom post slider
Utilizing pre-designed templates is an effective way to optimize time and leverage professional designs for creating sliders.
Pre-built templates for both standard and dynamic sliders differ in their functionalities. Fortunately, Depicter offers a vast selection of templates for both types, ready for import.
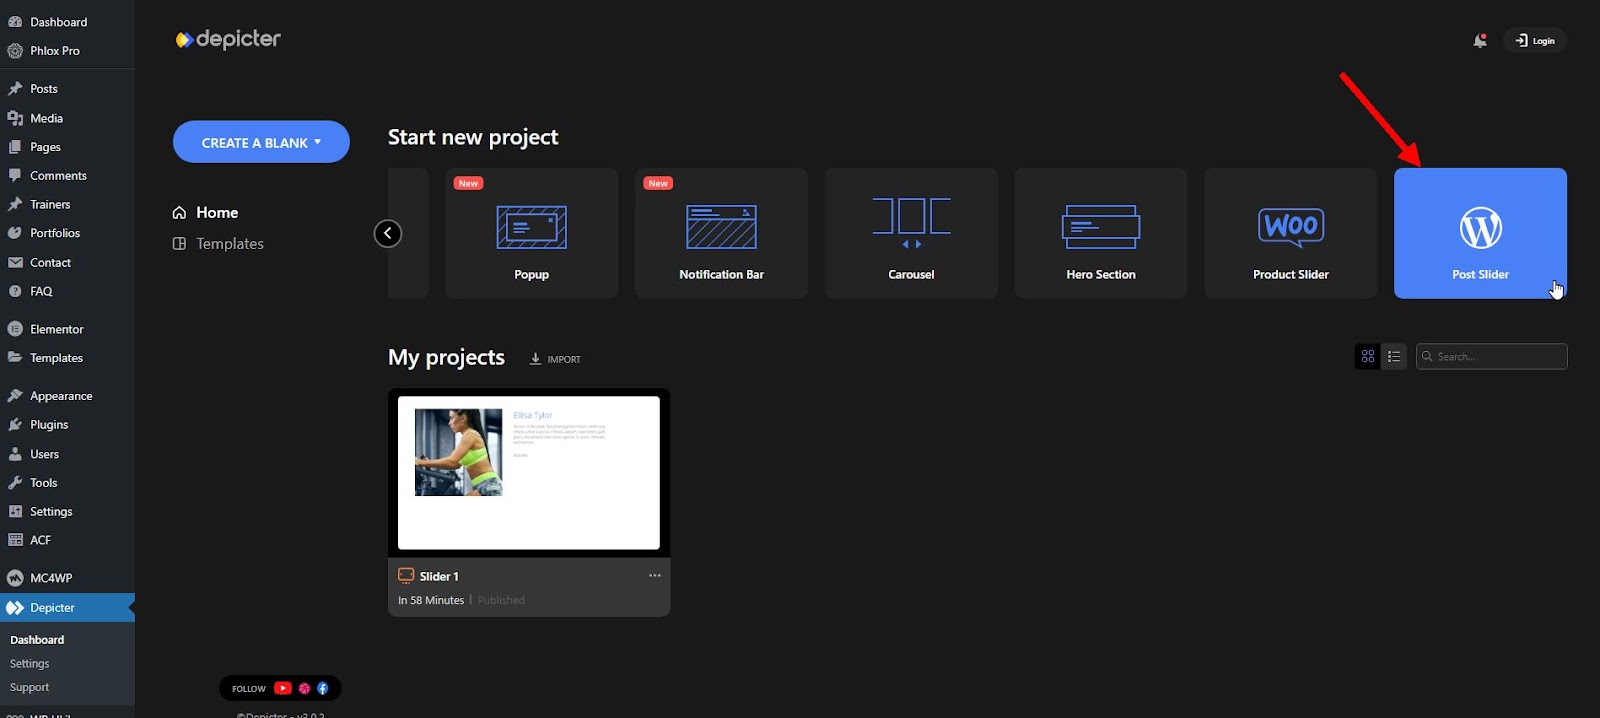
To import a template, navigate to the “Post Slider” section of the Depicter dashboard and select the desired template from the available options.
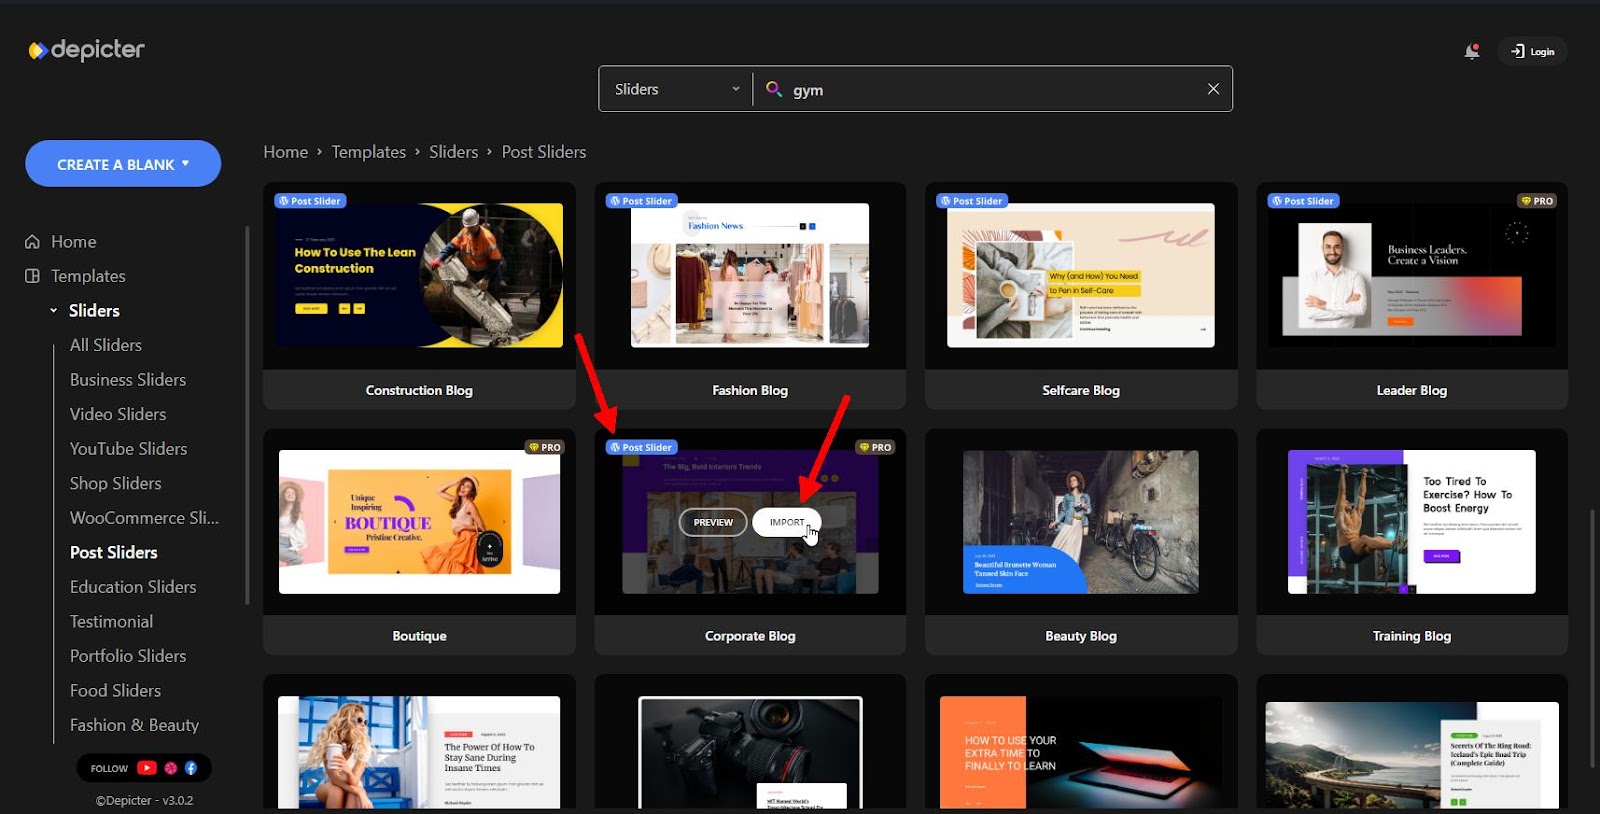
Since the imported template is designed for blog posts, we need to perform the following steps after importing it:
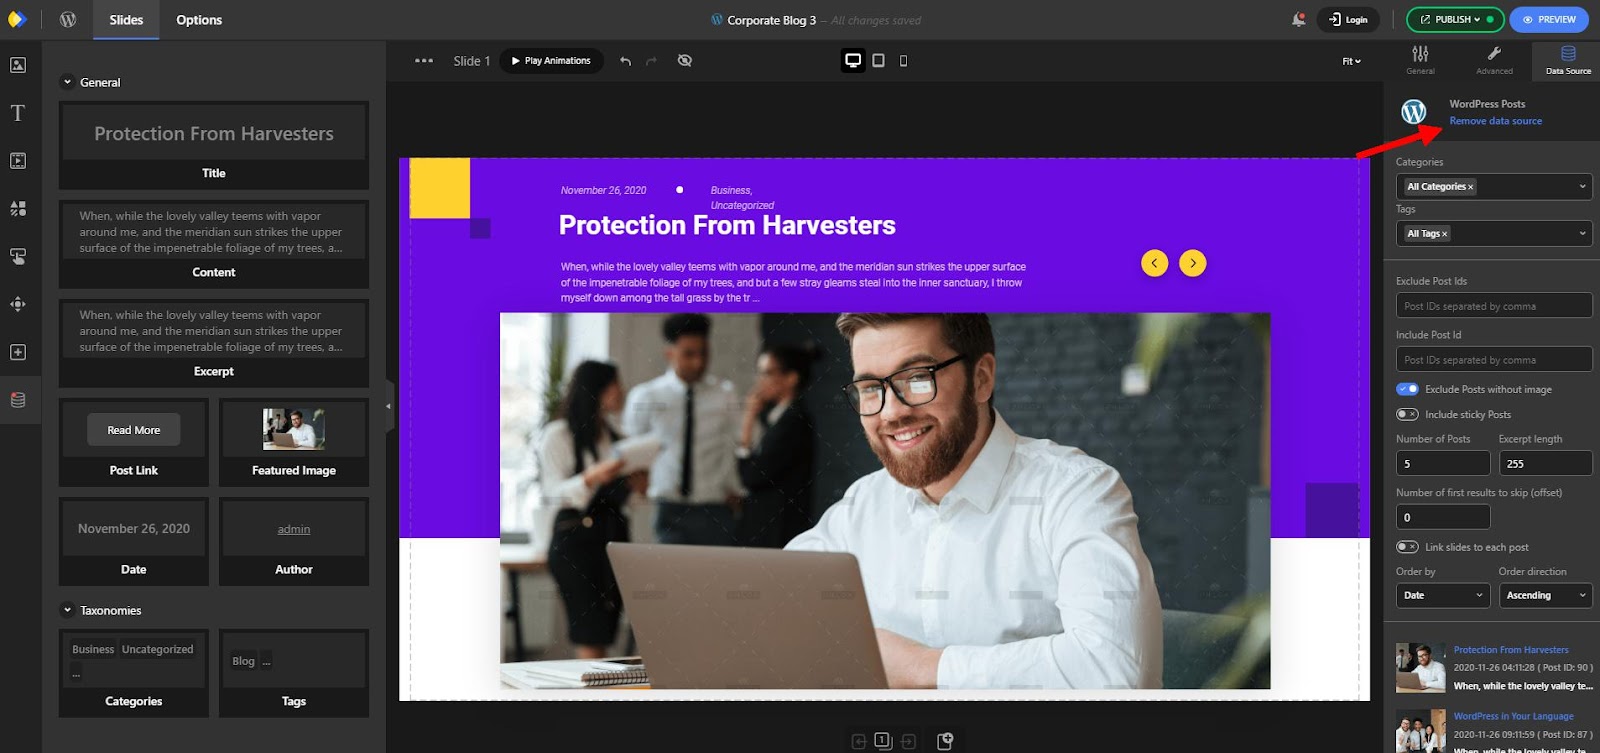
- Navigate to the “Data Source” section.
- Click the “Remove Data Source” option.
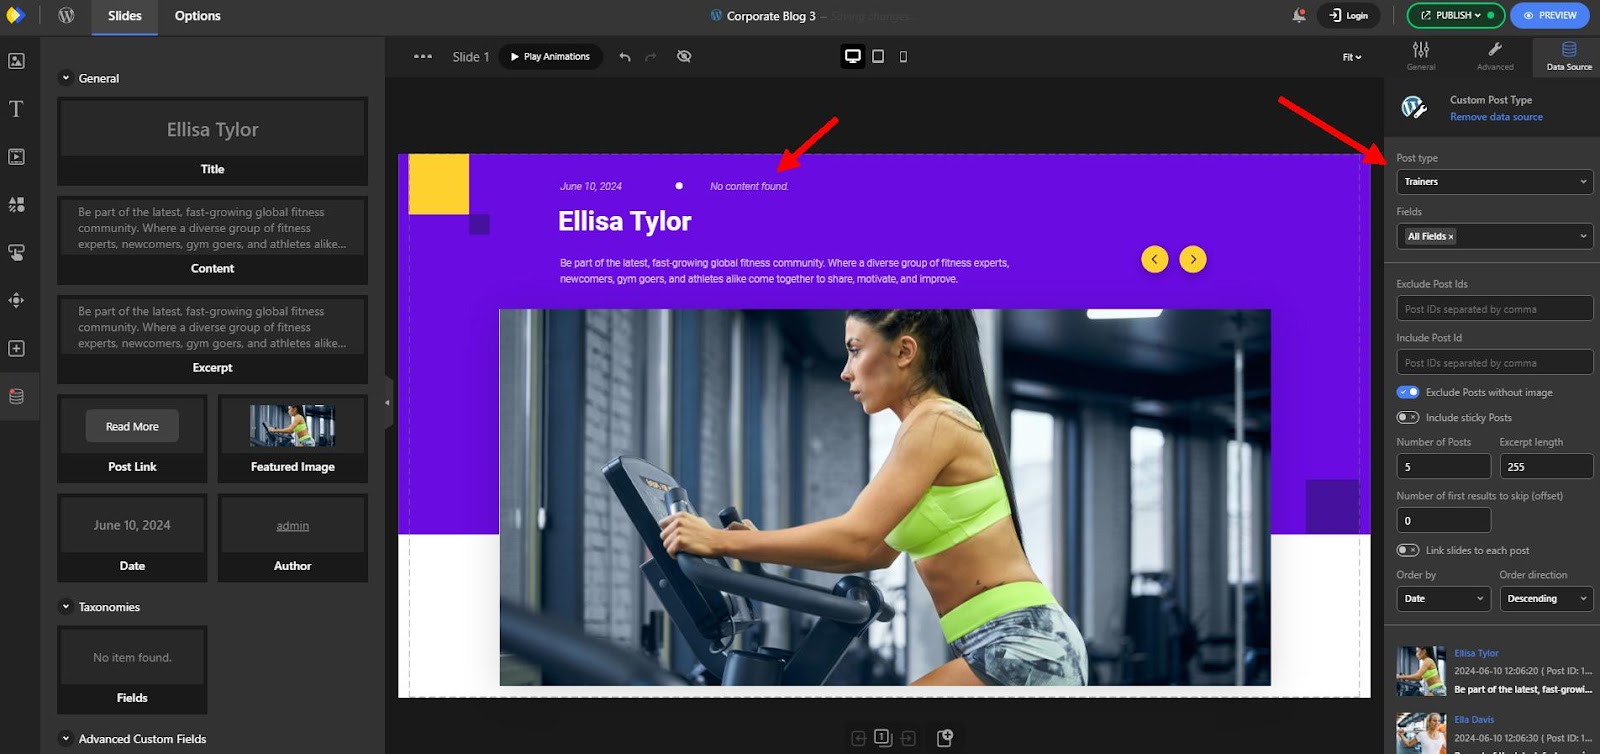
- Select your custom post type, which is “Trainer” in this case.
By following these steps, we have effectively utilized a pre-designed blog post template to create our own dynamic slider with our ACF slider.
Please note that changing the data source may require modifying or removing certain dynamic elements on the slider. For instance, the “Category” element, which is typically associated with blog posts, might not be defined for “Trainers” and may need to be removed.
Additionally, any custom fields we’ve defined can be added to the slider.
Congratulations, our advanced custom fields slider is done!

Conclusion
One of the attractive features of WordPress is custom post types, which gives your website unlimited flexibility to create personalized content. One of the best plugins for creating and managing custom post types in WordPress is ACF. In this article, we saw how we can create a post type using ACF and finally create a dynamic slider of our custom post type using the Depictor slider plugin.
FAQs
Does Depicter only support custom post types created with ACF?
No, Depicter does not exclusively support custom post types created with ACF.
Depicter recognizes and can work with any custom post type defined and registered within WordPress.
Why use a plugin like ACF to create custom post types?
While it’s possible to create custom post types manually by editing code, using a plugin like ACF is a more user-friendly and efficient option. It avoids the need for coding knowledge and streamlines the process.
Can I use ACF to create custom fields for existing post types (like posts or pages)?
Yes, ACF works for both standard post types and custom post types. You can add custom fields to pages, posts, or any other post type on your website and the new fields will be available to use in the Depicter slider as well.